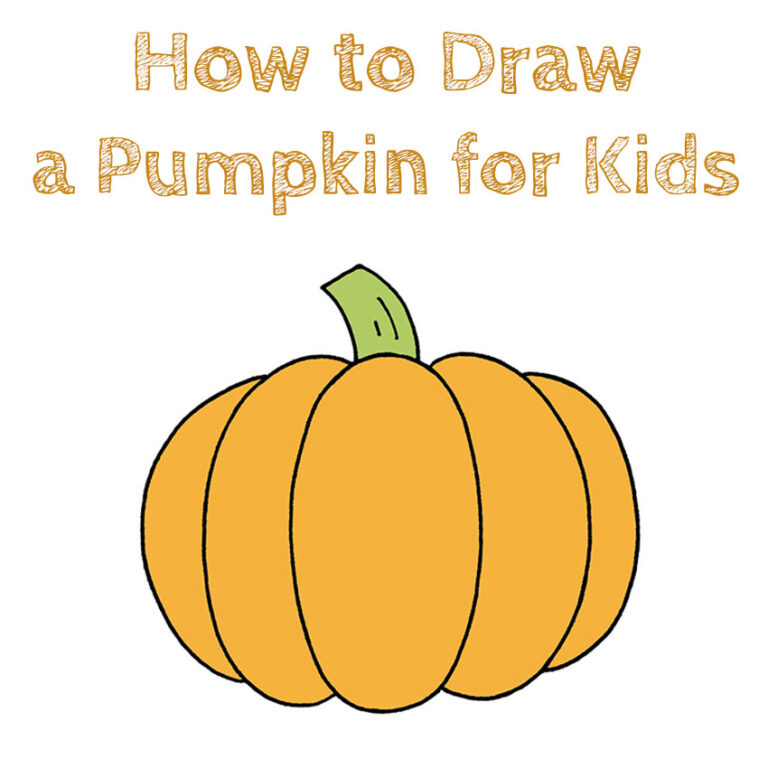
Basic Pumpkin Drawing
Basic Pumpkin Drawing - Web be it a fall or halloween drawing lesson, this how to draw a pumpkin step by step drawing tutorial will make the task easy peasy.get template here: Draw a circle connecting the two lines. Web easy step by step tutorial on how to draw a pumpkin, pause the video at every step to follow the steps carefully. Draw another curved line across it to give the tip of the stem an oval shape. Use a curved line to enclose the end of the stem. Draw a curved line on the left side of the pumpkin shape. Web draw a stalk and finish off with a vine! This initial shape will serve as the foundation upon which you'll build the intricate details and textures of the pumpkin. Color your pumpkin with your favorite shade of bright orange. Web depict an asymmetrical round shape in the center of your piece of paper.
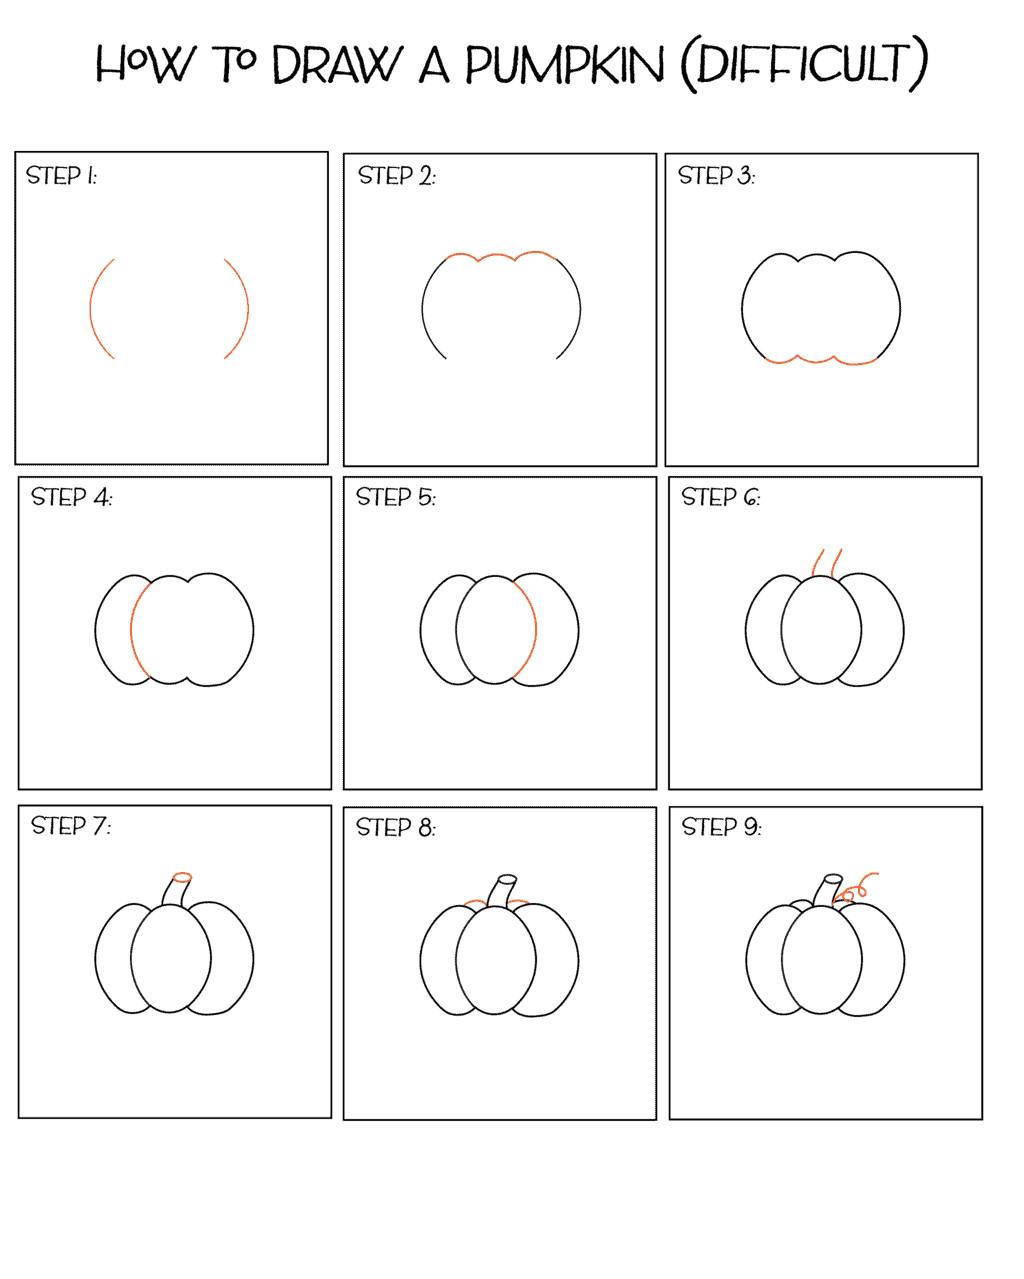
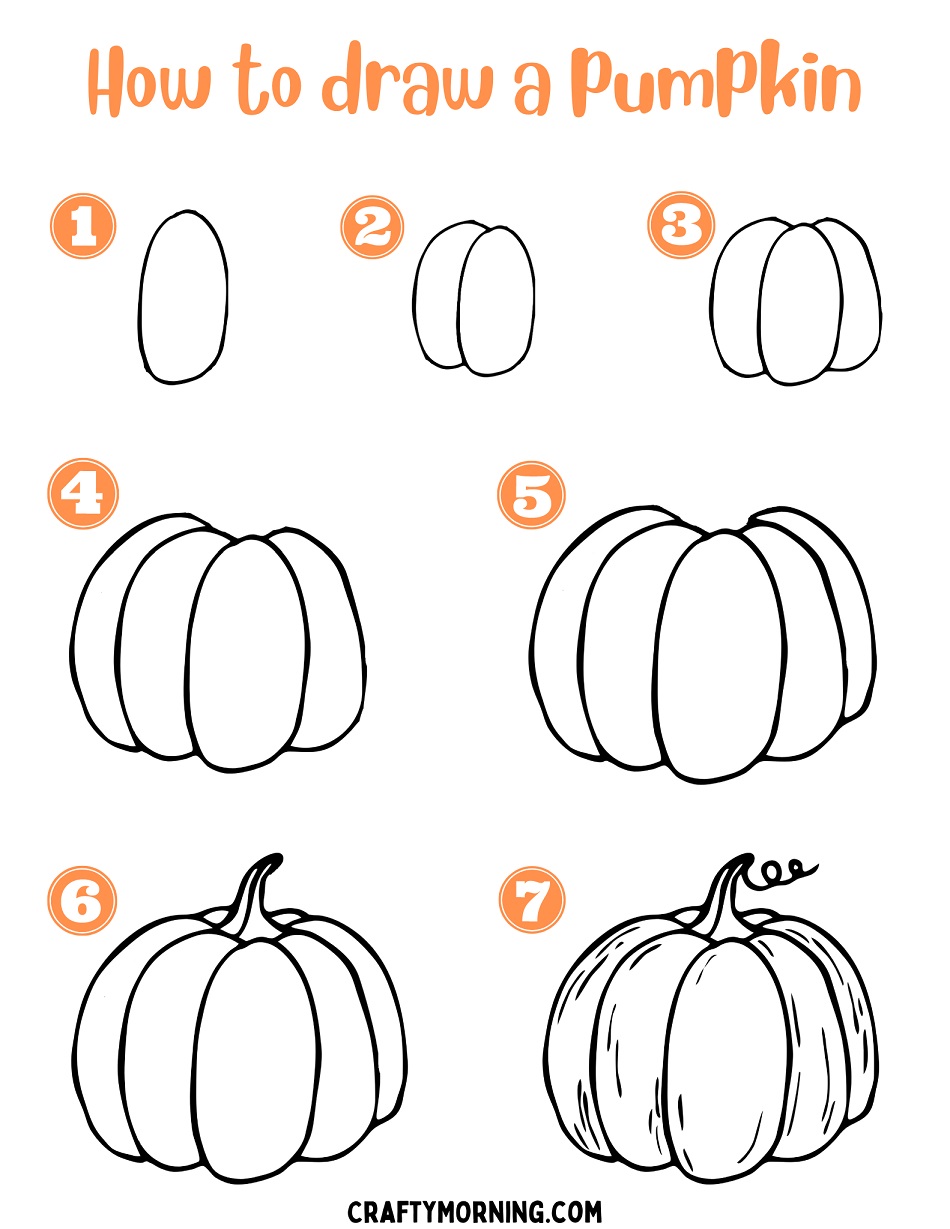
This shape drawing can be fairly rough and can omit the smaller bends and curves in the shape. We are going to do two things in this step. Start with a simple, soft oval. Connect the dots 3 times. Position the chalk pastel at the top of the oval and proceed to draw a large curve away from the shape and then back to join the bottom. And then draw your stem coming out of that curved line. Next, from each of the bumps on the top outline, create curving lines down the front of your pumpkin. Add shadows on the bottom and around the facial features to make them look sunken. It should look like a horizontally elongated, flattened, asymmetrical oval. Add some curved lines all around to add ridges to your pumpkin.
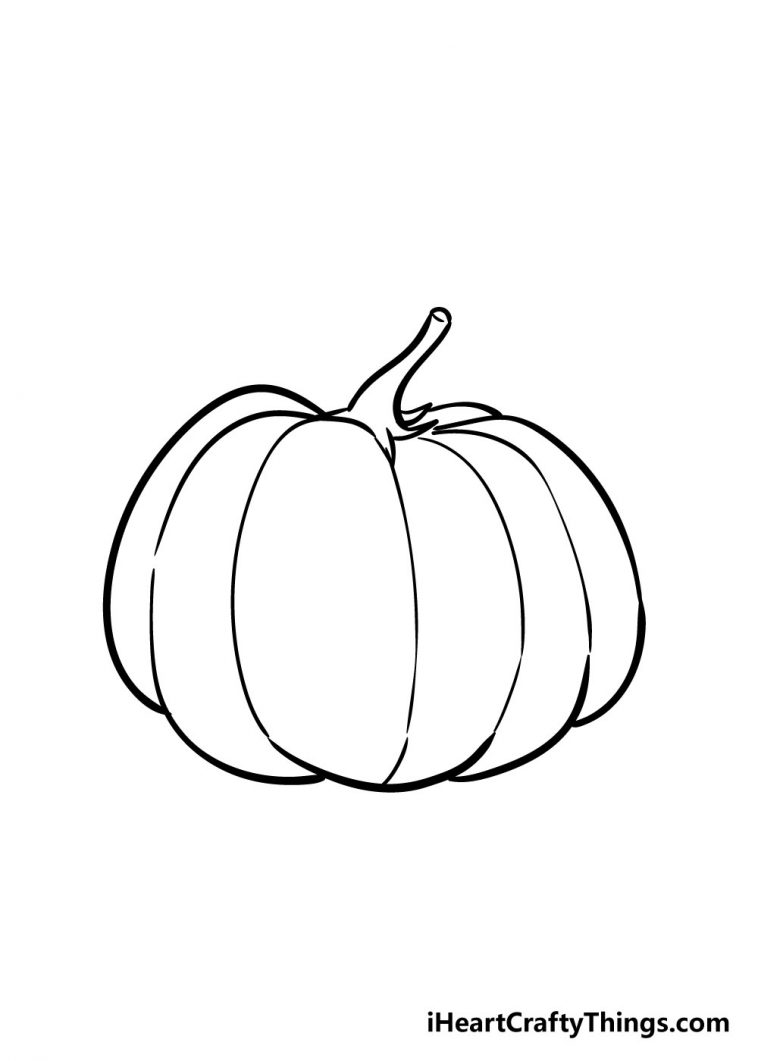
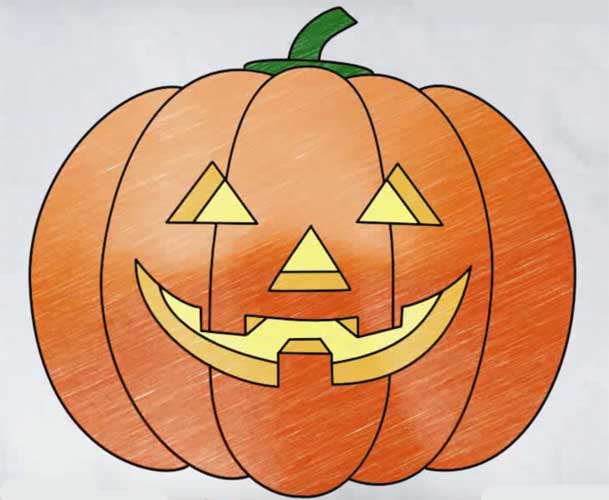
Web outline your cartoon halloween pumpkin, filling in the nose with black. Finally, color your pumpkin using colored pencils or markers. The base shape of a circle. You’ll be refining the details a little later in the process. Then, draw a matching curved line on the right side of the pumpkin to make it round. Start by drawing the overall shape of your pumpkin with a two curved lines. For a fall pumpkin drawing, try varying the basic oval shape we draw and give it a little squareness. Choose any colors for your halloween pumpkin. We are going to do two things in this step. Web be it a fall or halloween drawing lesson, this how to draw a pumpkin step by step drawing tutorial will make the task easy peasy.get template here:
How to Draw a Pumpkin for Kids How to Draw Easy
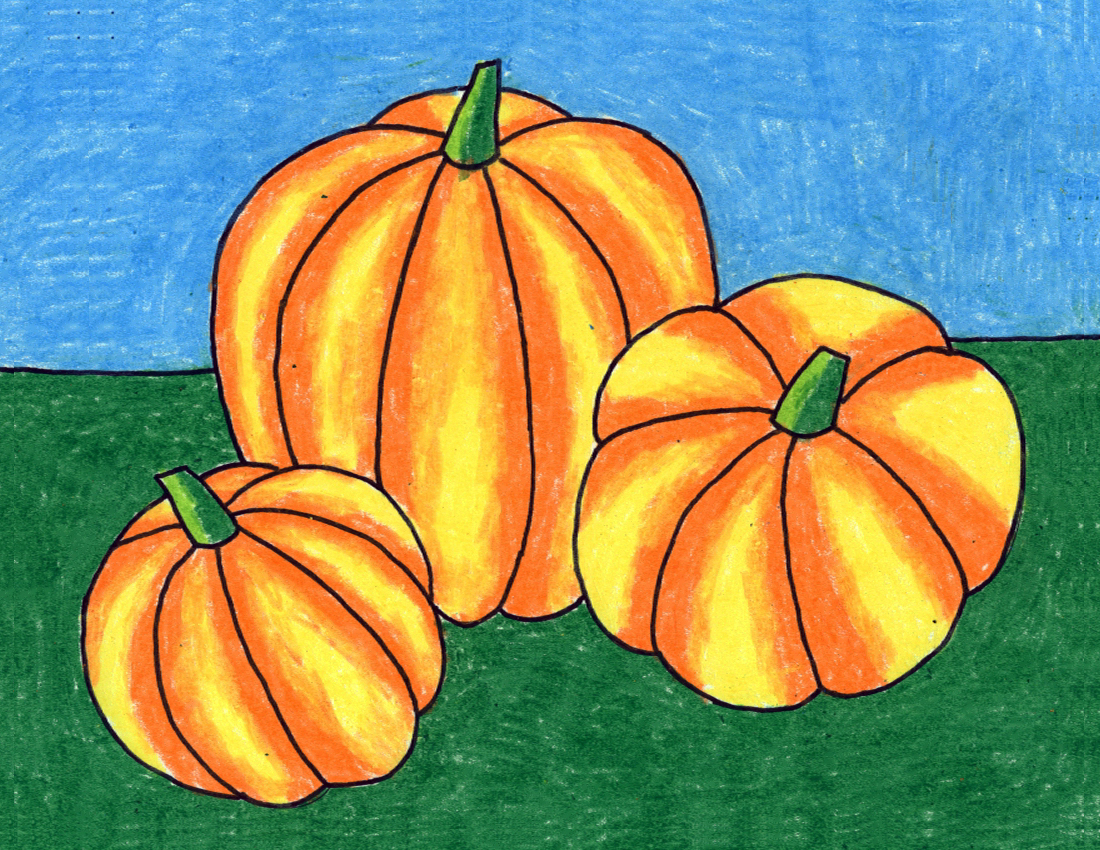
Web a cute pumpkin drawing focuses on adding charming elements, such as bright eyes or a cheerful smile. It should look like a horizontally elongated, flattened, asymmetrical oval. Draw the stalk and the ribs. Web at the base of the stem create some more indentations. This creates a heirloom pumpkin look and you can draw a few berries and leaves.
How to Draw a Really Easy Pumpkin Anderson Camonwarld
Divide the oval into 5 parts using curved lines. Place the pumpkin stem on top of the shape from the last step. Draw an adjoining segment to build the pumpkin shell. Next, from each of the bumps on the top outline, create curving lines down the front of your pumpkin. Web to do this, begin by drawing a curved line.
Easy Pumpkin Drawing at Explore collection of Easy
Start small at the top and make it bigger as you go down. Finally, color your pumpkin using colored pencils or markers. The next step is to draw small stems on the top of the pumpkin. Add shadows on the bottom and around the facial features to make them look sunken. Use a curved line to enclose the end of.

How to Draw a Pumpkin Easy Peasy and Fun
Then, texture the stem with curved lines. Draw a curved line on the left side of the pumpkin shape. It should look like a horizontally elongated, flattened, asymmetrical oval. The first step is to draw one larger circle in the middle and two others overlapping the middle one on either side. Make the stem green and the eyes bright yellow.
How To Draw A Pumpkin StepByStep So Festive!
Web how to draw pumpkin in easy steps for beginners lesson.tutorial of drawing technique.drawing tutorial,art tutorial youtube videoyou can watch the video at. There are all sorts of stems you could draw. Then, texture the stem with curved lines. You’ll be refining the details a little later in the process. This style is perfect for personalizing greetings cards or decorations,.
How to Draw an Easy Pumpkin · Art Projects for Kids
Use a curved line to enclose the end of the stem. Now we will add a little line at the top of the stem to give it some depth. Join the email list so you don't miss exclusive 2d animation courses: The most ideal options are dark orange, light red or different shades of yellow. Web remove extra lines from.
Pumpkin Drawing How To Draw A Pumpkin Step By Step!
This completes the first segment of the pumpkin shell. Web add a tail to your pumpkin by drawing a curved shape. Draw the vine with a squiggly line. Pumpkin usually tend to be shaped like a sort of sphere with a squashed in top and bottom. Then, draw a matching curved line on the right side of the pumpkin to.
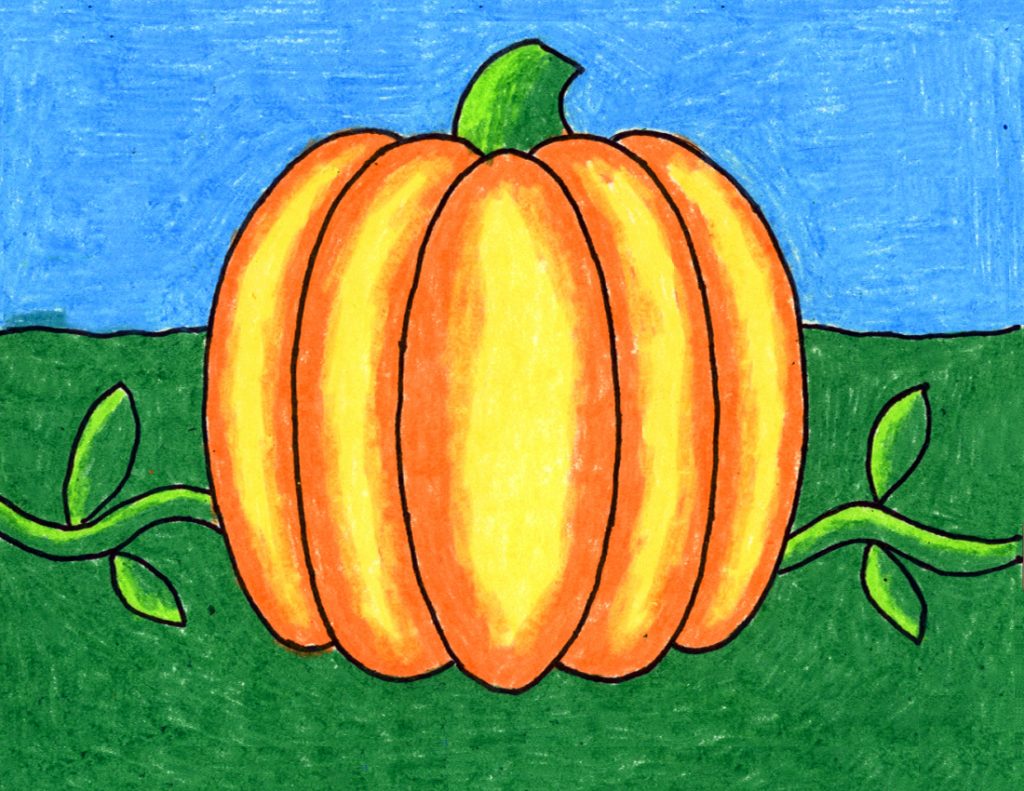
How to Draw a Pumpkin (Easy Step by Step) Crafty Morning
To begin your pumpkin drawing, start by sketching the basic shape of the pumpkin. Make the stem green and the eyes bright yellow. And then draw your stem coming out of that curved line. This completes the first segment of the pumpkin shell. Create the pumpkin’s eyes by drawing two triangles and a mouth.
How to Draw a Pumpkin Step by Step easy for Halloween, Cute, Realistic
It should look like a horizontally elongated, flattened, asymmetrical oval. Just a few more details. Start small at the top and make it bigger as you go down. Place the pumpkin stem on top of the shape from the last step. The next step is to draw small stems on the top of the pumpkin.

How to draw pumpkin step by step YouTube
Just a few more details. The most ideal options are dark orange, light red or different shades of yellow. Color your pumpkin with your favorite shade of bright orange. Connect the dots 3 times. Draw another curved line across it to give the tip of the stem an oval shape.
Add Shadows On The Bottom And Around The Facial Features To Make Them Look Sunken.
Finally, color your pumpkin using colored pencils or markers. Finally, add a stem, shading for a 3d effect, and voilà—you’ve harvested art! We are going to do two things in this step. Web a cute pumpkin drawing focuses on adding charming elements, such as bright eyes or a cheerful smile.
First, Draw A Small Curving Stalk That Extends From The Center Of The Top Of Your Pumpkin.
Web the simplest pumpkin drawing method uses just circles and basic curved lines. Begin the pumpkin drawing by first getting it’s major shapes. Web what are the basic steps to draw a simple pumpkin? Choose any colors for your halloween pumpkin.
Connect The Dots 3 Times.
Next, refine those lines for depth. Color the mouth and space behind the eyes black to give your. For a fall pumpkin drawing, try varying the basic oval shape we draw and give it a little squareness. Use additional short lines to begin enclosing the ribs visible behind the stem.
These Lines Will Create Sections On Your Pumpkin.
Start by drawing the overall shape of your pumpkin with a two curved lines. Draw the vine with a squiggly line. You’ll be refining the details a little later in the process. The base shape of a circle.