Big Bow Drawing
Big Bow Drawing - You can do so by drawing two curved lines on either side of the shapes from before. Near the ends of the frames, you can draw in some details for the nocks. Web the double play drawing is held following the regular drawing and has a top cash prize of $10 million. Web drawing a bow correctly involves several steps, each of which plays a crucial role in your shooting accuracy. Tie another piece of string around the bundle, securing the tails to the bow. Then, grip the bow with a relaxed yet firm hold, ensuring your fingers are correctly positioned. Web push the folded centers against the middle of the bow. Web start by drawing a square for the knot of your bow. Ribbon, bow, objects, gifts, bow tie, how to draw everyday objects. Web learn how to draw this cute bow step by step.
You can do so by drawing two curved lines on either side of the shapes from before. Then, create the loops by drawing a rectangular shape with rounded corners on either side. Draw the bottom of the loop on the left. Made with materials found around the shop, this is a che. Make sure the loops look the same on both sides and are all nice and even! First, nock the arrow onto the bowstring securely. Go ahead and add a bit more detail to make your bow look pretty. The nock of the bow is where the string is attached to the frame, and the reference image will show you the shape it should take. Then fold it in half lengthwise. Near the ends of the frames, you can draw in some details for the nocks.
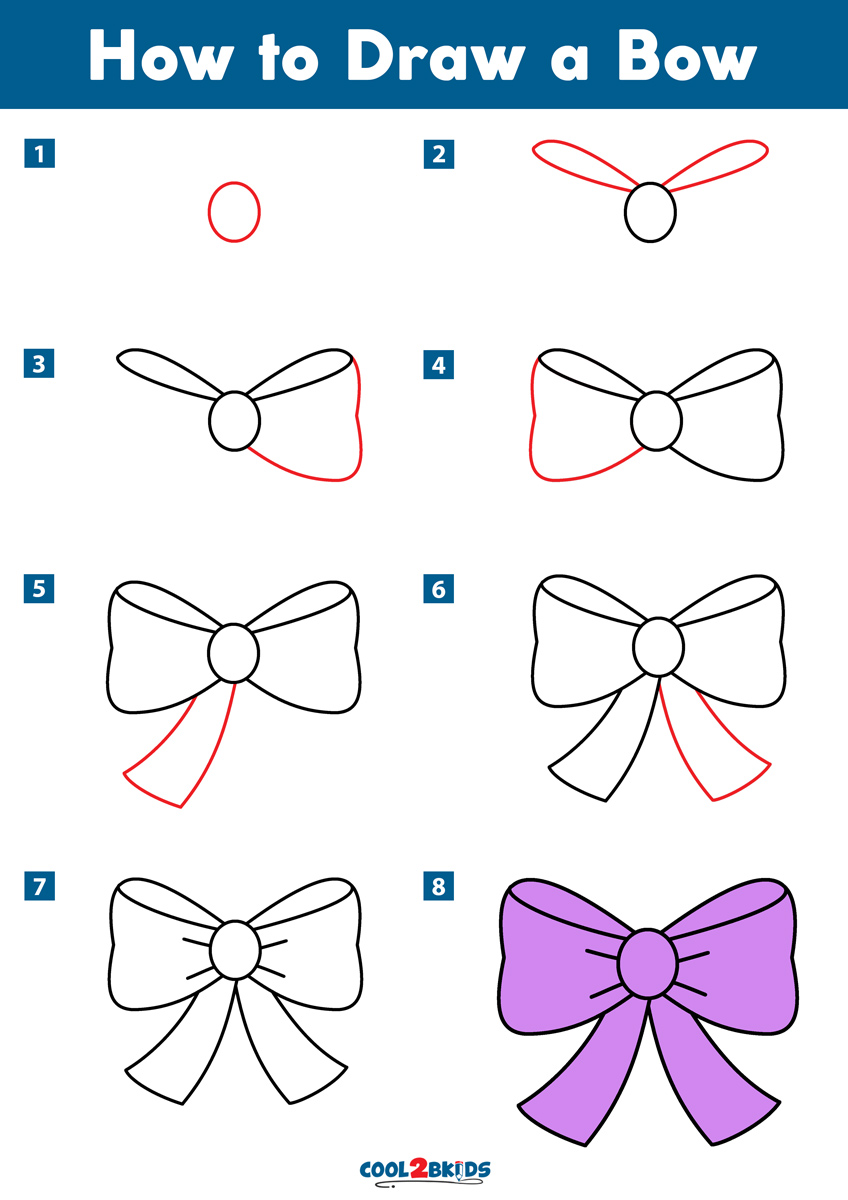
Draw the center of the bow. Next, draw two loops on either side of the rectangle, which will serve as the main body of the bow. Web make the loops of the bow by drawing two curvy shapes that cross each other in the middle. Yumi is the japanese term for a bow.as used in english, yumi refers more specifically to traditional japanese asymmetrical bows, and includes the longer daikyū and the shorter hankyū used in the practice of kyūdō and kyūjutsu, or japanese archery. Draw a knot and show, with smooth lines, the direction of the ribbon ends. Web published may 6, 2024 updated may 7, 2024. From that point, you can start aiming and fire the bow. Web learn how to quickly make an easy drawing bow to trace out long curves on your woodworking projects. This will create a layered appearance and a double bow tie. Draw the bottom of the loop on the right.

How to Draw a Bow Tie Really Easy Drawing Tutorial
Web how to draw a bow; Tie another piece of string around the bundle, securing the tails to the bow. Show, with light lines, the general proportions of it. Stand in the correct position. Your loops should narrow towards the center.

Hand drawn bow design element Premium PNG Sticker rawpixel
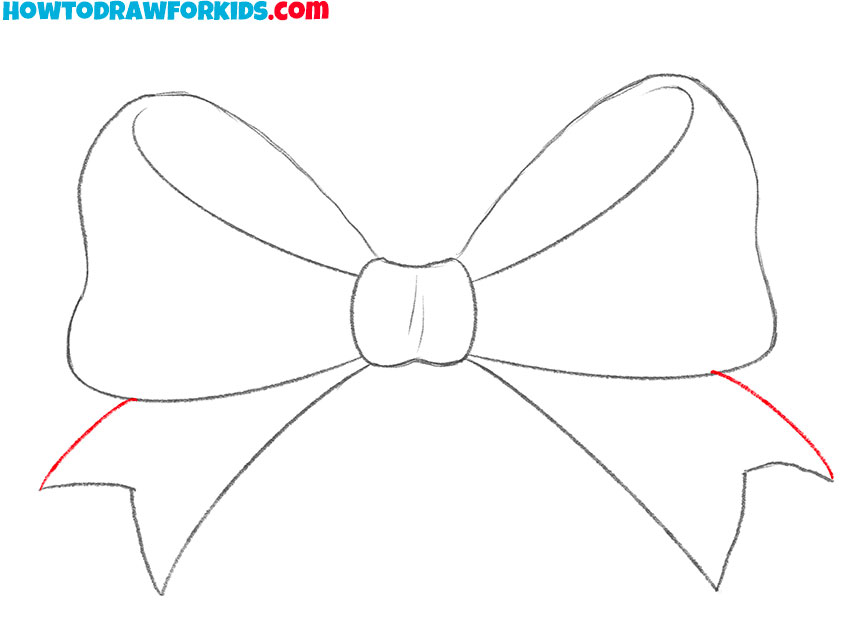
The nock of the bow is where the string is attached to the frame, and the reference image will show you the shape it should take. Trace and color the shadows with dark crayon. As the cruise ship approached new york on saturday, it was found to be carrying a grim, and unexpected, catch: Cut a 2 inch piece of.

How To Draw A Bow In 5 Steps Easy Drawing Tutorial Craftsonfire
Show, with light lines, the general proportions of it. Web how to draw a bow; If you stand correctly, you will be doing this automatically. Web start by drawing a square for the knot of your bow. Make two lines go down from the loops to make the tails of the bow.
How to Draw a Bow Easy Drawing Tutorial For Kids
Web learn how to quickly make an easy drawing bow to trace out long curves on your woodworking projects. Make sure the loops are symmetrical and of equal size. Make two lines go down from the loops to make the tails of the bow. This super easy drawing lesson is perfect for kids. Match with same shape on the left.
How to Draw a Bow Cool2bKids
Add the ribbon end on the right. Cut a 2 inch piece of ribbon and fold the left and right edges into the center. Go ahead and add a bit more detail to make your bow look pretty. Yumi is the japanese term for a bow.as used in english, yumi refers more specifically to traditional japanese asymmetrical bows, and includes.

How To Draw Bows, How To Draw Hands, Sketches Easy, Art Drawings Simple
Draw a knot and show, with smooth lines, the direction of the ribbon ends. This is a remake of an old video, but with heavier and more authentic bows. Web choosing the right bow. Draw the bottom of the loop on the left. Next, draw the main part of your bow.
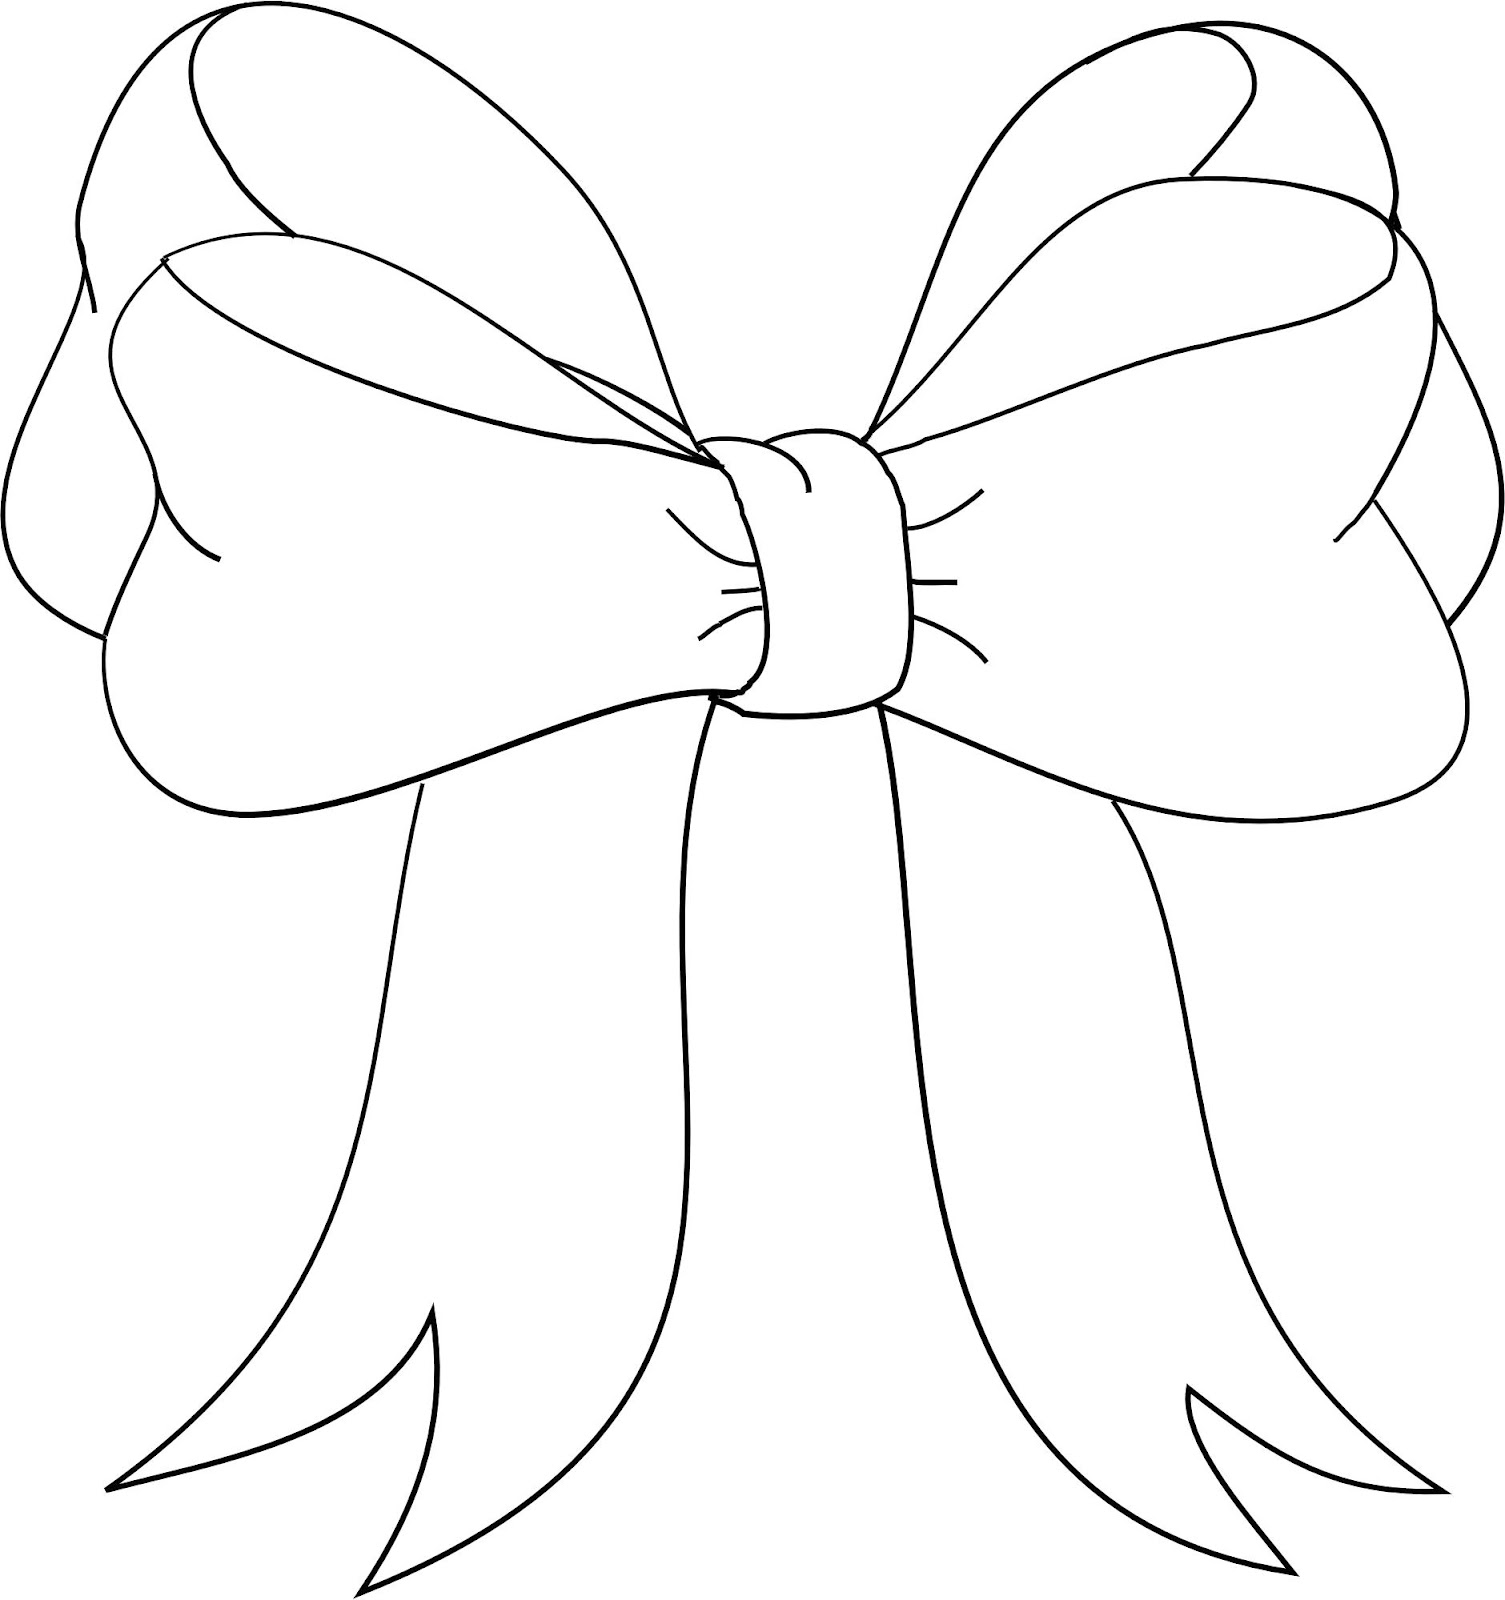
Bow Drawing at GetDrawings Free download
Start by sketching a rectangle shape for the center knot of the bow. Mark off the width and height of the picture. Start the top of the right loop. Web may 8, 2024. Draw her on a gift or anything that needs a cute accessory.
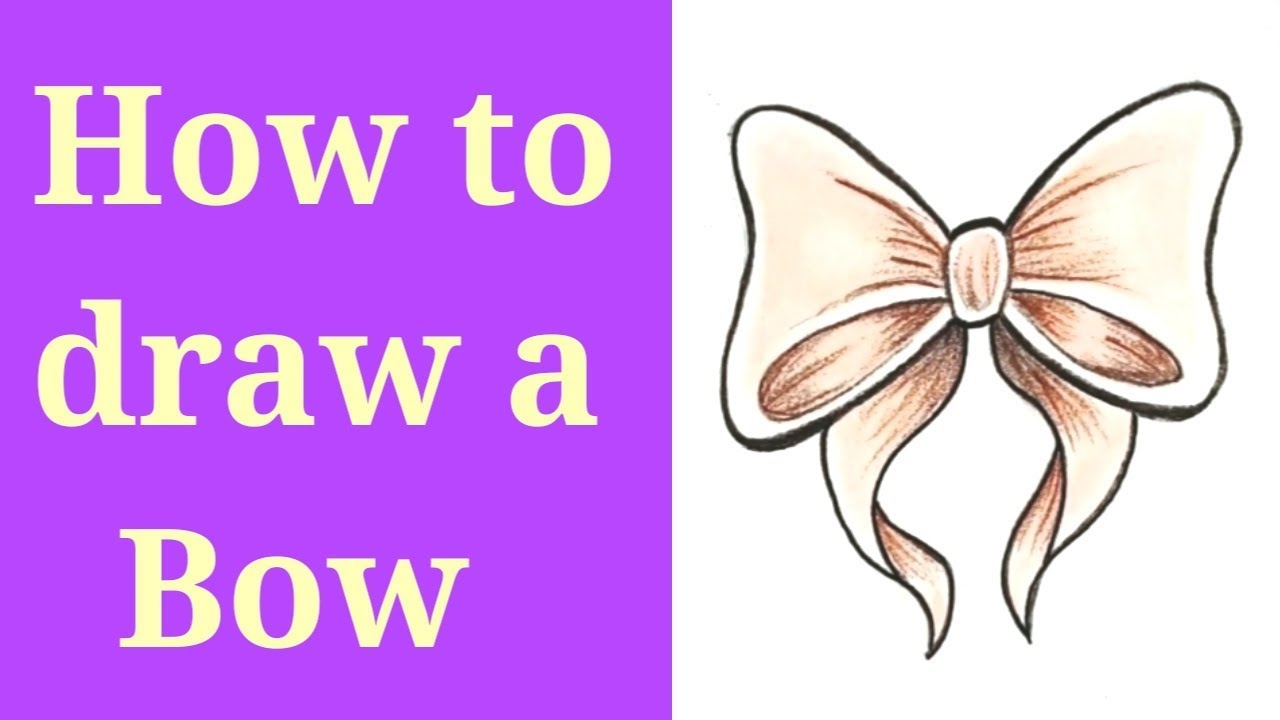
How to draw a Bow (Step by Step) YouTube
Web published may 6, 2024 updated may 7, 2024. You want the bow’s grip to sit outside your hand’s lifeline in the palm swell area. Cut a 2 inch piece of ribbon and fold the left and right edges into the center. Then, create the loops by drawing a rectangular shape with rounded corners on either side. Go ahead and.
How to Draw a Bow · Art Projects for Kids
You can do so by drawing two curved lines on either side of the shapes from before. Web mega millions lottery drawings are at 11 p.m, est tuesdays and fridays. Add the ribbon end on the right. The yumi was an important. Web push the folded centers against the middle of the bow.

How to draw a bow Step by step Drawing tutorials
Draw her on a gift or anything that needs a cute accessory. Web make the loops of the bow by drawing two curvy shapes that cross each other in the middle. Web welcome to my video on how to draw the heavy medieval longbow. Cut a 2 inch piece of ribbon and fold the left and right edges into the.
Now That The Nba Draft Lottery Has Passed And The Final Selection Order For The 2024 Nba Draft Is Set, Teams Now Know Exactly Where They Will Make.
This will create a layered appearance and a double bow tie. Draw a guideline for the bow. Draw a rounded rectangle & an oval. You should have something similar to the example image.
You Want The Bow’s Grip To Sit Outside Your Hand’s Lifeline In The Palm Swell Area.
Outline the edges, and add details to give your bow dimension. Web drawing a bow can be a challenging task for artists of all levels, but with the right techniques and a bit of practice, it can also be a rewarding experience. Web learn how to draw this cute bow step by step. It is a best alternate item of tie.
Start By Sketching A Rectangle Shape For The Center Knot Of The Bow.
With the frame of your bow drawing done, we can start to add some details to it. Make two lines go down from the loops to make the tails of the bow. Mark off the width and height of the picture. Before monday's win in florida, the powerball was last won april.
The Nock Of The Bow Is Where The String Is Attached To The Frame, And The Reference Image Will Show You The Shape It Should Take.
First, nock the arrow onto the bowstring securely. First, sketch an oval shape for the center of your bow sketch. You can do so by drawing two curved lines on either side of the shapes from before. It’s up to you if you want them to be symmetrical or not.