Books Drawing Simple
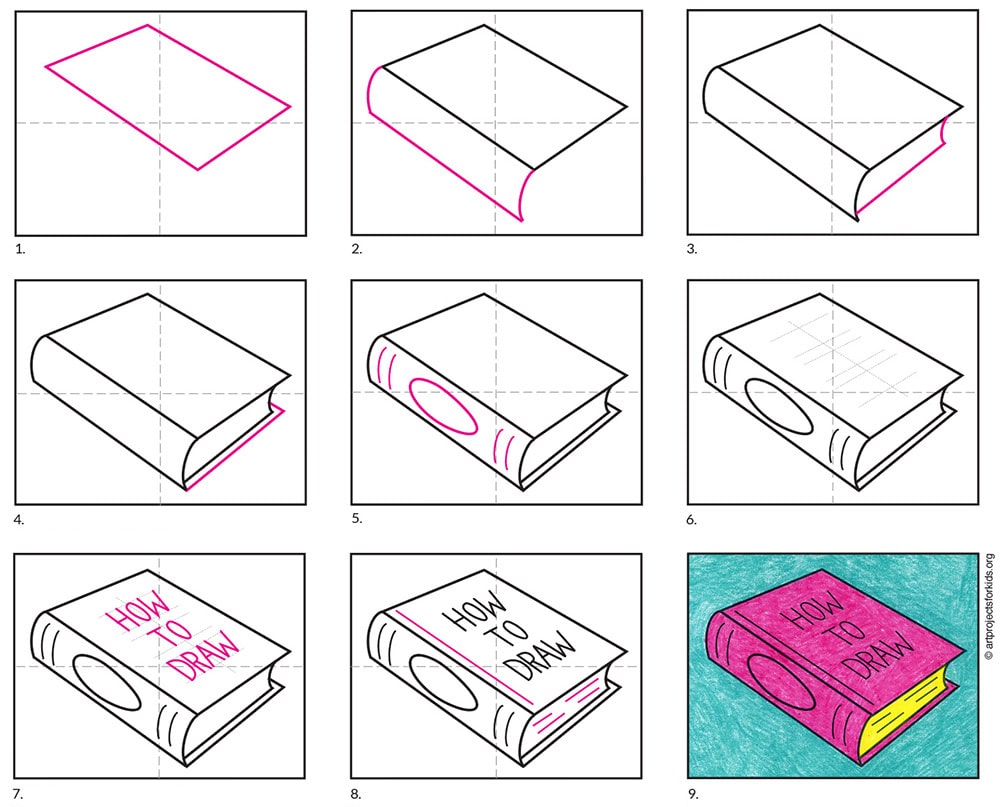
Books Drawing Simple - And these are all the steps we’ll guide you through: Print book giveaway ends in: Shadow lines is published by salt at £10.99. Draw a rectangle and the page split middle line. Design and draw a character. Drawing a book is a fairly easy task, their simple shape and consistent structure make the process much easier compared to objects, animals, or people with more complex shapes and forms. You will learn the techniques and tips to create your own book illustration. Add a few curved lines along the spine of the book for detail. Draw the outline of the book. Draw two lines at an angle from the top of the two book pages you just drew.
Web published may 6, 2024 updated may 7, 2024. Web book drawing for beginners. You should start with the top point perspective since it covers a wider area. Draw the outline of the book spines. And these are all the steps we’ll guide you through: 1.2 adding two more lines. Along the top of your drawing of a book, draw two curving shapes that extend out from the dividing line of the base rectangle. 1.4 add thickness to the book. Web expect 6 easy steps to follow, children will enjoy designing their own book on paper. Start with a basic rectangle.
Next, create the spine of the book by adding another arch and connecting it to a line that is parallel to the long side of the rectangle you drew. Next, add a line for the back of the book that is parallel to the front cover. Add detail to the cover of your book. Margherita cole | my modern met. Also included is a printable version of this book drawing tutorial. How to draw stacked books. Start by drawing a rectangle. Connect your spines with small curved lines and add a straight line to close your book cover. Shape the top curve of book pages. Usually other books fail to show that.

How To Draw A Book Easy Step By Step at Drawing Tutorials
This line will also curve and continue into an adjacent line. Draw a rectangle and the page split middle line. Start with a basic rectangle. You should start with the top point perspective since it covers a wider area. Web expect 6 easy steps to follow, children will enjoy designing their own book on paper.
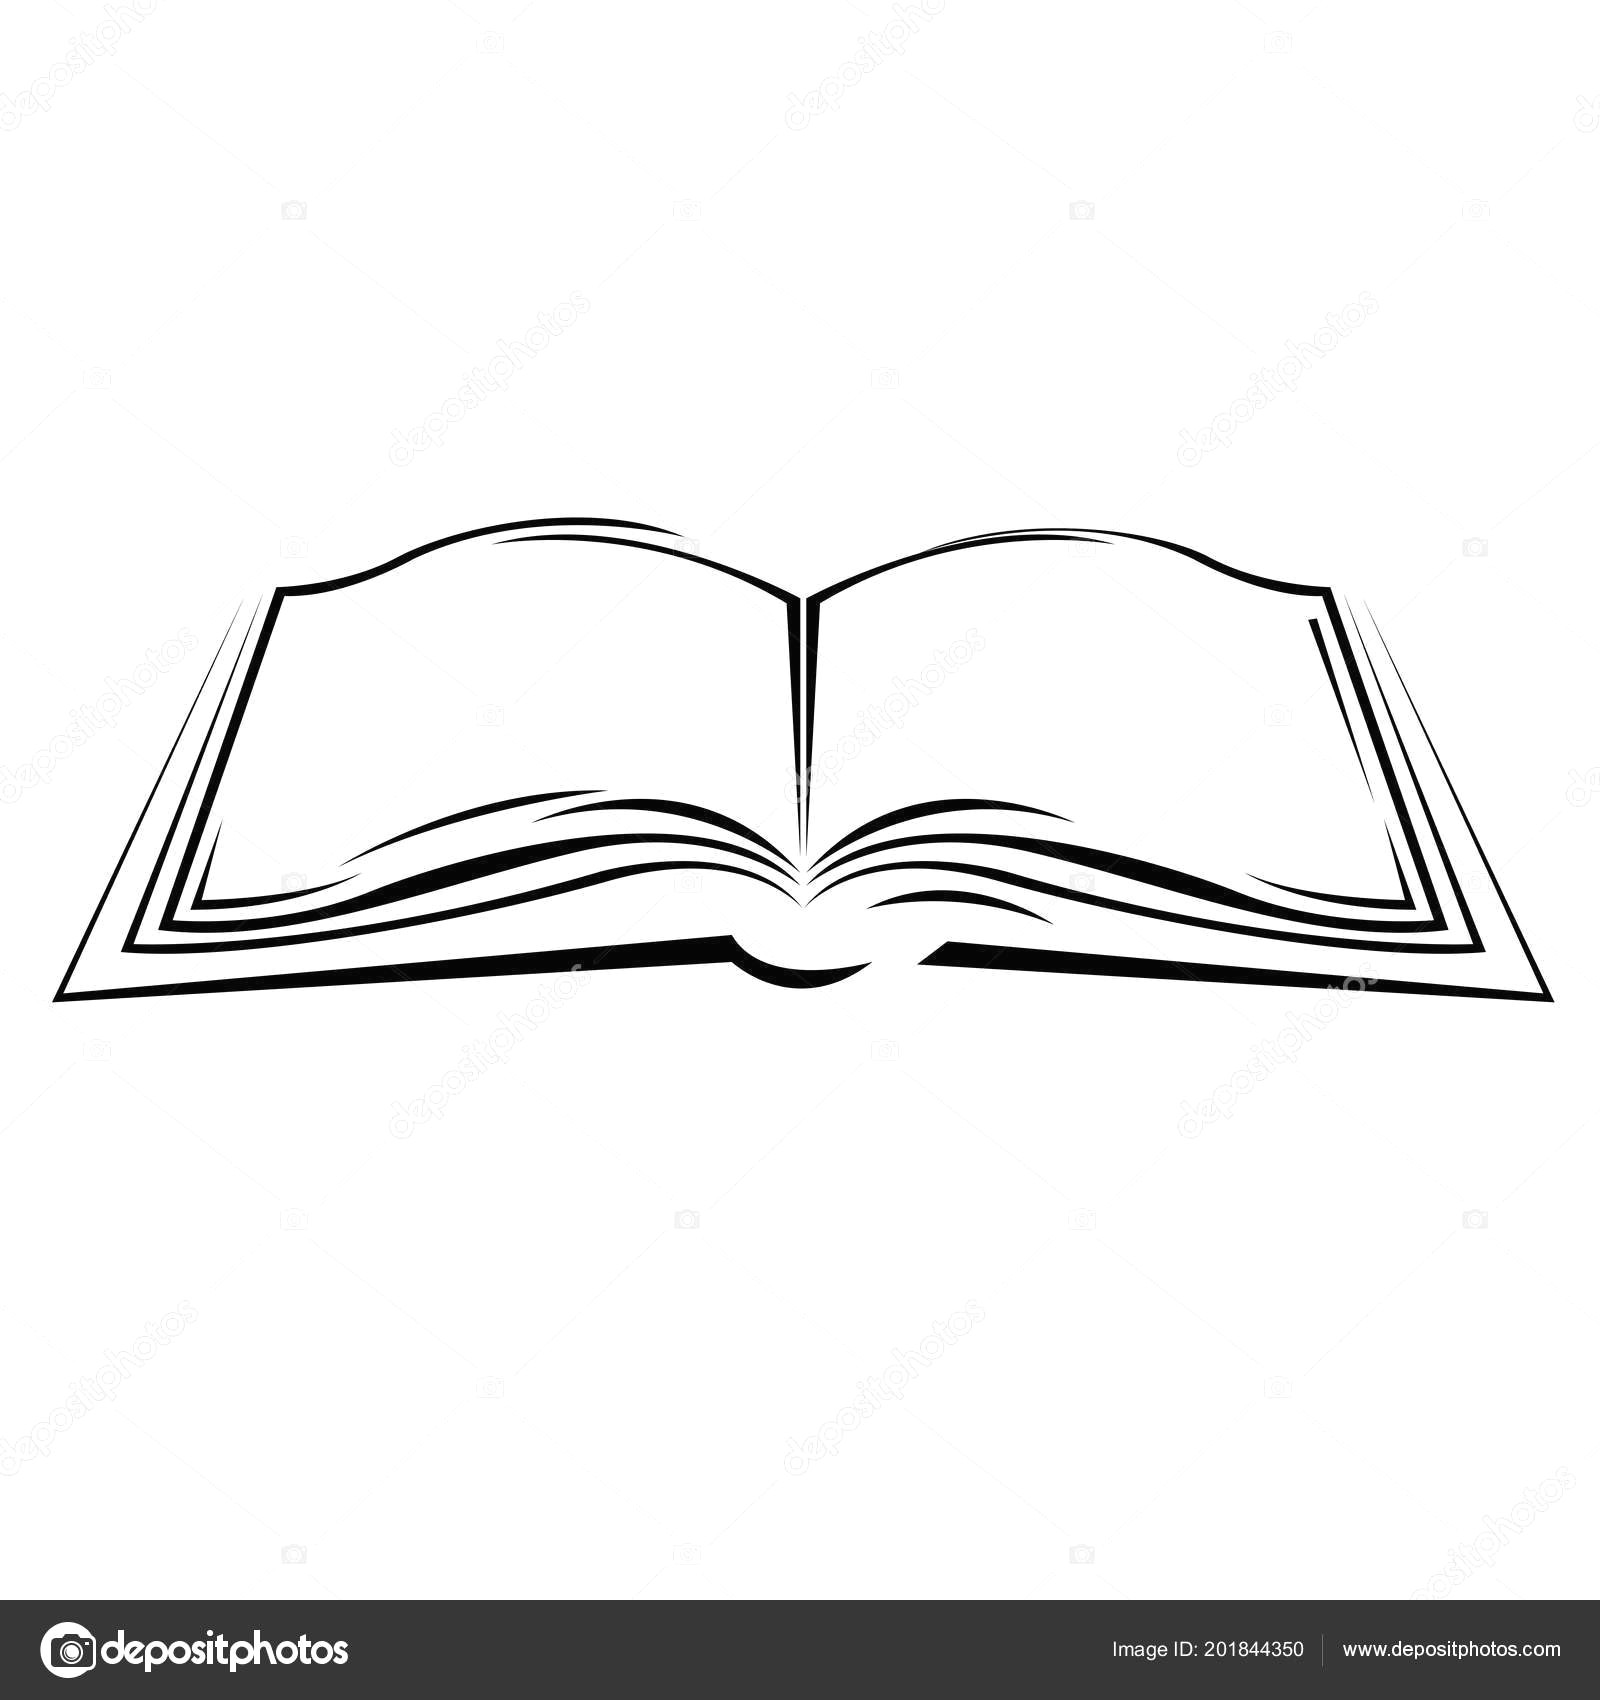
How To Draw An Open Book Step By Step Easy
Along the top of your drawing of a book, draw two curving shapes that extend out from the dividing line of the base rectangle. You will now create the open page shape. Next, create the spine of the book by adding another arch and connecting it to a line that is parallel to the long side of the rectangle you.
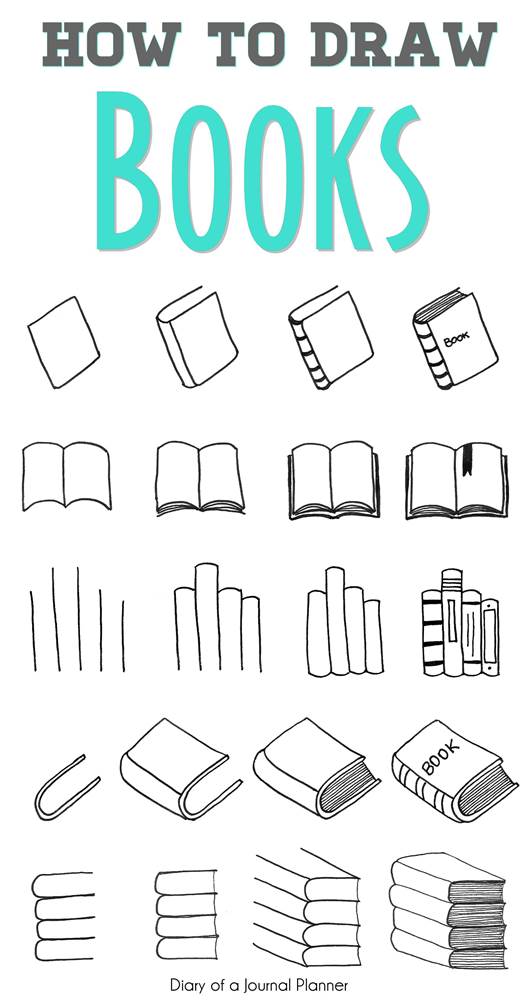
How To Draw A Book (5 Super Easy Step By Step Tutorials For Beginners)
How to draw stacked books. Start by drawing a rectangle. Draw a square from extending the lines from the vertices. Another one from jake spicer, “ you will be able to draw faces by the end of this book ,” is for someone who wants to become confident in drawing faces. Draw two more winding lines to create the page.
Easy How to Draw a Book Tutorial and Book Coloring Page
Start with a basic rectangle. Draw another straight line along the spine, from the top of the cover to the l shaped line. 1.3 drawing the basic shape of the book. The first step is drawing the outline of the book. Draw a square from extending the lines from the vertices.

How to Draw a Book Step by Step Drawing books for kids, Book drawing
Don’t forget to draw the border of the book cover. You should start with the top point perspective since it covers a wider area. Draw another straight line along the spine, from the top of the cover to the l shaped line. Draw a square from extending the lines from the vertices. Draw a light curve for back/binding area closer.
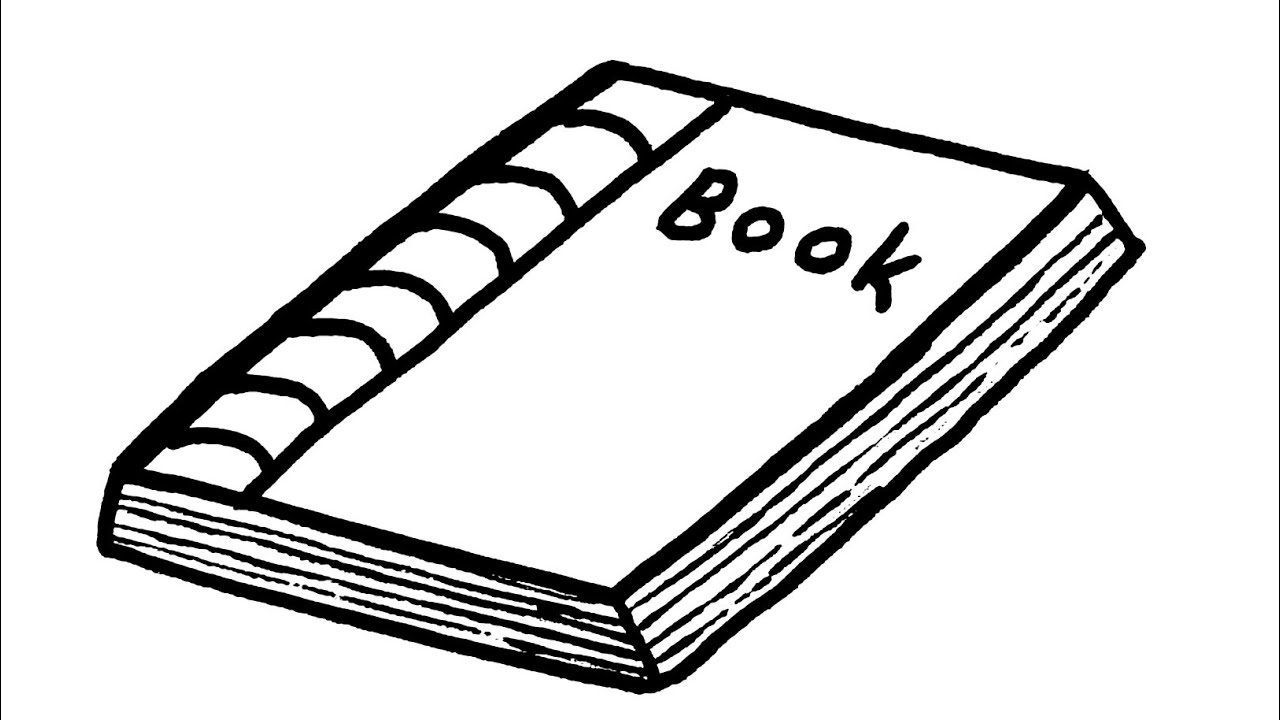
How to draw a book step by step book drawing very easy YouTube
Using two straight lines, draw a backwards letter l parallel to the bottom and edge of the cover. “i started bookbinding nearly a year ago. It's free to download on apple devices but requires a $19.99 payment for android. Depict the side of each book. Draw parallel lines coming from the curves of the us and one from the top.

How to Draw a Book 13 Steps (with Pictures) wikiHow
You can add the small page lines and the bookmark, heart, and scribbles if you want to. Web follow this easy tutorial to draw a book in a few steps. If you have pro, you can create your. Draw the nape of the book. Then, draw two straight, parallel lines across the cover of the book, in the area that.

How to draw a book Drawing of book for beginners YouTube
Web this is the book you will be drawing: This line will also curve and continue into an adjacent line. How to draw stacked books. Margherita cole | my modern met. Start the open book drawing with a simple flat rectangle again.
How To Draw A Book 7 Easy Step By Step Tutorials Masha Plans
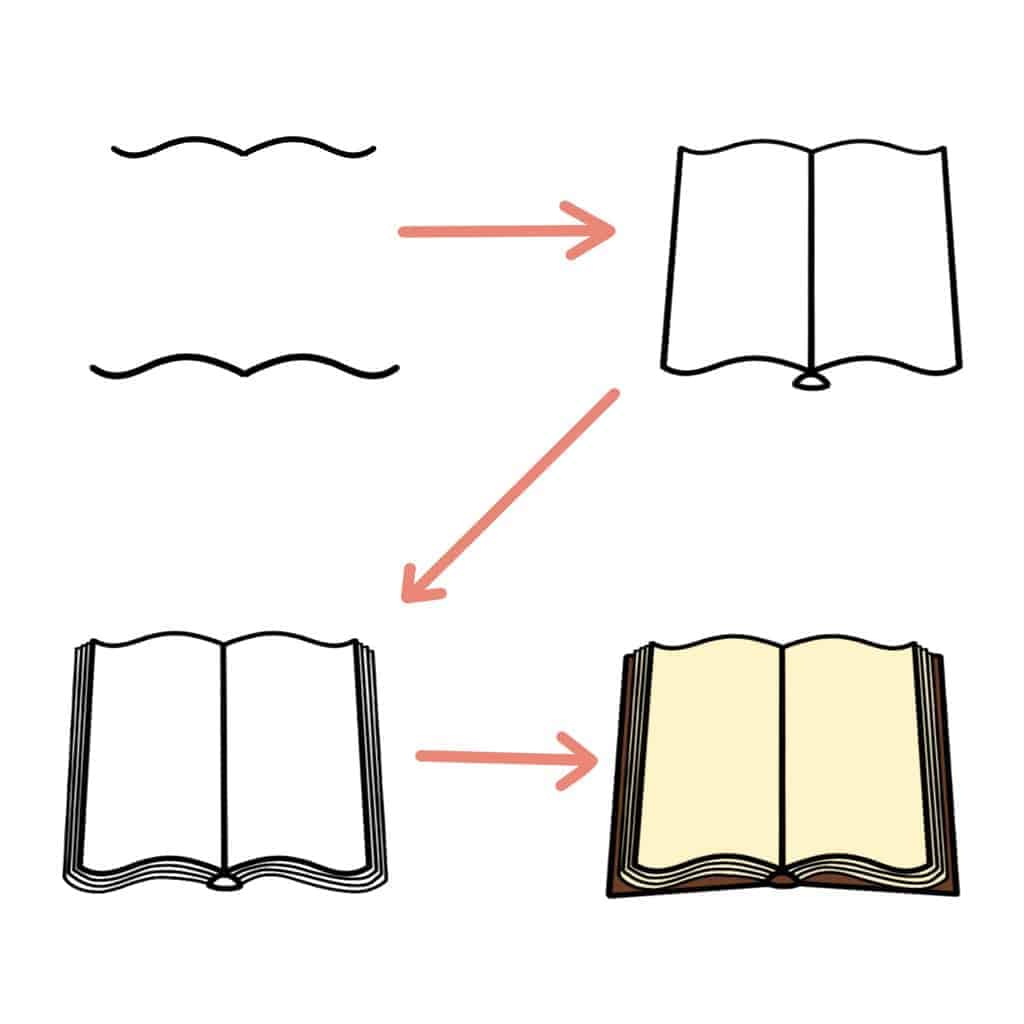
Web book drawing for beginners. Ideal for art teachers and homeschoolers looking to instruct kids how to draw their own book. You can simply draw another set of lines inside the prism to give the cover its “thickness”. Web 1 drawing an opened book. Depict the side of each book.
![How to draw a Book [easy step by step Guide]](https://craftknights.com/wp-content/uploads/2019/02/IMG_2824-1024x768.jpg)
How to draw a Book [easy step by step Guide]
Another one from jake spicer, “ you will be able to draw faces by the end of this book ,” is for someone who wants to become confident in drawing faces. 1.4 add thickness to the book. Draw a light curve for back/binding area closer to the viewer and from it project a line towards the. Finally, we were able.
Shaping The Upper Curve Of The Book’s Pages.
How to draw stacked books. Depict three even straight lines in the same position as in the example. Da vinci eye is an app that allows you to draw using augmented reality (ar). We shall start by using your ruler to draw the top cover of the book poking out.
Web Draw Diagonal Lines From The Bottom Vertices To The Upper Midpoint.
Next, create the spine of the book by adding another arch and connecting it to a line that is parallel to the long side of the rectangle you drew. Start by drawing a rectangle. You will be able to draw faces by the end of this book. These curves should curve up and then swoop down to the edges of the book drawing.
Web 1 Drawing An Opened Book.
A simple guide to draw a book. Create a straight line across the top, in parallel with the top of the book. Then, draw two straight, parallel lines across the cover of the book, in the area that the title would be printed. The first step is drawing the outline of the book.
You Can Simply Draw Another Set Of Lines Inside The Prism To Give The Cover Its “Thickness”.
Add the spine, remembering to add a slight curve at both the top and bottom of the spine. A huge bonus that i really loved as well that you don't see in a lot of manga/anime drawing books like this is the weight that comes with breasts on a human. Inside the construction frame draw the book cover (still with light lines at this point). Also included is a printable version of this book drawing tutorial.