Boot Drawing Easy
Boot Drawing Easy - Web complete the drawing of cowboy boots. Bring your boot illustrations to life by mastering the art of depth and dimension. Web step by step directions to draw a cowboy boot. How to draw a cowboy boot. Draw a small, rounded triangle at the bottom of the cylinder to indicate the point where the bottom of the shoe meets the heel. Time to color our cowboy boots drawing! Web in contrast the bombers, who have a relatively easy run into the bye weeks, will want to bank their wins early. Web how to draw for kids. Use curved lines to trace the top of the shoe, including the tall shaft that protects the leg. Not every drawing of a cowboy boot has to be overly difficult.
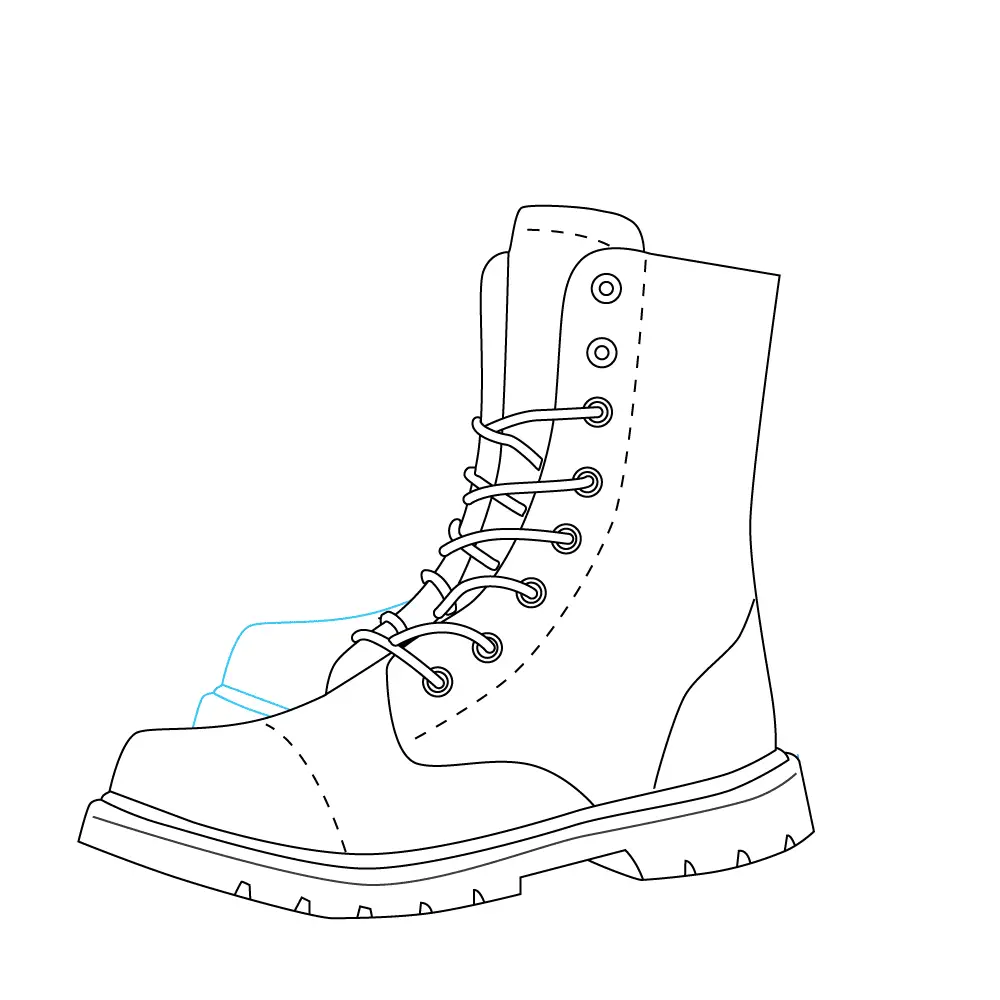
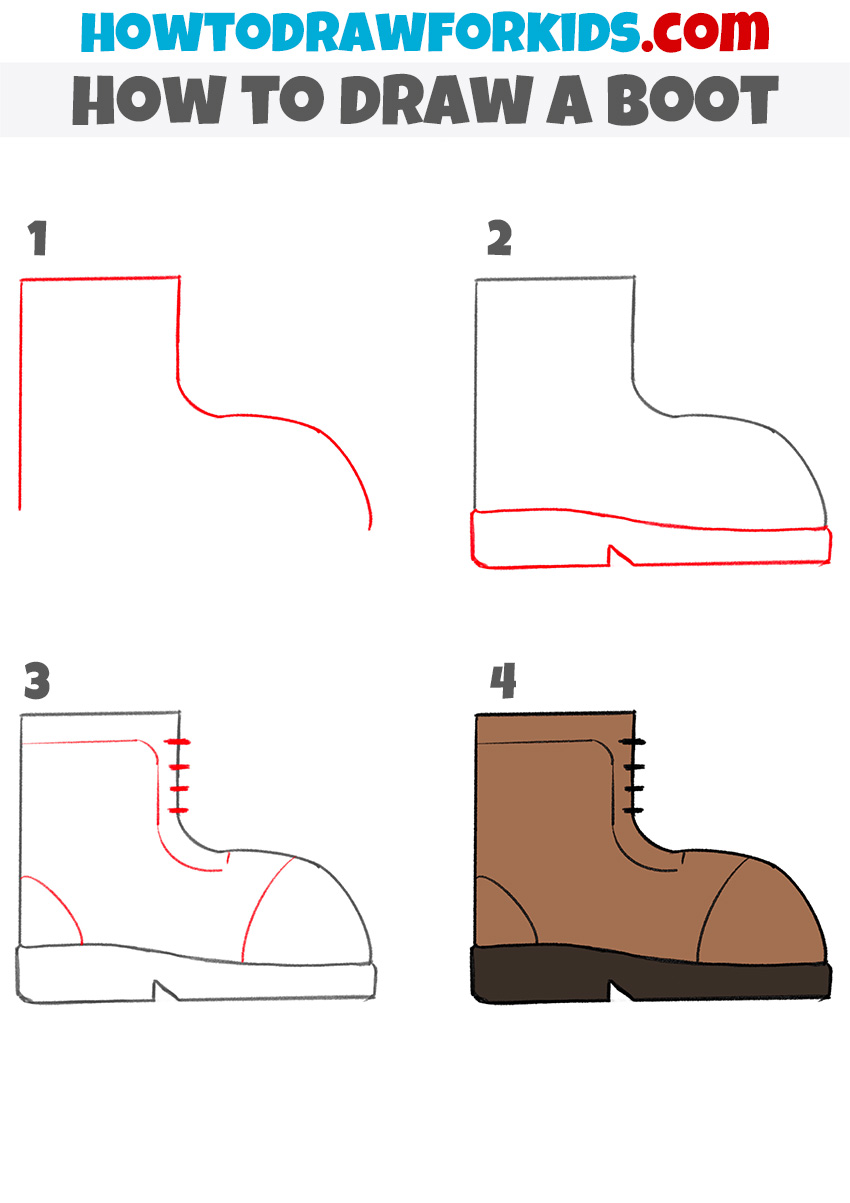
Finally for this step, we will draw the base of the boot. Web step by step directions to draw a cowboy boot. Web draw two parallel horizontal lines at the top. Emphasize texture and material, elevating your boots from mere sketches to captivating works of art. First, extend the back of the neck of the boots down further. Using the cylinder as a guide, add detail to the outline of the boot. This step adds a dynamic touch, making. Begin by drawing the combat boot's upper from a forward viewpoint. Draw a ring as shown. Identify the different components, such as the sole, shaft, and heel, and sketch their rough shapes lightly using simple lines and curves.
Surrounding the lower boot, draw the outsole and curve the rear end into the heel of the cowboy boot. On each side of the cylinder, draw a curved line that passes in and out of the cylinder. Draw the outsole on your easy cowboy boot drawing. Use a prominent color in the boot’s straps. Bring your boot illustrations to life by mastering the art of depth and dimension. Add some circles for lacing, add the heel and front. So, kids, this is the final step of our boots drawing easy guide. Draw this at the bend of the leg using curved lines. Web step by step directions to draw a cowboy boot. Add a line separating the sole of the boot from the top.
How to Draw Boots Step by Step
Not every drawing of a cowboy boot has to be overly difficult. Depict small vertical lines on the sides and draw a figured outline below. Surrounding the lower boot, draw the outsole and curve the rear end into the heel of the cowboy boot. Time to color our cowboy boots drawing! On each side of the cylinder, draw a curved.
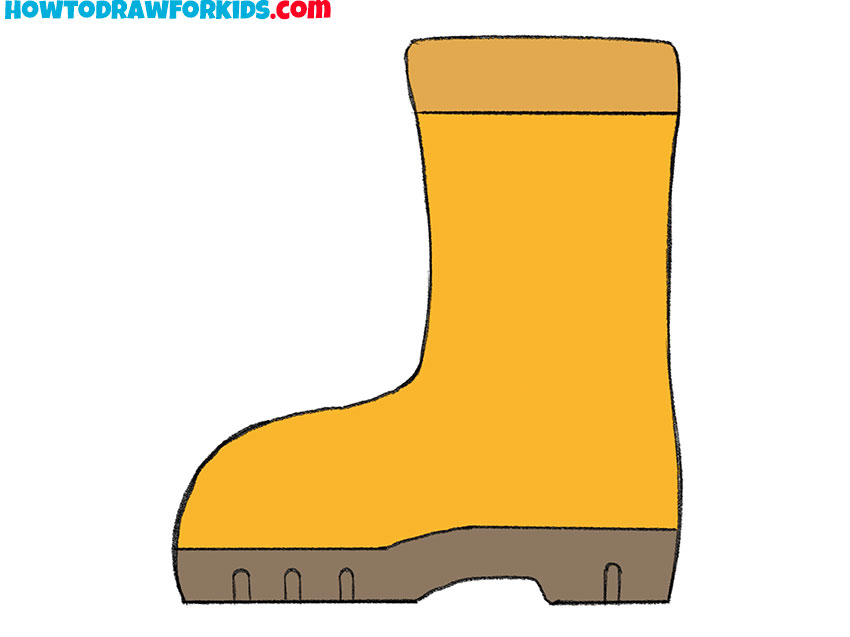
How to Draw a Rubber Boot Easy Drawing Tutorial For Kids
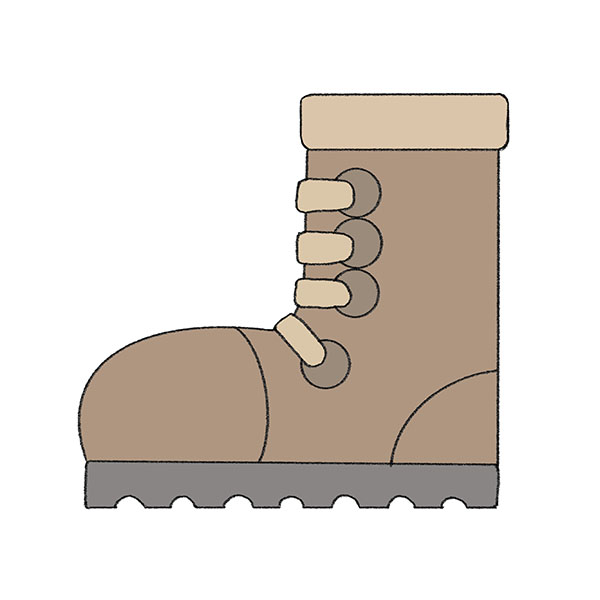
Draw a thick, slightly wavy line at the bottom of the boot to create the sole. Draw the outsole on your easy cowboy boot drawing. There will then be three straps connecting to one another near the base of the boot. Next, color the pull strap with a brown crayon and the side seam with a yellow crayon. Then, fill.

How to Draw Boots Really Easy Drawing Tutorial
Once completed, remove any remaining construction lines. Draw a horizontal line on the top of the boots. Web easy step for kids how to draw a boots subcribe to learn to draw !easy drawing of boots for kids.step by step for beginners. Surrounding the lower boot, draw the outsole and curve the rear end into the heel of the cowboy.
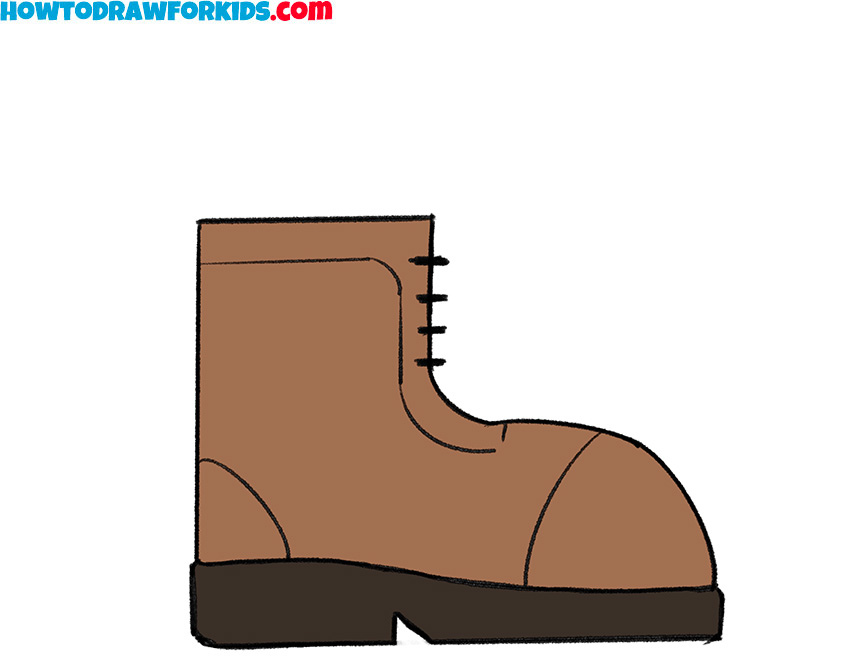
How to Draw a Boot Easy Drawing Tutorial For Kids
Introduce younger children to the joys of drawing with our simple and engaging tutorial on sketching brown boots. If one foot is at an angle to the viewer, it makes your task of how to draw boots much simpler immediately because the details of that boot are easily identifiable. Erase gray lines and add a curved lines. Emphasize texture and.
How to Draw Boots Step by Step
Identify the different components, such as the sole, shaft, and heel, and sketch their rough shapes lightly using simple lines and curves. Start your sketch by breaking down the overall shape of the boot into basic geometric forms. Web complete the drawing of cowboy boots. Use curved lines to trace the top of the shoe, including the tall shaft that.
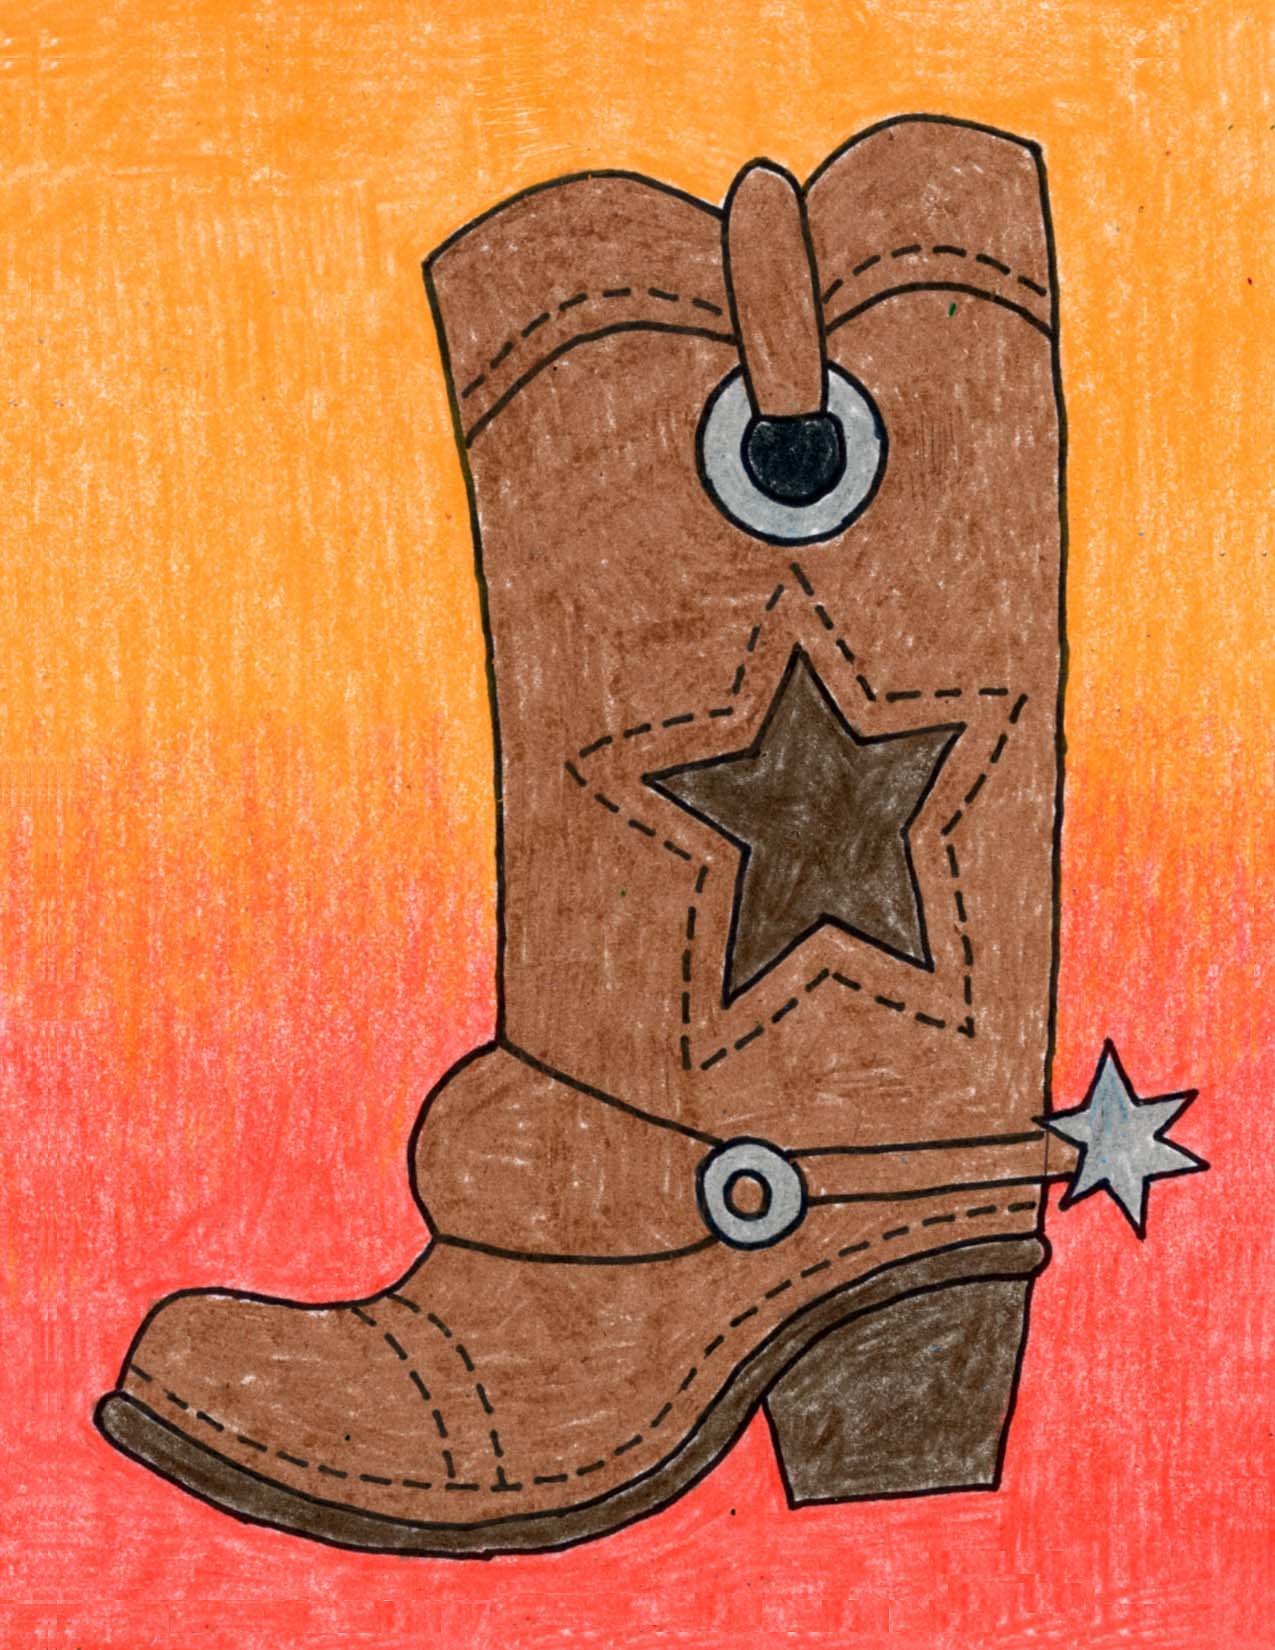
Draw a Cowboy Boot · Art Projects for Kids
Draw an easy cowboy boot. Now, shade the bottom part of the boots with an orange crayon. Add elements to the top and bottom of the boot. So, kids, this is the final step of our boots drawing easy guide. You can draw this with a curved line along the length of the sole of the boot.

How to Draw Rubber Boots Really Easy Drawing Tutorial
First, fill in the outsoles with a dark brown crayon. Next, color the pull strap with a brown crayon and the side seam with a yellow crayon. Web easy step for kids how to draw a boots subcribe to learn to draw !easy drawing of boots for kids.step by step for beginners. Add curved lines on the boots. Draw another.

How to Draw Rubber Boots Really Easy Drawing Tutorial
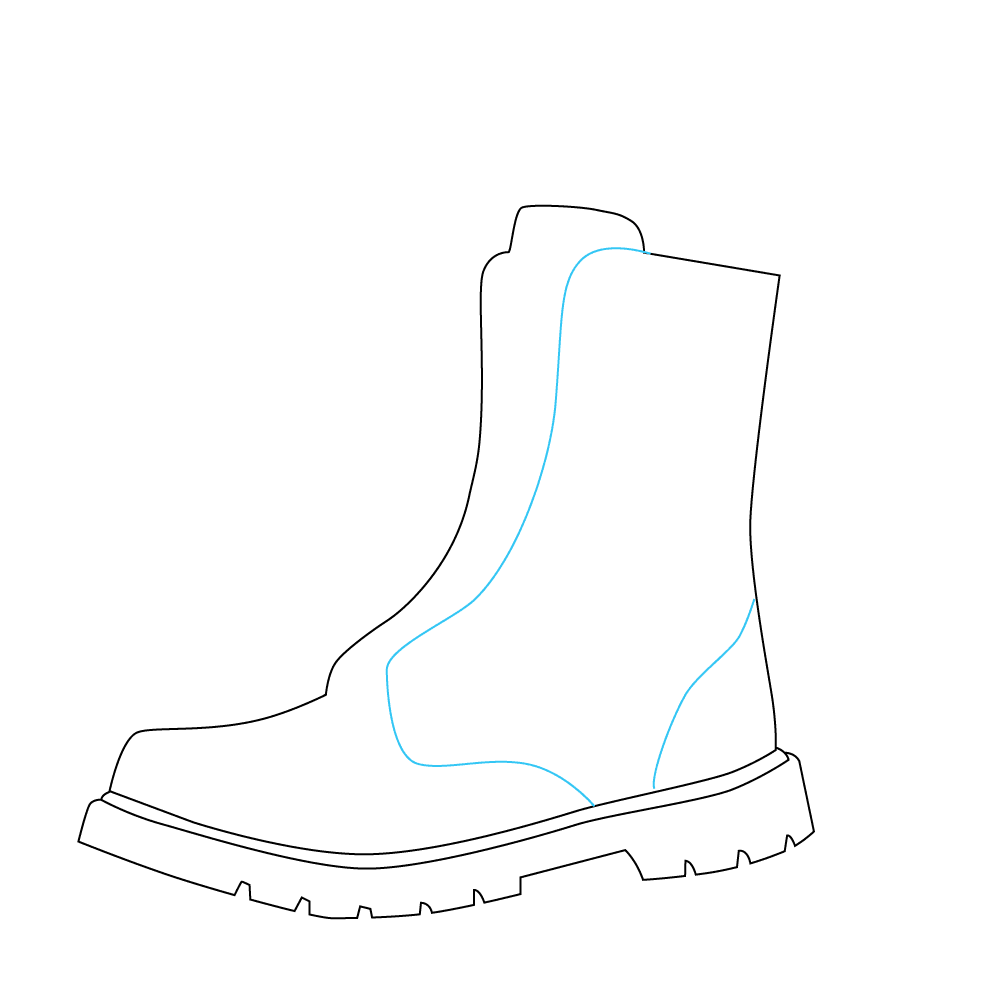
Web draw the outline of the heel and the toe of the boot using curved lines. This easy lesson is designed for kids, ensuring they won't struggle or feel overwhelmed while learning to draw these charming boots. Once completed, remove any remaining construction lines. Add curved lines on the boots. Draw a thick, slightly wavy line at the bottom of.
How to Draw a Boot for Kindergarten Easy Tutorial For Kids
Web how to draw an easy cowboy boot. On each side of the cylinder, draw a curved line that passes in and out of the cylinder. Once completed, remove any remaining construction lines. Web in contrast the bombers, who have a relatively easy run into the bye weeks, will want to bank their wins early. Add a bottom edge and.
How to Draw a Boot for Kindergarten Easy Drawing Tutorial For Kids
Now, shade the bottom part of the boots with an orange crayon. Depict small vertical lines on the sides and draw a figured outline below. First, extend the back of the neck of the boots down further. Draw two connecting lines at the top and one horizontal line at the bottom. Web if you want to know how to draw.
Then, Extend The Line And Double It Back Upon Itself To Trace The Sole Of The Wellington Boot.
Erase gray lines and add a curved lines. Brown boot drawing easy lesson. Then, we will be adding more rows of looping laces. Use curved lines to trace the top of the shoe, including the tall shaft that protects the leg.
Add A Bottom Edge And Heel.
Web first, use some more bumpy lines to extend the front and back edges of the boot. Sketch out the outline of the spur. Add a line separating the sole of the boot from the top. Use the same color in the sole of the boot and the part where you insert your foot into the boot.
Now, Shade The Bottom Part Of The Boots With An Orange Crayon.
Next, color the pull strap with a brown crayon and the side seam with a yellow crayon. How to draw a cowboy boot. Once completed, remove any remaining construction lines. Draw this at the bend of the leg using curved lines.
Time To Color Our Cowboy Boots Drawing!
This easy lesson is designed for kids, ensuring they won't struggle or feel overwhelmed while learning to draw these charming boots. Draw a ring as shown. Draw a small, rounded triangle at the bottom of the cylinder to indicate the point where the bottom of the shoe meets the heel. Web complete the drawing of cowboy boots.