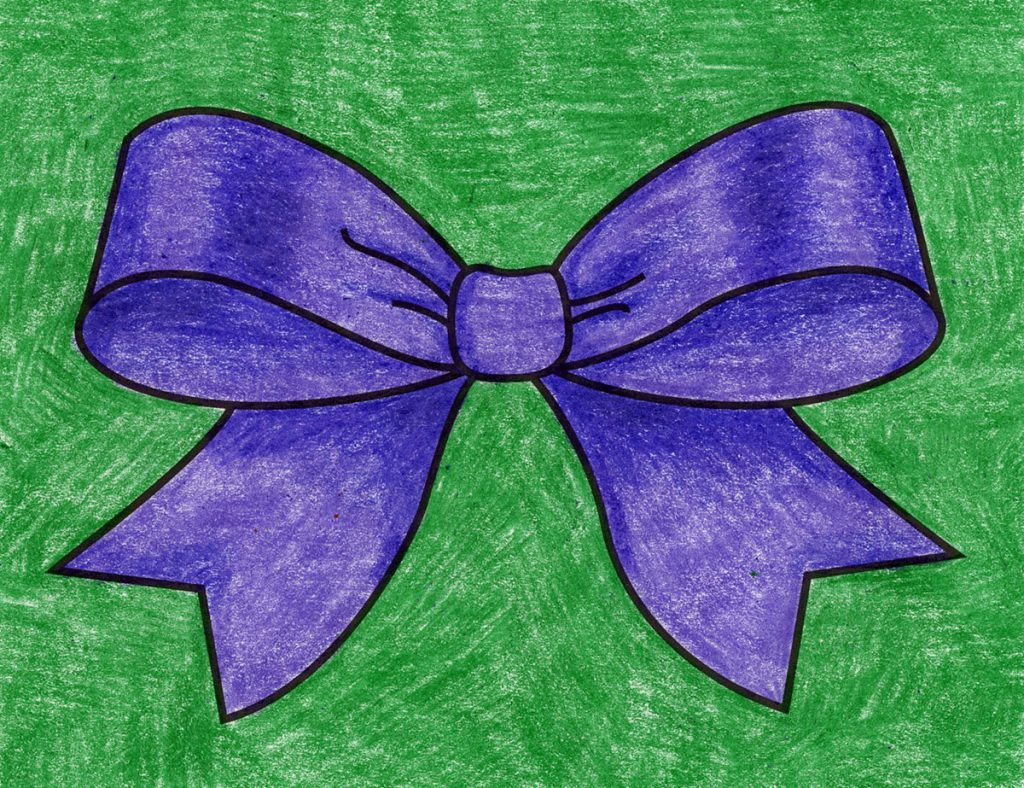
Christmas Present Bow Drawing
Christmas Present Bow Drawing - Remember, if you’re using a sharpie or black marker, you’ll want to use more than one sheet of paper. Draw the bottom of the loop on the right. You can make the rectangle as large or as small as you’d like, depending on how prominent you want your gift to be on the paper. Define a certain section on the bottom, and then add roughly the same length to the top. These gifts are perfect for putting under a christmas tree! Trace and color the shadows with dark crayon. Web add the bottom of the bow. It is best to proportion out the proportions of each part of the christmas present. Take a black abt pro marker to fill in the darkest areas of your gift bow. I like to work one area at a time, so you don’t get overwhelmed.
Web directions to draw a present step by step. This art lesson is easy and step by step, perfect for beginner artists and kids. Now you should draw two symmetrical curved lines above the previously drawn elements. Web follow along to learn how to draw christmas presents easy, step by step. Web finish up drawing the present with two sets of lines that make the two loops on the top of the package for the bow. Beneath the knot, extend two more ribbons. Web step by step directions. Web start by drawing a rectangular shape to represent the main body of the present. Define a certain section on the bottom, and then add roughly the same length to the top. Easy bows and boxes draw.
It is best to proportion out the proportions of each part of the christmas present. I like to work one area at a time, so you don’t get overwhelmed. Round off the sharp corners of the “wings” as you are outlining the bow. Web start drawing the outline of the ribbon. Create the left part of the box by drawing a long, nearly vertical line and connect this with a shorter diagonal line at the bottom, as shown in the illustration. Define a certain section on the bottom, and then add roughly the same length to the top. Web add the bottom of the bow. On the sides of the previously drawn bow knot, draw two loops as two curved lines. This art lesson is easy and step by step, perfect for beginner artists and kids. Sketch out the second free edge of the tape.

How to Draw a Christmas Bow HelloArtsy
This will protect your table from getting marker on it. Start the top of the right loop. Web i am filling this entire sketchbook with realistic colored pencil drawings! Draw a straight vertical line first. On the sides of the previously drawn bow knot, draw two loops as two curved lines.

Christmas Bow Drawing at Explore collection of
Trace and color the shadows with dark crayon. Austin and i are learning how to draw a christmas present! Match with same shape on the left. Round off the sharp corners of the “wings” as you are outlining the bow. Web directions to draw a present step by step.

How to Draw a Christmas Bow Step by Step Super Easy! YouTube
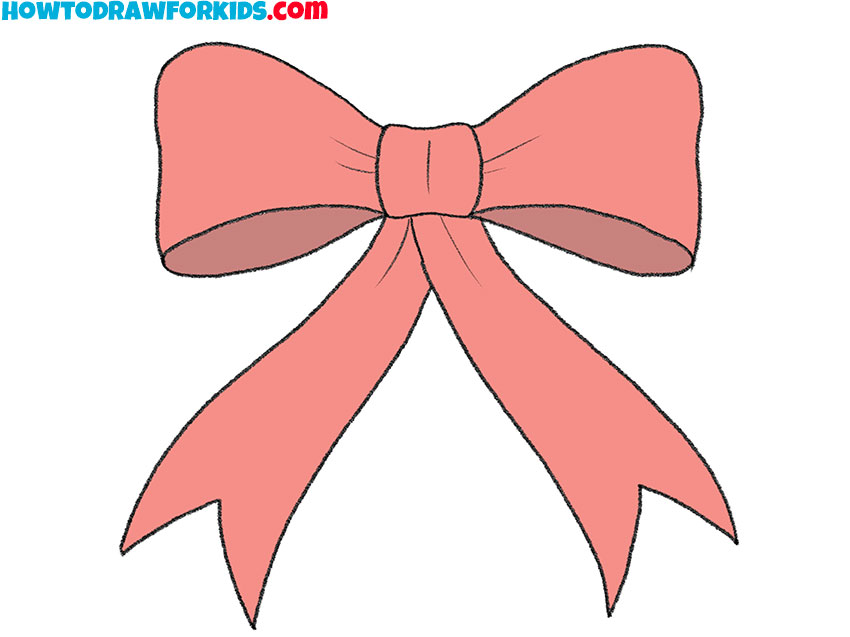
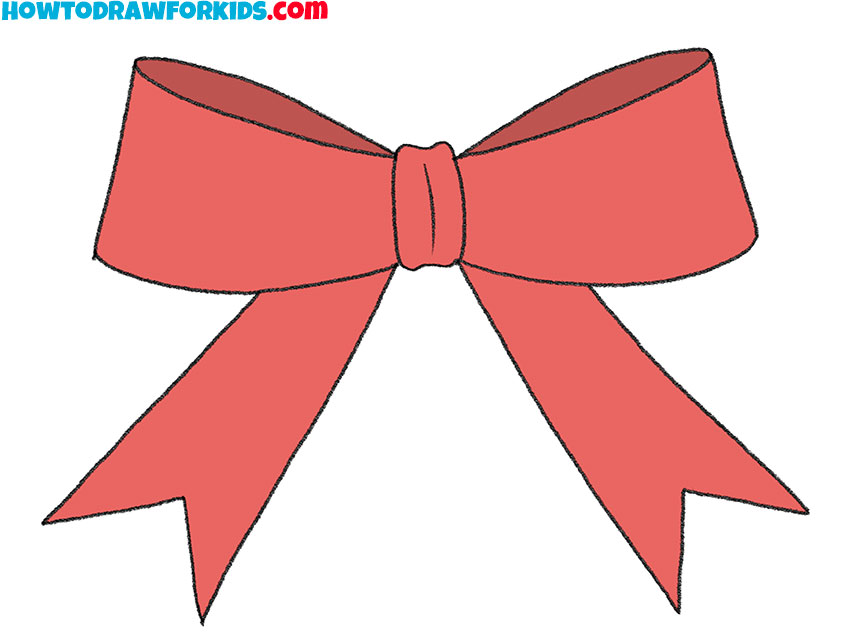
Add ribbon end on the left and the wrinkles. We're going to use geometry quite a lot here, so feel free to use a ruler (it's optional). Now you should draw two symmetrical curved lines above the previously drawn elements. Depict the top of the loops of the christmas bow. Draw a bow on top to make your christmas present.
How to Draw a Bow · Art Projects for Kids
This art lesson is easy and step by step, perfect for beginner artists and kids. Draw two more loops behind. Create the left part of the box by drawing a long, nearly vertical line and connect this with a shorter diagonal line at the bottom, as shown in the illustration. Let’s start outlining our present drawing. Depict the top of.
How to Draw a Christmas Bow Easy Drawing Tutorial For Kids
Create the left part of the box by drawing a long, nearly vertical line and connect this with a shorter diagonal line at the bottom, as shown in the illustration. Draw a bow on top to make your christmas present look. Web black marker (optional) how to draw a christmas present printable pdf (see bottom of lesson) in this tutorial,.

Free Christmas Bow Cliparts, Download Free Christmas Bow Cliparts png
I copied the design on the paper that was on the gift shown in the video. Web hi buddy!my name is gufo 🦉i love drawing ️in this video i will show you how to draw a christmas bow step by step 🎀have fun! Black marker (optional) how to draw a christmas bow printable pdf (see bottom of lesson) in this.
How to Draw a Present Bow Easy Drawing Tutorial For Kids
This will blend the colors together more. Web this drawing tutorial will teach you how to draw find my drawing books here: Here are even more christmas drawing tutorials. Now you should draw two symmetrical curved lines above the previously drawn elements. Below the drawn bow, draw two straight lines to start drawing the free edge of the ribbon.
![How To Draw A Christmas Bow Step by Step [6 Easy Phase & Video]](https://easydrawings.net/wp-content/uploads/2020/04/Overview-included-for-Bow-drawing.jpg)
How To Draw A Christmas Bow Step by Step [6 Easy Phase & Video]
This will serve as the base for your artwork. Web start by drawing a rectangular shape to represent the main body of the present. Draw the bottom of the loop on the left. Add the inner loop outlines of the christmas bow. Web add the bottom of the bow.
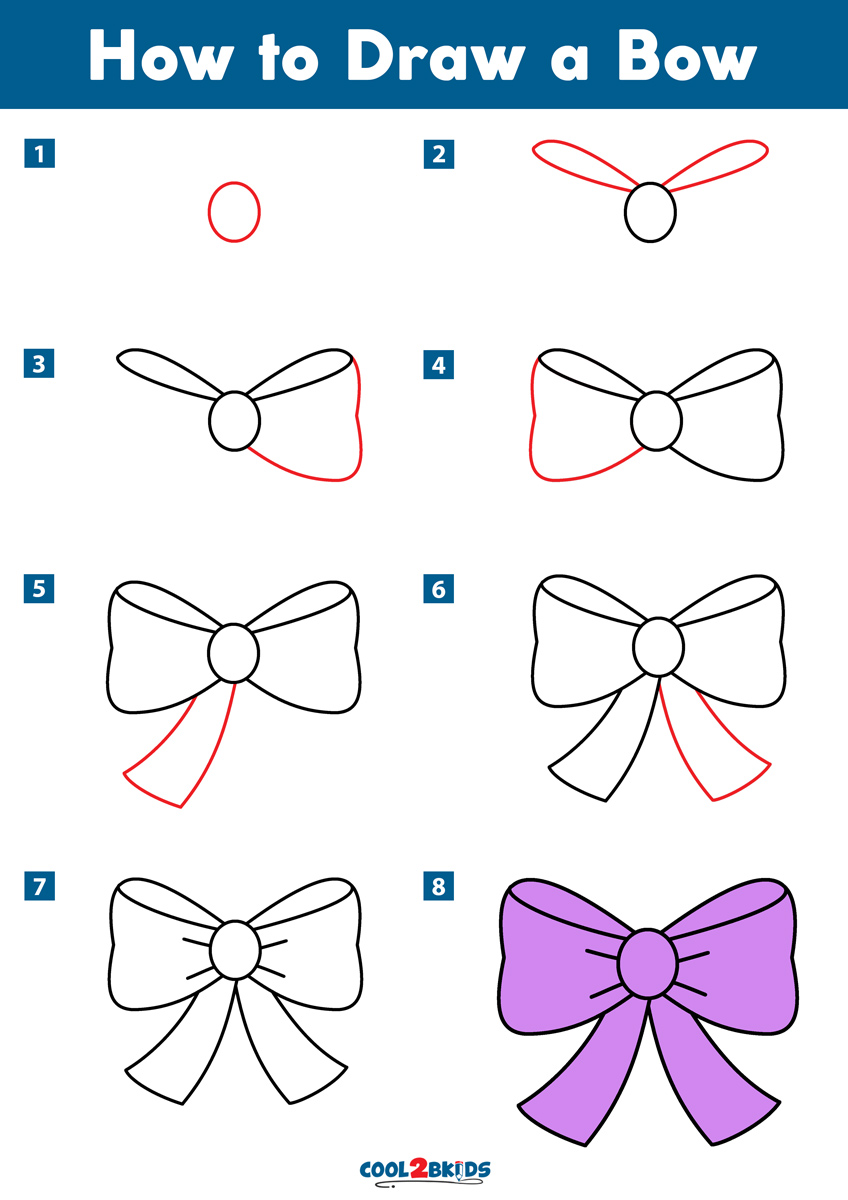
How to Draw a Bow Cool2bKids
Web hi buddy!my name is gufo 🦉i love drawing ️in this video i will show you how to draw a christmas bow step by step 🎀have fun! On the sides of the previously drawn bow knot, draw two loops as two curved lines. Here are even more christmas drawing tutorials. Black marker (optional) how to draw a christmas bow printable.
Christmas Bow Drawing at GetDrawings Free download
Web learn how to draw a christmas present with a fun bow! Here are even more christmas drawing tutorials. Define a certain section on the bottom, and then add roughly the same length to the top. Use a few small, smooth lines to depict the knot and the two ends of the ribbon. Easy bows and boxes draw.
Next, Go Back Over Everything With The Lightest Color (The First Marker That You Used).
Define a certain section on the bottom, and then add roughly the same length to the top. Browse the best collection of christmas. Draw another, smaller curved line within each shape, forming loops of ribbon. It is best to proportion out the proportions of each part of the christmas present.
This Will Blend The Colors Together More.
It’s best if we observe the proportions of each of the drawn parts of the christmas bow. Round off the sharp corners of the “wings” as you are outlining the bow. Web crayons or colored pencils. Finish drawing the edges of the free ends of the tape.
Add The Inner Loop Outlines Of The Christmas Bow.
How to draw a christmas present with a bow step 1. This art lesson is easy and step by step, perfect for beginner artists and kids. Draw a straight vertical line first. Add two loops of the bow.
Match With Same Shape On The Left.
You can make the rectangle as large or as small as you’d like, depending on how prominent you want your gift to be on the paper. Depict the top of the loops of the christmas bow. This will serve as the base for your artwork. Austin and i are learning how to draw a christmas present!