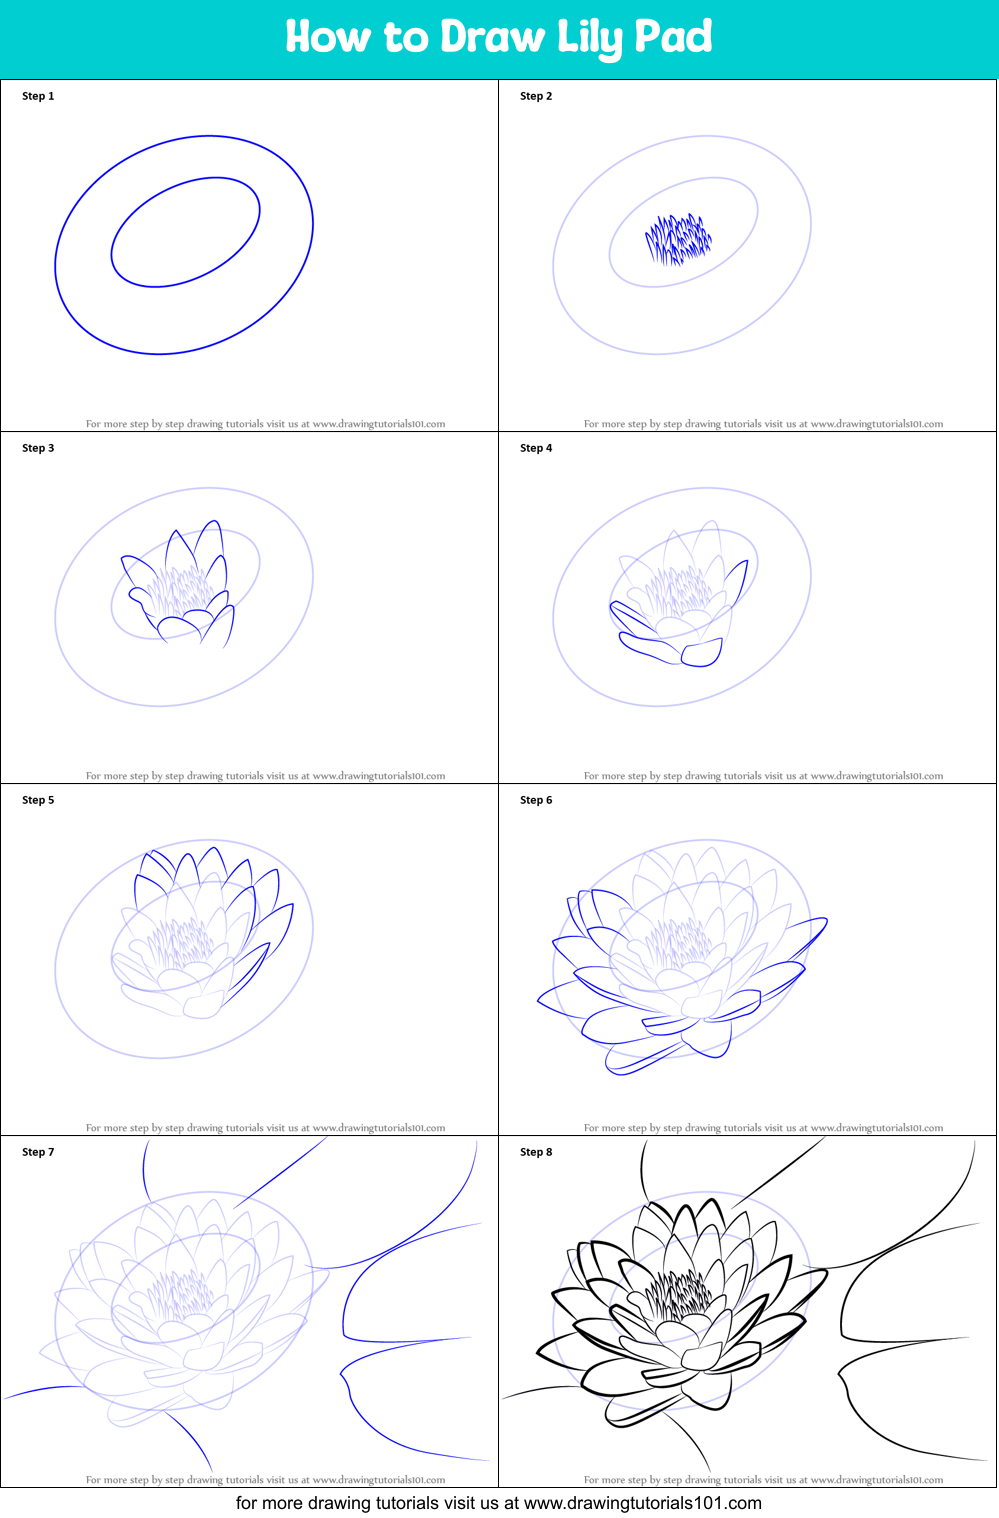
Drawing A Lily Pad
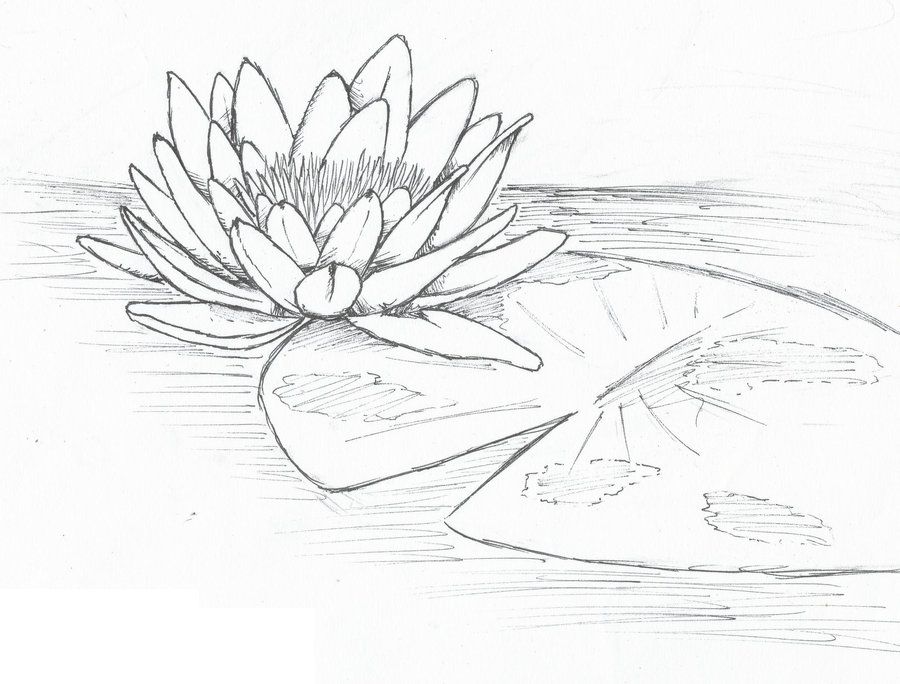
Drawing A Lily Pad - To show the water lying on the lily pad just shade the edge of the water dark to show it curls downward. The edges of the lily pad are slightly curved and uneven, giving them a natural appearance. This will be the base of your lily pad. Use a 6b and an eraser to create these edges. Lily pad drawing stock photos are available in a variety of sizes and formats to fit your needs. Web our lily pad is more or less done. How to draw a lily pad. Lily pad drawing reference 5. Add two circles for the eyes of the frog. What then happens is that you get highlights and shadows running all along the edge of the lily pad.
Add a horizontal line through it. Lily pad drawing reference 6. The edges of the lily pad are slightly curved and uneven, giving them a natural appearance. It is very easy i hope you enjoy the video and try it out for yourself!any pen. Web how to draw lily pad. To add depth and dimension to your drawing, lightly shade the areas of the lily pad that are farther away. Define shapes for the legs and mouth. Web how to draw a lily pad. Web wild eyed and wicked: See more ideas about lily pad drawing, lily pads, lilies drawing.
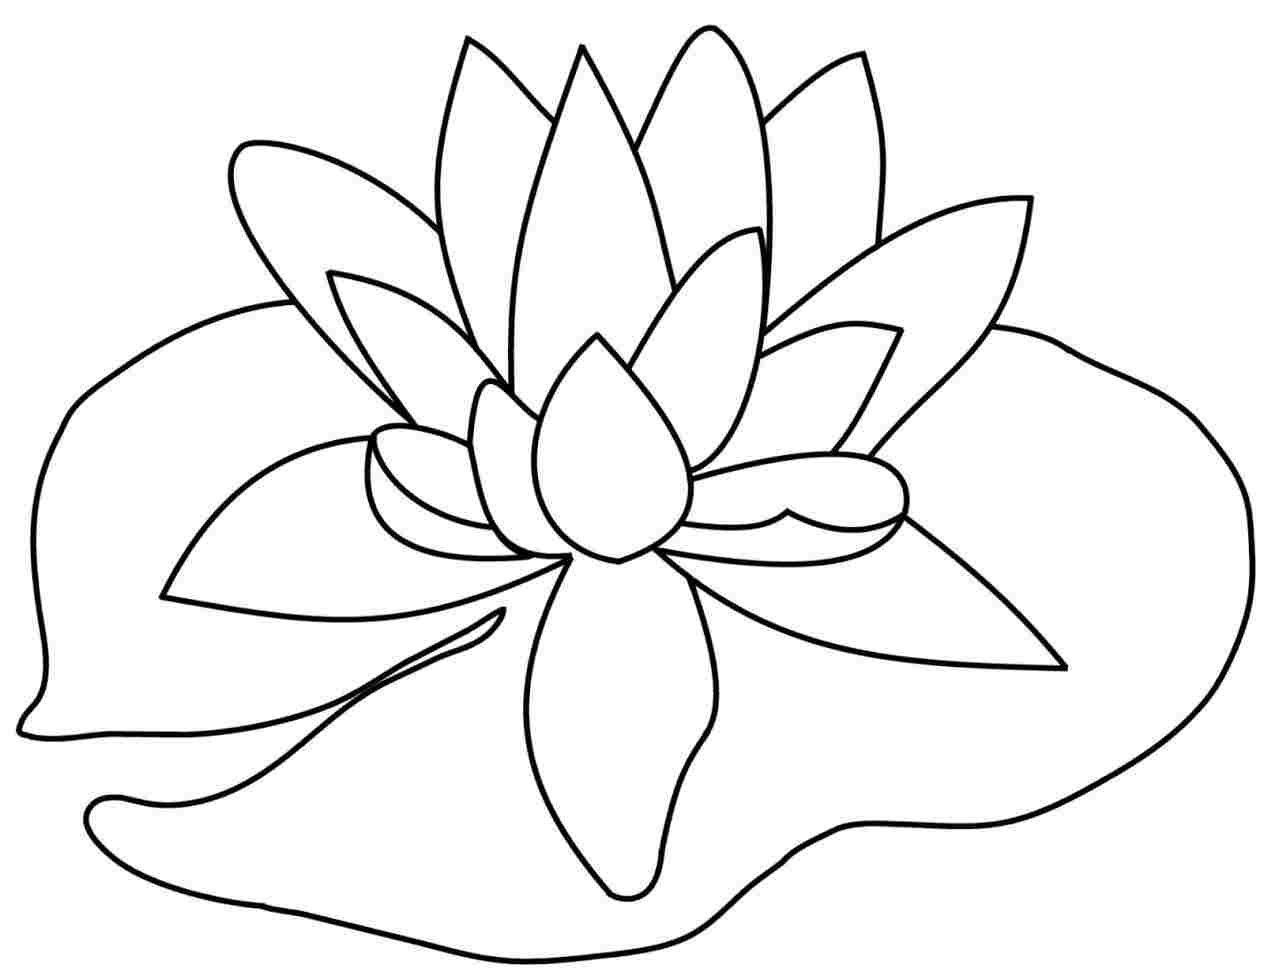
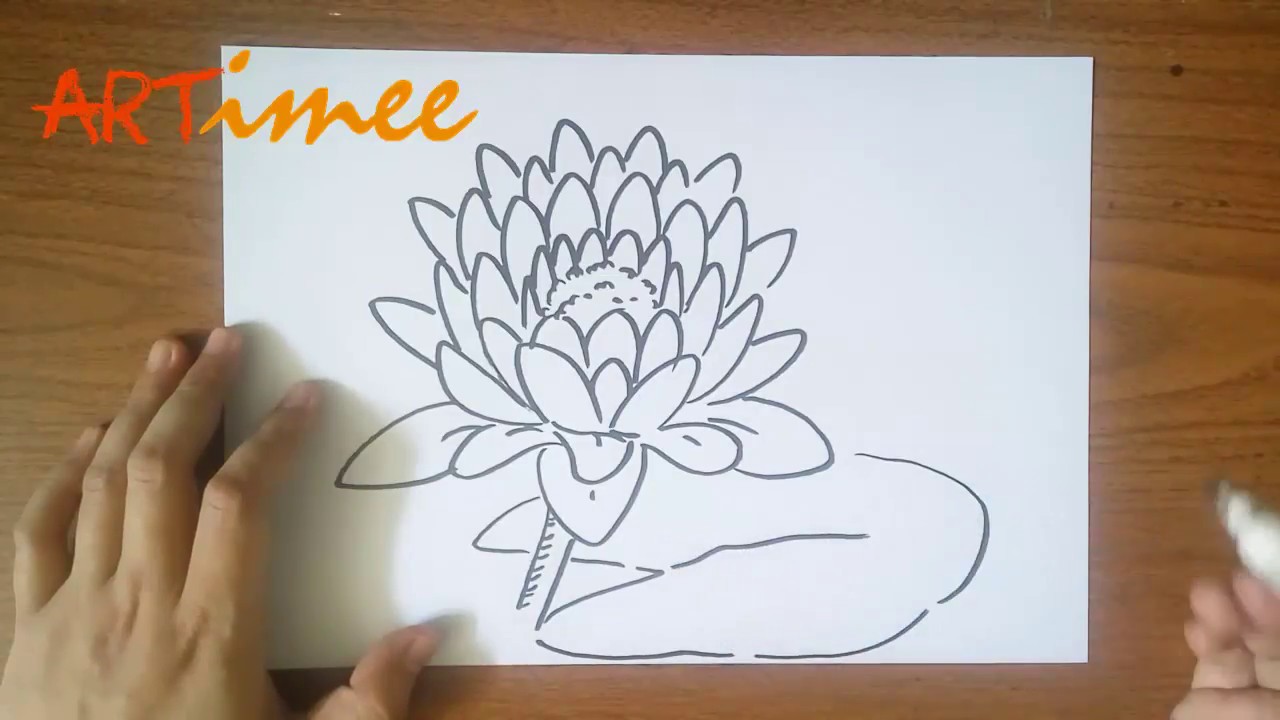
Next, shade its underbelly with a light yellow crayon. Keep the stroke thickness 8pts and stroke color #c0fcfc. The edges of the lily pad are slightly curved and uneven, giving them a natural appearance. Start by drawing a large circle on your paper. First, use an orange crayon to color the eyes. How to draw water lily plant. Draw an oval for the pad and add a line through it. Add circular spots on its back and legs using a darker shade of green. Find out how to draw a. Impress your friends with your artistic skills and create stunning lily pad drawings today!
How to Draw Lily Pad (Lily) Step by Step
Home catalog all drawing member exclusive folding surprise painting origami cutout sculpting art core parent & teacher info extras. What then happens is that you get highlights and shadows running all along the edge of the lily pad. Web our lily pad is more or less done. Web frog jumps into the water. Web next, draw 2 curves at the.

How to Draw a Lily Pad, Step by Step, Flowers, Pop Culture, FREE Online
Web next, draw 2 curves at the side of the frog’s head. Directed by gordon shoemaker foxwood. Add black horizontal ovals to form its pupils. Web how to draw a lilly pad. Web how to draw lily pad.

How to draw a water lily and pad Step by step Drawing tutorials
Add black horizontal ovals to form its pupils. Keep the stroke thickness 8pts and stroke color #c0fcfc. Web how to draw a lily pad. Web how to draw a lilly pad. Now let's enhance it by adding the circular waves around the leaves.

How to draw a lily pad Drawing Factory Lilies drawing, Lily pad
Add a guideline of the area in which to place the petals. Add two circles for the eyes of the frog. Add the toes and pupils of the frog on the lily pad. The first step in drawing lily pads is to understand their basic shape. Web hello everyonein this tutorial i will be showing you how to draw water.
Lily Pad Flower Drawing at Explore collection of
Add circular spots on its back and legs using a darker shade of green. How to draw a koi fish. Web hello everyonein this tutorial i will be showing you how to draw water lilies. Some of them are fully open, others are past their prime and wilting. Impress your friends with your artistic skills and create stunning lily pad.
Lily Pad Drawing at Explore collection of Lily Pad
How to draw a lily pad. Next, we are going to draw the frog’s eyes. Web wild eyed and wicked: To add depth and dimension to your drawing, lightly shade the areas of the lily pad that are farther away. Now let's enhance it by adding the circular waves around the leaves.
How to Draw a Lily Pad YouTube
Next, we are going to draw the frog’s eyes. To show the water lying on the lily pad just shade the edge of the water dark to show it curls downward. Web dive into the serene world of aquatic plants with our lily pad drawing tutorial! Web draw an oval for the shape of the animal’s body. Use a 6b.

Are you looking for a tutorial on How to draw a Lily Pad? Look no
The flowers stand high above the water. Web learn how to draw a pretty lily flower easy, step by step drawing tutorial. Next, we are going to draw the frog’s eyes. Web 📎 i this tutorial video you will know how to draw a lily pad , cartoon lily pad, step by step, using simple shapes , so please follow.

How to Draw Lily Pad from Plants vs. Zombies printable step by step
Web hello everyonein this tutorial i will be showing you how to draw water lilies. Next, shade its underbelly with a light yellow crayon. Web next, draw 2 curves at the side of the frog’s head. Draw one or a few lily pads. Lily pad drawing reference 6.
How to Draw Lily Pad (Lily) Step by Step
Draw an oval for the pad. We’ll draw 2 small eyes in the upper portion and draw a small smile in the middle of the eyes. Web how to draw a lilly pad. Web dive into the serene world of aquatic plants with our lily pad drawing tutorial! It is very easy i hope you enjoy the video and try.
Web Learn How To Draw Step By Step In A Fun Way!Come Join And Follow Us To Learn How To Draw.
This will be the base of your lily pad. Add a horizontal line through it. Web in this picture of lilies you can really see how the lilies thin out as the water gets deeper. Sketch the central part of the flower.
Use A 6B And An Eraser To Create These Edges.
When you are happy with the shape of the lily pad, draw a few little veins coming out from its center (figure 2). How to draw water lily plant. Web draw an oval for the shape of the animal’s body. Next, we’ll draw the frog’s body.
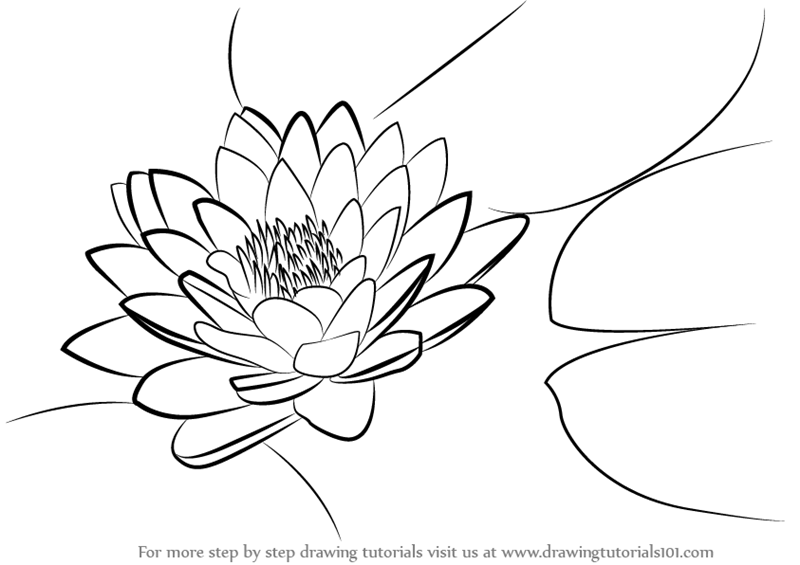
Add Guidelines For Some Petals.
We are going to draw a large curve. Web draw the stem of the water lily. Directed by gordon shoemaker foxwood. Next, we are going to draw the frog’s eyes.
Sketch One Row Of Petals.
What then happens is that you get highlights and shadows running all along the edge of the lily pad. A lily pad is a little unevenly round in shape, with one slit that goes all the way to its center (figure 1 below). Beautiful easter lily flower colored with copic markers with leaves and buds. In order to do that remove all the construction lines and carefully separate each petal using a softer pencil and a bit of shadow.