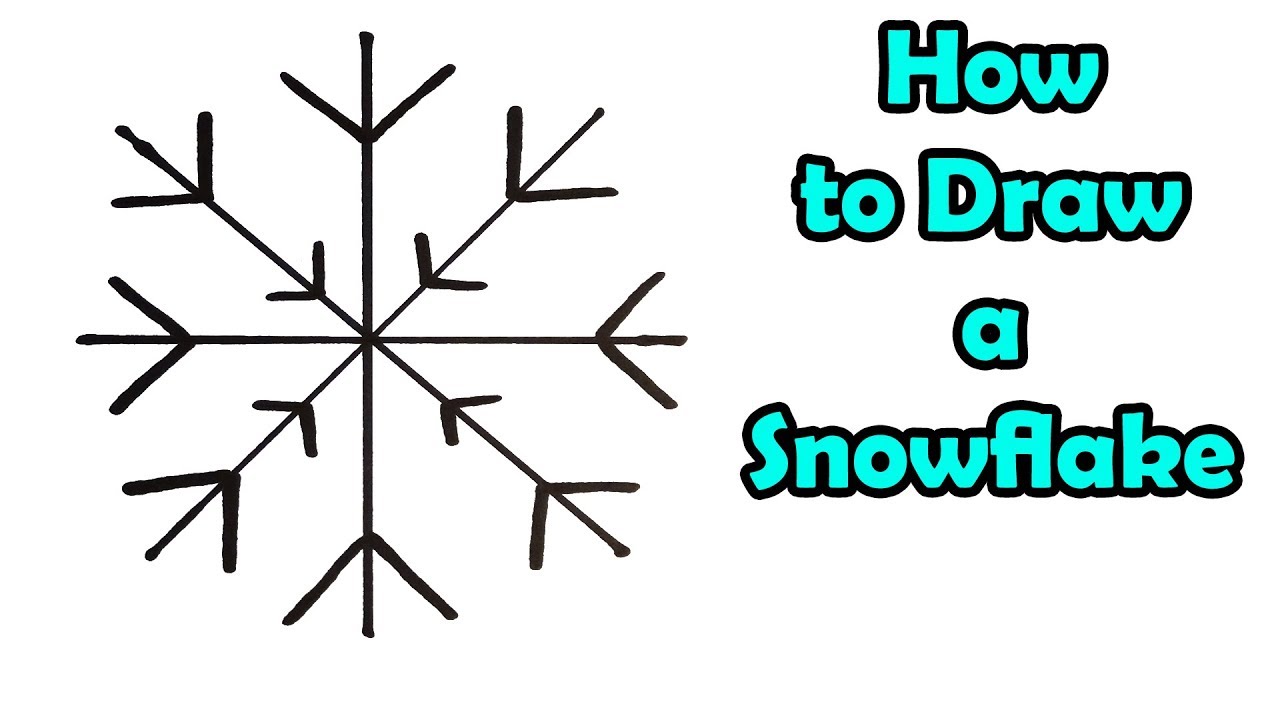
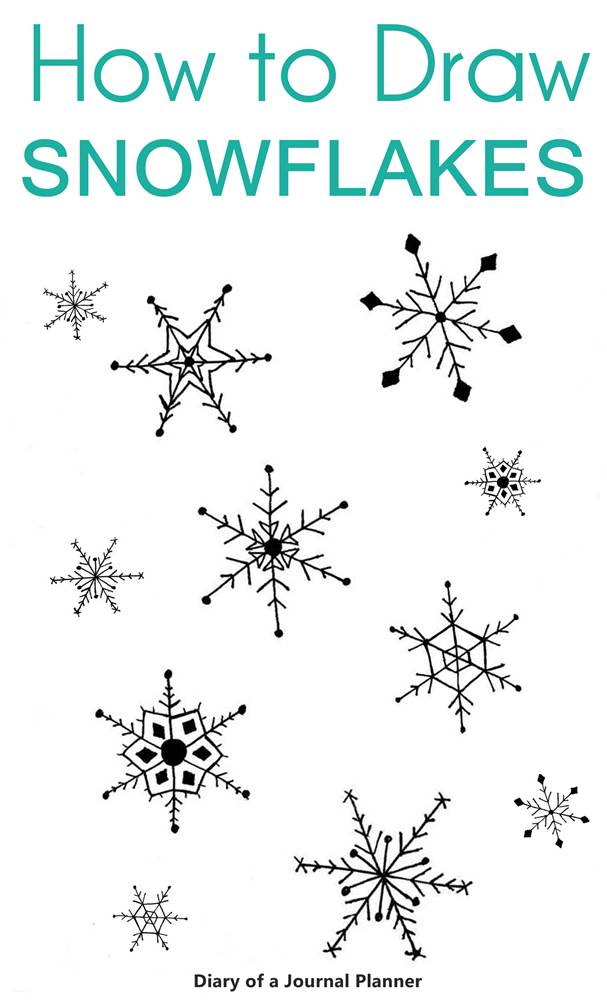
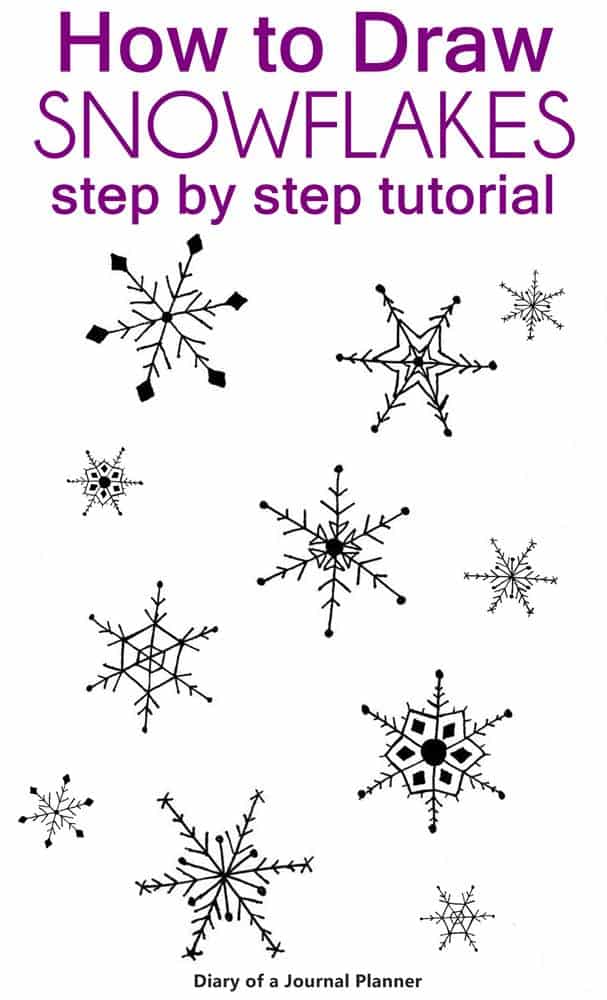
Drawing A Simple Snowflake
Drawing A Simple Snowflake - Remember to start with an x and cross the middle of it to create the first step with 6 lines. Draw a circle on your chalkboard either freehand or by tracing around a circular object. This is a fun way to teach children about negative space. Web join us in a winter wonderland with our snowflakes drawing tutorial! The next step is to draw the lines that give your snowflake its shape. For this one, start by drawing a straight line down. On the arms closest to the circles, draw two more, smaller arms. With the pencil lines drawn, we will be adding another shape to help with drawing the final snowflake. Go over your lines multiple times with the chalk to thicken them. Add a second, smaller v above your first one.
Here’s a simple and easy snowflake doodle you can start with. For this one, start by drawing a straight line down. Perfect for capturing the beauty of the winter season, this guide will teach you how to. Go over your lines multiple times with the chalk to thicken them. Start adding the details on your snowflake drawing. Begin with the intersecting line you drew in the last step, adding two sets of extending arms just before the ends. Now draw another line from left to right. Draw a small dot on the page. Use two sets of straight, parallel lines, and two short, curved lines for each. Add a second, smaller v above your first one.
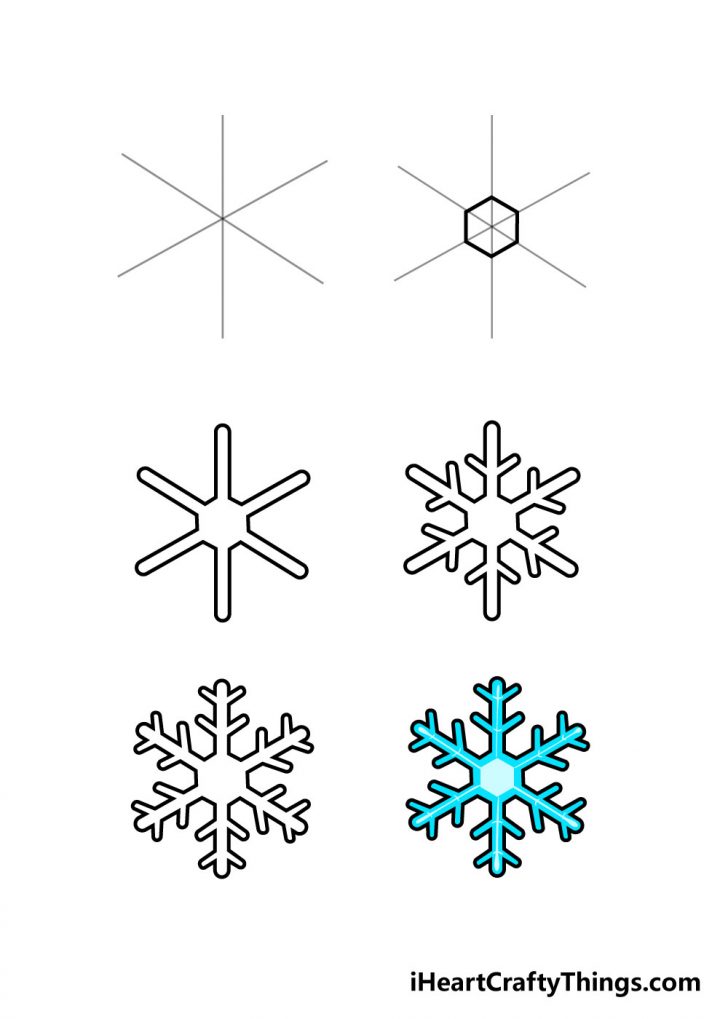
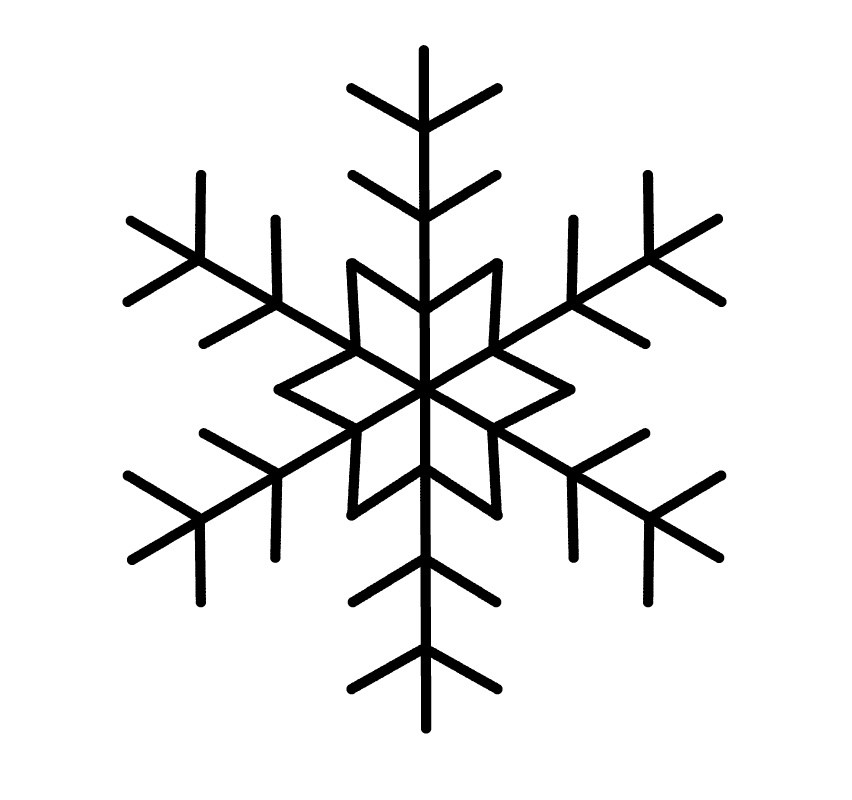
A hexagon has 6 sides that are all the same length. Using a pencil, draw a larger circle around the dot. This is a fun way to teach children about negative space. 1 how to draw a snowflake: Using a fineliner and a ruler to help keep your lines straight, draw 4 straight lines through the point in the middle. Web drawing a beautiful snowflake is a lot easier than you might think! This really creates the illusion of a dusty, lacy snowflake form. Add a second, smaller v above your first one. The bigger you make the hexagon, the bigger your snowflake will be. Start with a blank sheet of paper and your favorite drawing tool—this could be a pencil, pen, or even a digital stylus.
How to Draw a Snowflake VERY EASY FOR KIDS YouTube
Creating the first circle for your snowflake drawing; You can use the reference image as. Draw a hexagon on a piece of paper. Draw a third vertically to intersect the first two lines. 1 how to draw a snowflake:
Snowflake Drawing How To Draw A Snowflake Step By Step!
This really creates the illusion of a dusty, lacy snowflake form. Here’s a simple and easy snowflake doodle you can start with. With the pencil lines drawn, we will be adding another shape to help with drawing the final snowflake. Draw 3 lines that cross each other. Draw a line from each corner of the hexagon to the corner across.
How to Draw a Snowflake MediBang Paint the free digital painting
Web join us in a winter wonderland with our snowflakes drawing tutorial! Web start with your essential six sides of the snowflake. Use a ruler to draw the hexagon so the lines are straight and even. We now begin to add the signature arms on our easy snowflake drawing. At the end of all your straight lines, add a v.
How to Draw a Snowflake Easy Drawing Tutorial For Kids
Use a compass and put the point on the dot in the center, or draw around something circular. Use two sets of straight, parallel lines, and two short, curved lines for each. This can be done with a pencil or a drawing program on a computer. We now begin to add the signature arms on our easy snowflake drawing. The.
How to draw a snowflake Easy snowflake drawing step by step tutorial
Draw two intersecting lines by adding an ‘x’ at the center point. Draw three straight lines that intersect right in the middle, like a star. You can use a ruler, or you can let the kids draw free hand. Draw a line from the middle of the circle to the edge to start. Web table of contents.
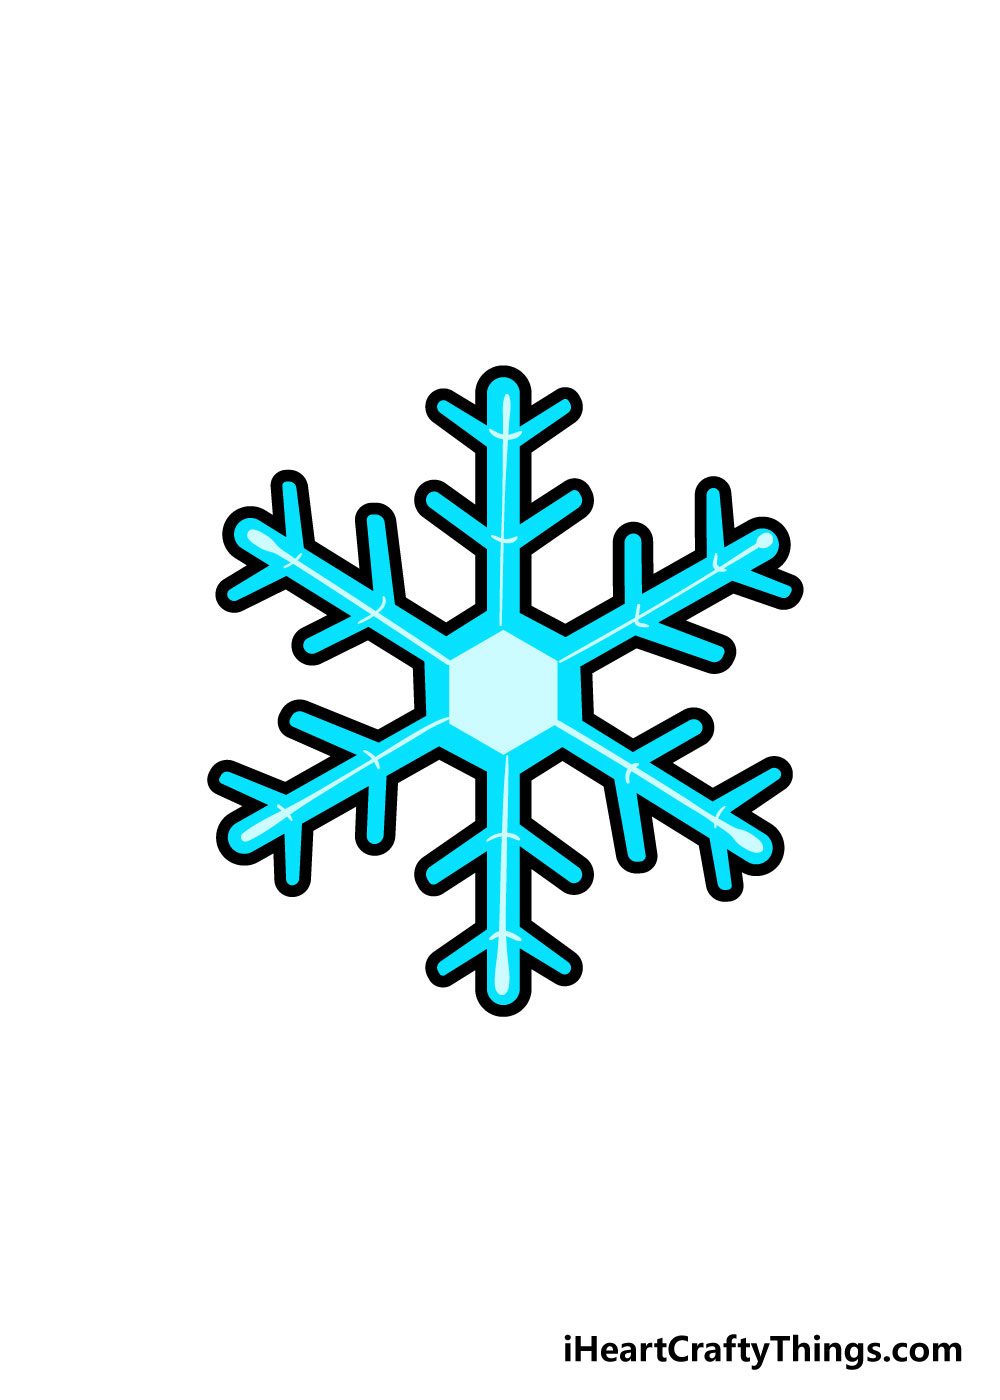
Snowflake Drawing How To Draw A Snowflake Step By Step!
If you have students ready to take on a bigger. Then out from the center, draw shorter new lines in between each of the six main lines. Begin with the intersecting line you drew in the last step, adding two sets of extending arms just before the ends. Repeat this process on each arm of the snowflake. Using a pencil,.

How to Draw a Snowflake Really Easy Drawing Tutorial
Begin with the intersecting line you drew in the last step, adding two sets of extending arms just before the ends. Draw another line slanted from one side to the other of the first line. Web table of contents. We now begin to add the signature arms on our easy snowflake drawing. This can be done with a pencil or.
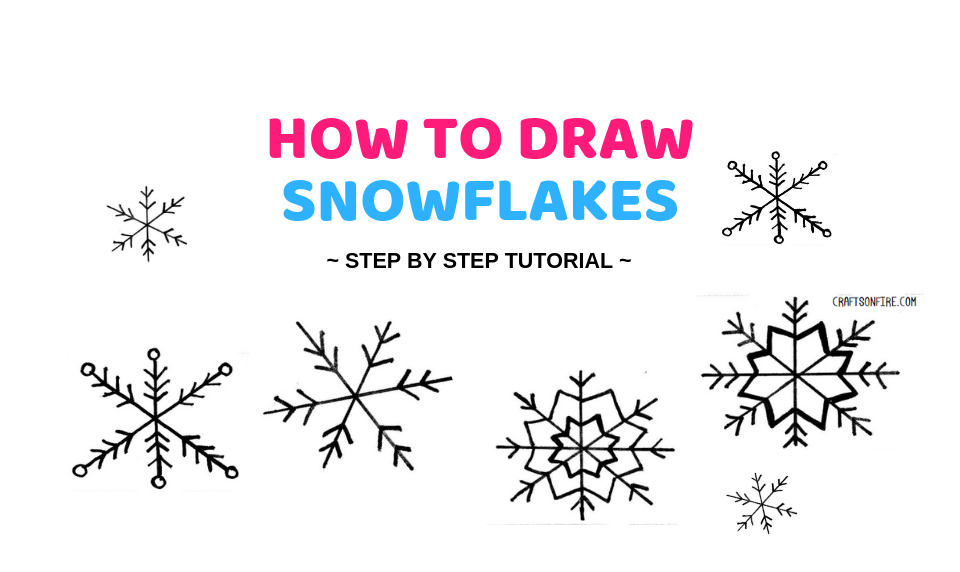
How To Draw A Snowflake In 3 Steps Easy Drawing Tutorial Craftsonfire
This is the most simple design. Use a ruler to draw the hexagon so the lines are straight and even. Using a pencil, draw a larger circle around the dot. The bigger you make the hexagon, the bigger your snowflake will be. On the arms closest to the circles, draw two more, smaller arms.
How to draw a snowflake Easy snowflake drawing step by step tutorial
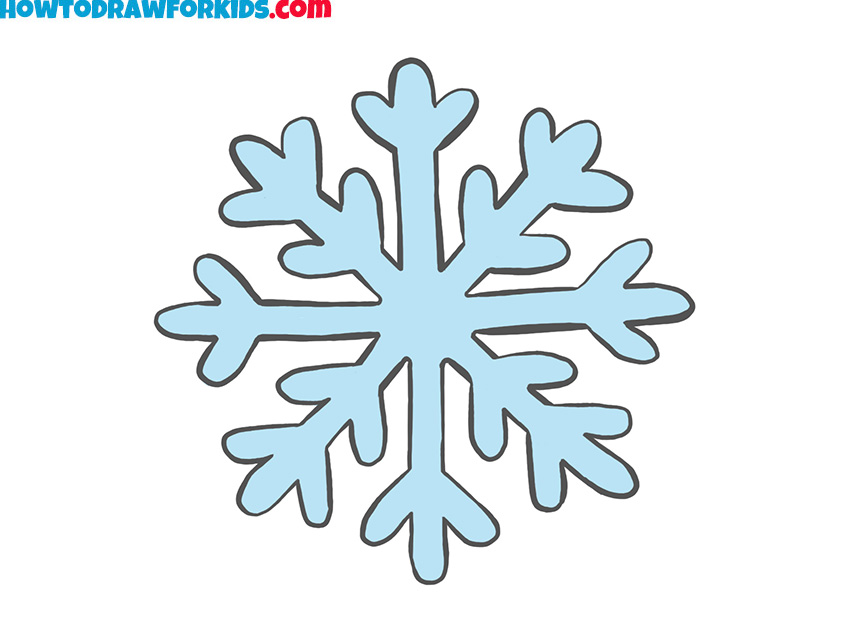
This is another very simple design, with easy straight strokes on each point making different designs. Finish off the snowflake by drawing filled in circles at the end of each line. Learn how to create your own snowflake drawing with our easy guide. Web 7 easy steps to draw a snowflake step 1: 1 how to draw a snowflake:

How to Draw a Snowflake Really Easy Drawing Tutorial
Using a fineliner and a ruler to help keep your lines straight, draw 4 straight lines through the point in the middle. Then, draw a second line from the circle’s center to its edge, but this time at a different angle. Web let's draw a snowflake. Building the circles for your easy snowflake drawing; This is the most simple design.
Web Let's Draw A Snowflake.
Finish off the snowflake by drawing filled in circles at the end of each line. Creating the second circle for your snowflake drawing; Web the first set of three below are easy for kids of all ages and abilities. Draw those 3 intersecting lines again but this time draw small v shapes at the end of each line.
The Bigger You Make The Hexagon, The Bigger Your Snowflake Will Be.
This asterisk shape will be the starting point for all of our snowflakes. Go over your lines multiple times with the chalk to thicken them. Start with a blank sheet of paper and your favorite drawing tool—this could be a pencil, pen, or even a digital stylus. Now draw another line from left to right.
On The Arms Closest To The Circles, Draw Two More, Smaller Arms.
Build the skeleton of your snowflake drawing. Use two sets of straight, parallel lines, and two short, curved lines for each. Learn how to create your own snowflake drawing with our easy guide. Using a pencil, draw a larger circle around the dot.
At The End Of All Your Straight Lines, Add A V.
Between the boomerang shape and the small circle on each arm of the snowflake, draw another, smaller boomerang shape. Web start with your essential six sides of the snowflake. You can play and create your own variation. Draw a hexagon on a piece of paper.