Drawings Of A Smile
Drawings Of A Smile - Give it some time and with practice, you will manage to do it. These should be slightly wavy since lips are rarely symmetrical. This double curve of the upper lip is called the cupid's bow, as it is said to resemble the weapon of the roman god of love. Web start by sketching the outline of your smile. Web i’m excited to share these 25 easy smile drawing ideas with you. Draw a hammock shape with a vertical line down the middle. S.e.v.a | smile 🤑 @unbreakableinkco booking may for appointment text dm or email 📩sevaoscarwer@gmail.com #tattoo #tattoos #chicago #art #chic. Remember to keep the lines light and loose, as. Draw the top of the mouth. On the sides of the mouth, add two identical small arcs.
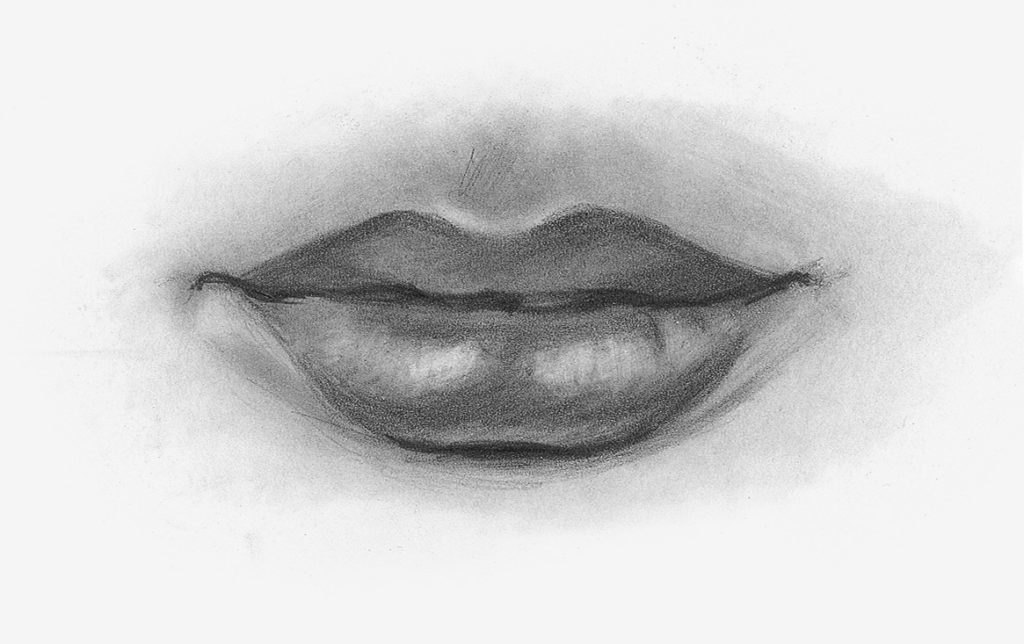
Add light shading and highlights to the teeth, lips, and surrounding skin. Let’s start drawing and spread some happiness with our artwork! Give it some time and with practice, you will manage to do it. These should be slightly wavy since lips are rarely symmetrical. The horizontal line should run through where you wish to have the middle of the smile. Start by drawing a slight curve in the center of your paper to form the top half of the smile. To complete this step, you need to draw one arc. It’s all about the curves. Using a pencil or pen, draw the top lip curving down slightly and the bottom lip curving up slightly, indicating the shape of the smile without doing any detailing. They’re a great way to practice and capture the joy in everyday moments.
Smile 🤑 @unbreakableinkco booking may for appointment text dm or email 📩sevaoscarwer@gmail.com #tattoo #tattoos #chicago #art #chic.. Draw the bottom line of the upper lip as before, but this time, make sure to lift the corners of the line into a slight smile. Web ever wanted to learn how to draw a perfect smile?drawing a smile will give you enough practice to become a better portrait artist, regardless of age or skill. The detailed description tells and shows how to draw a smile with a pencil step by step. Draw a hammock shape with a vertical line down the middle. Give it some time and with practice, you will manage to do it. Capturing the curve of a smile, the natural pout of lips, or the gritty texture of teeth can transform a simple sketch into a story. When learning how to draw a smile, notice the nice, big highlight that’s been added to the upper left part of the pupil (the colored part of the eye). Remember to keep the lines light and loose, as. Add two small lines on either side towards the middle of the mouth, simulating bumps in.
Draw Facial Features with This InDepth Beginner’s Guide
The horizontal line should run through where you wish to have the middle of the smile. Web how to draw a mouth: Now it’s time to add the mouth and create that beautiful smile. S.e.v.a | smile 🤑 @unbreakableinkco booking may for appointment text dm or email 📩sevaoscarwer@gmail.com #tattoo #tattoos #chicago #art #chic. These should be slightly wavy since lips.

Lips. Vector set. Isolated. Lips drawing, Smile drawing, Pencil art
Web drawing a smile can be the perfect way to capture the mood and emotion of a particular situation, so it’s important to practice so you can become proficient at it. To complete this step, you need to draw one arc. Add light shading and highlights to the teeth, lips, and surrounding skin. This double curve of the upper lip.

How to Draw a Smile with Teeth YouTube
Drawing smiley lips is an important part of creating a happy expression. Adding highlights to the eyes is a great way to bring out the personality of your character, no matter if you are. You’re breathing life onto the canvas. Web start by sketching the outline of your smile. Begin by drawing a curved line to form the top of.

HOW TO DRAW SMILEY, HAPPY FACE, EMOJI EMOJI DRAWINGS DRAW EMOJI
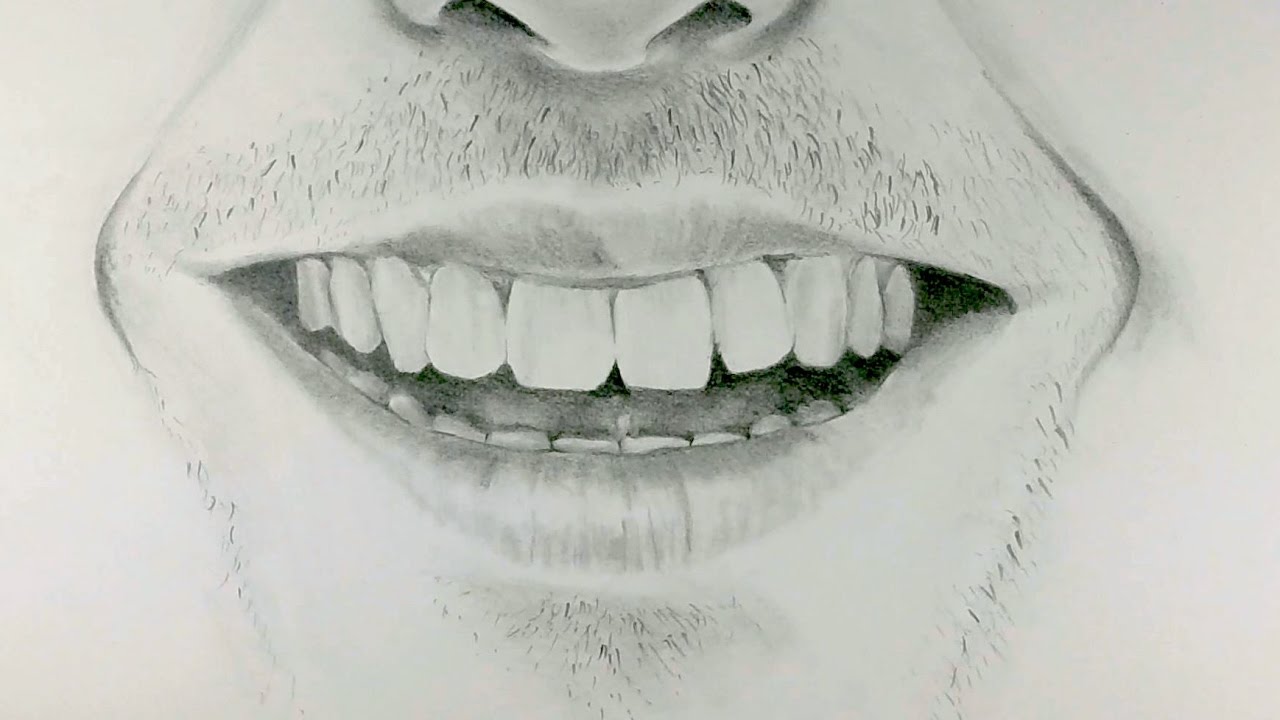
If you want to depict a smiling mouth with visible teeth, lightly sketch the individual teeth within the outline of the lips. Using a pencil or pen, draw the top lip curving down slightly and the bottom lip curving up slightly, indicating the shape of the smile without doing any detailing. Let’s start drawing and spread some happiness with our.

Smiling Ink drawing. Smile drawing, Girl drawing sketches, Pencil
Draw a hammock shape with a vertical line down the middle. Keep the lines light and adjustable until you achieve the desired expression. You’re breathing life onto the canvas. Drawing smiley lips is an important part of creating a happy expression. It’s goal is to help you see if both halves of the mouth are relatively even in width.
How to Draw a Smiling Mouth YouTube
Web how to draw a realistic smile with teeth step 1: When learning how to draw a smile, notice the nice, big highlight that’s been added to the upper left part of the pupil (the colored part of the eye). Browse or use the filters to find your next illustration stock image for your project. It’s goal is to help.

Smile Sketch at Explore collection of Smile Sketch
Web i’m excited to share these 25 easy smile drawing ideas with you. Using a pencil or pen, draw the top lip curving down slightly and the bottom lip curving up slightly, indicating the shape of the smile without doing any detailing. Browse or use the filters to find your next illustration stock image for your project. Web how to.

Realistic Smile Drawing at GetDrawings Free download
Browse or use the filters to find your next illustration stock image for your project. These should be slightly wavy since lips are rarely symmetrical. Keep the lines light and adjustable until you achieve the desired expression. They will immediately add life to your smile drawing. This outlines the head of the smiley face.
Realistic Smile Drawing at Explore collection of
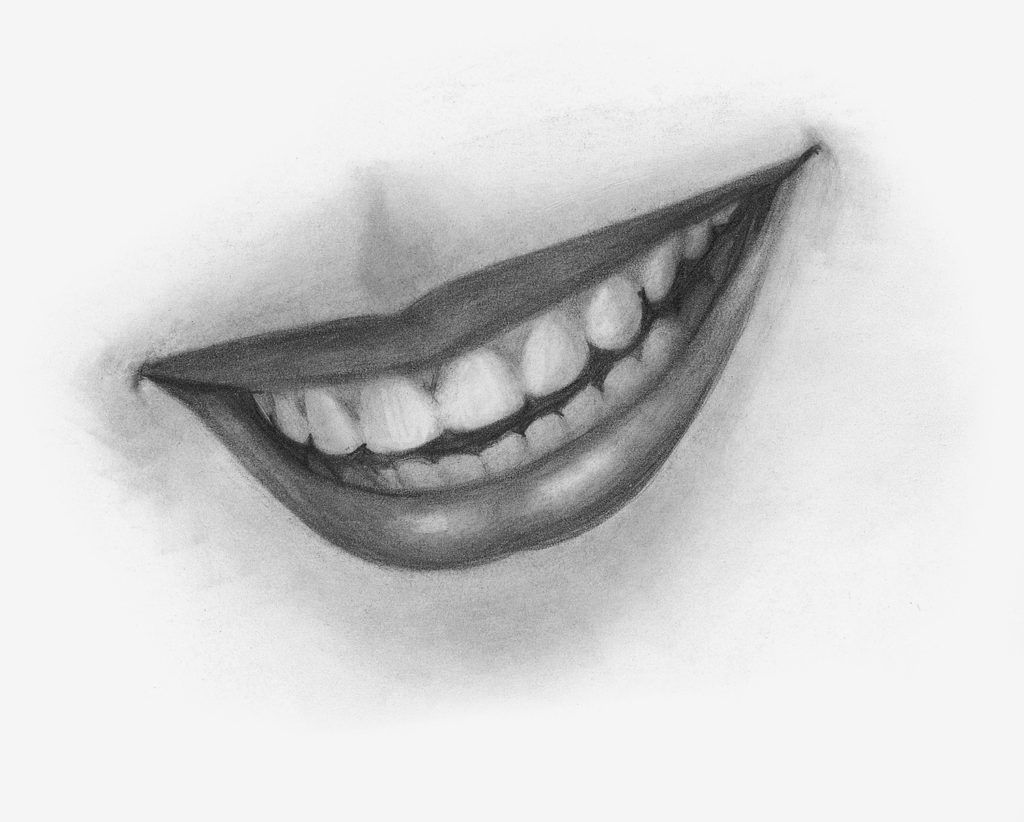
Web how to draw a mouth: Draw the bottom teeth lightly as they appear in your reference photo. How to draw a toothy smile from scratch. Remember, the bottom teeth are smaller in width than the upper teeth and, therefore, need not match the upper teeth. Web drawing a smile can be the perfect way to capture the mood and.

Smiling Face Drawing at Explore collection of
Begin by drawing a curved line to form the top of the upper lip. Draw a curved line below the eyes, starting from one side of the circle and ending on the other side. Add light shading and highlights to the teeth, lips, and surrounding skin. Web how to draw a mouth full of teeth: Then, add two small marks.
Drawing Smiley Lips Is An Important Part Of Creating A Happy Expression.
Start by drawing a perfect circle shape in the very middle of your paper. Draw in the pupil and iris inside the eye to finish them off. These should be slightly wavy since lips are rarely symmetrical. This outlines the head of the smiley face.
They’re A Great Way To Practice And Capture The Joy In Everyday Moments.
Remember, the bottom teeth are smaller in width than the upper teeth and, therefore, need not match the upper teeth. Let’s start drawing and spread some happiness with our artwork! Web pay attention to the shape and size of the smile you want to portray. Give it some time and with practice, you will manage to do it.
Begin The Drawing With A Pair Of Lines, On Vertical And One Horizontal.
How to draw a toothy smile from scratch. Notice the slight dip in the middle of the line. Using a pencil or pen, draw the top lip curving down slightly and the bottom lip curving up slightly, indicating the shape of the smile without doing any detailing. It is a drawing tool that assists you in drawing a symmetrical circle quickly and easily.
Then Extend The Curve Downward On Both Sides To Create The Bottom Half Of The Smile.
Add 2 diagonal lines on each side and 2 curves about a third or quarter of the way up depending on where you want to position the top and bottom sets of teeth. On the sides of the mouth, add two identical small arcs. Then, add two small marks or shading to the corners of the lips to signify the nodes. Now it’s time to add the mouth and create that beautiful smile.