Easy Cute Easy Flamingo Drawing
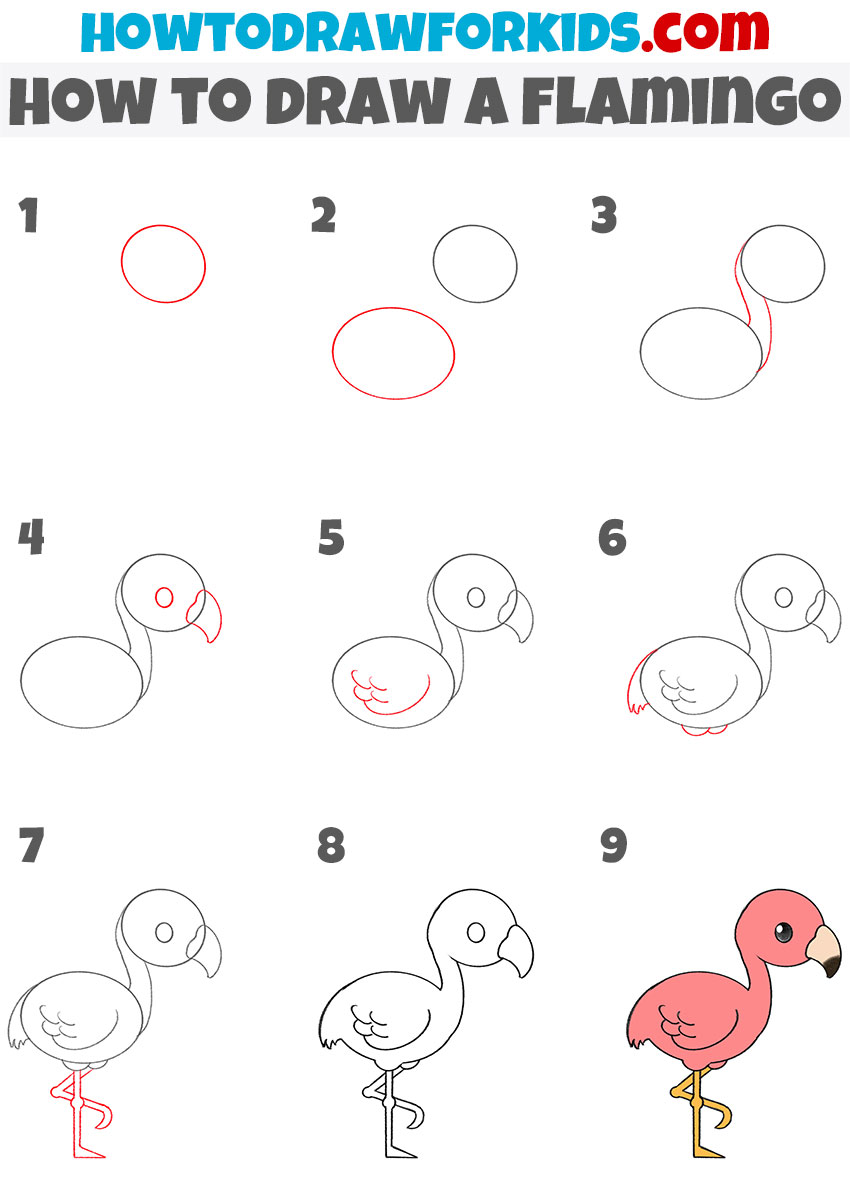
Easy Cute Easy Flamingo Drawing - Then, the other elements of the bird’s body are drawn out. Draw this below the flamingo’s head, as a larger oval than the oval of the head. Template paper squishy pop tarts helô kitty by marina. At the finishing stage of the process, we’ll work on textures and finer details using colored pencils. Web learn how to draw a flamingo with this easy to follow step by step drawing guide video tutorial. It will help you get that famously curvy neck just right.flamingos have a funny way of eating. Add an outline of the body. Package of marshmallows done by moi. Start out with some simple shapes. Then, add in the details such as the beak, eye, and feathers.
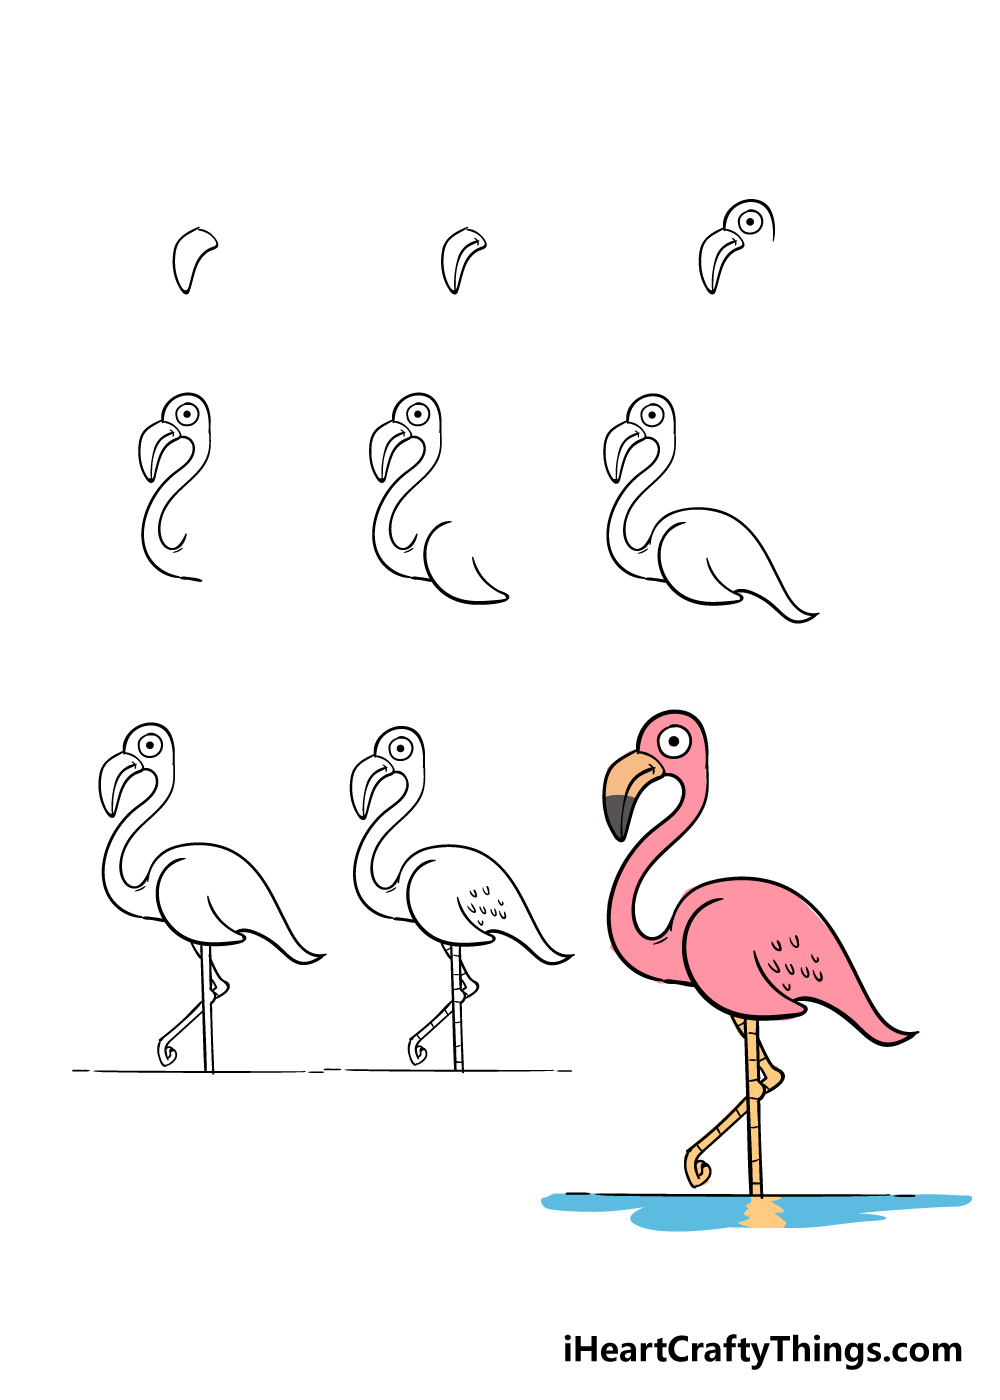
Draw two curved lines extending diagonally from the head, and allow them to curve steeply downward before meeting in a gentle point. Then, the other elements of the bird’s body are drawn out. Web want to hear a bad flamingo joke? Continuing with this cartoon flamingo drawing, we will now be adding some facial details along with the start of the body. Download these coloring sheets and appreciate the beauty of butterflies! Simple kawaii cartoon flamingo drawing step by step. Let’s draw the flamingo’s belly now. Web in this drawing tutorial, i’ll show you an easy way to draw a flamingo with wonderful pink feathers. Add an outline of the body. Inside the head, draw a smaller circle for the eye.
First, the artist chalks out the main outline. From the bottom of the head, draw the front part of the neck—it should have the same shape as the other side of the neck. Finally, add color and shading for depth and texture and bring the flamingo to life. Then draw the flamingo’s side wing. We begin this flamingo illustration by creating the basic shape of the flamingo’s body. Web learn how to draw a flamingo with this easy to follow step by step drawing guide video tutorial. It will help you get that famously curvy neck just right.flamingos have a funny way of eating. Draw a small circle for the head. From the back of the head, draw a long, curved line that bends slightly towards the bottom to form the neck. Outline the beak with two curves that meet at a point at the bottom.
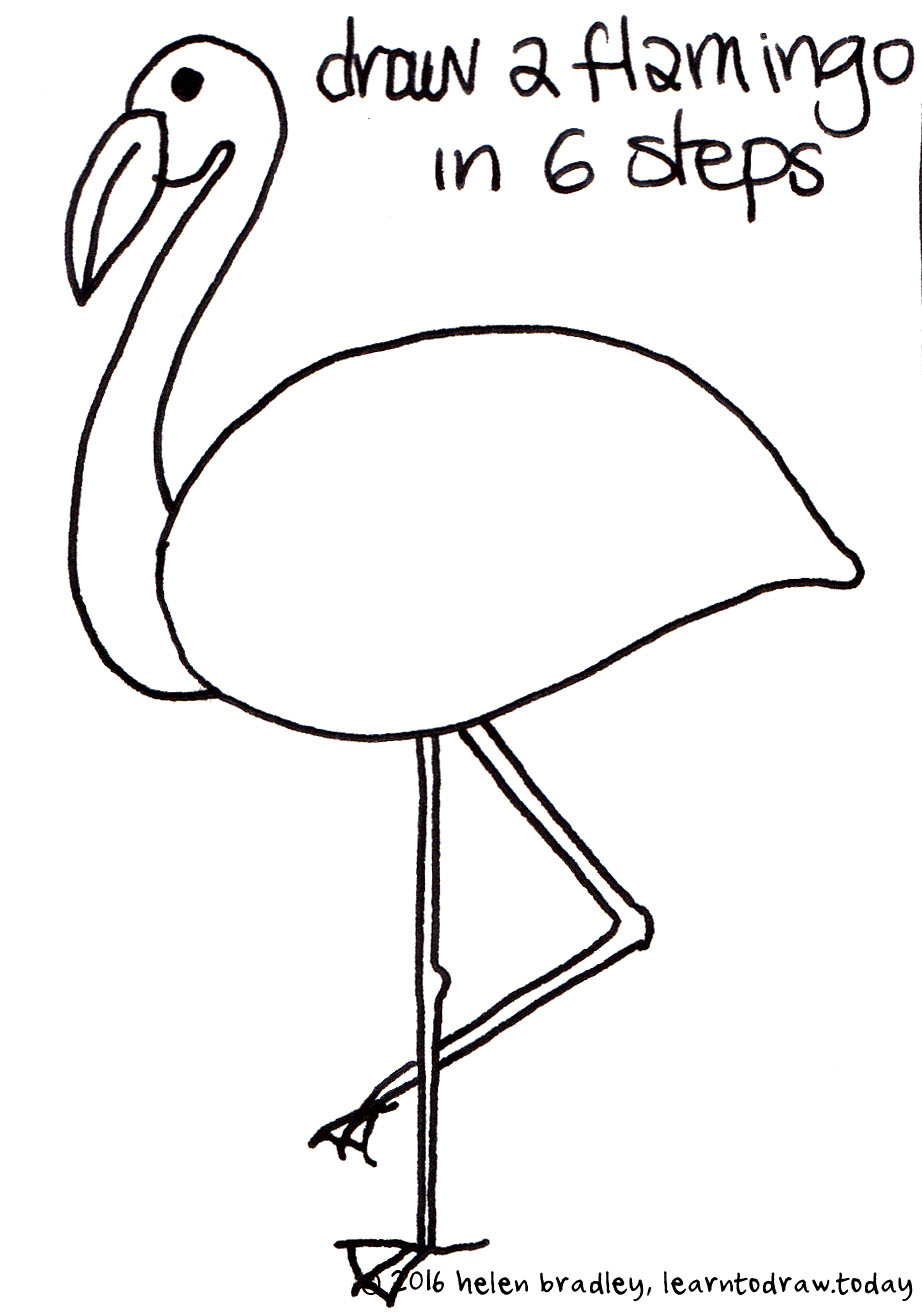
Learn to Draw A Flamingo in 6 Steps Learn To Draw
Draw this below the flamingo’s head, as a larger oval than the oval of the head. Then draw the flamingo’s side wing. Start out with some simple shapes. I’ve used a few shades of pink for the body but you can make the legs a shade of cream or light brown if you want. Use the two curved lines to.
HOW TO DRAW A FLAMINGO KAWAII YouTube
Add some lines to form the neck and legs. Easy and cute flamingo drawing for kids and beginners. Then we’ll add some watercolor. =) art tutorial on how to draw and color a flamingo easy, step by step. Find the central point of your drawing area, and place this oval slightly above the center.
Flamingo Drawing How To Draw A Flamingo Step By Step
Web cute easy drawings ﹫solyhae 🐼. We’ll start with a graphite pencil outline. Your flamingo drawing is nearly complete but you do need to include the feathers on the body, once you do this, you can now color your drawing in if you want. Web learn how to draw a flamingo with this easy to follow step by step drawing.
How to Draw a Flamingo for Kindergarten Easy Drawing Tutorial For Kids
Unlock ad free and printable drawing and coloring tutorials. Template paper squishy pop tarts helô kitty by marina. Tinky winky lino~ minsung sekeymiş aga. Then, add in the details such as the beak, eye, and feathers. From the back of the head, draw a long, curved line that bends slightly towards the bottom to form the neck.
How to Draw a Flamingo Step by Step Drawing Tutorial For Kids
Keep in mind that a flamingo’s legs bend in a forward position. Continuing with this cartoon flamingo drawing, we will now be adding some facial details along with the start of the body. Web in this drawing tutorial, i’ll show you an easy way to draw a flamingo with wonderful pink feathers. Then draw a sort of slanted oval for.
How to Draw a Flamingo Easy Drawing Tutorial For Kids
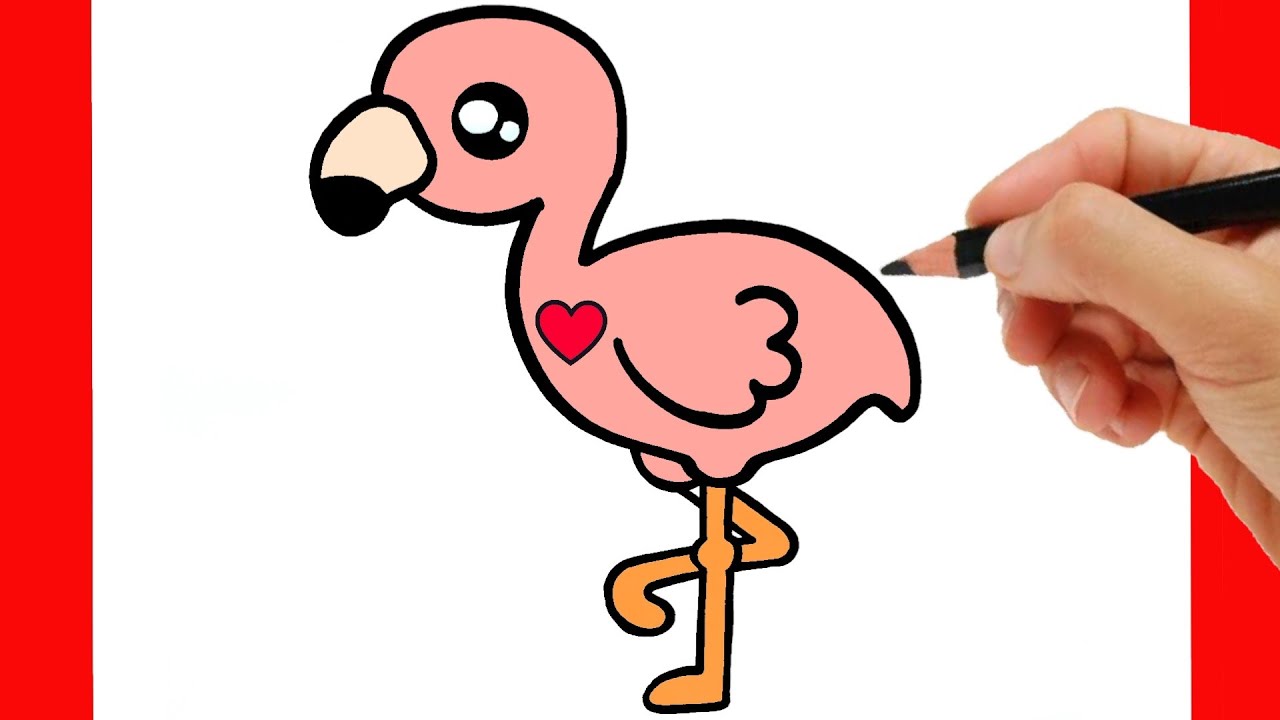
Use the two curved lines to connect the outline of the flamingo’s head to its body. Web want to hear a bad flamingo joke? Draw a small circle for the head. At the finishing stage of the process, we’ll work on textures and finer details using colored pencils. Cute cartoon flamingo drawing and coloring with col.
How to Draw a Flamingo Easy Drawing Tutorial For Kids
Ready to take your drawing to the next level!? Add a circle for the knee joint on both legs. Add some lines to form the neck and legs. From the back of the head, draw a long, curved line that bends slightly towards the bottom to form the neck. Draw the second line for its neck.
Flamingo Drawing How To Draw A Flamingo Step By Step
At the end of your flamingo legs draw a triangle for the foot. Then, add in the details such as the beak, eye, and feathers. Tinky winky lino~ minsung sekeymiş aga. Cute cartoon flamingo drawing and coloring with col. It may seem difficult at first glance, but trust me, it’s way easier.
HOW TO DRAW A CUTE FLAMINGO EASY STEP BY STEP YouTube
Web simple flamingo drawing. Then, add in the details such as the beak, eye, and feathers. Ready to take your drawing to the next level!? Download these coloring sheets and appreciate the beauty of butterflies! I’ve used a few shades of pink for the body but you can make the legs a shade of cream or light brown if you.
How to Draw a Flamingo Easy Drawing Tutorial For Kids
Then we’ll add some watercolor. Begin by sketching a small circle for the head and a long curve for the neck. Add a circle for the knee joint on both legs. From the bottom of the head, draw the front part of the neck—it should have the same shape as the other side of the neck. Finally, you’ll get to.
Then Draw The Flamingo’s Side Wing.
This is a simple oval shape that is sloped with the left side being slightly higher. We’ll start with a graphite pencil outline. Web cute easy drawings ﹫solyhae 🐼. Add an outline of the body.
It Will Help You Get That Famously Curvy Neck Just Right.flamingos Have A Funny Way Of Eating.
Web learn how to draw a flamingo with this easy to follow step by step drawing guide video tutorial. Web want to hear a bad flamingo joke? Your flamingo drawing is nearly complete but you do need to include the feathers on the body, once you do this, you can now color your drawing in if you want. Then we’ll add some watercolor.
Add A Long, Curved Neck Extending From The Body And Connecting To A Small, Rounded Head.
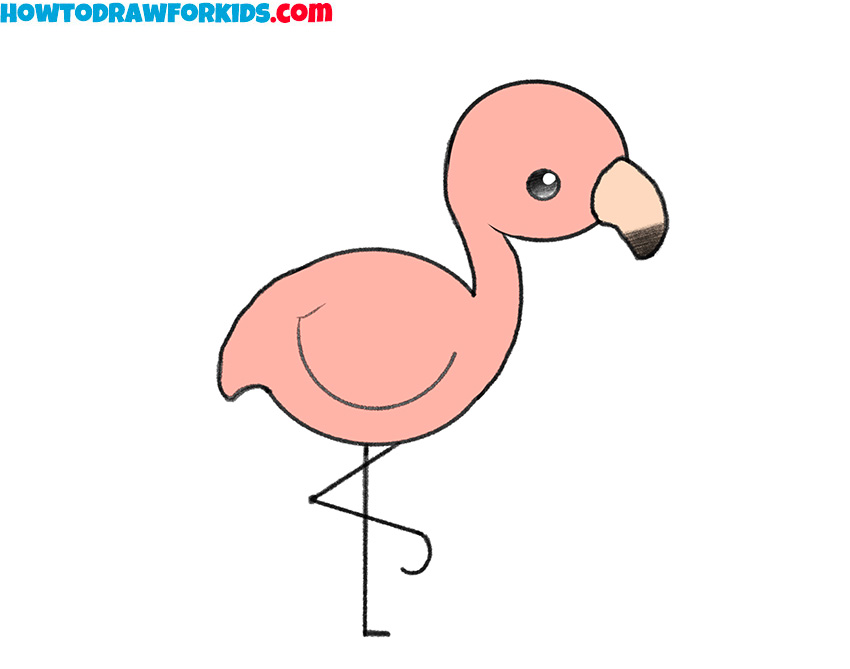
You’ve finished the how to draw a flamingo drawing lesson! Now, if you want to add color or shading to your drawing, take a look at the picture below and use it as a reference to make your. Draw a long curvy line for its neck. Package of marshmallows done by moi.
Finally, Add Color And Shading For Depth And Texture And Bring The Flamingo To Life.
I’ve used a few shades of pink for the body but you can make the legs a shade of cream or light brown if you want. Web in this drawing tutorial, i’ll show you an easy way to draw a flamingo with wonderful pink feathers. Continue the line to form the underbelly, almost connecting with the arc of the back. Draw the second line for its neck.