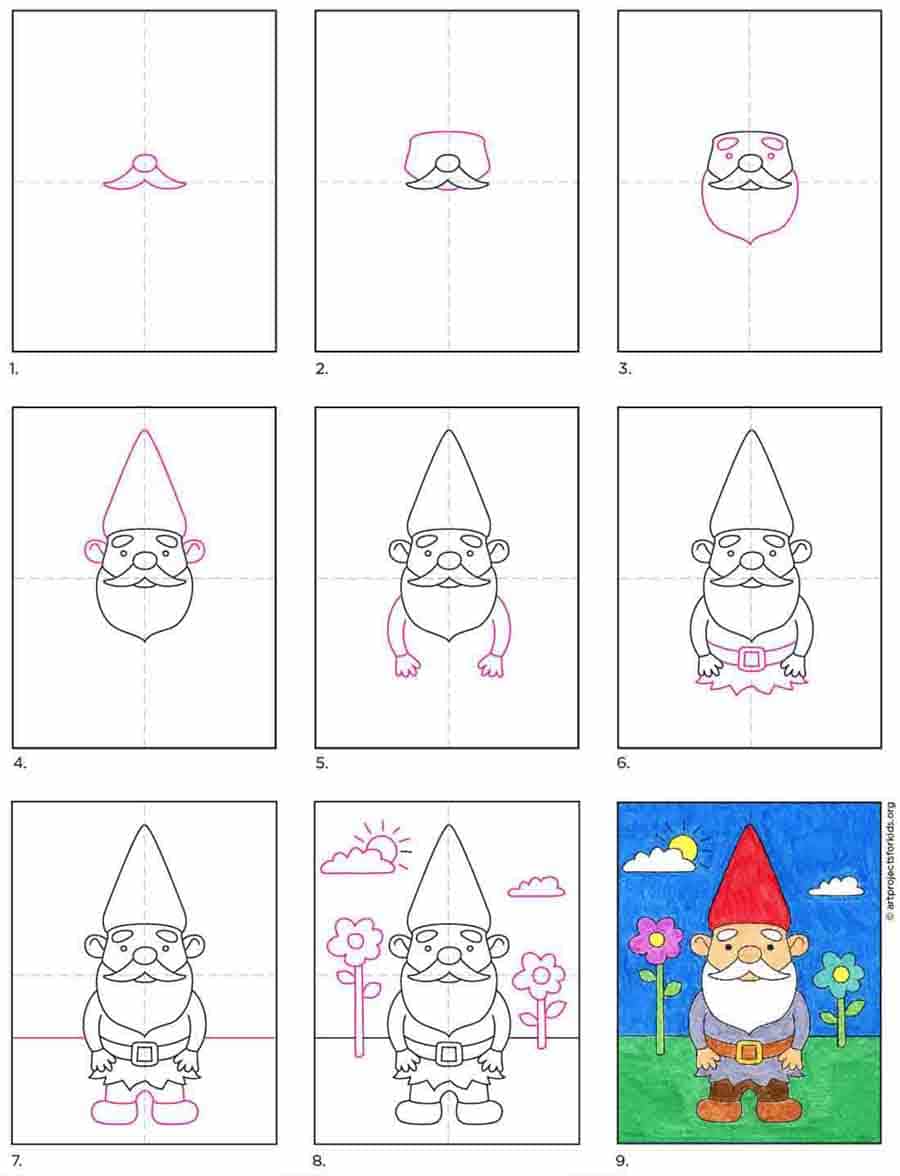
Easy To Draw Gnomes
Easy To Draw Gnomes - You can make the nose any size you like, but i think bigger is cuter! I want to very briefly talk about how i would do a little bit of a chart to do a single gnome in a few different poses. Web you can also manually draw your glow. Start adding in the details of the face beginning with the nose. Draw the mustache below the hat. Web this drill will add width — and power — to your swing. You can quarter the circle to help with the placement of his facial features. Draw two ovals below the beard for feet. Web learn how to draw a cute garden gnome, a symbol of good luck with flowers, mushrooms and watering can scenery. Make a long curve on each side, draw a parallel curve underneath and complete the shoes with short rectangles.
Traditionally, a gnome is a small supernatural spirit which lives on earth, and have been mentioned in children’s fairy. In the center of the face, draw a small circle for the nose. I hope you enjoyed that. Select a sharp brush and gray paint, and evenly color the entire beard, this includes the mustache. This is your gnome’s head and body all in one! At the end, i show a few options for customizing your gnome and adding a little per. Add a circle for the nose at the center of the hat, and then go fancy with the beard.c create a nice pointy tip and zig zags. Then, connect the feet to the beard to form a little body. We left the beard white and applied a black color to the shoes. Make a long curve on each side, draw a parallel curve underneath and complete the shoes with short rectangles.
This is your gnome’s head and body all in one! Draw a present behind the mittens. Then, we will be drawing two large circles sitting atop his nose. Draw two ovals below the beard for feet. But this step isn’t really required. Adding width to your swing is a great way to add power. I think we're done with that. For your gnome, use any color you have available or color it to match a theme, like spring or christmas. You can quarter the circle to help with the placement of his facial features. Add some small squares for the hands and feet as well.

How to Draw a Gnome Easy YouTube
Color the beard on your gnome drawing. I think we're done with that. Add a circle for the nose at the center of the hat, and then go fancy with the beard.c create a nice pointy tip and zig zags. You can quarter the circle to help with the placement of his facial features. Start by drawing a loose floppy.

How to Draw a Christmas Gnome Amy Latta Creations
This gnome is simple but cute, perfect for any project that needs a little bi. Using the same brush and light cream paint, proceed to add color to the gnome’s face, ears, and hands. Art supplies ~ this is a list of. Draw a long triangle for the gnome’s tall hat on top of the oval. Draw a circle on.
Simple Easy methods to Draw a Gnome Tutorial and Gnome Coloring Web
Draw the mustache below the hat. Web this quick video goes over the basics to start drawing the cutest gnomes! Use curved lines to draw two symmetrical elements. It should start about a. This will form the head of your gnome.

How to Draw Simple Christmas Gnomes YouTube
Draw the belt on your belly. Add some small squares for the hands and feet as well. At the end, i show a few options for customizing your gnome and adding a little per. Draw the mustache below the hat. Children, dive into the whimsical world of gnomes with this simple and exciting lesson.
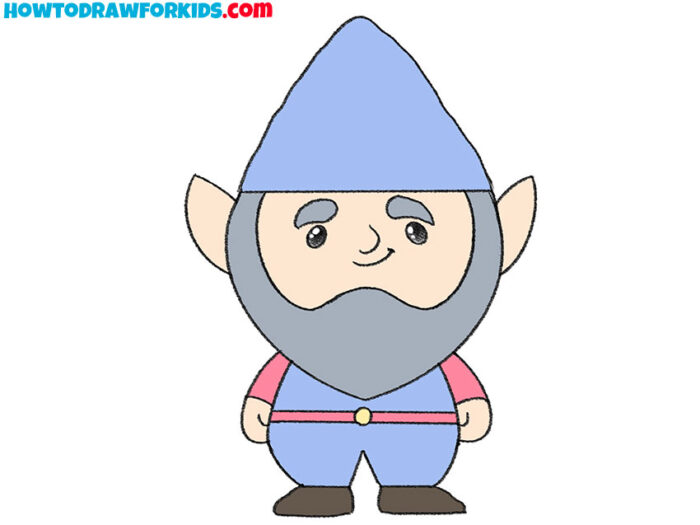
How to Draw a Gnome Easy Drawing Tutorial For Kids
Draw the shoes and belt. But this step isn’t really required. Add some small squares for the hands and feet as well. Add the top and the fold lines. In just 9 easy steps, you’ll be crafting your very own gnome masterpiece on paper.

How to draw a cute gnome in 6 steps Dessin de noel facile, Dessin
Draw a long triangle for the gnome’s tall hat on top of the oval. Add the arms with mittens. Next, let's give your gnome a face. But this step isn’t really required. Web this how to draw a gnome tutorial shares an easy way to draw this little guy, cute clothes and all.

How to Draw a Christmas Gnome Amy Latta Creations
Finish off your gnome drawing by adding the arms with mittens. This gnome is simple but cute, perfect for any project that needs a little bi. Web hey art friends! Continue onto the secondary color coat. Web this how to draw a gnome tutorial shares an easy way to draw this little guy, cute clothes and all.

How to Draw an Easy Gnome Really Easy Drawing Tutorial
Web step by step directions for a christmas gnome drawing. Web at the bottom of the gnome’s torso add two short legs and draw a horizontal line on the belly. Next, let's give your gnome a face. A rectangle for the body. In our final step, we are going to add color to our drawing.
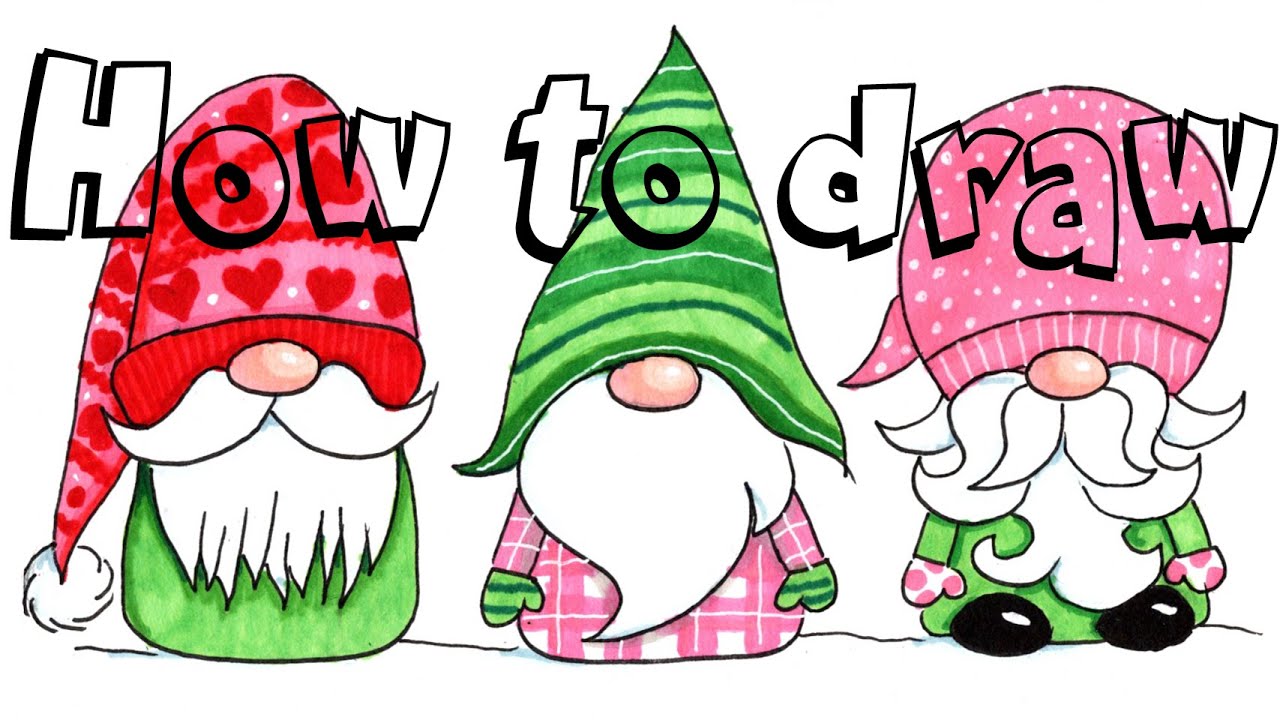
HOW TO DRAW CHRISTMAS GNOMES Step by Step Drawing Tutorial for Kids
A rectangle for the body. Start the tall hat around the nose. Draw a long triangle for the gnome’s tall hat on top of the oval. Then, we will be drawing two large circles sitting atop his nose. You can make the nose any size you like, but i think bigger is cuter!

Gnome step by step drawing tutorial. Learn how to draw a cute gnome
It should start about a. I think we're done with that. Draw the mustache below the hat. Web at the bottom of the gnome’s torso add two short legs and draw a horizontal line on the belly. Finish off your gnome drawing by adding the arms with mittens.
Then, We Will Be Drawing Two Large Circles Sitting Atop His Nose.
We will be creating a classic depiction of a gnome in this guide on how to draw a gnome. At the end, i show a few options for customizing your gnome and adding a little per. Web children will enjoy learning to draw a gnome in a series of easy illustrative steps. In the center of the face, draw a small circle for the nose.
Using The Same Brush And Light Cream Paint, Proceed To Add Color To The Gnome’s Face, Ears, And Hands.
Use your 3/4″ flat wash brush and the colors: Draw the mustache below the hat. Sketch a circle for the gnome’s head, leaving space at the bottom to add the beard later. Finish off your gnome drawing by adding the arms with mittens.
Traditionally, A Gnome Is A Small Supernatural Spirit Which Lives On Earth, And Have Been Mentioned In Children’s Fairy.
Start adding in the details of the face beginning with the nose. Add two small shoes, with the feet, turned in opposite directions. There you have it, a cute gnome face! Continue onto the secondary color coat.
You Can Begin By Drawing A Small, Rounded Shape For His Nose.
Web draw a circle for the head. Web drawing the face. I hope you enjoyed that. Draw the gnome’s head and body.