Eye Pictures Drawing
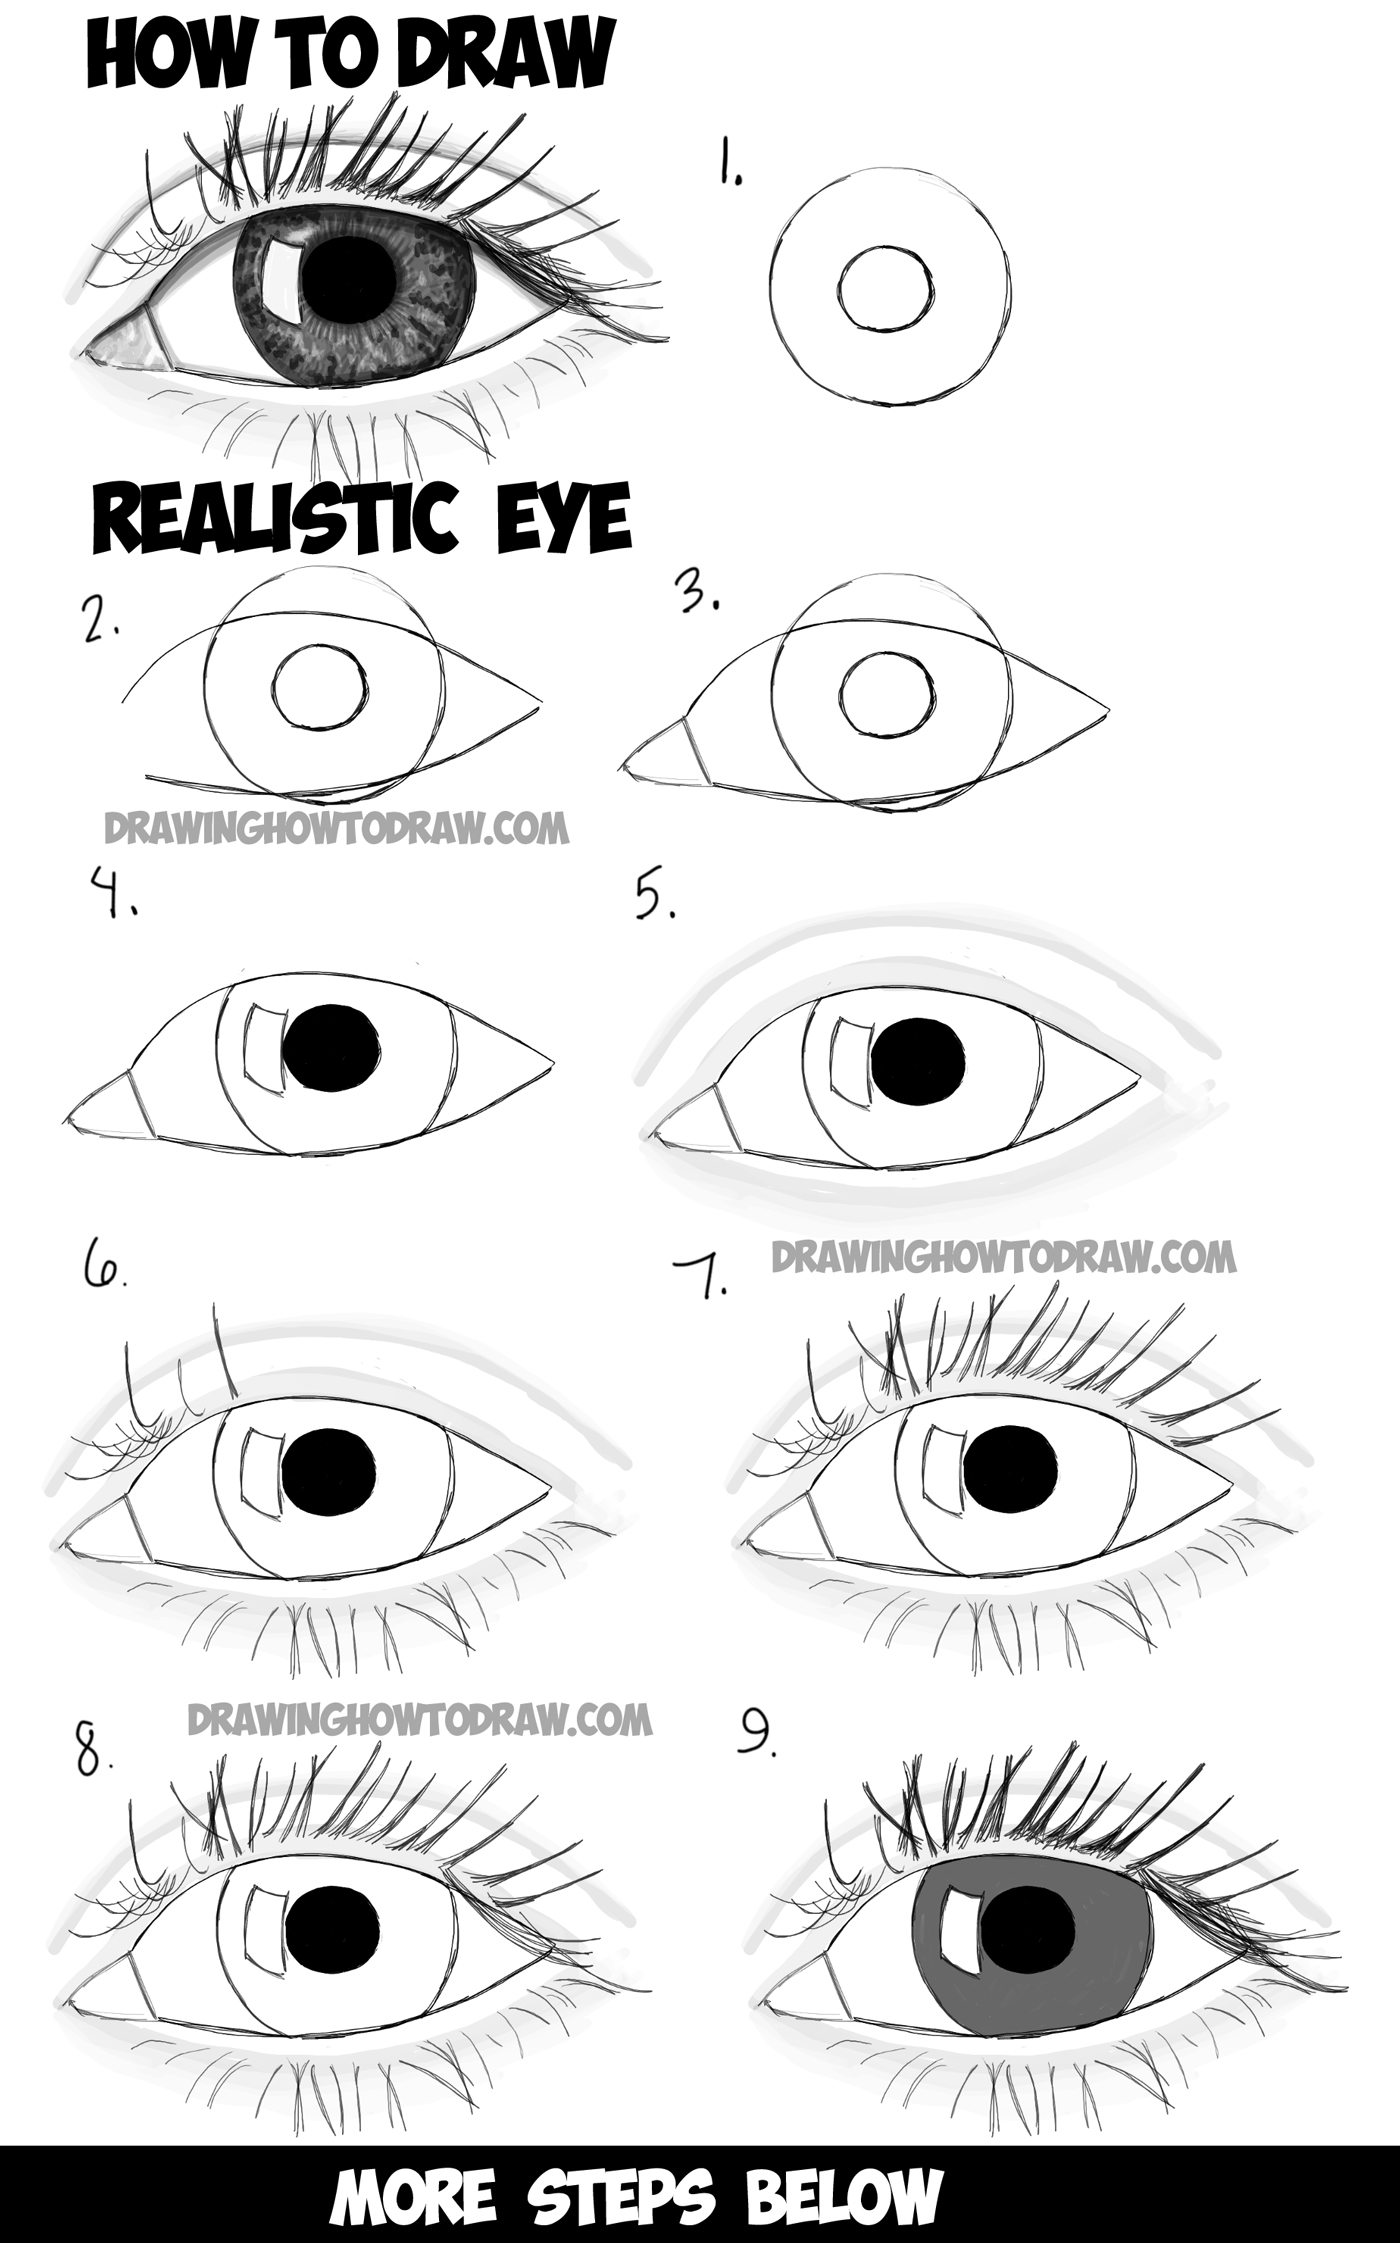
Eye Pictures Drawing - The space between these eye shapes is equal to the length of one almond shape. At the tip of the almond close off that little soft triangle, this will be your tear duct. Learn how to create a wide range of characters and customize their eyes, ensuring each one is unique and stands out. This outline should not be too dark because you want to prevent it from showing through in the end. See this as drawing four different lines — first, the top inner eye line, and then the top outer eye line. Outline the shape of an eye and highlight. Draw a dark line separating the upper lid from the eyeball connecting it with the one we’ve made in step 10. Leave space for the tear duct in the inner corner and add any additional lines to show the folds of the eyelid. We just need the basic shapes outlined at. Add a circle for the iris.
Outline the shape of an eye and highlight. Leave space for the tear duct in the inner corner and add any additional lines to show the folds of the eyelid. Draw an almond shape with one corner tapering downwards. Draw the details for the eyelashes, pupil highlights, iris and eyebrows. Draw the shape of the eye. Drawing eyes with eyelashes adds more realism and depth to the drawing. Now draw the soft features which transform ocular orbs into attractive human eyes. Sketch almond shape for eye. Start with an almond shape. Draw the details for the pupils, iris and eyebrows.
Learn how to create a wide range of characters and customize their eyes, ensuring each one is unique and stands out. Draw the details for the eyelashes, pupil highlights, iris and eyebrows. Drawing the eye’s basic shape. Draw the details for the pupils, iris and eyebrows. First off, begin by roughly drawing the outer shape of the eye. Apply light shading over the drawing to simulate light shadows. Add the eyelids, eyelashes, and eyebrows. Outline the shape of an eye and highlight. At the tip of the almond close off that little soft triangle, this will be your tear duct. Drawing eyes with eyelashes adds more realism and depth to the drawing.
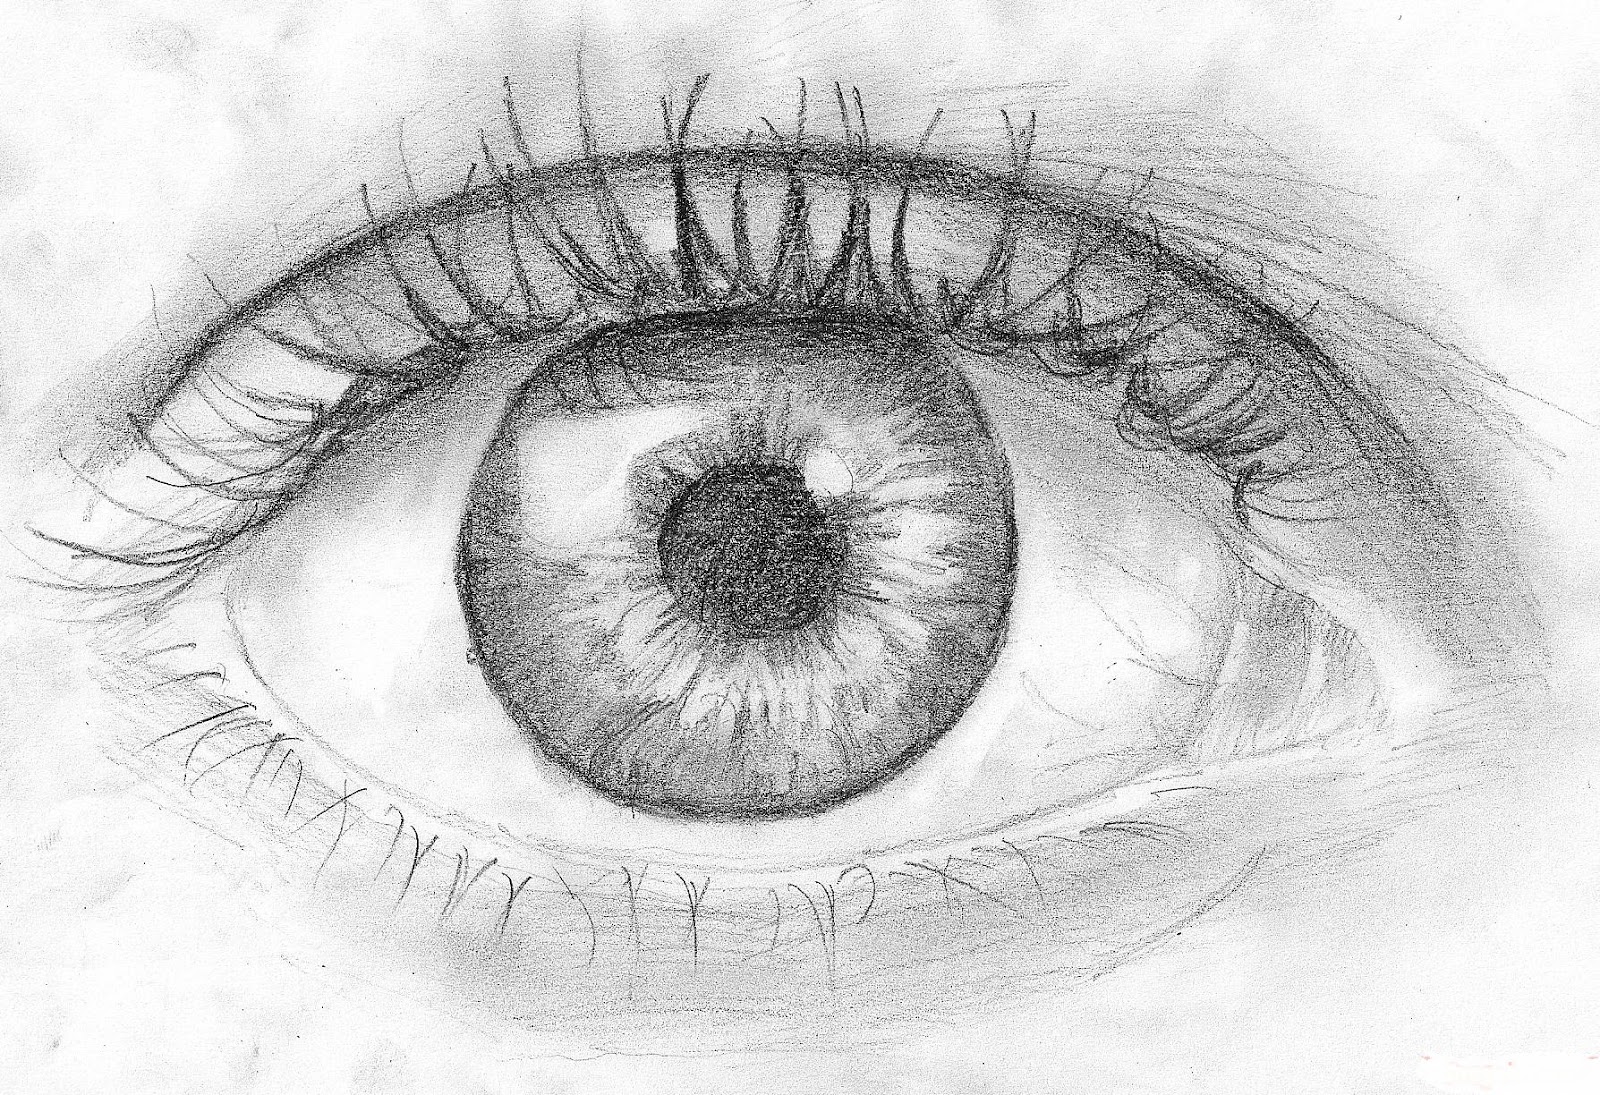
Realistic Eye Drawing by mhylands on DeviantArt
At the tip of the almond close off that little soft triangle, this will be your tear duct. Now draw the soft features which transform ocular orbs into attractive human eyes. My method is aimed to help even the most complete beginner draw something they once thoug. With your cheek guideline in place, you’ll draw the shape of the eye..
How to Draw Realistic Eyes with Step by Step Drawing Tutorial in Easy
Now, around the midpoint of the almond shape make a circle with a bit of the top of the circle outside the almond. Draw the details for the pupils, iris and eyebrows. Start with an almond shape. Drawing eyes with eyelashes adds more realism and depth to the drawing. Draw the shape of the eye.
how to draw How to Draw an Eye in Pencil
Draw the details for the pupils, iris and eyebrows. Drawing the eye’s basic shape. Draw a light horizontal guideline across. Let’s start off with an hb pencil to sketch the shape of the eye. Draw the shape of the eye.

How To Draw An Eye Easy / 25 Impressive Ways to Draw an Eye Easily
Use an eraser to break that bottom line with some white, just like i did. See this as drawing four different lines — first, the top inner eye line, and then the top outer eye line. Draw the shape of the eye. Bring your cartoons to life with these cartoon eye drawings. Draw an almond shape with one corner tapering.
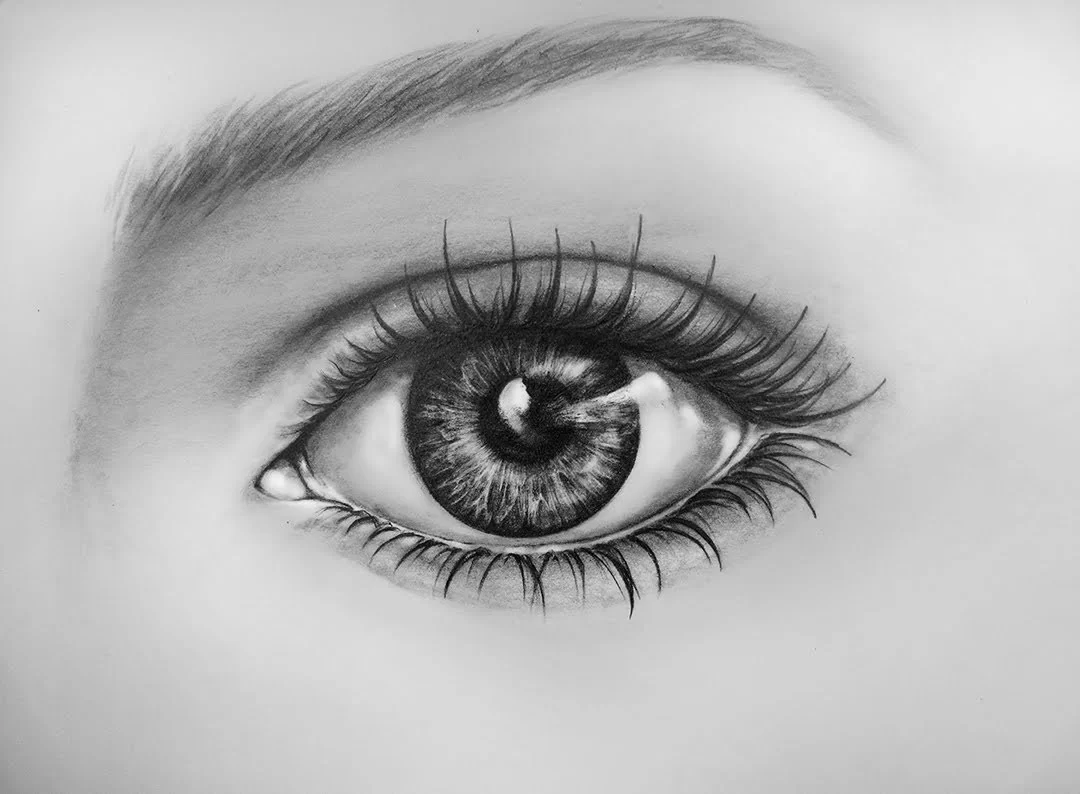
How to Draw an Eye (Realistic Female Eye) Step by Step Drawing Tutorial
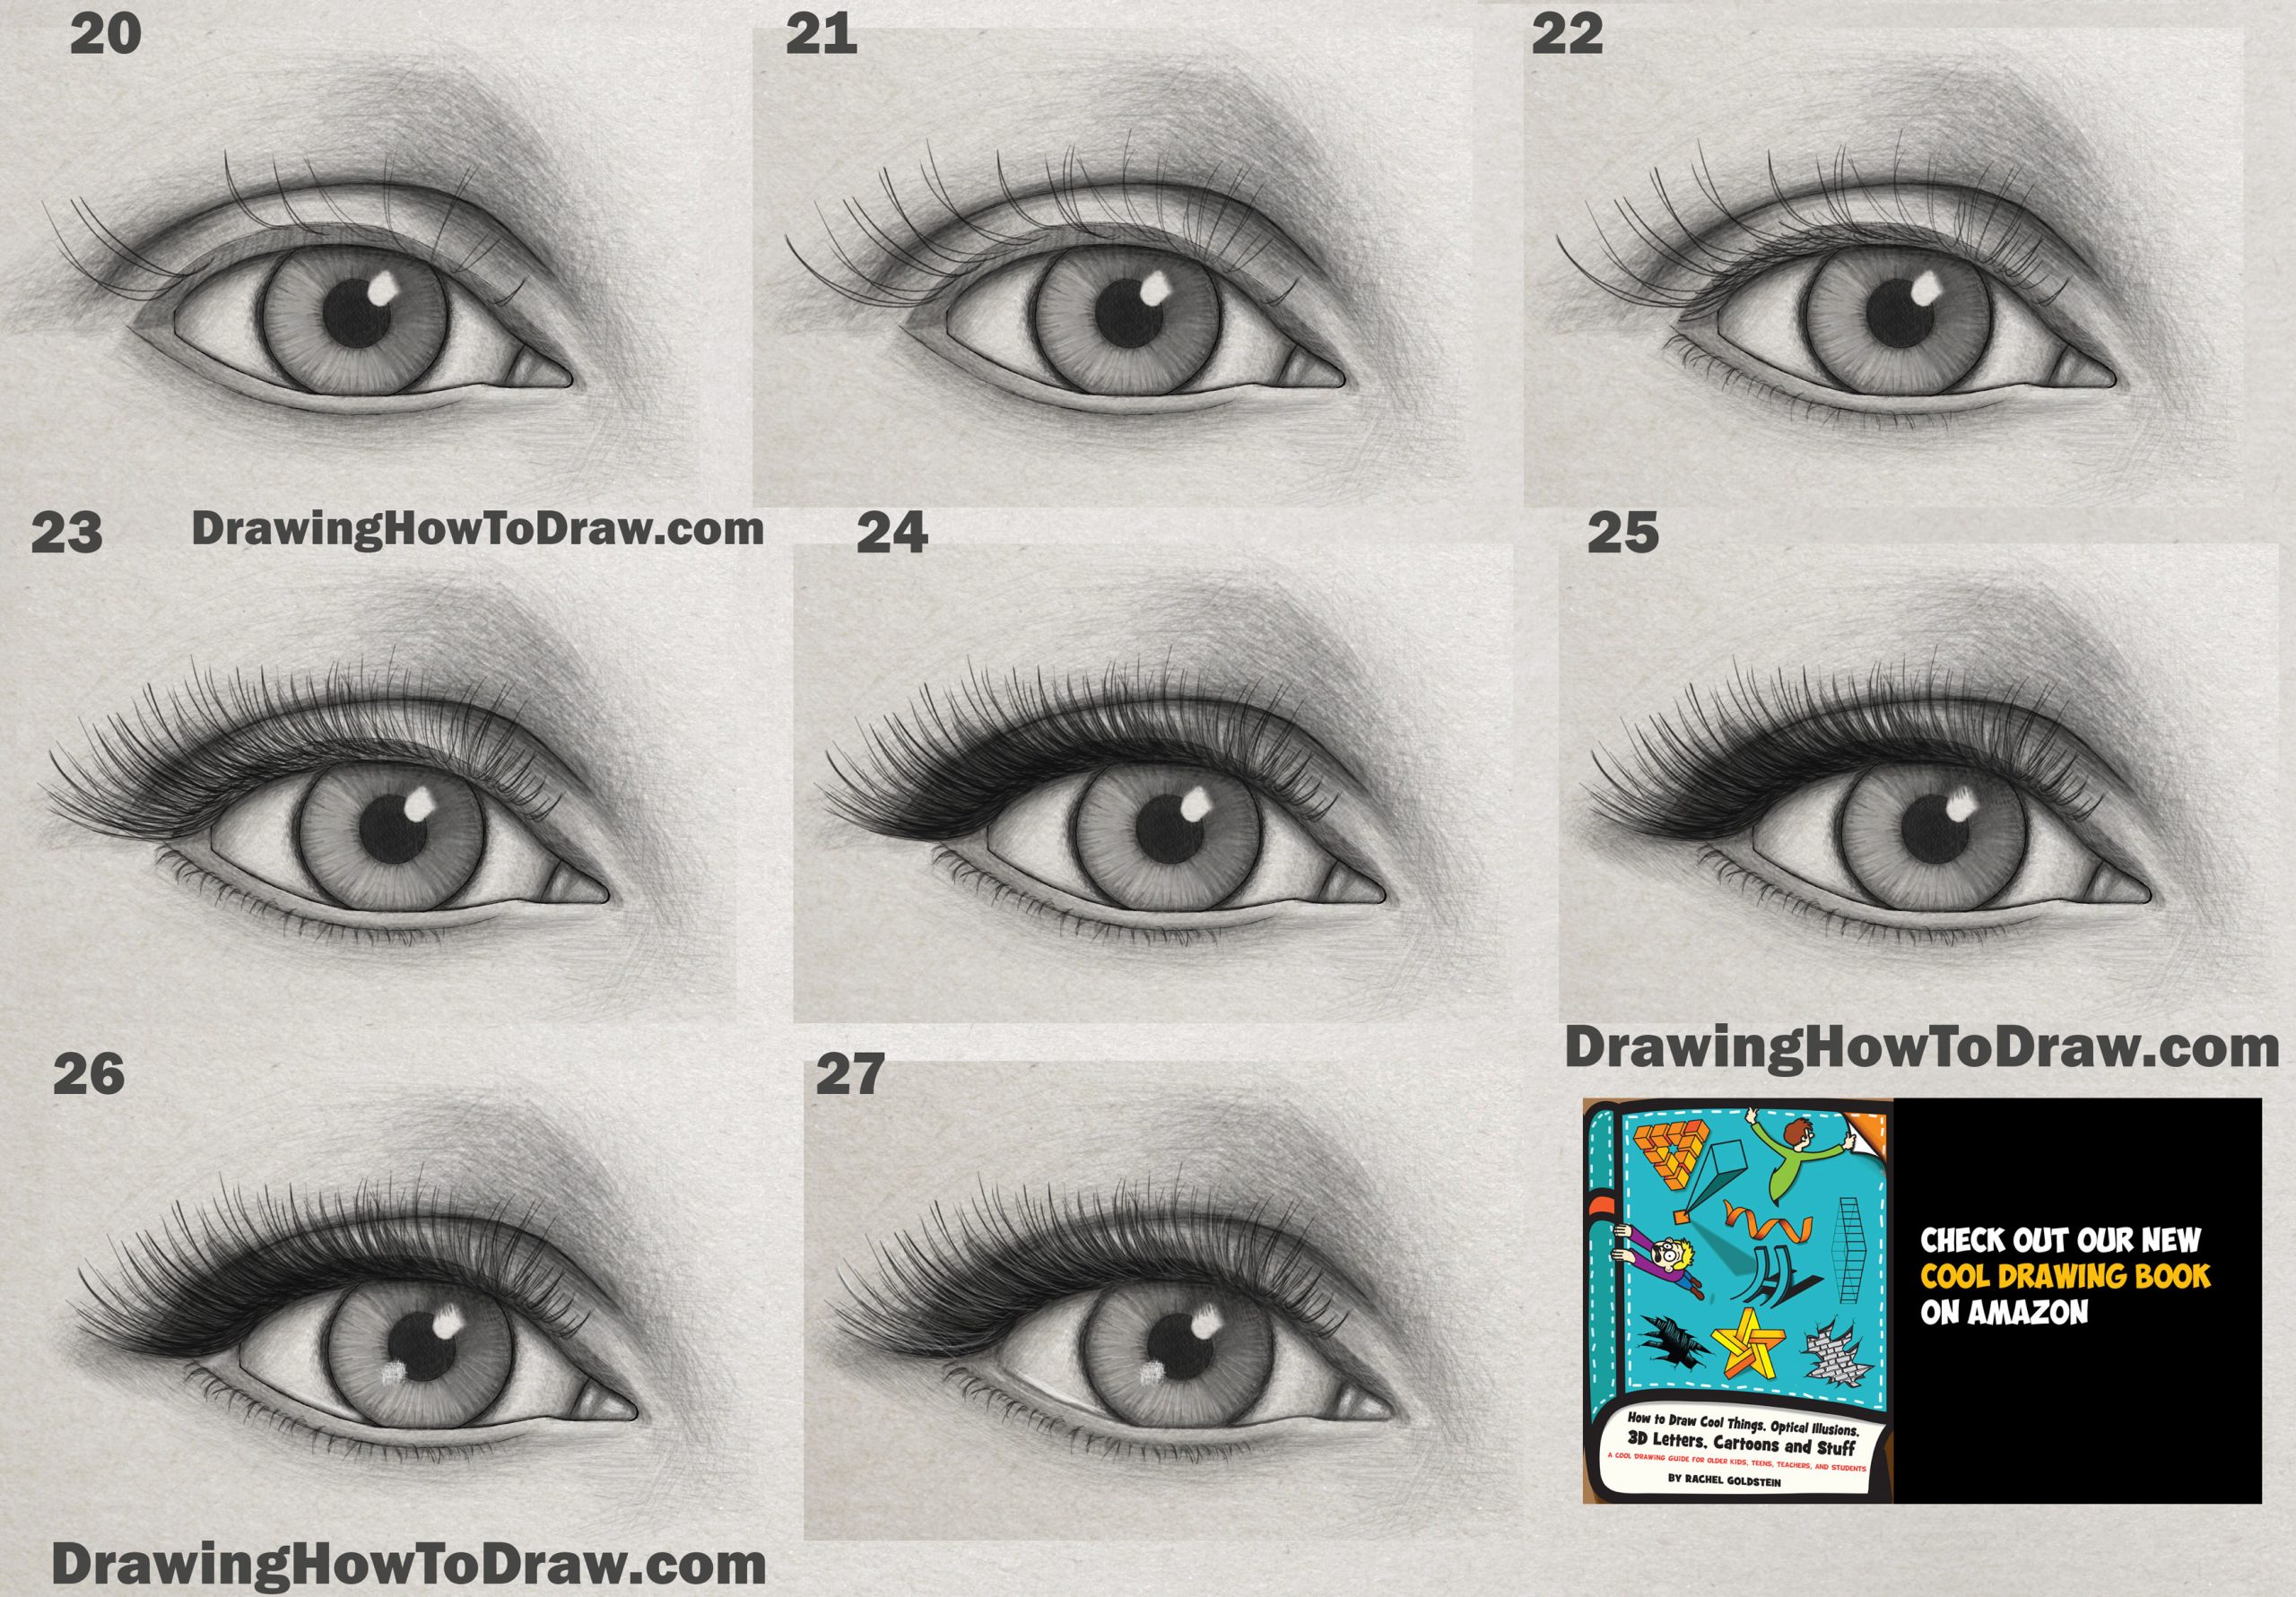
Start with an almond shape. At the tip of the almond close off that little soft triangle, this will be your tear duct. Web draw the shape of the eye. Erase the guidelines and draw a circle inside each of the eye shapes. Complete the drawing by using a darker shade to fill areas with darker shadows.
how to draw How to Draw an Eye in Pencil
This outline should not be too dark because you want to prevent it from showing through in the end. Bring your cartoons to life with these cartoon eye drawings. Erase the guidelines and draw a circle inside each of the eye shapes. Drawing the eye’s basic shape. Sketch almond shape for eye.

Drawings Of Eyes 15 Unbelievable Collections Design Press
At the tip of the almond close off that little soft triangle, this will be your tear duct. My method is aimed to help even the most complete beginner draw something they once thoug. Draw a dark line separating the upper lid from the eyeball connecting it with the one we’ve made in step 10. Now draw the soft features.
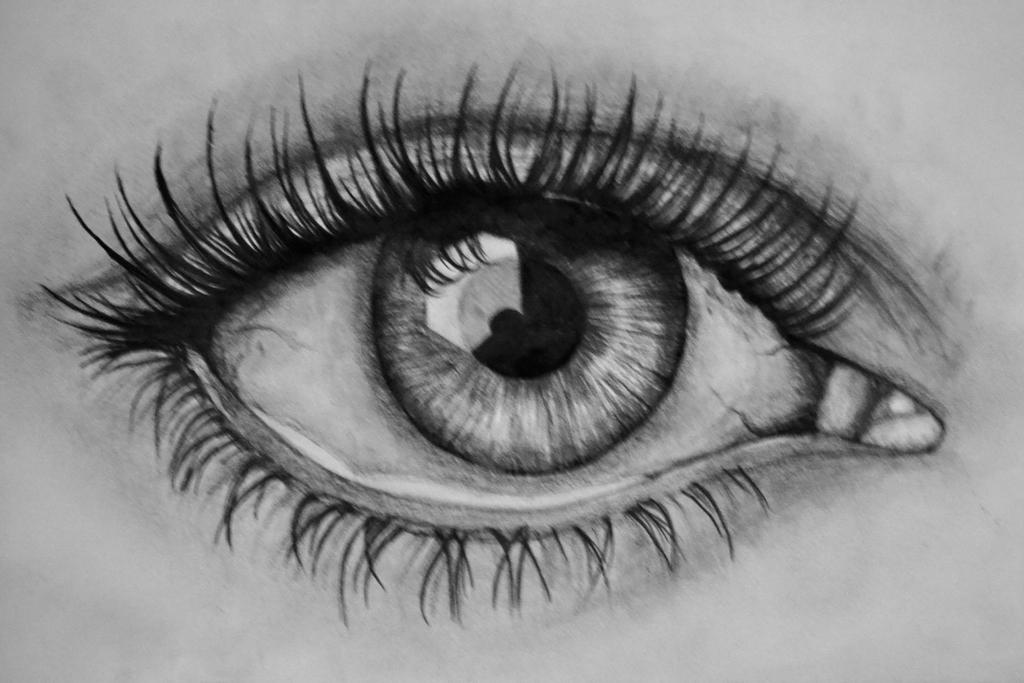
Eye Drawing by LeaKirkegaard on DeviantArt
My method is aimed to help even the most complete beginner draw something they once thoug. Add the eyelids, eyelashes, and eyebrows. Drawing eyes with eyelashes adds more realism and depth to the drawing. Web draw the shape of the eye. First off, begin by roughly drawing the outer shape of the eye.
How To Draw Eyes Draw Eyes Using These Easy Video Lessons
Draw the shape of the eye. Draw a dark line separating the upper lid from the eyeball connecting it with the one we’ve made in step 10. Draw an almond shape with one corner tapering downwards. We just need the basic shapes outlined at. Now draw the soft features which transform ocular orbs into attractive human eyes.

Eye drawing Queeky photos & collages
Leave space for the tear duct in the inner corner and add any additional lines to show the folds of the eyelid. Web follow my simple, detailed steps to draw a realistic eye in pencil. See this as drawing four different lines — first, the top inner eye line, and then the top outer eye line. Bring your cartoons to.
Now, Around The Midpoint Of The Almond Shape Make A Circle With A Bit Of The Top Of The Circle Outside The Almond.
Draw a light horizontal guideline across. See this as drawing four different lines — first, the top inner eye line, and then the top outer eye line. This outline should not be too dark because you want to prevent it from showing through in the end. Let’s start off with an hb pencil to sketch the shape of the eye.
Draw The Shape Of The Eye.
We just need the basic shapes outlined at. My method is aimed to help even the most complete beginner draw something they once thoug. Use curved lines to show where the eyelids reveal the shape of the eye. First off, begin by roughly drawing the outer shape of the eye.
Draw The Details For The Eyelashes, Pupil Highlights, Iris And Eyebrows.
Web follow my simple, detailed steps to draw a realistic eye in pencil. Drawing the eye’s basic shape. Outline the shape of an eye and highlight. Start with an almond shape.
Draw The Details For The Pupils, Iris And Eyebrows.
The space between these eye shapes is equal to the length of one almond shape. At the tip of the almond close off that little soft triangle, this will be your tear duct. Add a circle for the iris. Draw a dark line separating the upper lid from the eyeball connecting it with the one we’ve made in step 10.