Eye Side View Drawing Easy
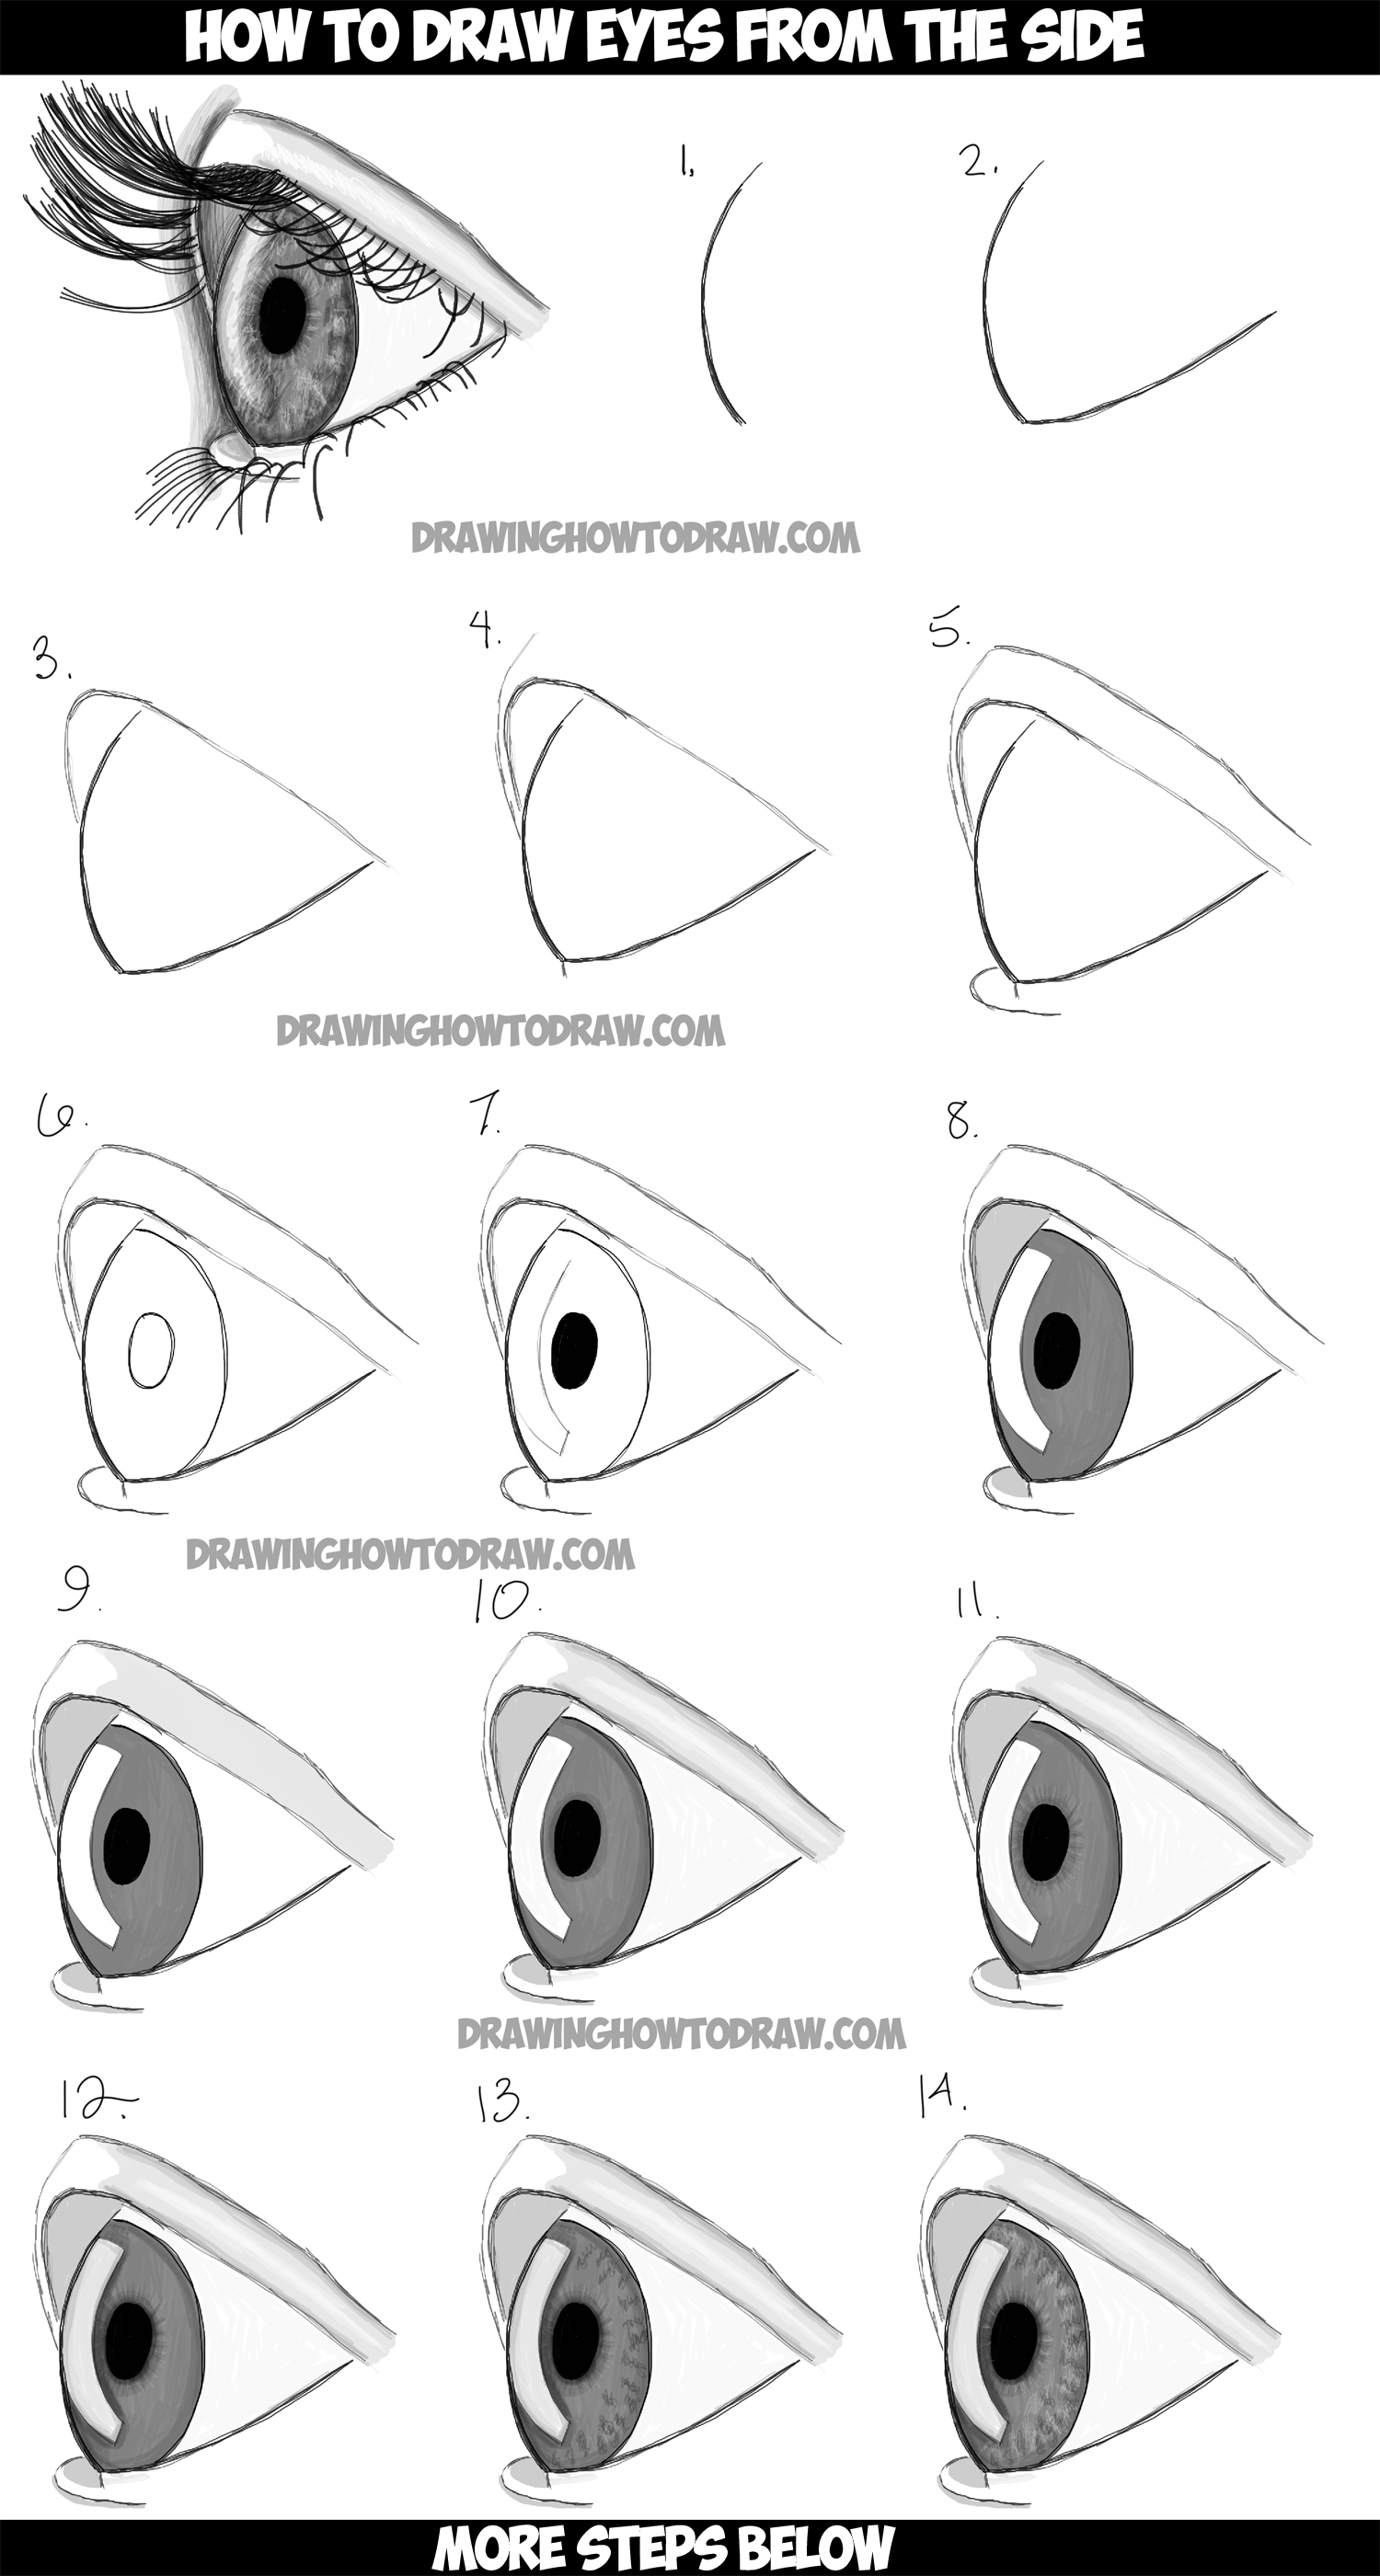
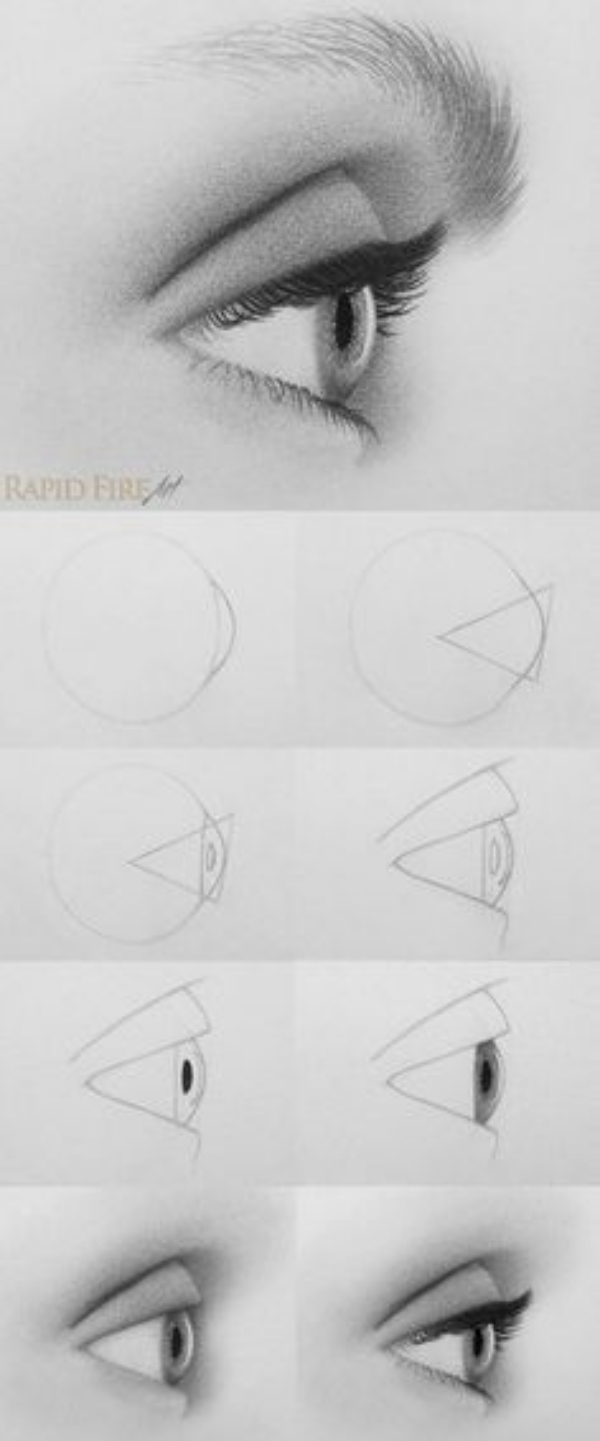
Eye Side View Drawing Easy - The eye drawing will start to look like the real one. Now draw the iris by creating a curve that touches the top and bottom of the cornea. Line your straight edge or ruler up to the marking labelled ‘h’ and draw a straight line through the face. Now draw the soft features which transform ocular orbs into attractive human eyes. With the side of your pencil. This is an easy step by step portrait tutorial, perfectly suited for be. To make it easier to see if the iris is actually round you can first draw out it’s entire circle and then erase the part behind the eyelid. Then draw another pair of horizontal and vertical lines that meet in the middle of the page. Begin by drawing a grid of guidelines. Add iris and pupil outlines.
Begin by drawing a grid of guidelines. Line your straight edge or ruler up to the marking labelled ‘h’ and draw a straight line through the face. Make sure the cornea fits inside this triangle. Inside the outline of the eye add the iris. #stayhome and draw #withme.in this tutorial, you'll learn ho. Now that we have one lip drawn, it’s time to draw the mouth’s corner. The result is a pair of large, sparkling, adorable eyes. Tilt your pencil slightly to keep the strokes soft, like on the right side of the picture below. To make it easier to see if the iris is actually round you can first draw out it’s entire circle and then erase the part behind the eyelid. Fill in the pupil black.
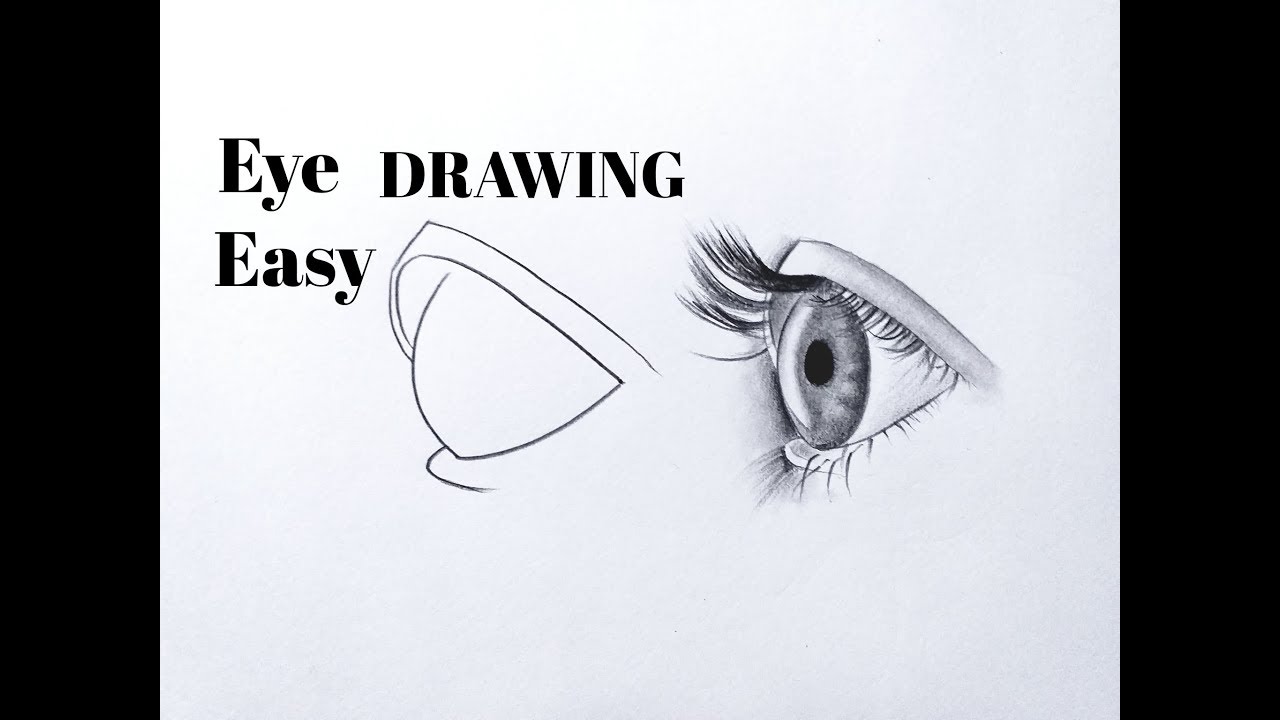
Draw the bottom lip above line 3. Web cute cartoon eyes. The eye should be drawn where those two lines meet. We just need the basic shapes outlined at. Make it round in shape with it’s upper slightly covered by the eyelid. Here, you will use curved lines for the basic outline, the lashes, and the eyebrows. Begin by drawing a grid of guidelines. Then inside the iris, draw a narrow oval for the pupil. Line your straight edge or ruler up to the marking labelled ‘h’ and draw a straight line through the face. Use curved lines to show where the eyelids reveal the shape of the eye.
How to Draw an Eye from the Side StayHome and Draw WithMe YouTube
Web use your hb pencil to draw a circle with a small bump (cornea) on one side. Finally, draw shorter horizontal lines at the. Now that we have one lip drawn, it’s time to draw the mouth’s corner. Make sure the cornea fits inside this triangle. Make sure your linework is very light, so you can make changes easily.
How to draw an eye/eyes easy(side view) Eye drawing easy step by step
Web welcome to an enthralling drawing tutorial where we explore the art of side portrait drawing! Draw the shape of the eye. Line your straight edge or ruler up to the marking labelled ‘h’ and draw a straight line through the face. We'll begin the drawing by lightly and loosely drawing the contour lines of the upper portion and lower.

How To Draw An Eye Side View Toned Paper Time Lapse Black And
Then inside the iris, draw a narrow oval for the pupil. Follow the general shape of the eye to form the eyebrow. To find where to place the eye, draw a vertical line from the corner of the lip to the center line. Make it round in shape with it’s upper slightly covered by the eyelid. Erase part of the.
How to Draw Realistic Eyes from the Side Profile View Step by Step
Here, you will use curved lines for the basic outline, the lashes, and the eyebrows. Make sure the cornea fits inside this triangle. Fill the iris using a black marker so that the pupil becomes more visible. Web learn how to draw a face with realistic proportions, as seen from the side (profile). 3 moving the iris to the sides.

How To Draw An Eye Easy / 25 Impressive Ways to Draw an Eye Easily
(step 8) add tint to the iris of the eye. Web welcome to an enthralling drawing tutorial where we explore the art of side portrait drawing! Leave space for the tear duct in the inner corner and add any additional lines to show the folds of the eyelid. Draw the bottom lip above line 3. Starting from roughly the center.

How to draw an eye easy(Side View) with pencil Eye drawing easy step by
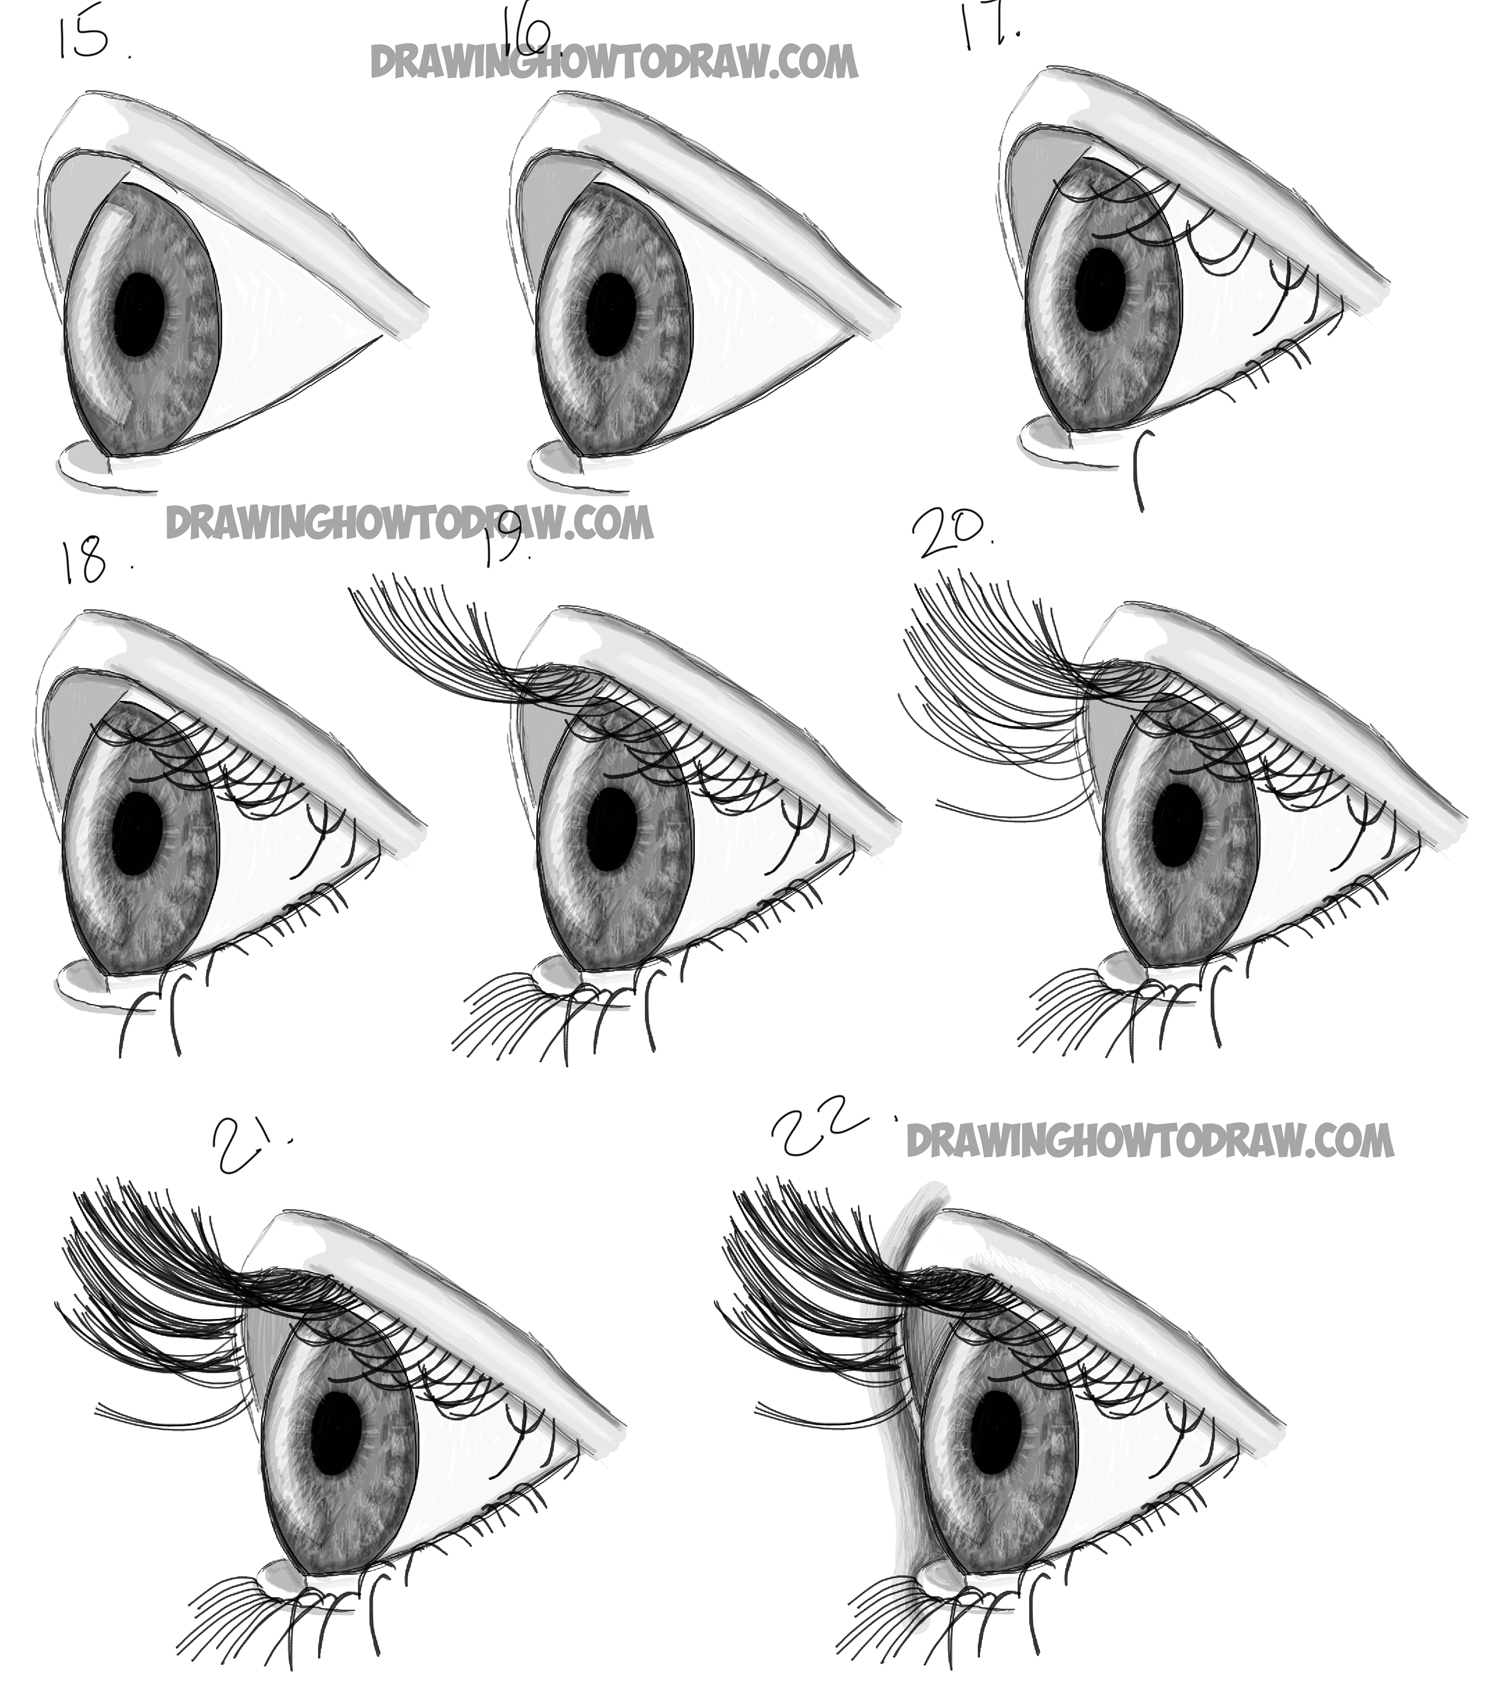
Using a much darker shade, define an outline of the iris. Now draw the iris by creating a curve that touches the top and bottom of the cornea. We'll begin the drawing by lightly and loosely drawing the contour lines of the upper portion and lower portion of the shape of the eye, leaving open the location of the tear.
How to Draw Realistic Eyes from the Side Profile View Step by Step
Starting from roughly the center of the eyeball, draw an obtuse triangle. We just need the basic shapes outlined at. With the side of your pencil. Web use your hb pencil to draw a circle with a small bump (cornea) on one side. It’s the second factor defining the contrast.
How to Draw an Eye (Step by Step Pictures Guides)
With the side of your pencil. Web learn how to draw an eye from the side using art tools you have, can easily buy or make at home! Draw the top lip under line 2. Starting from roughly the center of the eyeball, draw an obtuse triangle. Line your straight edge or ruler up to the marking labelled ‘h’ and.
How to draw an eye for beginners (side view) YouTube
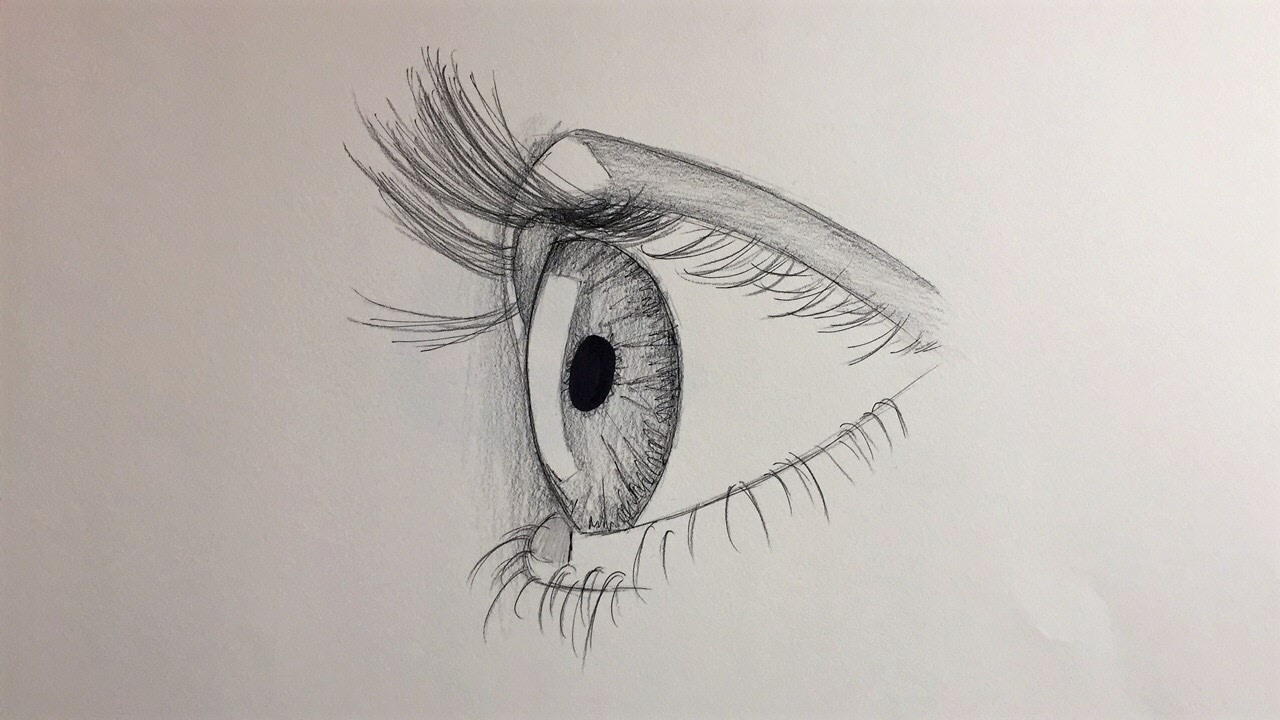
Leave space for the tear duct in the inner corner and add any additional lines to show the folds of the eyelid. Draw the shape of the eye. This outline should not be too dark because you want to prevent it from showing through in the end. And draw small curve lines both on the upper and lower side to.
How To Draw An Eye From The Side View Depp My Fav
It’s the second factor defining the contrast. This is an easy step by step portrait tutorial, perfectly suited for be. Now draw the iris by creating a curve that touches the top and bottom of the cornea. Add iris and pupil outlines. Web draw the iris and pupil.
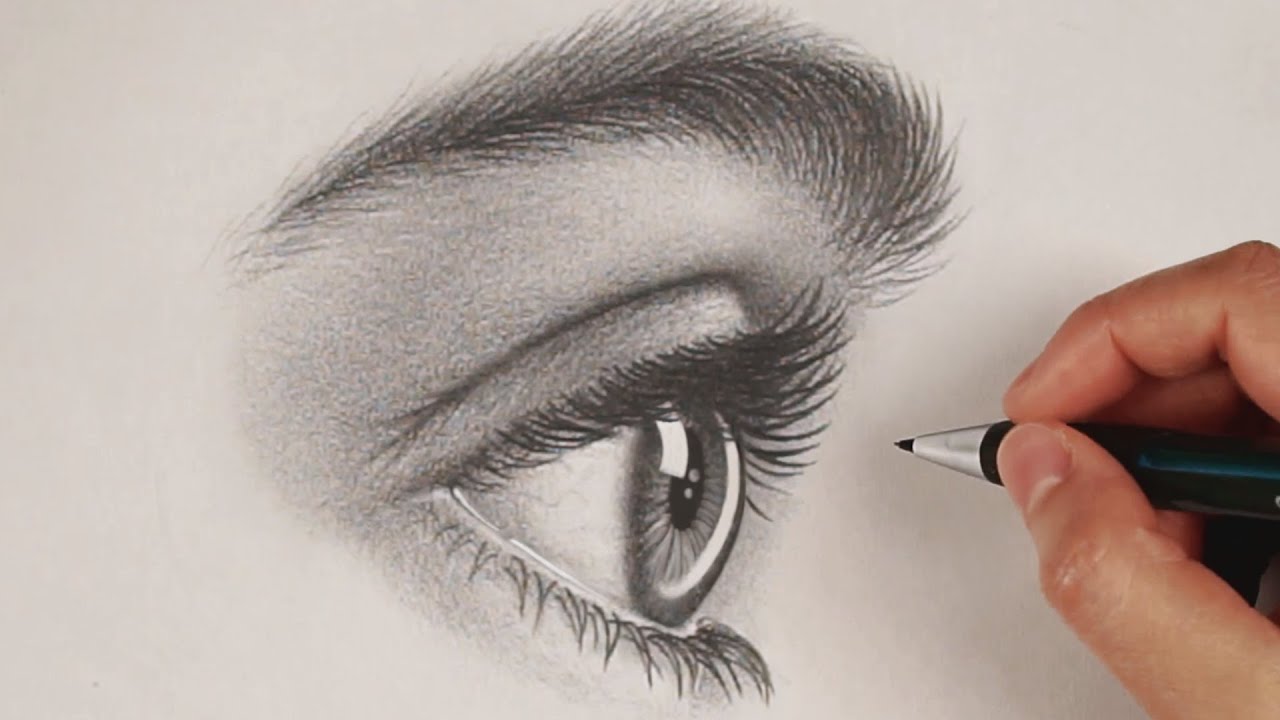
The Eye Drawing Will Start To Look Like The Real One.
Starting from roughly the center of the eyeball, draw an obtuse triangle. This outline should not be too dark because you want to prevent it from showing through in the end. To find where to place the eye, draw a vertical line from the corner of the lip to the center line. Follow the general shape of the eye to form the eyebrow.
Tilt Your Pencil Slightly To Keep The Strokes Soft, Like On The Right Side Of The Picture Below.
Web learn how to draw a face with realistic proportions, as seen from the side (profile). Then draw another pair of horizontal and vertical lines that meet in the middle of the page. Then inside the iris, draw a narrow oval for the pupil. Leave the light reflection white.
Use Curved Lines To Show Where The Eyelids Reveal The Shape Of The Eye.
Make sure the cornea fits inside this triangle. Leave space for the tear duct in the inner corner and add any additional lines to show the folds of the eyelid. 3 moving the iris to the sides. It’s the second factor defining the contrast.
To Make It Easier To See If The Iris Is Actually Round You Can First Draw Out It’s Entire Circle And Then Erase The Part Behind The Eyelid.
Web use your hb pencil to draw a circle with a small bump (cornea) on one side. The result is a pair of large, sparkling, adorable eyes. Fill the iris using a black marker so that the pupil becomes more visible. Draw a curved line to connect the top and bottom parts of the cornea to form the iris.