How To Draw A Pan Easy
How To Draw A Pan Easy - Draw a smaller oval shape inside the pan to create the cooking surface of the pan. Web how to draw a bee! In the next picture, the lines you drew in the previous steps will have faded to black. Web add the bottom of the pan. How to draw a frying pan step by step for beginners. From there, fill in details like eyes, legs, tail, tusks, and other features that give it its unique charm. Start by loosely sketching a oval shape for the base. Use light brown for the handle of his dagger and light gray for its blade. At the very bottom, draw a smooth connecting line to end up with a closed loop. For his hair and brows, use an orange crayon.
Web how to draw a frying pan.quick and simple drawings. This is the part where you can also describe how they fit. Then, use short lines that meet at points to draw the hair along his forehead. All drawing steps are included here which make it fun and easy to follow! Start by drawing the head and trunk of the elephant. Draw a wide, slightly curved line at the top of the pot’s body. With the help of a smooth curved line, depict the inner contour. Erase any extra lines, and. In this drawing lesson, we’ll show how to draw a dustpan step by step total 6 phase, and it will be easy tutorial. Draw this pot by following this drawing lesson.
Sketch two small, curved lines on either side of the pot to form the handles. Begin by drawing a large oval shape for the pan's body. Draw this pot by following this drawing lesson. Draw a smaller oval shape inside the pan to create the cooking surface of the pan. Web easy drawingslearn to draw a frying pan step by step.drawings: Use curved lines to form the chin and sides of the face. Outline the shape of the pan. Add a subtle curve along the top edge of the pan’s body to indicate its thickness. Draw a wide, slightly curved line at the top of the pot’s body. Draw another arc as shown.

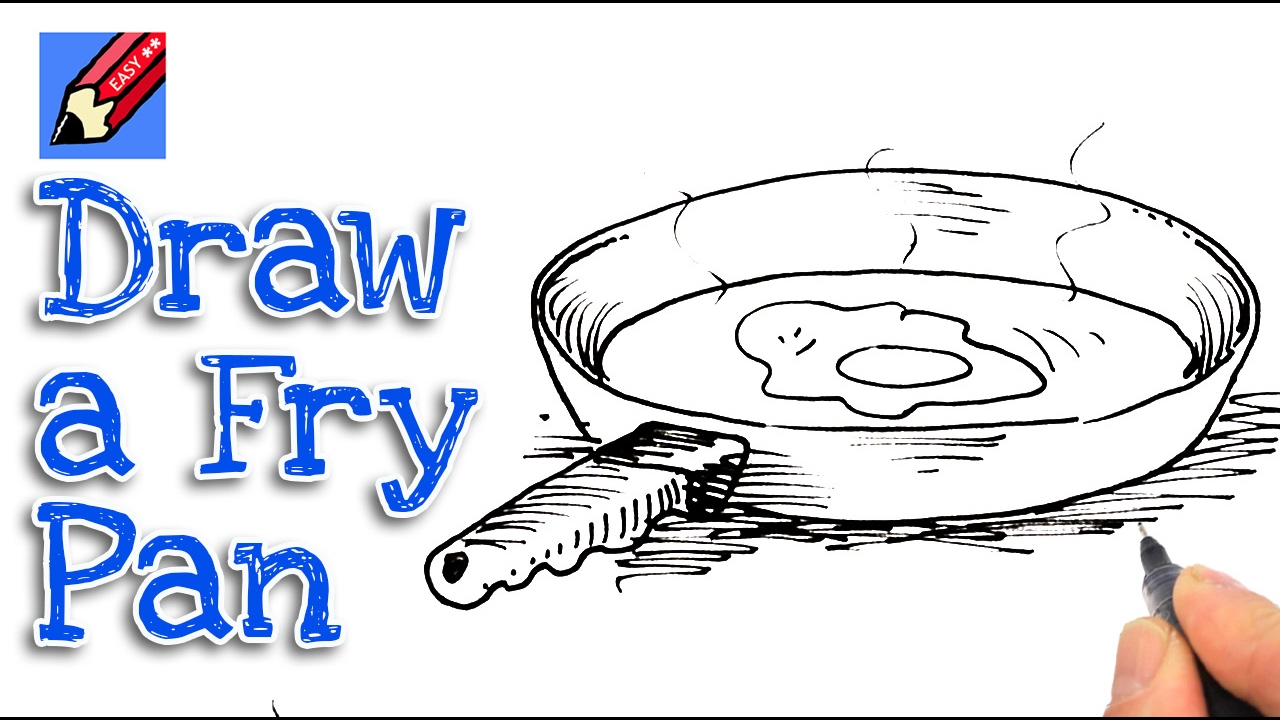
How to draw a Frying pan step by step for beginners YouTube
Draw this pot by following this drawing lesson. This forms the bottom of. Sketch out the inside of the pan. Leave a small gap between the inner and outer ovals to. The rim line should tilt slightly to show the perspective.

HOW TO DRAW A FRYING PAN EASY YouTube
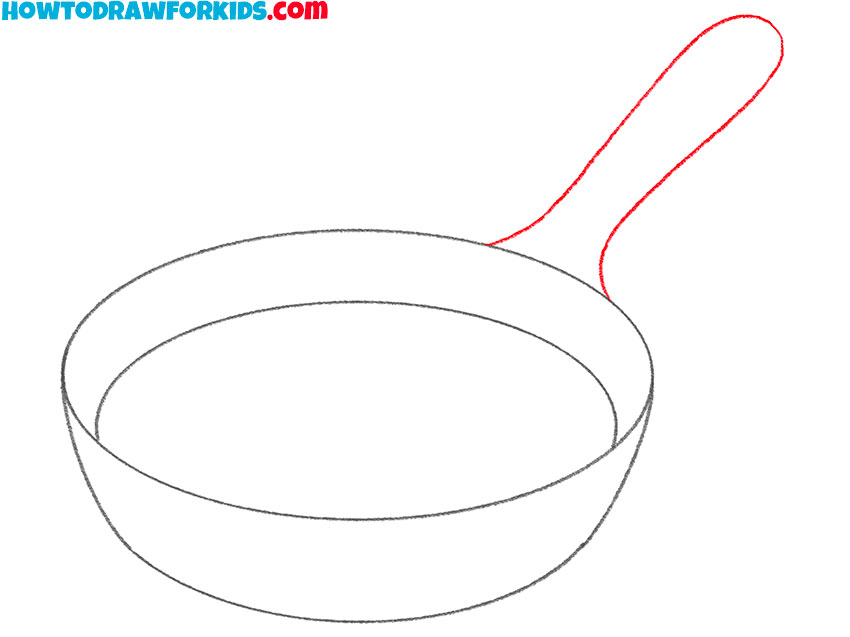
On the side, add the handle of the same shape as shown in the example. This is the part where you can also describe how they fit. Depict the hair and eyes. Web this easy frying pan instruction guide is perfect for young children looking to get started with drawing. Web describe your services or products.
How to Draw a Pan Easy Drawing Tutorial For Kids
Depict the hair and eyes. Then, use short lines that meet at points to draw the hair along his forehead. Web add the bottom of the pan. From there, fill in details like eyes, legs, tail, tusks, and other features that give it its unique charm. All drawing steps are included here which make it fun and easy to follow!

How to draw a Frying Pan step by step YouTube
For his hair and brows, use an orange crayon. In this drawing lesson, we’ll show how to draw a dustpan step by step total 6 phase, and it will be easy tutorial. Use light brown for the handle of his dagger and light gray for its blade. Add a subtle curve along the top edge of the pan’s body to.
![How To Draw A Frying Pan Step by Step [6 Easy Phase] & [Video]](https://easydrawings.net/wp-content/uploads/2020/05/Overview-for-Frying-pan-drawing-all-steps-in-one-place-1.jpg)
How To Draw A Frying Pan Step by Step [6 Easy Phase] & [Video]
Click on any image below to view this guide in gallery mode. Begin by sketching peter's head. This forms the bottom of. Grab your pen and paper and follow along as i guide you through these step by step drawing i. Erase any extra lines, and.
Learn how to draw a frying pan Step by Step with Easy Spoken
The rim line should tilt slightly to show the perspective. On the side, add the handle of the same shape as shown in the example. Draw another arc as shown. Then draw guidelines extending up from the sides that slope outward gradually. Web how to draw a frying pan.quick and simple drawings.

How to draw a Frying pan easy and step by step. YouTube
Grab your pen and paper and follow along as i guide you through these step by step drawing i. Then, use short lines that meet at points to draw the hair along his forehead. Make sure the proportions are accurate and adjust as needed. Web how to draw spiderman sketch | easy spiderman drawing | spiderman sketch drawing | easy.

How to Draw Food HelloArtsy
For his hair and brows, use an orange crayon. Draw another arc as shown. Make sure the proportions are accurate and adjust as needed. Add the ears and other elements of the face. Sketch a long, slightly curved line extending from the top of the pan to form the handle.
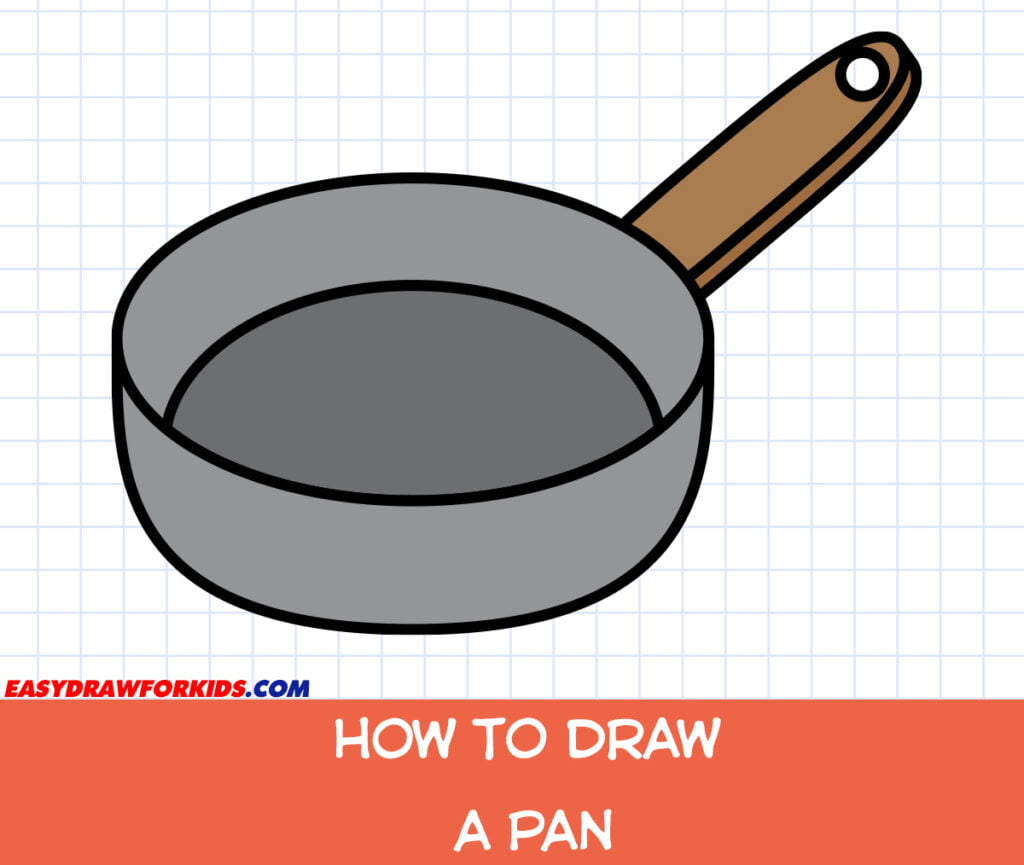
How To Draw A Pan Easy Draw For Kids
Drawing an elephant can be fun and easy, taking only 3 to 5 minutes of your time. All drawing steps are included here which make it fun and easy to follow! Use curved lines to form the chin and sides of the face. Click on any image below to view this guide in gallery mode. First, use black for the.
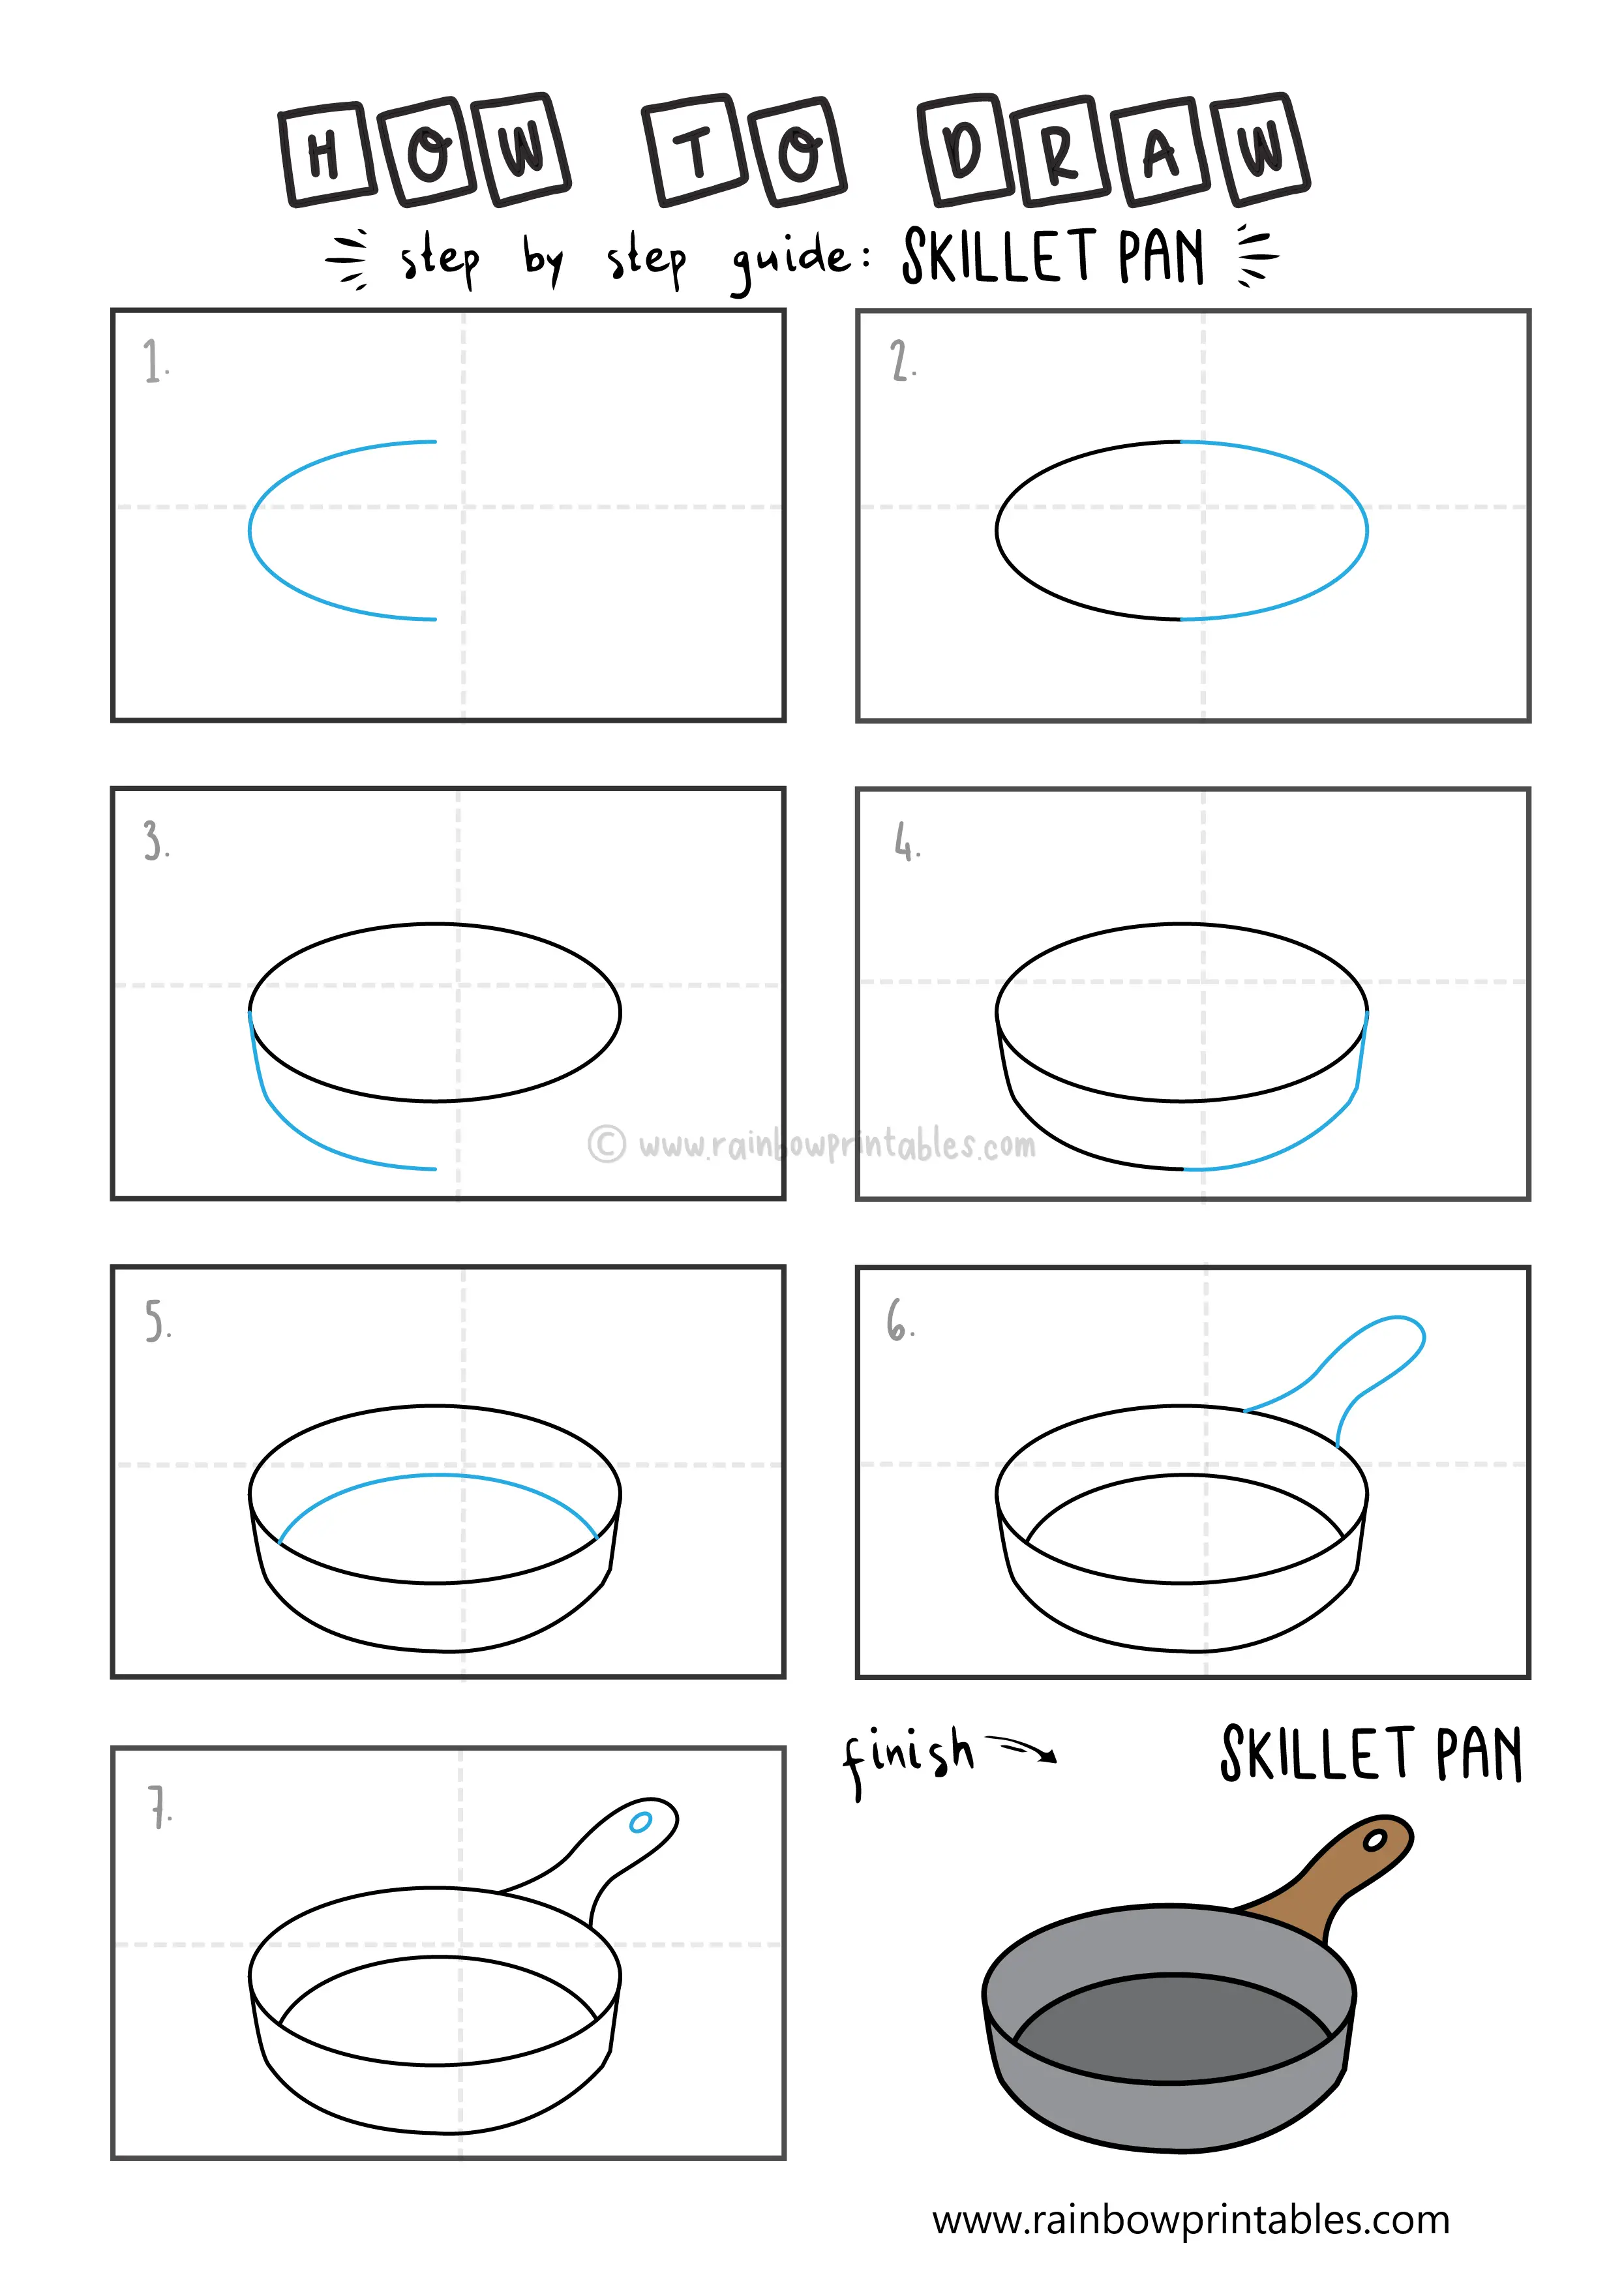
How To Draw a Skillet Pan Rainbow Printables
Depict the hair and eyes. Easy step by step drawing tutorial. Draw a wide, slightly curved line at the top of the pot’s body. Outline the shape of the pan. New lines and shapes to draw will be highlighted in blue.
Use Light Brown For The Handle Of His Dagger And Light Gray For Its Blade.
Draw this pot by following this drawing lesson. Web how to draw spiderman sketch | easy spiderman drawing | spiderman sketch drawing | easy spiderman drawing for beginners | spider man drawing | how to draw a. First, use black for the eyes and peach for the skin. Easy step by step drawing tutorial.
Draw A Smaller Oval Shape Inside The Pan To Create The Cooking Surface Of The Pan.
Trace an arc along the lower part of the egg shape. Draw the head and torso. Erase any extra lines, and. Begin by sketching peter's head.
All Drawing Steps Are Included Here Which Make It Fun And Easy To Follow!
Finish enclosing the head by drawing a curved line across the top of it. Click on any image below to view this guide in gallery mode. Depict the thickness of the handle. From there, fill in details like eyes, legs, tail, tusks, and other features that give it its unique charm.
Next, Draw A Smaller Circle At The Top Center Of The Oval For The Handle.
Click on a guide that interests you. Now, we are drawing a curve line across the bottom of the oval to create the rim of the pan. With the help of a smooth curved line, depict the inner contour. Draw a wide, slightly curved line at the top of the pot’s body.