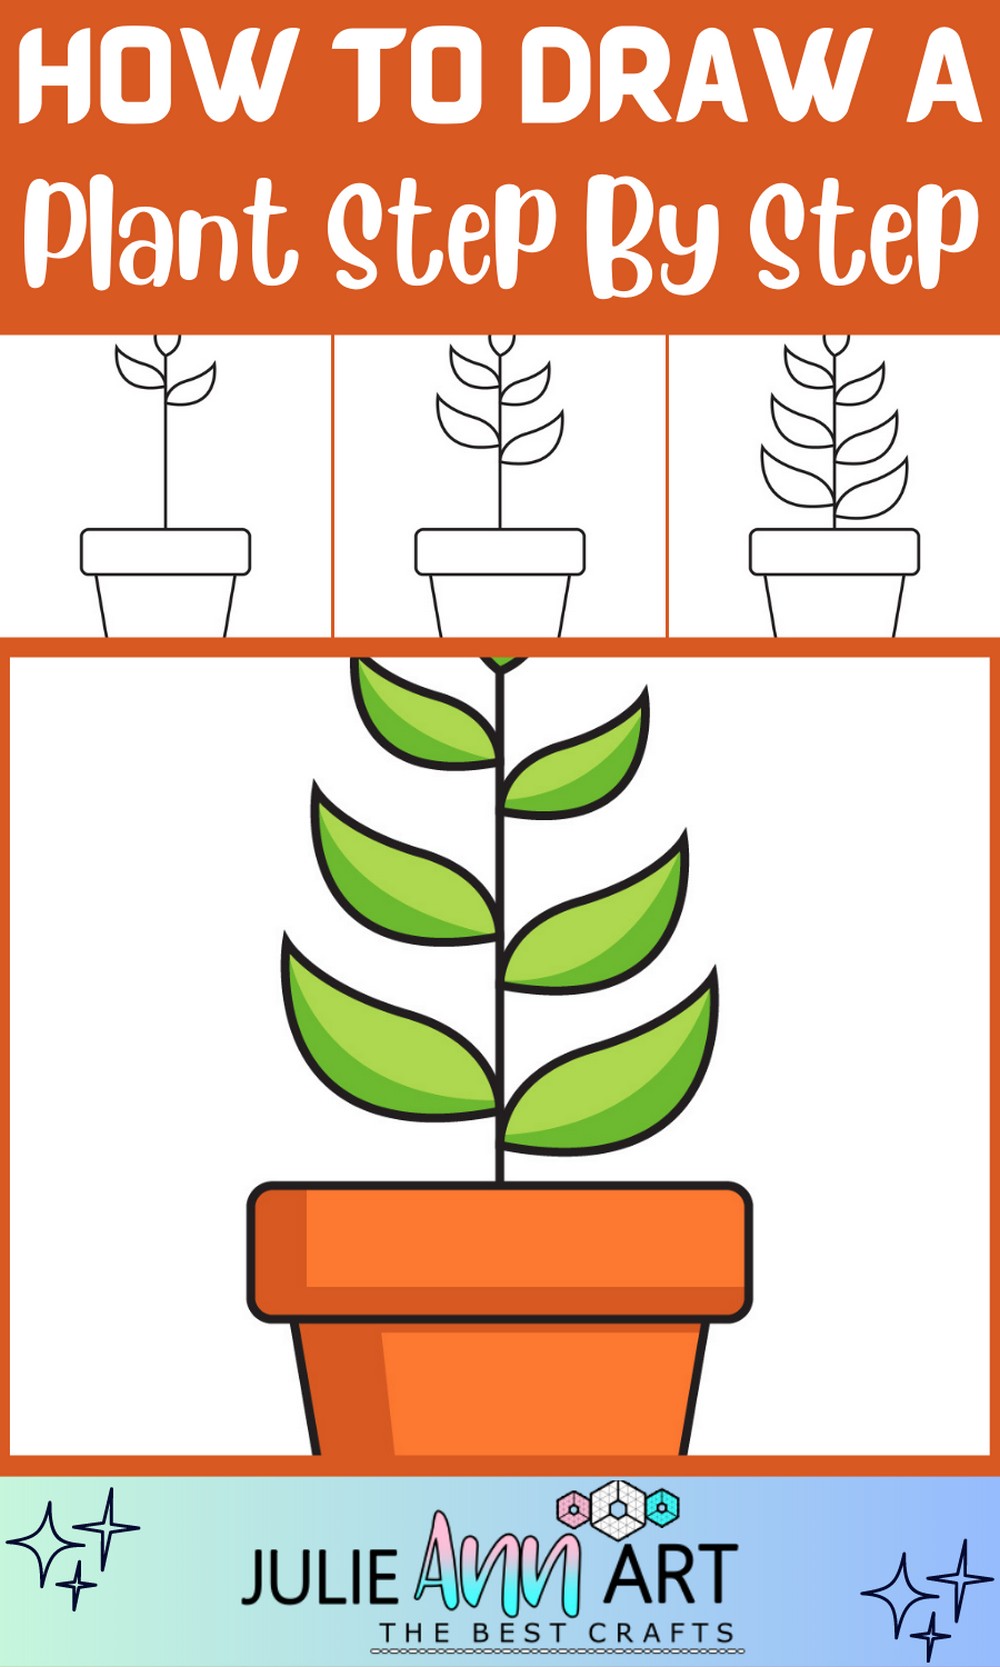
How To Draw A Plant Step By Step
How To Draw A Plant Step By Step - We will continue adding these little leaves as we move on as well! , a resident botany expert at plantum, recommends propagating your fiddle leaf fig by rooting the topmost shoot of the plant. Pruning in spring once the honeysuckle starts growing means removing wood that will carry that year’s buds and. Repeat this step on each leaf and sepal. The little one’s always want something simple but attractive, even for the plants, so this potted plant drawing choice is perfect for them. 5.0 out of 5 stars detailed and logical drawing steps. Start by drawing a circle shape. Draw five curved lines around the circle, starting at the top and working your way down. Allow the short lines to meet in points, forming c shaped indentations. Web how to draw a flower easy and step by step.
Learn about topics such as how to draw flowers: For this final step of the line drawing first add the stem. Web hi everyone, in this video i show you how to draw a plant cell step by step. Watch the video and please be kind enough to thumbs up my videos. In each step, a few new lines or shapes are added. Follow along with us and learn how to draw a plan. Learn everything you want about drawing plants with the wikihow drawing plants category. The cutting should have a few leaves. Now that you have the vines drawn, we can start adding some smaller details to the image. Web step by step tutorial how to draw a monstera plant using a pencil.
Learn about topics such as how to draw flowers: The difference lies in the use of several short, curved lines, rather than a single line, forming each side. 5.0 out of 5 stars detailed and logical drawing steps. Adding leaves to the rose’s stem. Use a soft brush and black paint, and softly apply shading to the edges and the previously drawn texture lines on the stem. Begin by sketching a sturdy, straight line at the center of your paper, laying the foundation as the main stem of your plant. Draw a circle for the center of the poinsettia. The leaf can be created by drawing two connected curved lines. Step by step flower drawing instructions step 1. Begin your drawing by sketching the basic shapes that make up the plant.
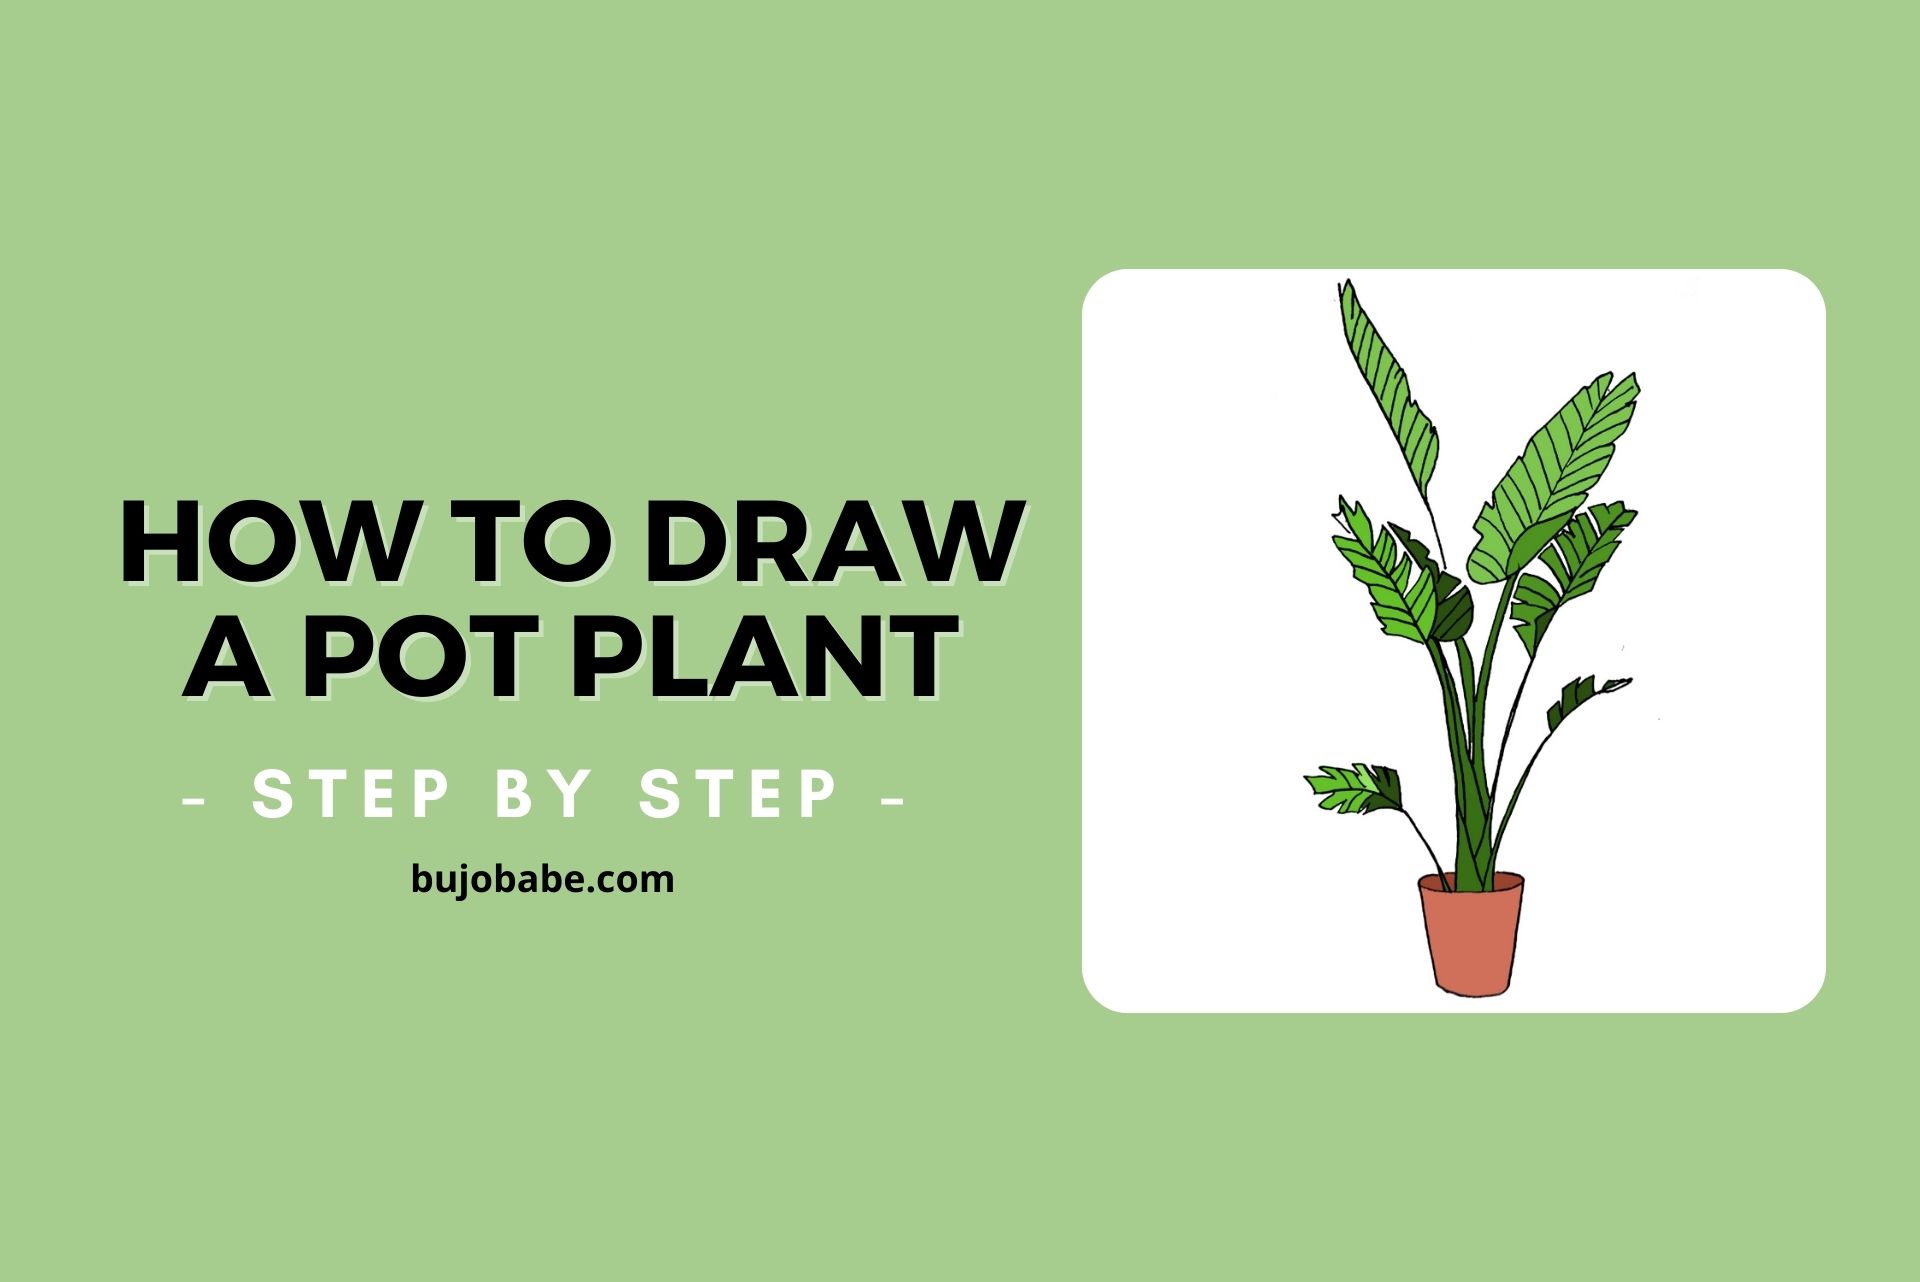
How To Draw A Pot Plant (Step By Step Drawing Tutorial) Bujo Babe
Follow along with me as i draw an easy swiss cheese potted plant.here's a list of material. Begin by sketching a sturdy, straight line at the center of your paper, laying the foundation as the main stem of your plant. Web how to draw a flower easy and step by step. Each petal will go around one of the lines.

Plant Drawing — How To Draw A Plant Step By Step
Draw it coming up from the middle of the leaves and make it slightly wider as it goes up (as shown in the example). Now that you have the vines drawn, we can start adding some smaller details to the image. In each step, a few new lines or shapes are added. Web easily add colour to your garden this.
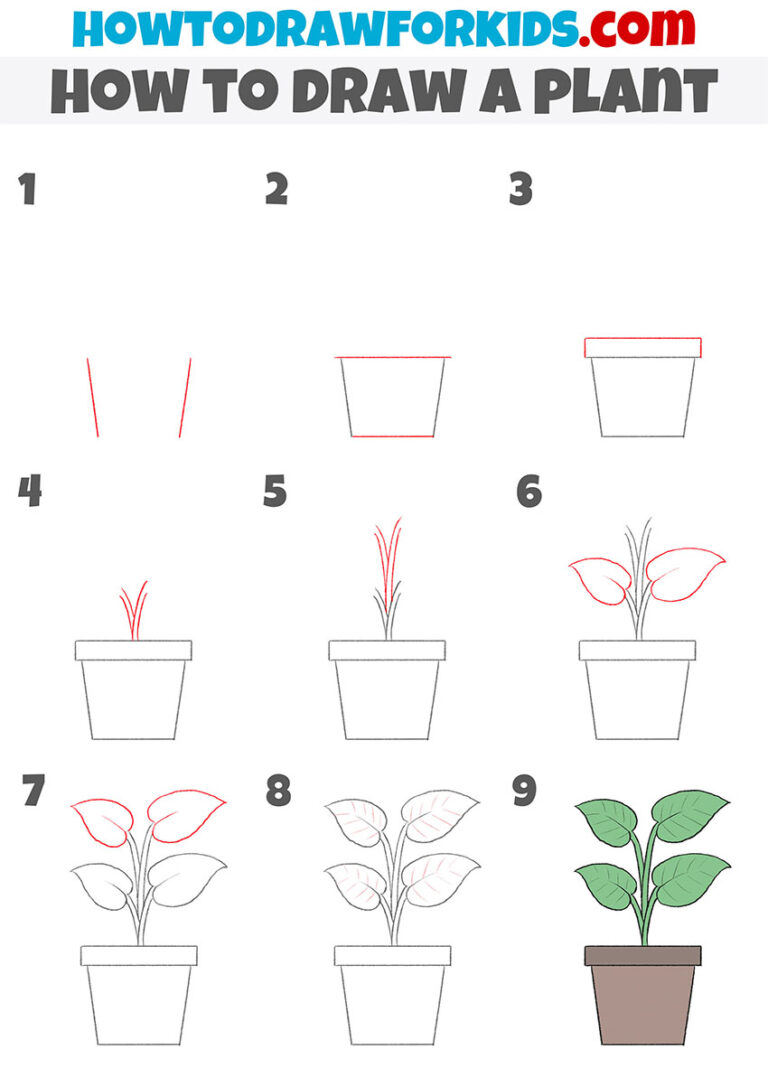
How to Draw a Plant Easy Drawing Tutorial For Kids
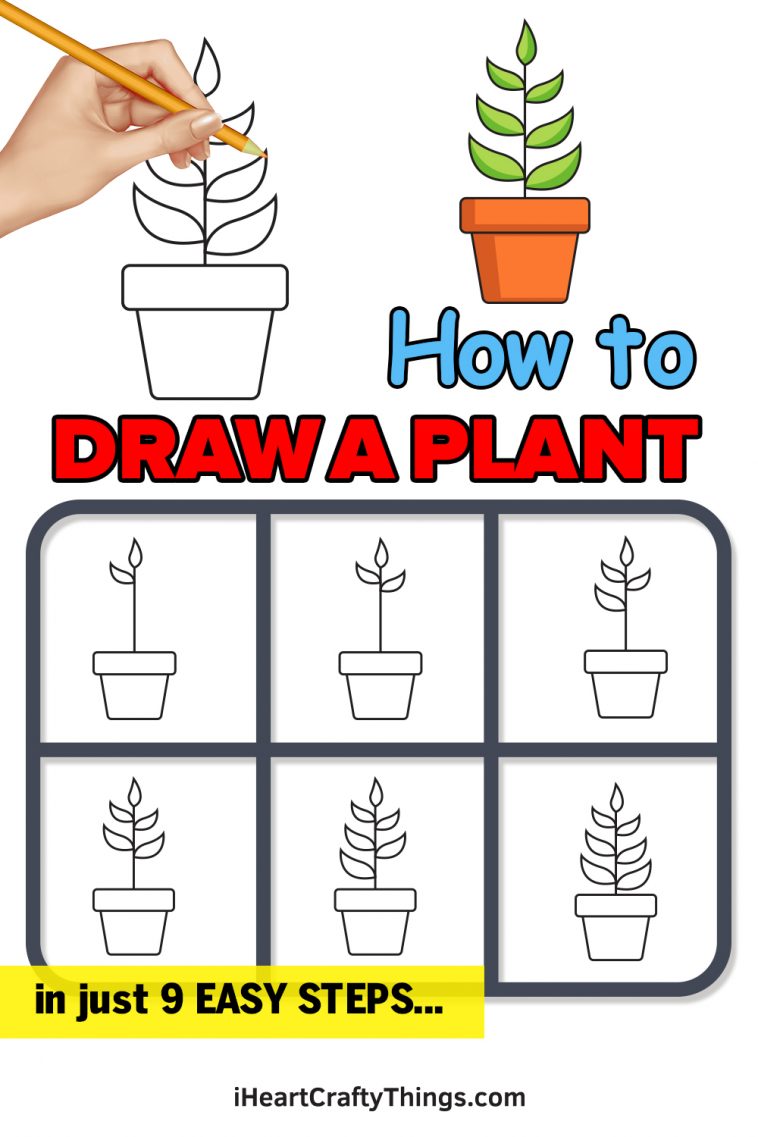
Follow along with us and learn how to draw a plan. Web hi everyone, in this video i show you how to draw a plant cell step by step. Web how to draw a flower easy and step by step. These are highlighted in blue. Web following just a few simple steps, you or your kids will learn how to.
How TO Draw a plant step by step(very easy)/let's draw the plarts of a
Web learn how to draw a plant for kids easy and step by step. If you are drawing a leafy plant, use ovals or triangles to represent the leaves. Follow along with me as i draw an easy swiss cheese potted plant.here's a list of material. This central line will guide the placement of leaves and possibly flowers, defining the.
22 Easy Plant Drawing Ideas With The Best Video Guides
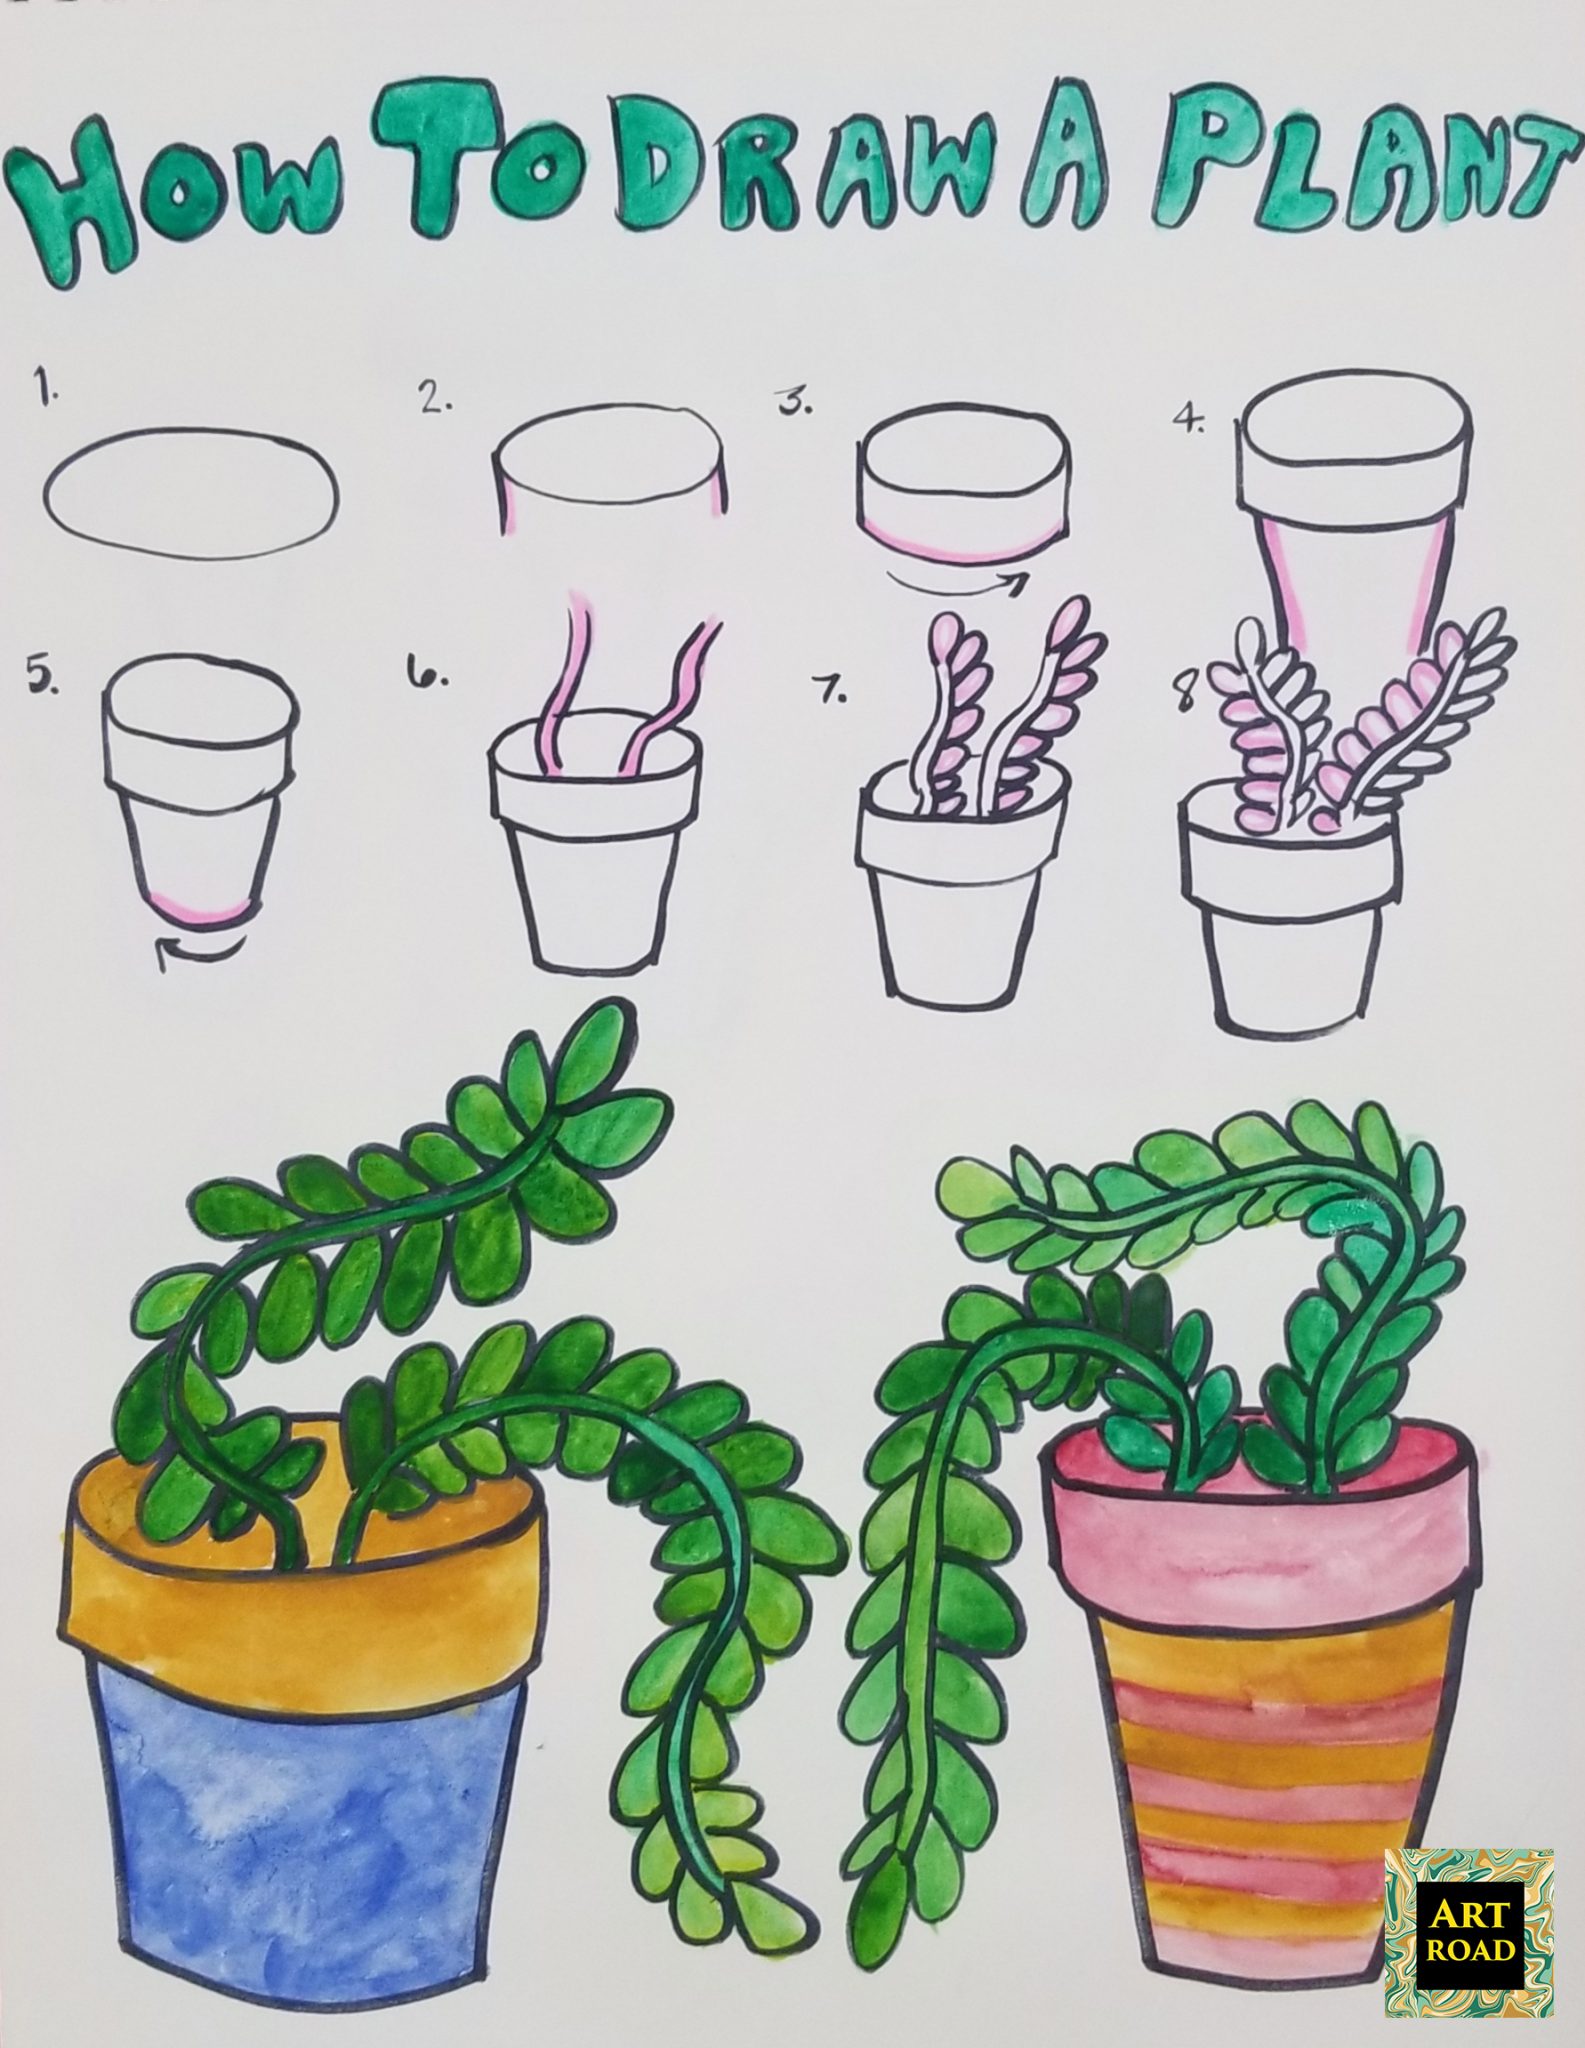
Learn everything you want about drawing plants with the wikihow drawing plants category. First, create your charming pot by drawing two uncomplicated shapes. Draw a circle for the center of the poinsettia. Watch the video and please be kind enough to thumbs up my videos. Allow the short lines to meet in points, forming c shaped indentations.
Draw Plants
These flower drawing tutorials are great for beginners. Begin your drawing by sketching the basic shapes that make up the plant. Add another part of the plant. Learn about topics such as how to draw flowers: In each step, a few new lines or shapes are added.

Plant Drawing — How To Draw A Plant Step By Step
Begin by sketching a sturdy, straight line at the center of your paper, laying the foundation as the main stem of your plant. Appreciated the step by step explanations with drawing examples. Starts with simple idea, then elaborates, easy to. Poinsettias are a popular christmas flower, and for good reason. Continue with a pair of petals opposite of each other.

How to Draw a Plant Super Easy step by step Plant step by step easy
These are highlighted in blue. Appreciated the step by step explanations with drawing examples. Use a soft brush and black paint, and softly apply shading to the edges and the previously drawn texture lines on the stem. Starts with simple idea, then elaborates, easy to. Add the new blue lines to your drawing one by one, and soon you'll be.
Plant Drawing How To Draw A Plant Step By Step
Shade the stems in your plant pot drawing. Draw a circle for the center of the poinsettia. These details bring an authentic feel to our. Reviewed in the united states on november 4, 2023. In each step, a few new lines or shapes are added.
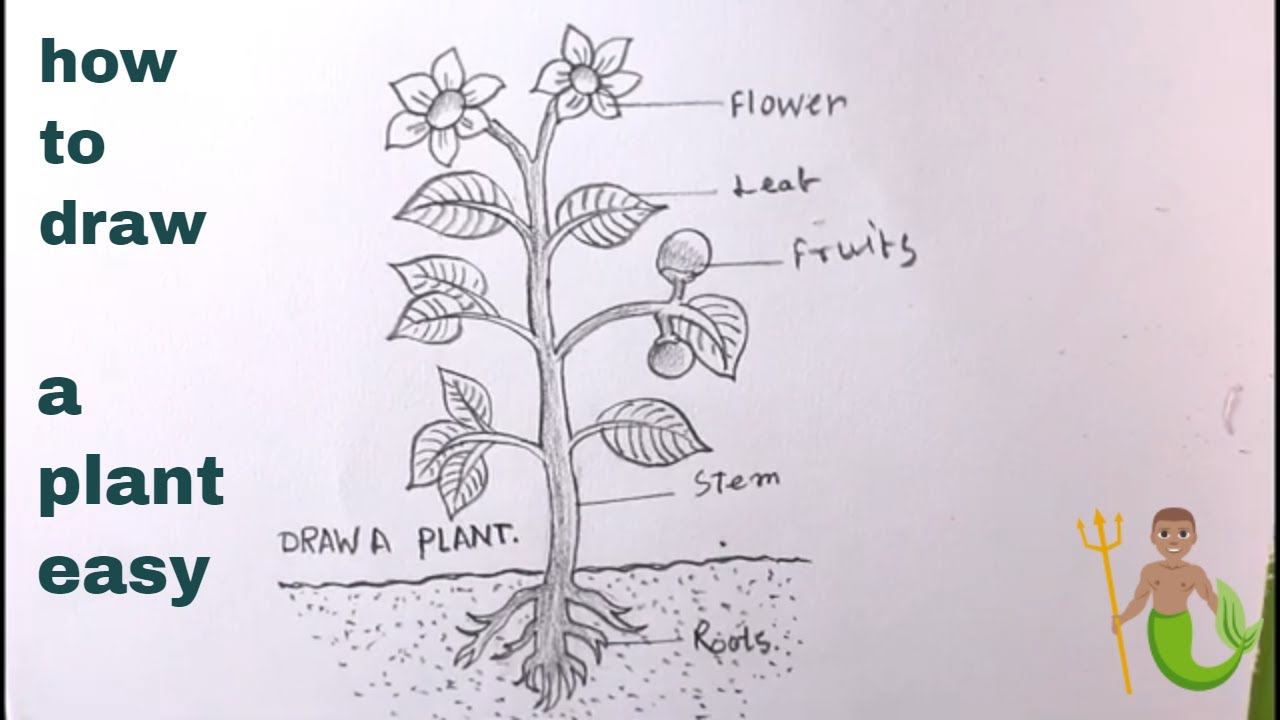
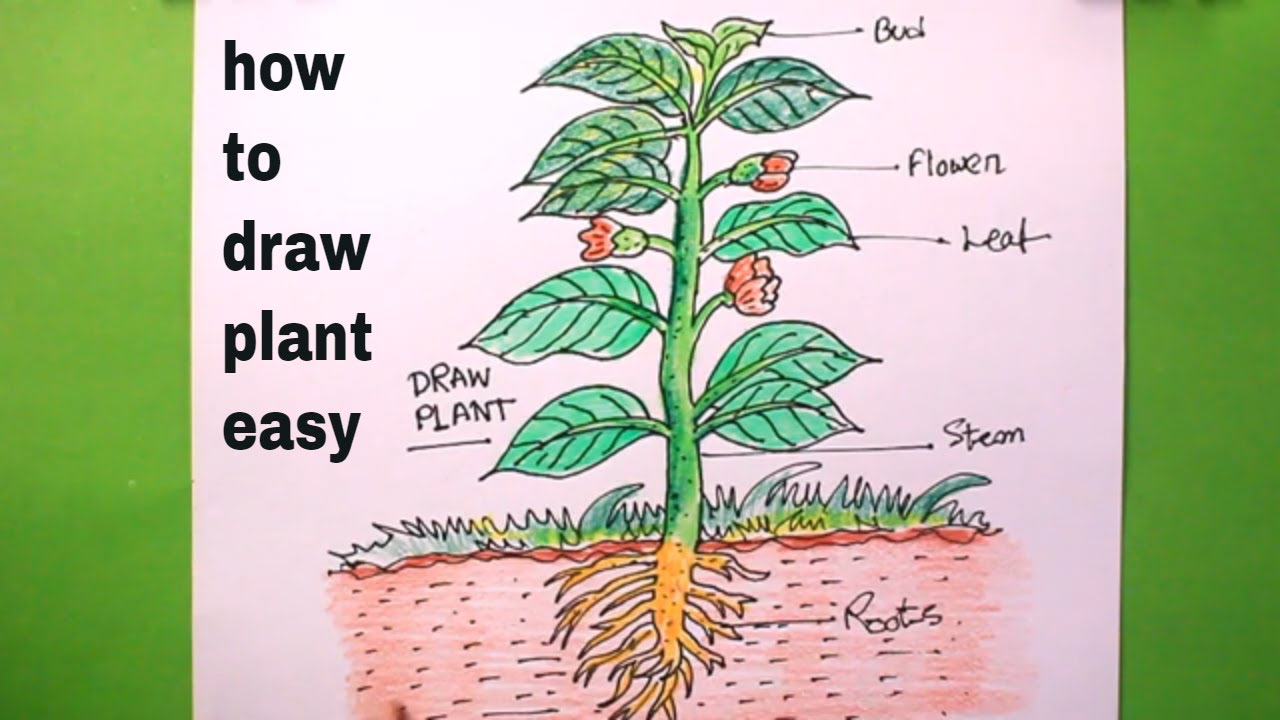
How TO Draw a Plant Step By Step/Draw Parts Of Plant Easy YouTube
These flower drawing tutorials are great for beginners. Draw this cute plant by following this drawing lesson. Learn everything you want about drawing plants with the wikihow drawing plants category. The leaves should be shaped roughly the same as the petals; Continue with individual brush strokes elevating the texture and creating a shading layer to the stem.
Allow The Short Lines To Meet In Points, Forming C Shaped Indentations.
Draw five curved lines around the circle, starting at the top and working your way down. First, create your charming pot by drawing two uncomplicated shapes. Web depict straight horizontal lines at the bottom and top of the pot. Web the plants flower from summer through to fall on growth produced that season.
We Will Continue Adding These Little Leaves As We Move On As Well!
The difference lies in the use of several short, curved lines, rather than a single line, forming each side. Now that you have the vines drawn, we can start adding some smaller details to the image. Appreciated the step by step explanations with drawing examples. Web drawing plants is a fun and rewarding way to relax, be creative, and connect with nature.
Adding Leaves To The Rose’s Stem.
Foods, plants and more your kids will never get bored. Web how to draw corn plant with corns. Web a beautiful drawing of a plant. Begin by sketching a sturdy, straight line at the center of your paper, laying the foundation as the main stem of your plant.
Web The Complete Guide To Drawing Action Manga:
You can erase the small bits of the drawing where it overlaps the lines from the previous steps. The leaf can be drawn quite similar to a droplet of water, but instead of. Repeat this step on each leaf and sepal. Continue with individual brush strokes elevating the texture and creating a shading layer to the stem.