How To Draw A Soup Bowl
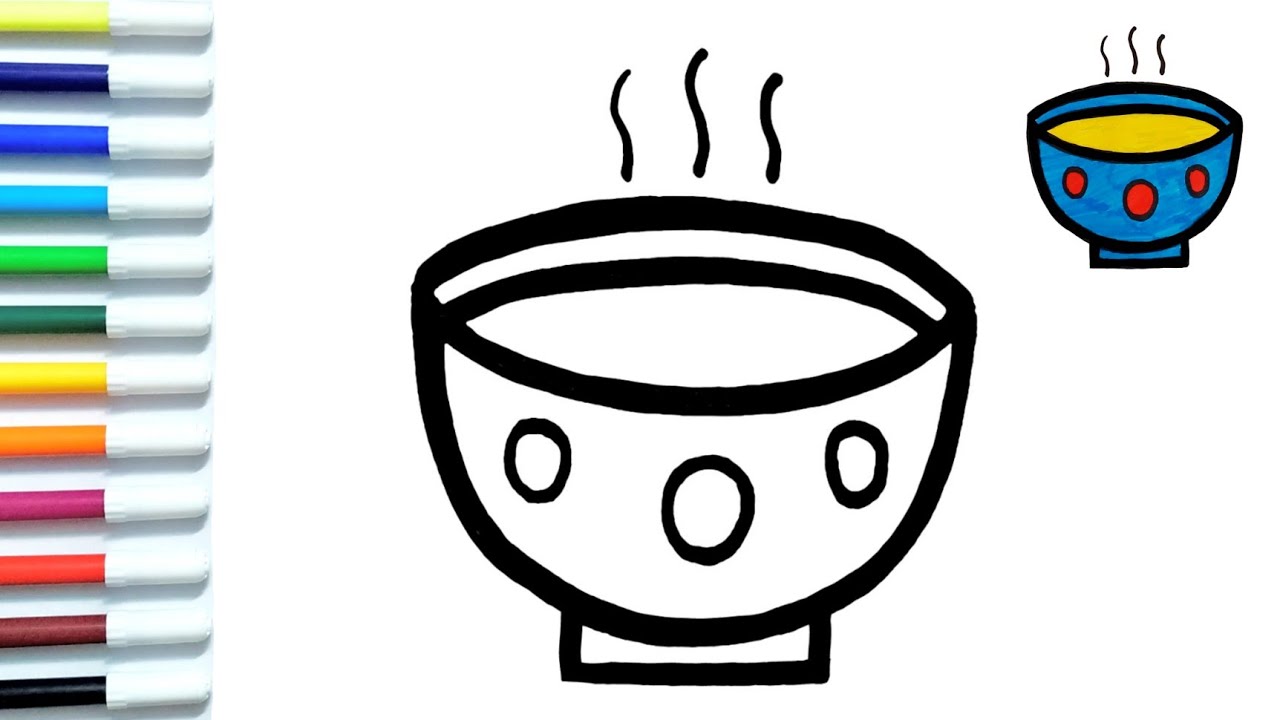
How To Draw A Soup Bowl - Start by lightly sketching an oval shape on your drawing paper. Web how to draw a bowl. Begin by drawing a large, rounded u shape for the body of the bowl. Run the pieces you stacked through your sewing machine from corner to corner. Now on this how to make a soup bowl cozy sewing tutorial, it’s time to sew! There’s also a roasted vegetable salad among several bowls that seems. Expect 6 easy steps to follow, children will enjoy designing their own soup on paper. Sketch out the bottom of the bowl. Color the surface of the bowl with dark blue. At this stage, draw a smooth, rounded line.
Learn how to make a bowl cozy step by step here. Begin by drawing a large, rounded u shape for the body of the bowl. Then draw two curved lines on each side of the oval to give it more definition. Web how to draw soup bowls, learn drawing by this tutorial for kids and adults. This will serve as the basic outline for your bowl. 35k views 3 years ago. Web to draw a soup bowl, start by sketching an oval shape slightly wider at the top and narrower at the bottom. Web if you’re interested in learning how to draw everyday objects, such as a soup bowl, you’ve come to the right place! View bowl of soup drawing videos. Check other videos from sherry drawings step by step playlist.
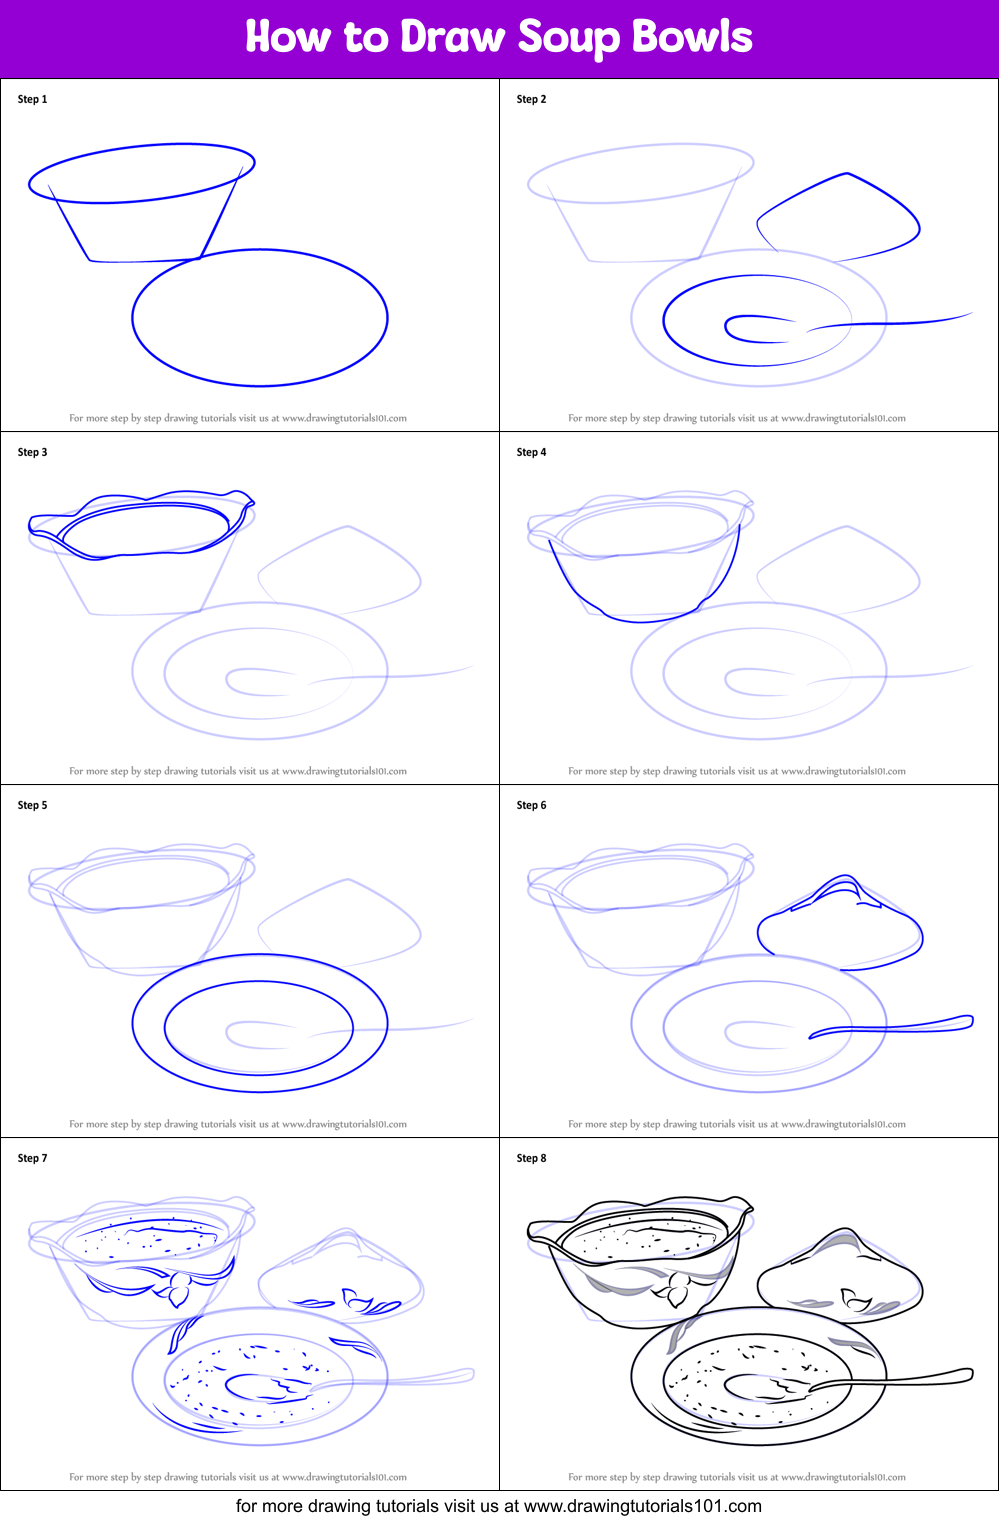
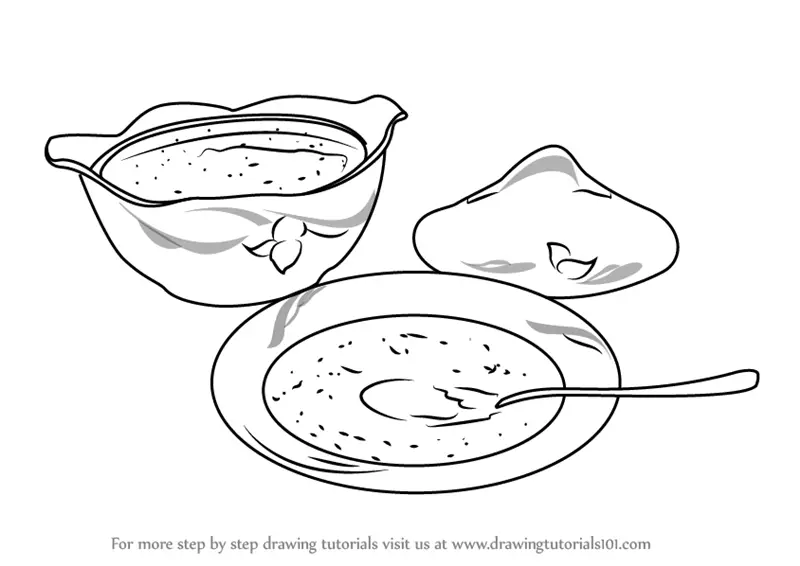
Add a horizontal, curved line at the top of the u shape to form the open rim of the bowl. This bowl is a hearty feast, blending split peas with chunks of ham and sausage for a truly satisfying meal. To create the thickness of the rim, draw another parallel curved line inside the first one, following its shape. Sketch out another slightly larger oval. Then draw two curved lines on each side of the oval to give it more definition. Web split pea, ham & sausage soup. It provides simple illustrated examples as well as quick drawing tips. Web if you’re looking to learn how to draw a bowl of soup, you’ve come to the right place. That’s why we will be breaking it down into smaller steps to show you how it can be easy when you know what to do. As we mentioned in the introduction, a simple object like a bowl can look much easier to draw than it can sometimes turn out to be.
How to Draw A Bowl of Soup Easy Drawing and Coloring for Kids and
Use sky blue to color the inner surface. Also included is a printable version of this soup drawing tutorial. Web this tutorial shows how to draw a bowl of soup with a spoon in it in six steps. Begin by drawing a large, rounded u shape for the body of the bowl. Web it’s a cozy little cover for your.

How To Draw A Soup Soup YouTube
Expect 6 easy steps to follow, children will enjoy designing their own soup on paper. Determine what the size of the bowl will be and draw an even oval. Web this tutorial shows how to draw a bowl of soup with a spoon in it in six steps. Draw a small smooth line at the bottom, as shown in the.
How to Draw Soup Bowls printable step by step drawing sheet
35k views 3 years ago. Add the main part of the bowl. Use sky blue to color the inner surface. Remember to keep the lines light, as you will be refining the shape in the following steps. Begin by drawing a large, rounded u shape for the body of the bowl.
How to Draw Soup Bowls (Everyday Objects) Step by Step
Depict the thickness of the bowl. Web esther walks through the steps of drawing a simple soup illustration using the procreate app on their ipad. Web if you’re looking to learn how to draw a bowl of soup, you’ve come to the right place. This free pattern includes 3 sizes so you’ll be able to sew lots using fabric yardage,.
How to Draw a Soup Bowl Yonderoo
Web if you’re looking to learn how to draw a bowl of soup, you’ve come to the right place. Soup bowl drawing step by step. Web how to draw soup bowls, learn drawing by this tutorial for kids and adults. This bowl is a hearty feast, blending split peas with chunks of ham and sausage for a truly satisfying meal..

HOW TO DRAW A BOWL OF SOUP EASY YouTube
Use sky blue to color the inner surface. Web esther walks through the steps of drawing a simple soup illustration using the procreate app on their ipad. By the end of the class, you will be able to create a drawing of your very own favorite dish. You can see a preview of the drawing stages for the soup bowl.

How to draw a soup bowl 🥣 very easy step by step // Easy drawings
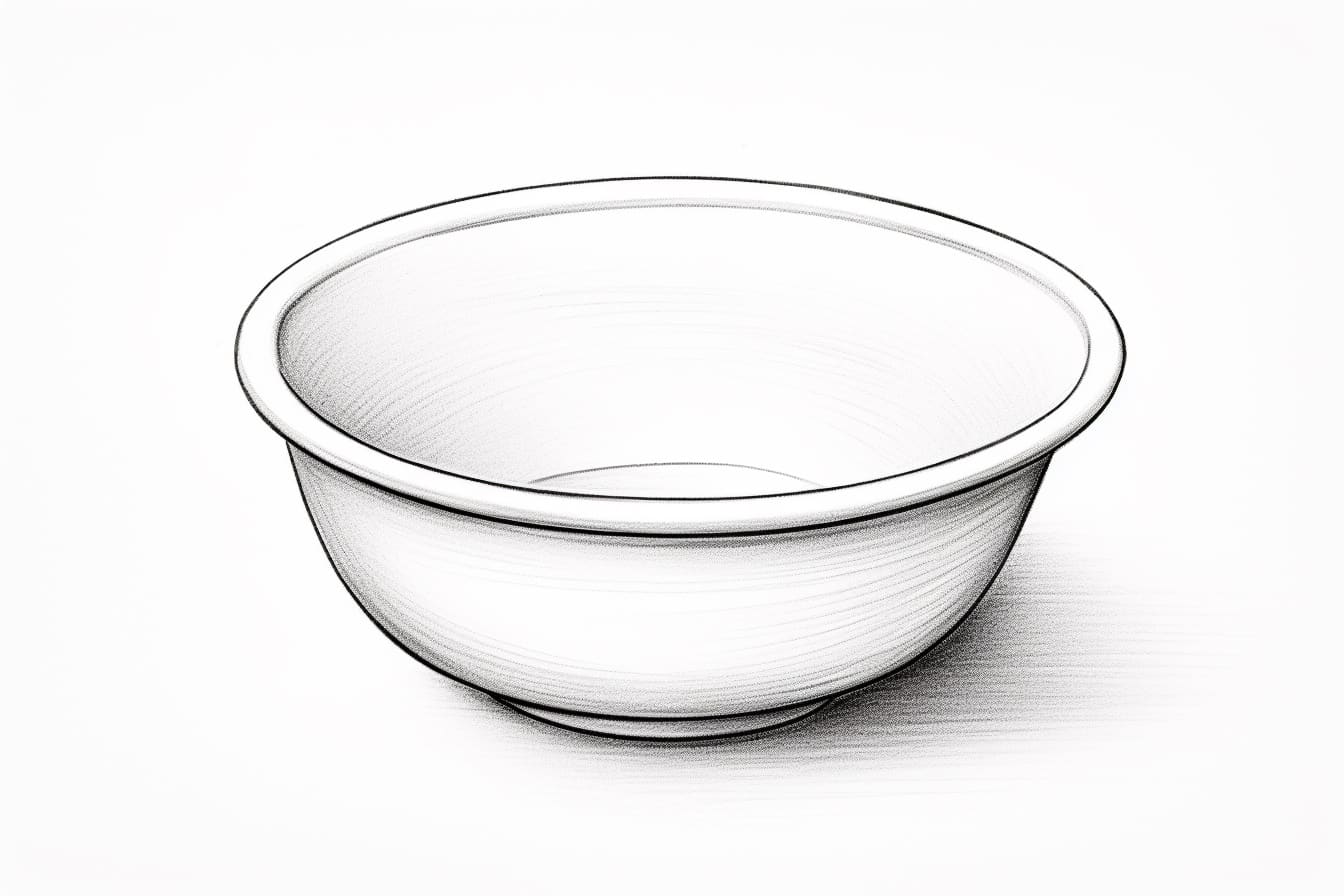
Start by lightly sketching an oval shape on your drawing paper. Sketch out another slightly larger oval. Web this tutorial shows how to draw a bowl of soup with a spoon in it in six steps. You can see a preview of the drawing stages for the soup bowl in the image above. View bowl of soup drawing videos.

How to Draw Soup HelloArtsy
Remember to keep the lines light, as you will be refining the shape in the following steps. Learn how to make a bowl cozy step by step here. We shall start things simply in this first step of our guide on how to draw a bowl! Depict the thickness of the bowl. Now, draw a smooth, rounded line to create.

How to Draw SOUP / Easy step by step tutorial / A bowl of soup YouTube
Web if you’re interested in learning how to draw everyday objects, such as a soup bowl, you’ve come to the right place! This bowl is a hearty feast, blending split peas with chunks of ham and sausage for a truly satisfying meal. Run the pieces you stacked through your sewing machine from corner to corner. At this stage, draw a.

How To Draw A Bowl Of Soup Step By Step 🥣 Bowl Of Soup Drawing Easy
This bowl is a hearty feast, blending split peas with chunks of ham and sausage for a truly satisfying meal. Next, add some contours around the rim of the bowl and shade in between them to make it look more realistic. Depict the thickness of the bowl. Sketch out the bottom of the bowl. Web how to draw a bowl.
Add A Horizontal, Curved Line At The Top Of The U Shape To Form The Open Rim Of The Bowl.
Color the surface of the bowl with dark blue. Sketch out the bottom of the bowl. Web if you’re interested in learning how to draw everyday objects, such as a soup bowl, you’ve come to the right place! Soup bowl drawing step by step.
Web To Draw A Soup Bowl, Start By Sketching An Oval Shape Slightly Wider At The Top And Narrower At The Bottom.
Web how to draw a bowl. Start by lightly sketching an oval shape on your drawing paper. You can see a preview of the drawing stages for the soup bowl in the image above. Bowl of soup drawing stock illustrations.
Determine What The Size Of The Bowl Will Be And Draw An Even Oval.
Web how to draw soup bowls, learn drawing by this tutorial for kids and adults. Web this tutorial shows how to draw a bowl of soup with a spoon in it in six steps. This will serve as the basic outline for your bowl. Also included is a printable version of this soup drawing tutorial.
Now On This How To Make A Soup Bowl Cozy Sewing Tutorial, It’s Time To Sew!
Web if you’re looking to learn how to draw a bowl of soup, you’ve come to the right place. Web in this drawing tutorial i show you how to draw a bowl of soup, with colorin. Web how to draw a bowl. Web lay out the two pieces of wrap n’ zap fabric and then place your main fabric print side up on top so that you have two separate stacks of fabric and wrap n’ zap fabric squares.