How To Draw Angels Step By Step
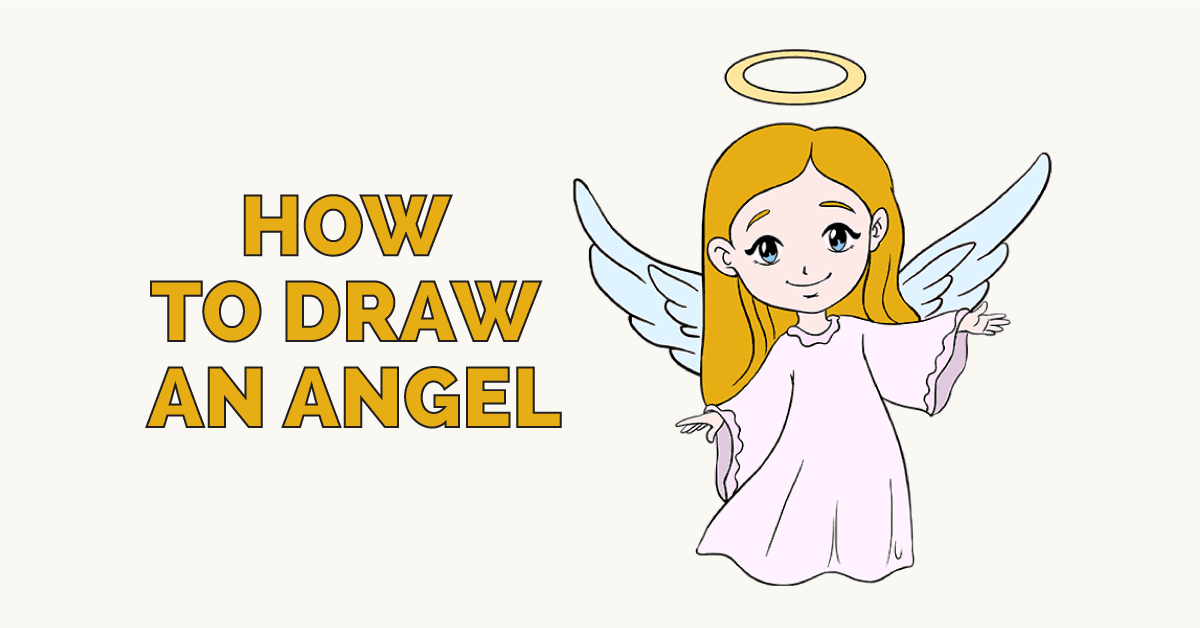
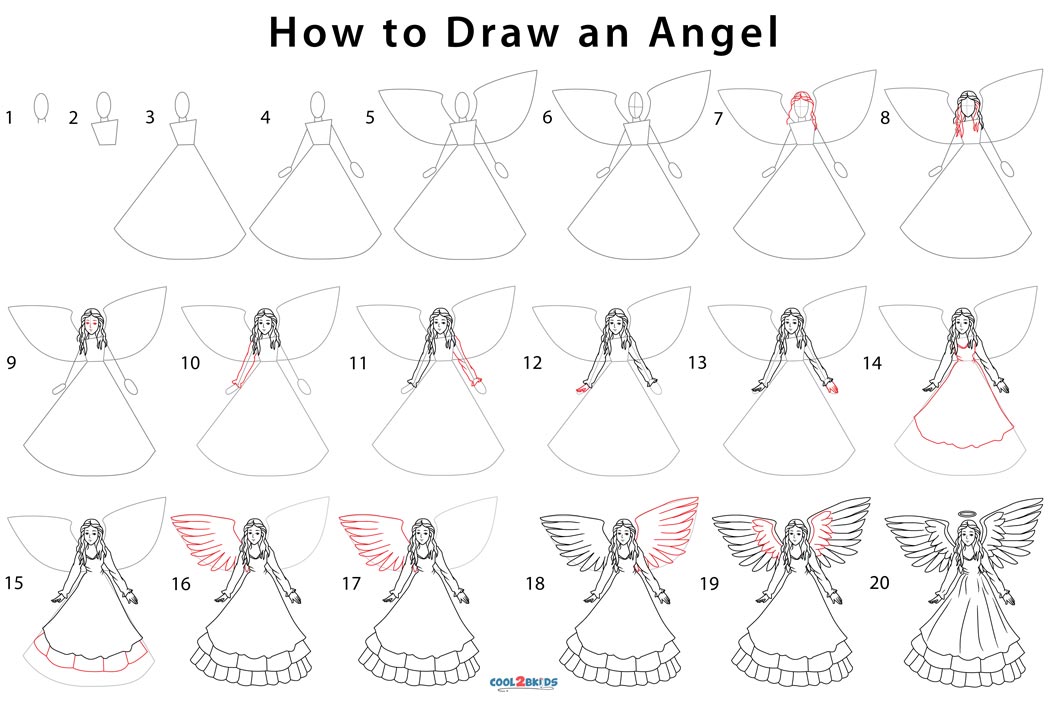
How To Draw Angels Step By Step - Then, connect the two lines by adding another curved line at the top. Next, draw a smaller circle below the head for the angel’s body and two lines extending downwards for the legs. Then create two more rows of ovals below the first row, making three rows of ovals in total. Next, connect twos slightly slanted lines at the bottom and layer a partial square on top of that, to great the folds of her dress. First, let’s draw the body of the angel. Draw 2 connected curves on the lower part of the diamond. Web these lines will act as a guide for positioning the facial features. Draw another sideways u shaped line at the end of the latter. This is a chibi style cartoon angel drawing tutorial lesson. At the end of this line, draw another curved line, resembling a u turned on its side.
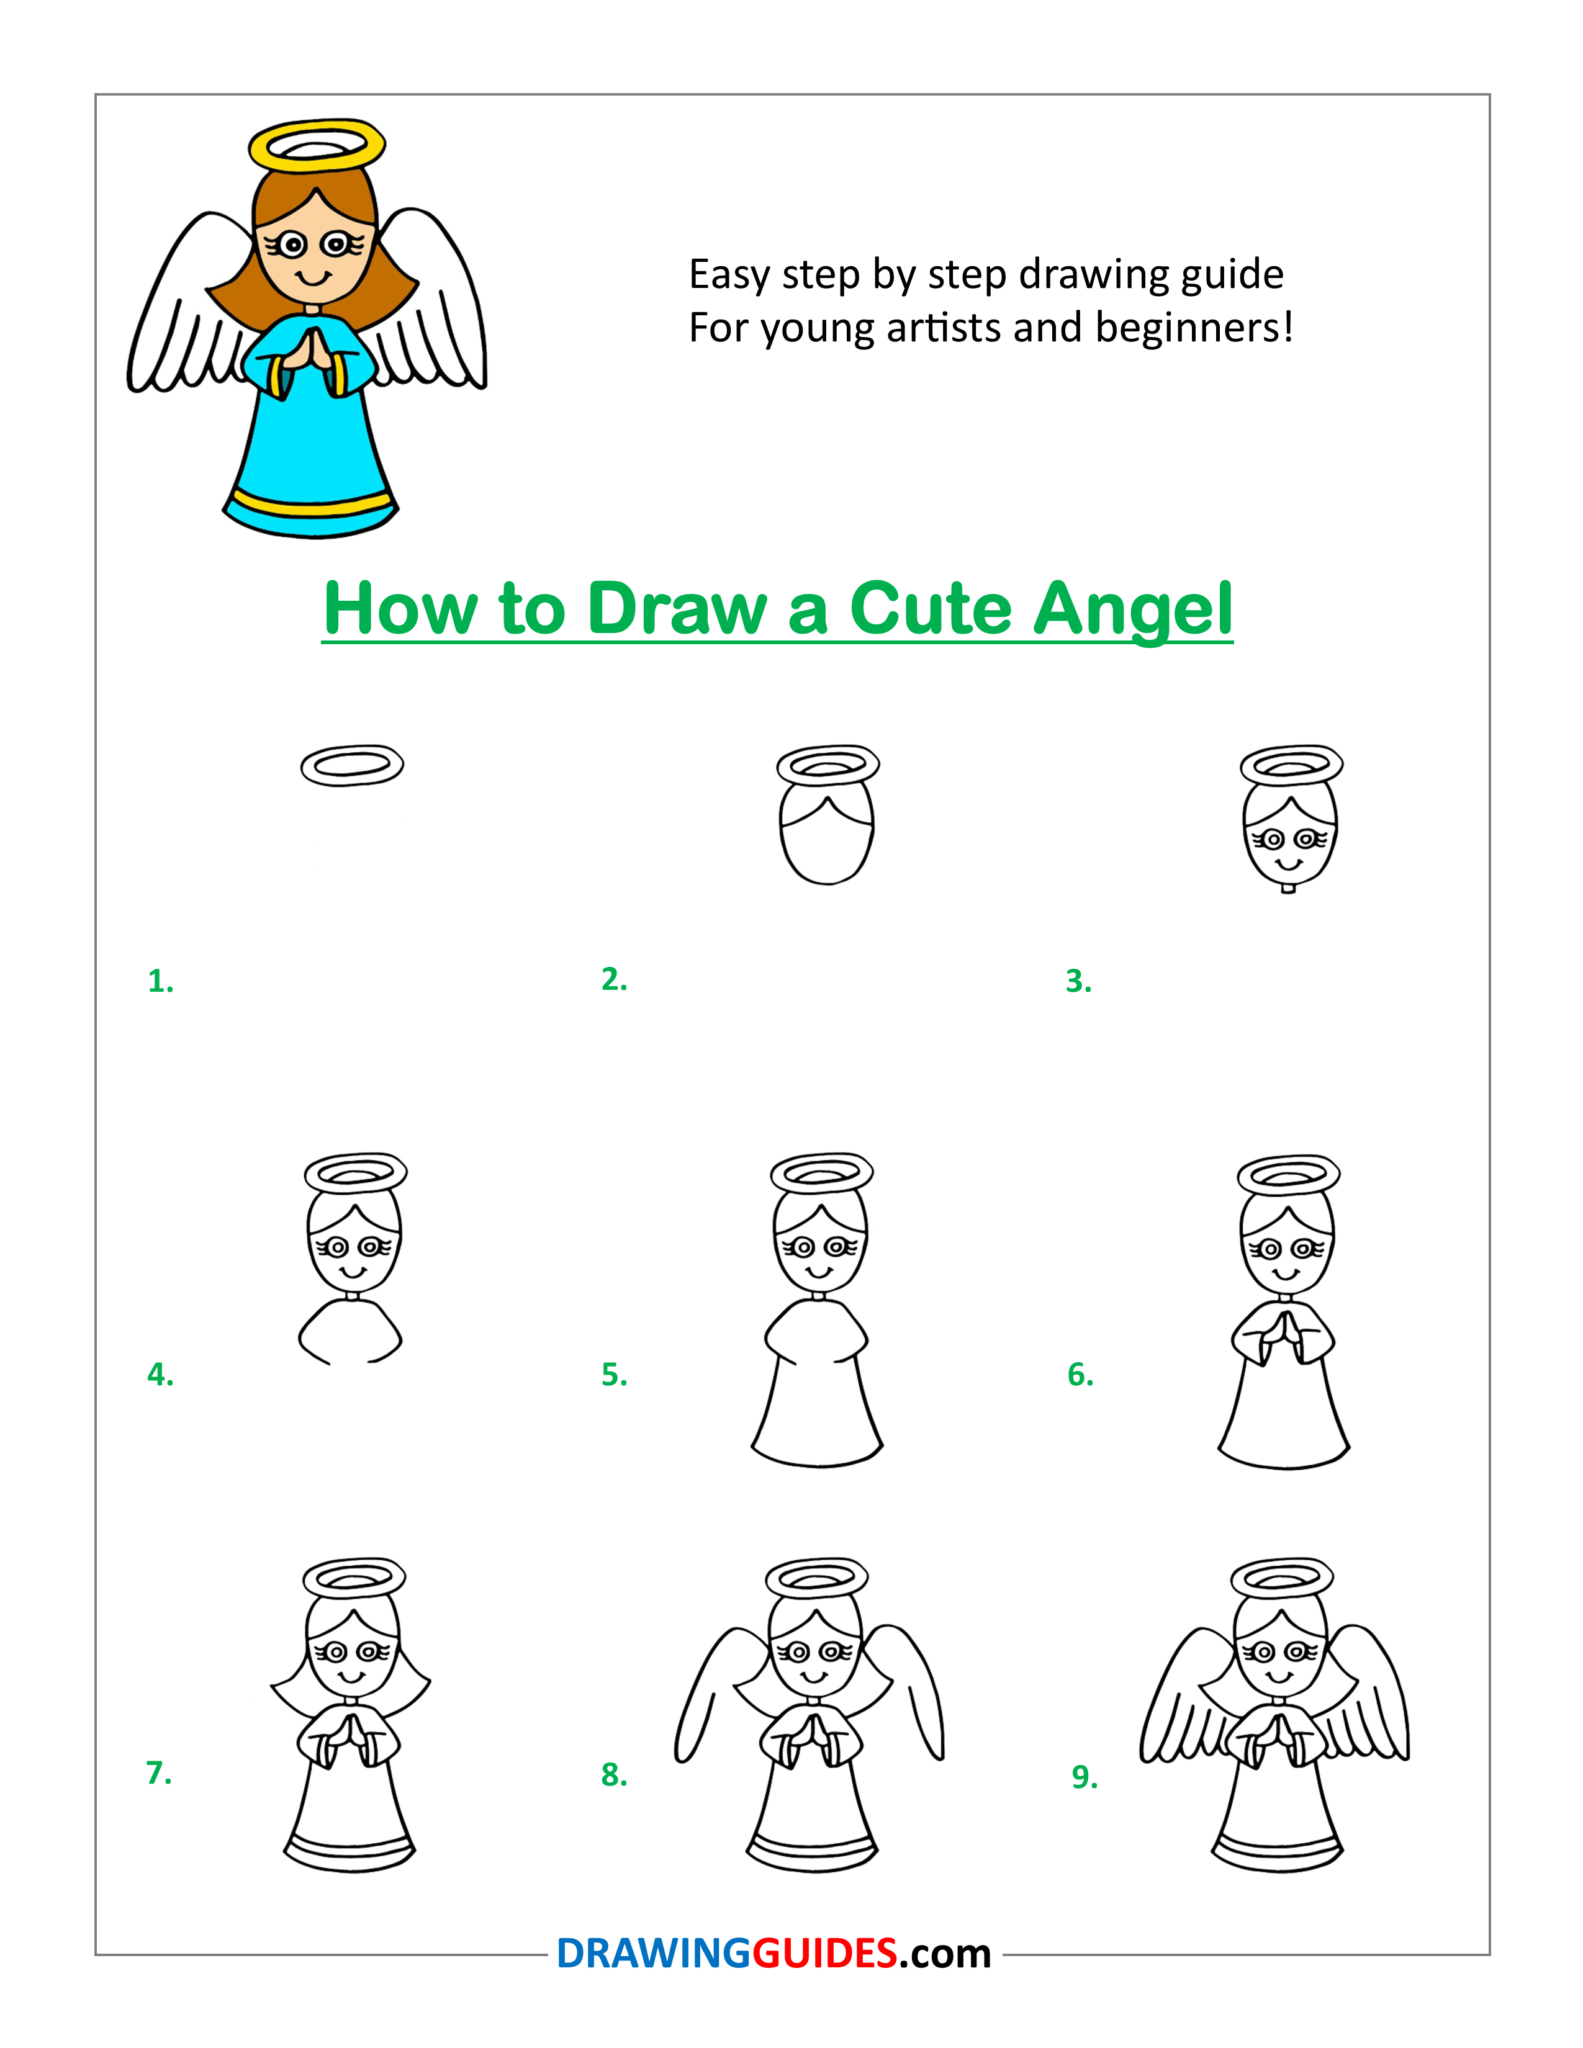
Perfect drawing for a chris. Web how to draw a angel easy and step by step. From the uppermost point on each line, draw a curved line, angling downward diagonally. Next, draw a smaller circle below the head for the angel’s body and two lines extending downwards for the legs. Web angel drawing step 1. Angels are often depicted with large, feathery wings. Draw the first of the angel's wings. Draw 2 connected curves on the lower part of the diamond. Use a long curved line for the top of the wing and a series of u shaped lines for the bottom of the wing. Add some wavy lines to make the hair look more natural and soft.
Angels are often depicted with large, feathery wings. These lines form the flight feathers of the wing. It is in video format so you can watch it at slow speed or even pause if you. Web hello,in this drawing lesson i show you how to draw an angel easily! Then create two more rows of ovals below the first row, making three rows of ovals in total. From the bottom of the head, draw two curved lines downwards to create the angel a graceful posture. Draw 2 connected curves on the lower part of the diamond. Then, connect the two lines by adding another curved line at the top. Draw the first of the angel's wings. This is a chibi style cartoon angel drawing tutorial lesson.
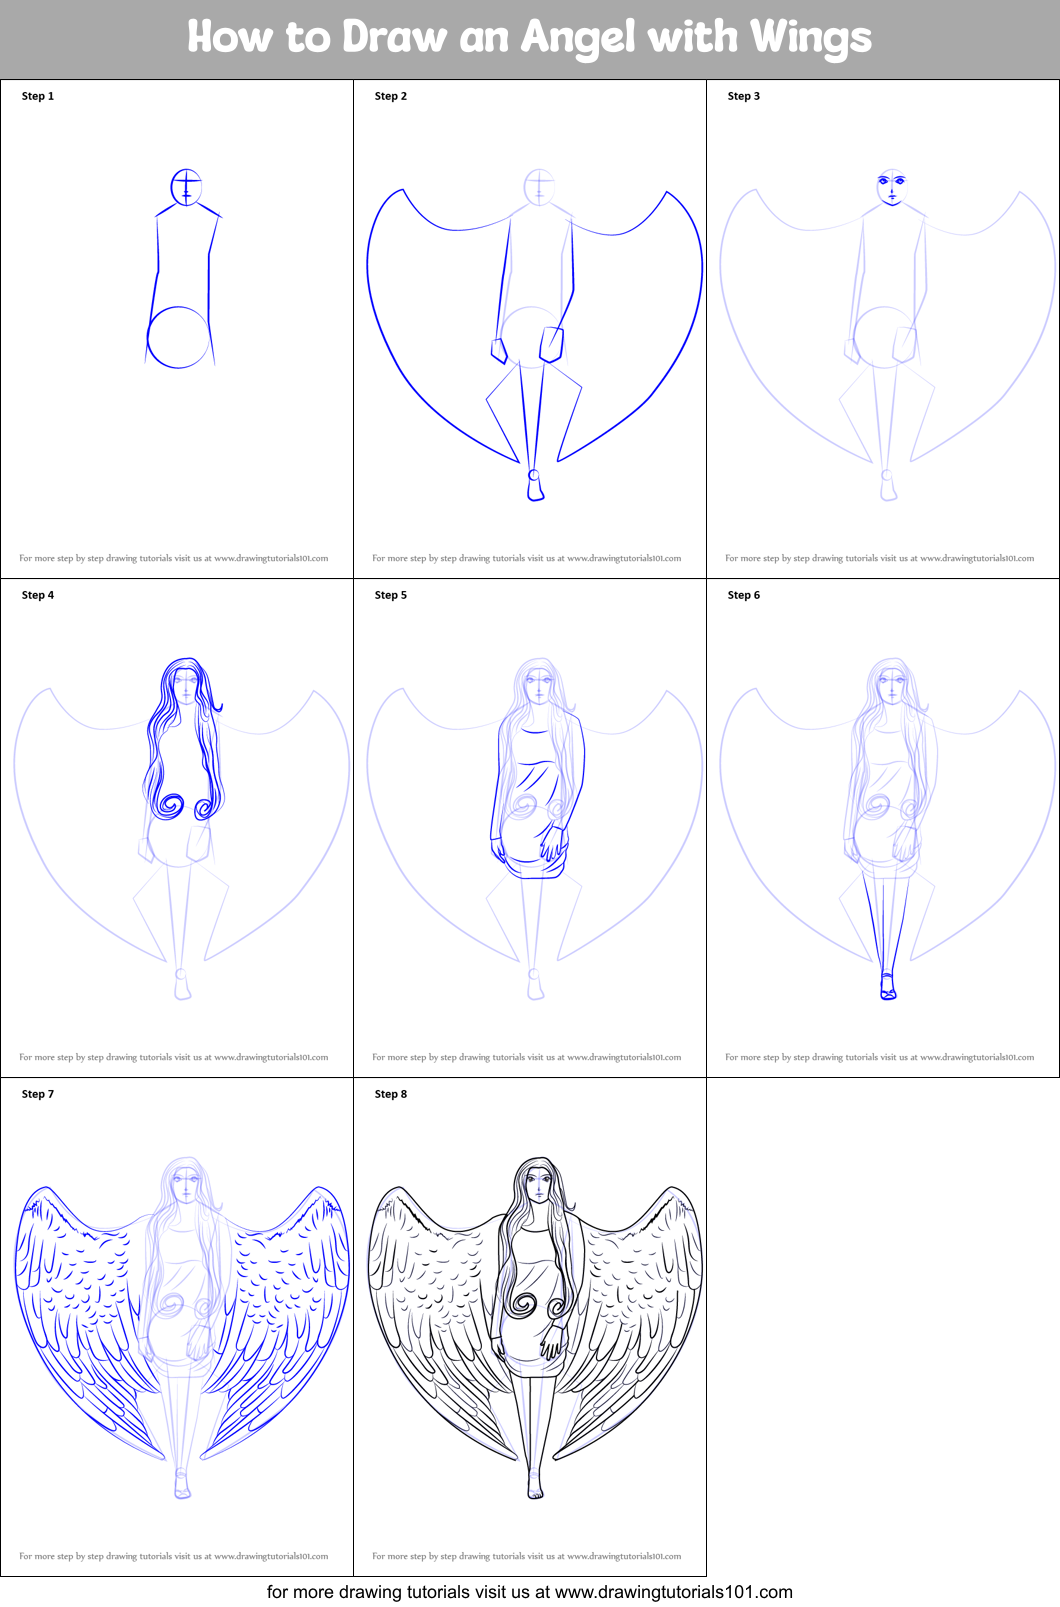
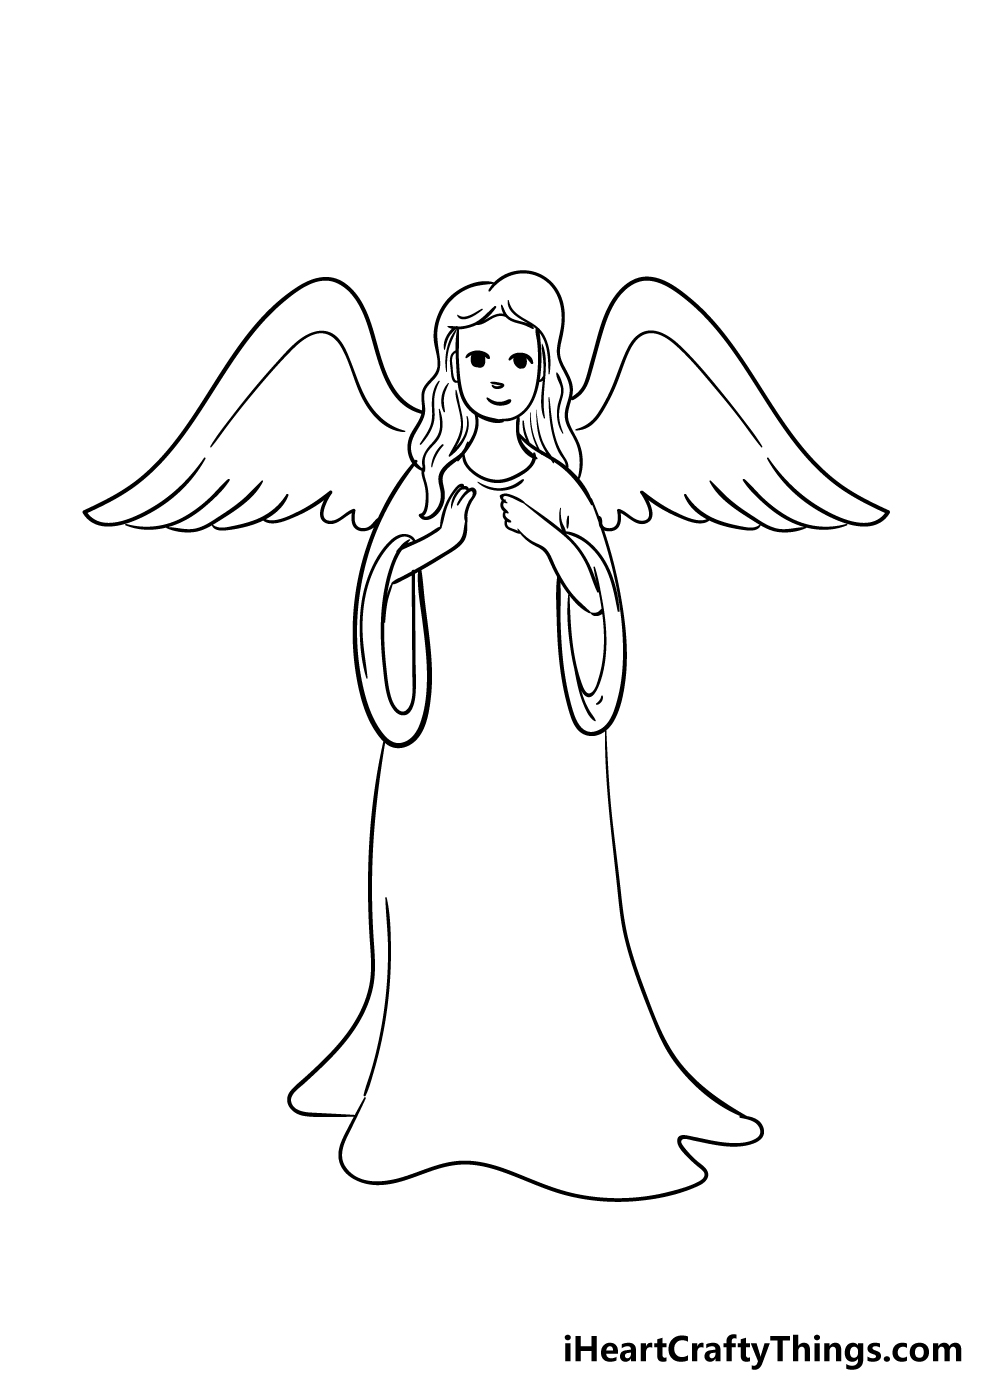
How to Draw an Angel with Wings printable step by step drawing sheet
Follow my step by step drawing tutorial and you are going to be able to make your own an. At the end of this line, draw another curved line, resembling a u turned on its side. Draw another sideways u shaped line at the end of the latter. Next, connect twos slightly slanted lines at the bottom and layer a.
How to Draw an Angel (Step by Step Pictures)
Then create two more rows of ovals below the first row, making three rows of ovals in total. Web how to draw a angel easy and step by step. To do that, sketch two vertical curved lines. This is a simple angel drawing tutorial hat can be used by any kid or beginner. Draw the first of the angel's wings.

Step by step drawing tutorial to create a minimalistic yet powerful
Draw another sideways u shaped line at the end of the latter. Web these lines will act as a guide for positioning the facial features. Angels are often depicted with large, feathery wings. Draw the same ovals at the intersection of the diamond and the curve. This is a chibi style cartoon angel drawing tutorial lesson.
How to Draw an Angel in a Few Easy Steps Easy Drawing Guides
Then, connect the two lines by adding another curved line at the top. It is in video format so you can watch it at slow speed or even pause if you. Next, connect twos slightly slanted lines at the bottom and layer a partial square on top of that, to great the folds of her dress. These lines form the.
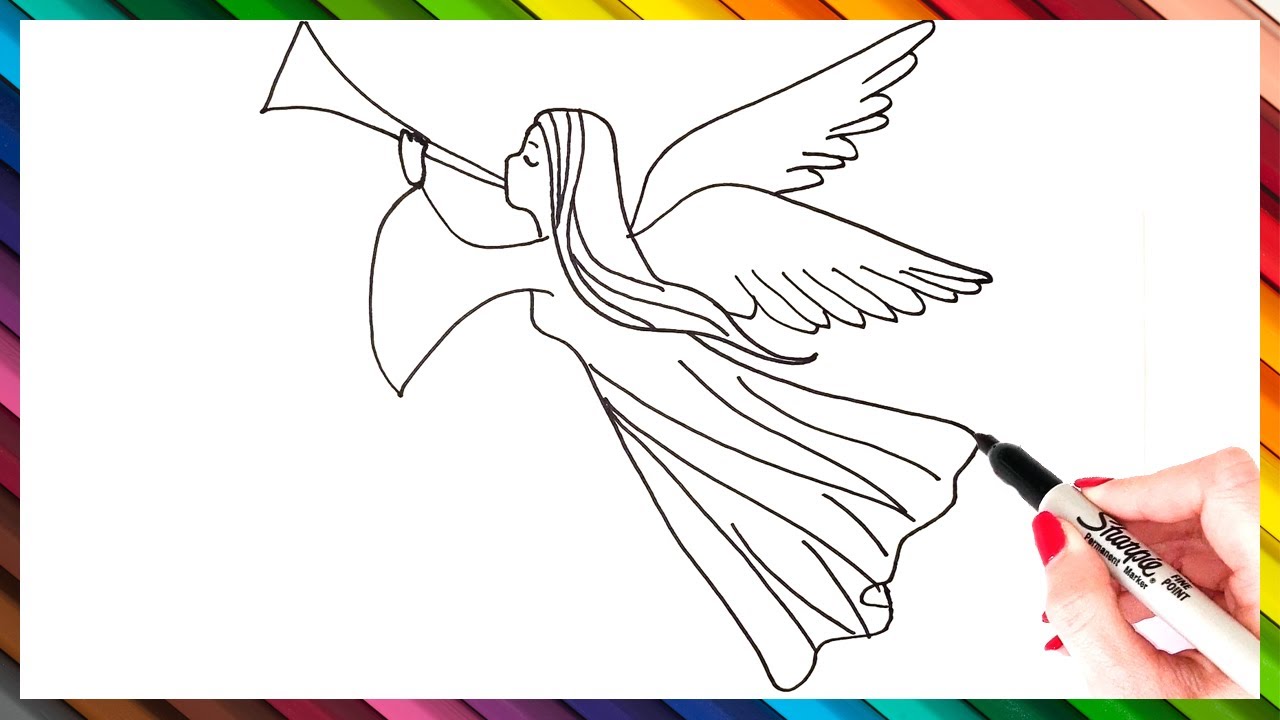
How To Draw An Angel Step By Step Angel Drawing EASY YouTube
Add some wavy lines to make the hair look more natural and soft. First, let’s draw the body of the angel. These lines form the flight feathers of the wing. Follow my step by step drawing tutorial and you are going to be able to make your own an. From the bottom of the head, draw two curved lines downwards.
How to Draw an Angel (Step by Step Pictures)
Above the angel’s head, sketch the hair. Then create two more rows of ovals below the first row, making three rows of ovals in total. Web how to draw a angel easy and step by step. These lines form the flight feathers of the wing. Web angel drawing step 1.
Angel Drawing How To Draw An Angel Step By Step
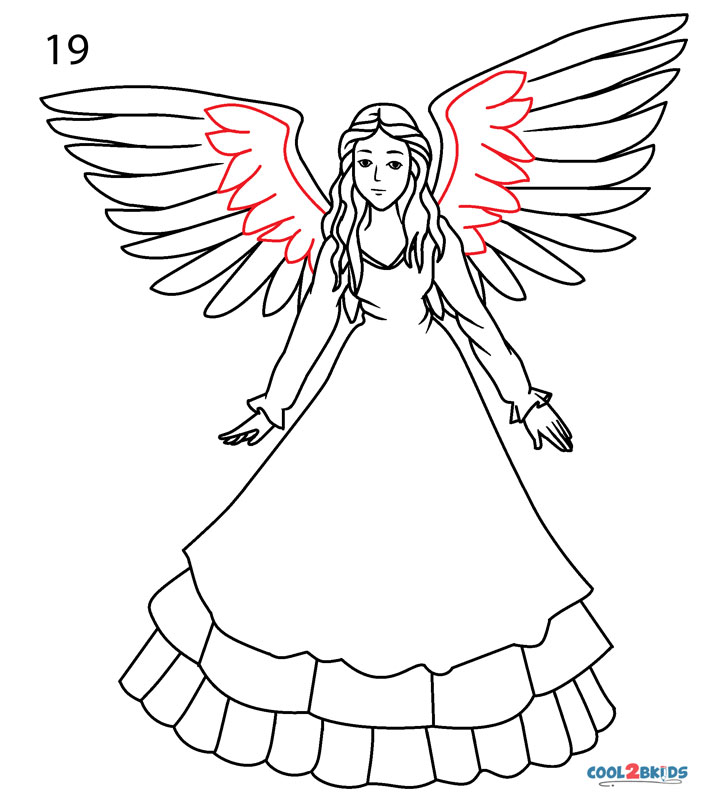
Extend two curved lines from the angel’s upper back, forming the wings’ shape. Draw 2 connected curves on the lower part of the diamond. This is a chibi style cartoon angel drawing tutorial lesson. It is in video format so you can watch it at slow speed or even pause if you. Web angel drawing step 1.

How To Draw An Angel Art For Kids Hub Art for kids hub, Angel
Extend two curved lines from the angel’s upper back, forming the wings’ shape. Next, draw a smaller circle below the head for the angel’s body and two lines extending downwards for the legs. Angels are often depicted with large, feathery wings. Draw 2 connected curves on the lower part of the diamond. Draw the same ovals at the intersection of.
How to Draw an Angel Step by Step Drawing Guides for Everyone!
From the bottom of the head, draw two curved lines downwards to create the angel a graceful posture. Use a long curved line for the top of the wing and a series of u shaped lines for the bottom of the wing. Then texture the wings with additional curved lines. This is a simple angel drawing tutorial hat can be.

How to Draw an Angel in a Few Easy Steps Easy Drawing Guides
It is in video format so you can watch it at slow speed or even pause if you. Draw this angel by following this drawing lesson. Above the angel’s head, sketch the hair. Draw another sideways u shaped line at the end of the latter. This is a simple angel drawing tutorial hat can be used by any kid or.
Then, Connect The Two Lines By Adding Another Curved Line At The Top.
Then texture the wings with additional curved lines. Next, draw a smaller circle below the head for the angel’s body and two lines extending downwards for the legs. Add some wavy lines to make the hair look more natural and soft. Above the angel’s head, sketch the hair.
Draw The First Of The Angel's Wings.
First, let’s draw the body of the angel. Start by draw an oval shape for the head. Draw this angel by following this drawing lesson. Web beautiful angel drawing.
Use A Long Curved Line For The Top Of The Wing And A Series Of U Shaped Lines For The Bottom Of The Wing.
Web how to draw a angel easy and step by step. Then create two more rows of ovals below the first row, making three rows of ovals in total. This is a chibi style cartoon angel drawing tutorial lesson. From the bottom of the head, draw two curved lines downwards to create the angel a graceful posture.
Extend Two Curved Lines From The Angel’s Upper Back, Forming The Wings’ Shape.
Perfect drawing for a chris. At the end of this line, draw another curved line, resembling a u turned on its side. This is a simple angel drawing tutorial hat can be used by any kid or beginner. These lines form the flight feathers of the wing.