How To Draw Blood Splatter
How To Draw Blood Splatter - Tap any tubes that contain additives to dislodge the additives from the walls of the tube. Pick a tiny brush size from the toolbar and click the “smudge” tool. Switch to a soft brush and contour the previously added structure lines. Close and reopen gimp (if it was open when you extracted the brush files). Simply subscribe and allow notificati. To begin, you will want to prepare the surface of your paper by wetting it down with some water. However, if you want larger splats, then you can add more paint to the toothbrush. Another technique would be to. Add a new color layer and select “multiply” from layer blending. Follow our step by step tutorial and be.
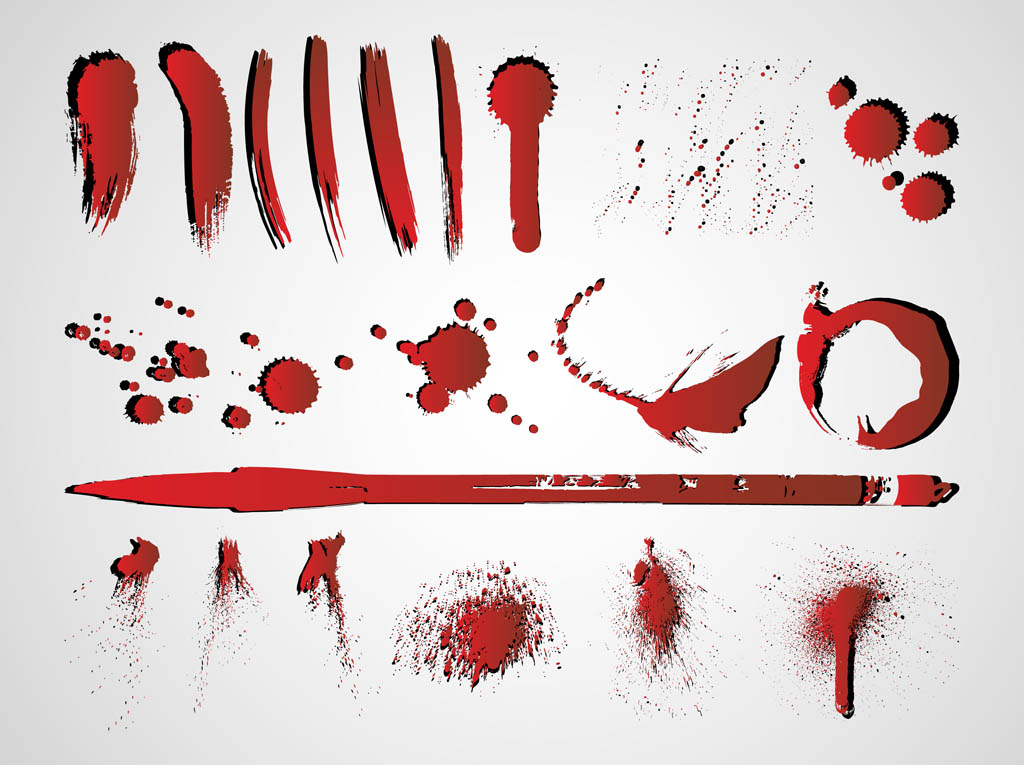
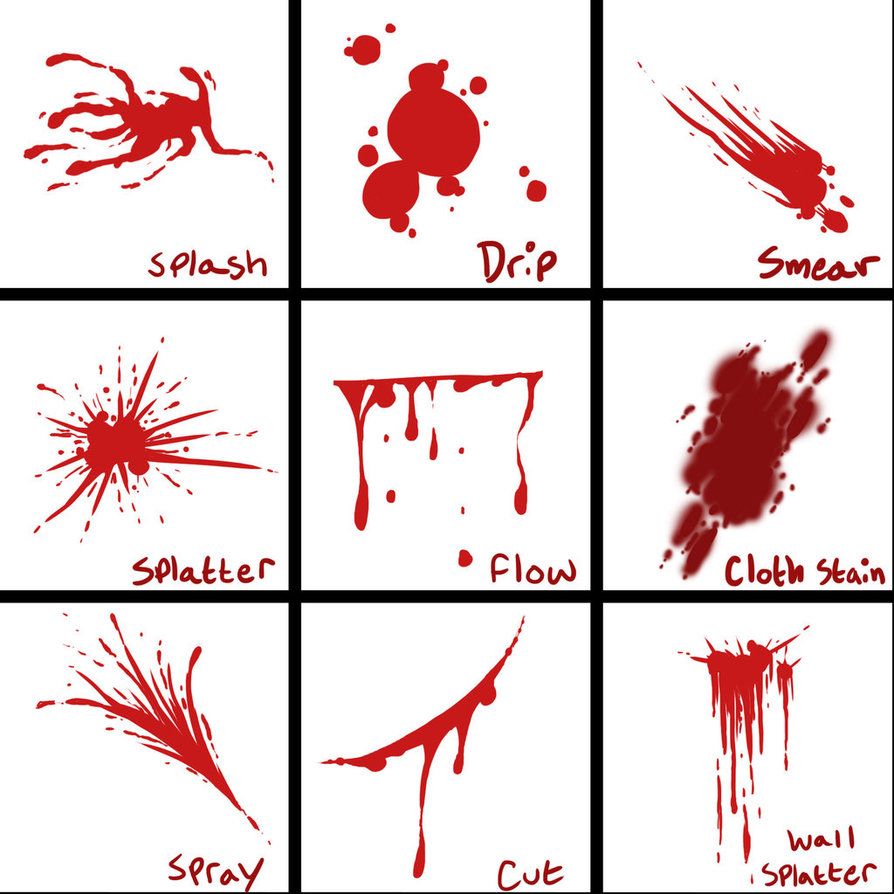
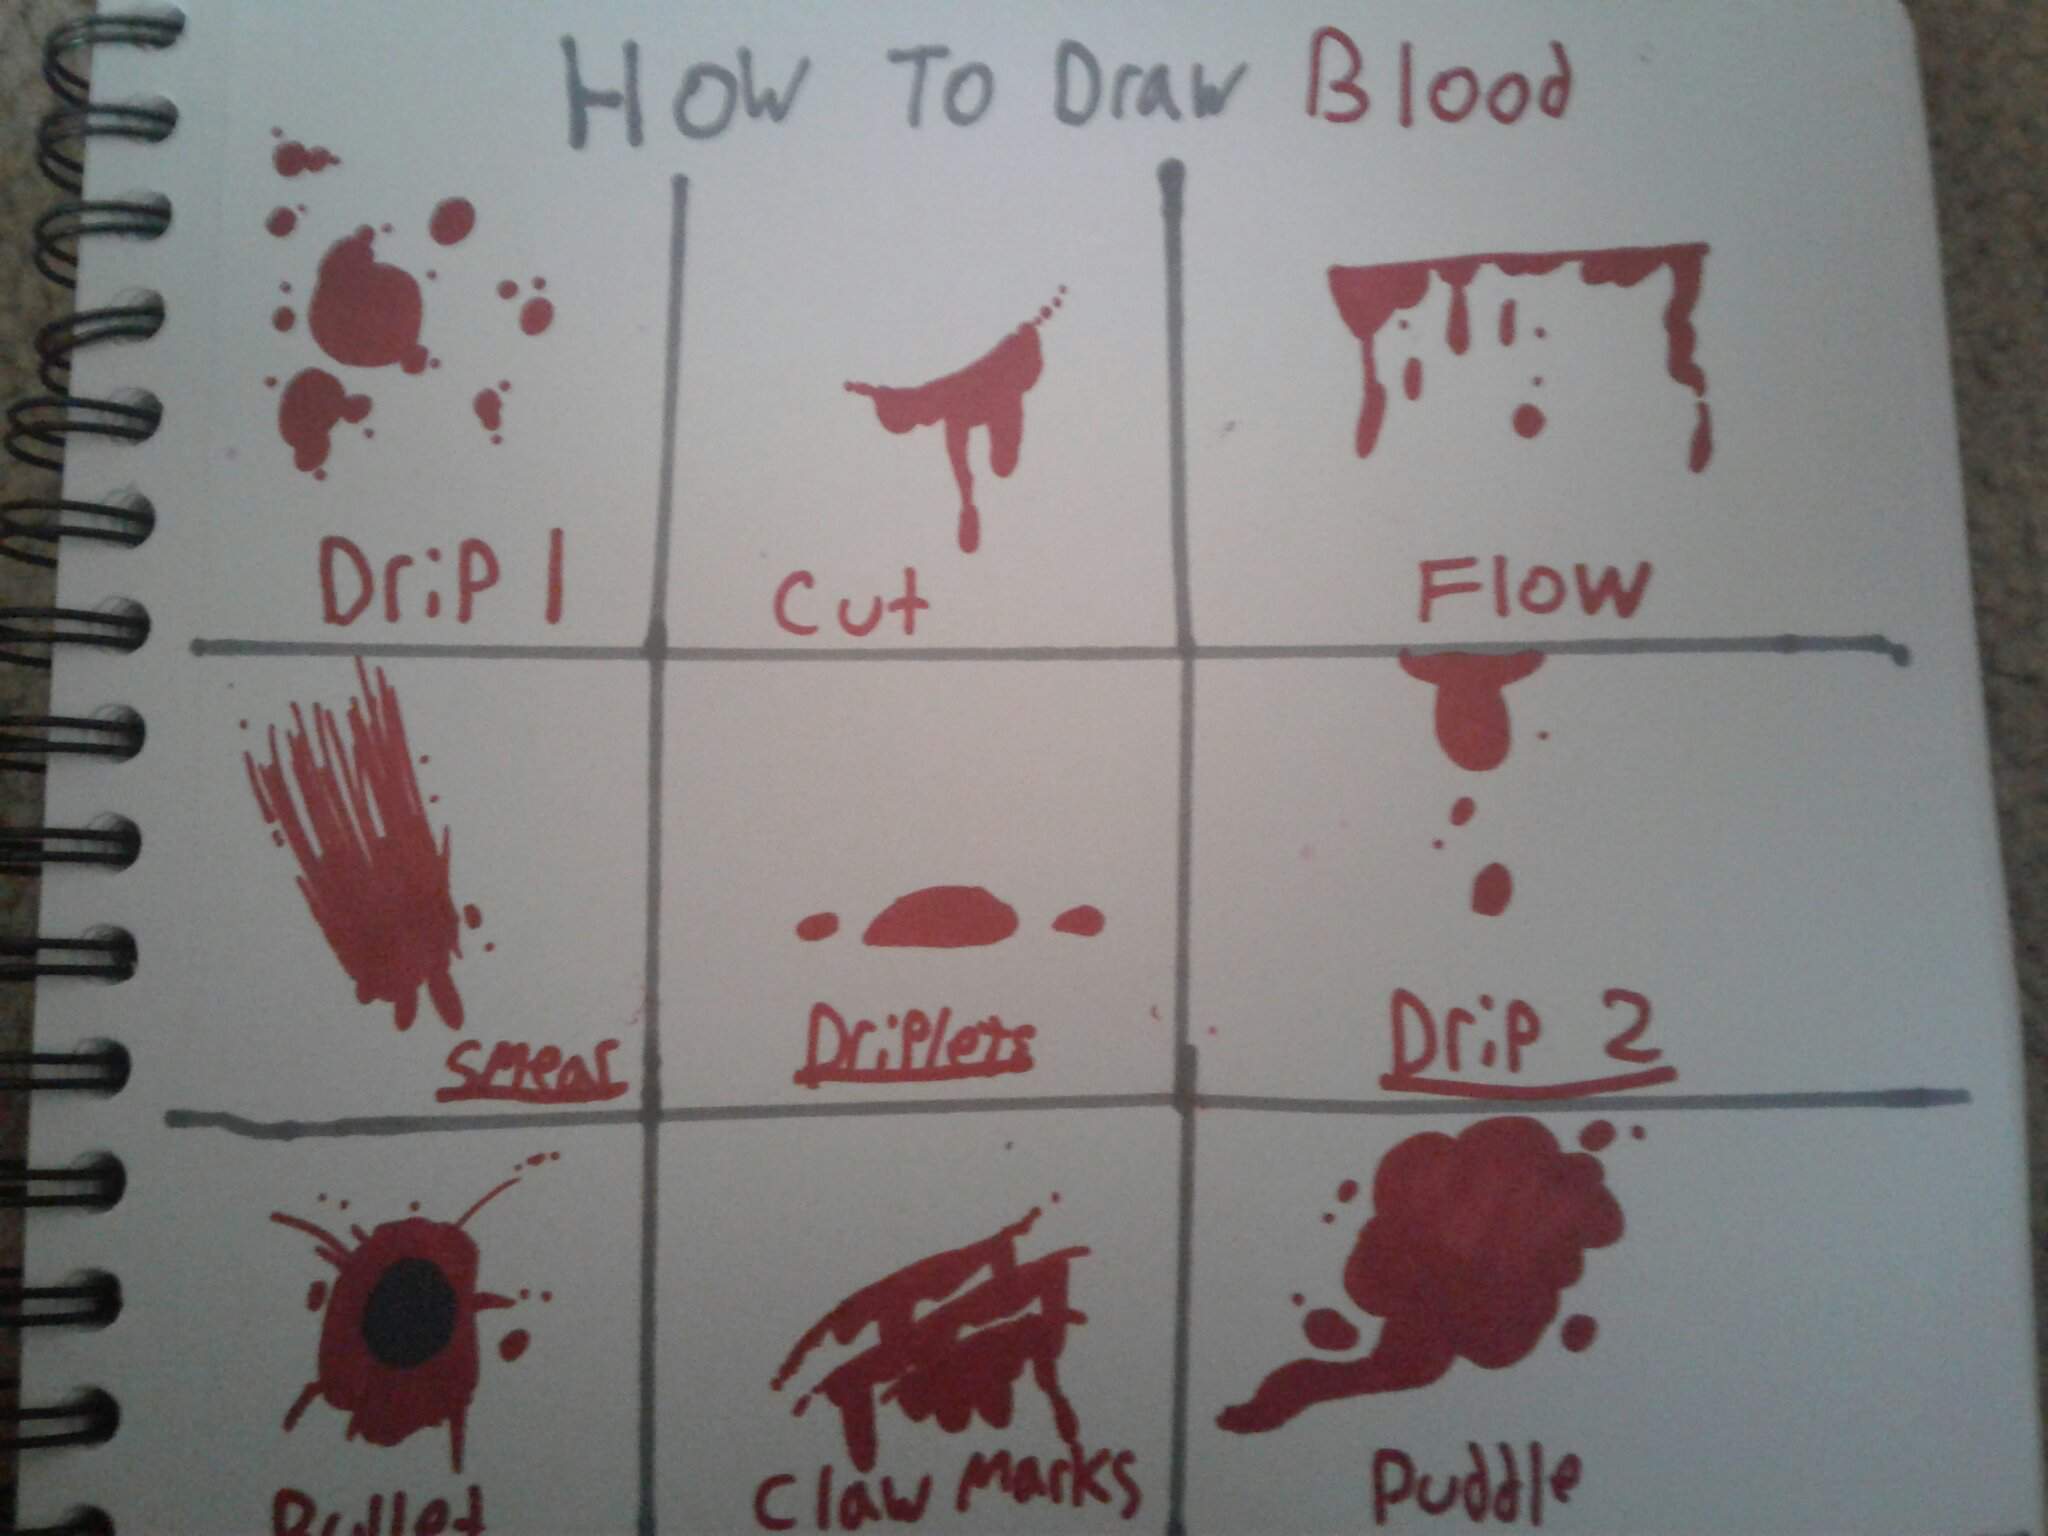
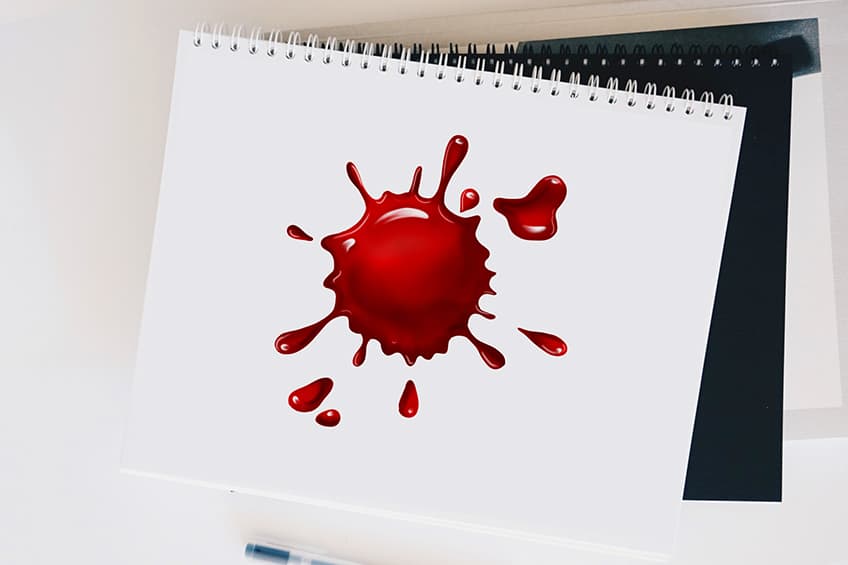
In this step you will start drawing the blood shapes. Web choose a variety of red and brown paint, brushes, paper and a cup of water. Web learn how to draw step by step in a fun way!come join and follow us to learn how to draw. Blood, like any other liquid, follows the laws of physics. Web blood spatter is categorized as impact spatter (created when a force is applied to a liquid blood source) or projection spatter (caused by arterial spurting, expirated spray or spatter cast off an object). Web blood / gore brush. Pick a tiny brush size from the toolbar and click the “smudge” tool. Add a new color layer and select “multiply” from layer blending. Next, trace over the outline with the light pink (328) prisma color pencil. Simply subscribe and allow notificati.
Students hit the sponge with a bat, pole, hammer, or some other heavy blunt object. Pick a tiny brush size from the toolbar and click the “smudge” tool. With a blending brush, soften both the structure lines and. We will make two examples: But not for like when you slaughtered somone. To catch the spatter for observation, set up a piece of poster paper just in front of the sponge. Add a new color layer and select “multiply” from layer blending. This will create a consistent base to work on. It's simple!simply subscribe us for more drawing tutorial. Choose the airbrush tool and a foreground color to match the blood spatter color you want.
How To Draw Blood Splatters Learn how to draw step by step in a fun way
Web soak a sponge or washcloth in the blood substitute. With a blending brush, soften both the structure lines and. Thread the needle into the holder. But not for like when you slaughtered somone. Simply subscribe and allow notificati.
Blood Splatter Drawing at GetDrawings Free download
Learn how to draw easily with our simple method. The second part will have more painting in it. To begin, you will want to prepare the surface of your paper by wetting it down with some water. Pick a tiny brush size from the toolbar and click the “smudge” tool. Close and reopen gimp (if it was open when you.
How To Draw Blood Art Amino
Make sure to not press down too hard. Thread the needle into the holder. With a blending brush, soften both the structure lines and. Tap any tubes that contain additives to dislodge the additives from the walls of the tube. The characteristics of blood spatter depend on the speed at which the blood leaves the body and the type of.

Blood Splatter Drawing at GetDrawings Free download
These paths converge, providing a position from which the blood originated. But not for like when you slaughtered somone. Switch to a soft brush and contour the previously added structure lines. Web blood / gore brush. I see there is a brush who look like that in krita but i found it's good only for splash on walls or floor.

How To Draw Blood Splatters How to draw blood splatter
Close and reopen gimp (if it was open when you extracted the brush files). Bear in mind that painting rather small circles, not big circles. Simply subscribe and allow notificati. To begin, you will want to prepare the surface of your paper by wetting it down with some water. But not for like when you slaughtered somone.

How To Draw Blood, Step by Step, Drawing Guide, by Dawn DragoArt
Learn how to draw easily with our simple method. The end should have no obstructions or hooks that will restrict the flow of blood. Select your red compound path and click the new brush button from the brushes panel ( window > brushes ). Web inspect your needle for defects. I see there is a brush who look like that.
How to Draw Blood Create a Realistic Blood Drawing
Students hit the sponge with a bat, pole, hammer, or some other heavy blunt object. The second part will have more painting in it. Next draw a few pointed shapes for the pool of blood and then. Web thanks for visiting pikasso draw, the best place to learn how to draw. However, if you want larger splats, then you can.
Blood Splatter Drawing at GetDrawings Free download
Students hit the sponge with a bat, pole, hammer, or some other heavy blunt object. Next, trace over the outline with the light pink (328) prisma color pencil. Before the brush even hits the canvas, it’s crucial to understand the dynamics behind blood splatter. In this step you will start drawing the blood shapes. Tap any tubes that contain additives.

how to draw blood splatters apstudioartphotography
This part is the easy part with no painting required and mostly relies on splatter brushes, adjustment layers, and blending modes. Choose the airbrush tool and a foreground color to match the blood spatter color you want. The second part will have more painting in it. We will make two examples: Be an expert in drawing by learning to draw.

How To Draw Blood Splatters Learn how to draw step by step in a fun way
Web choose a variety of red and brown paint, brushes, paper and a cup of water. But not for like when you slaughtered somone. Select one of the custom brushes. Web thanks for visiting pikasso draw, the best place to learn how to draw. Follow our step by step tutorial and be.
However, If You Want Larger Splats, Then You Can Add More Paint To The Toothbrush.
Before the brush even hits the canvas, it’s crucial to understand the dynamics behind blood splatter. Select one of the custom brushes. You can do this by using a brush or your finger. Next, trace over the outline with the light pink (328) prisma color pencil.
I See There Is A Brush Who Look Like That In Krita But I Found It's Good Only For Splash On Walls Or Floor.
Watch this tutorial and unleash your creativity. To create the appearance of bleeding, gently brush the red color downward using the ‘smudge tool.’. All you have to do is draw different shapes and sizes of the blood drips. Add a new color layer and select “multiply” from layer blending.
Web Thanks For Visiting Pikasso Draw, The Best Place To Learn How To Draw.
The second part will have more painting in it. Web learn how to draw realistic and stylized blood effects with medibang art, a free digital painting software. Use “burn” from the toolbar to darken the wound’s core. To begin, you will want to prepare the surface of your paper by wetting it down with some water.
Web 20 Cleaning Secrets Only Car Detailers Know.
But not for like when you slaughtered somone. Make sure to not press down too hard. Web thanks for visiting our drawing tutorial in 5 minutes. This part is the easy part with no painting required and mostly relies on splatter brushes, adjustment layers, and blending modes.