How To Draw Clovers
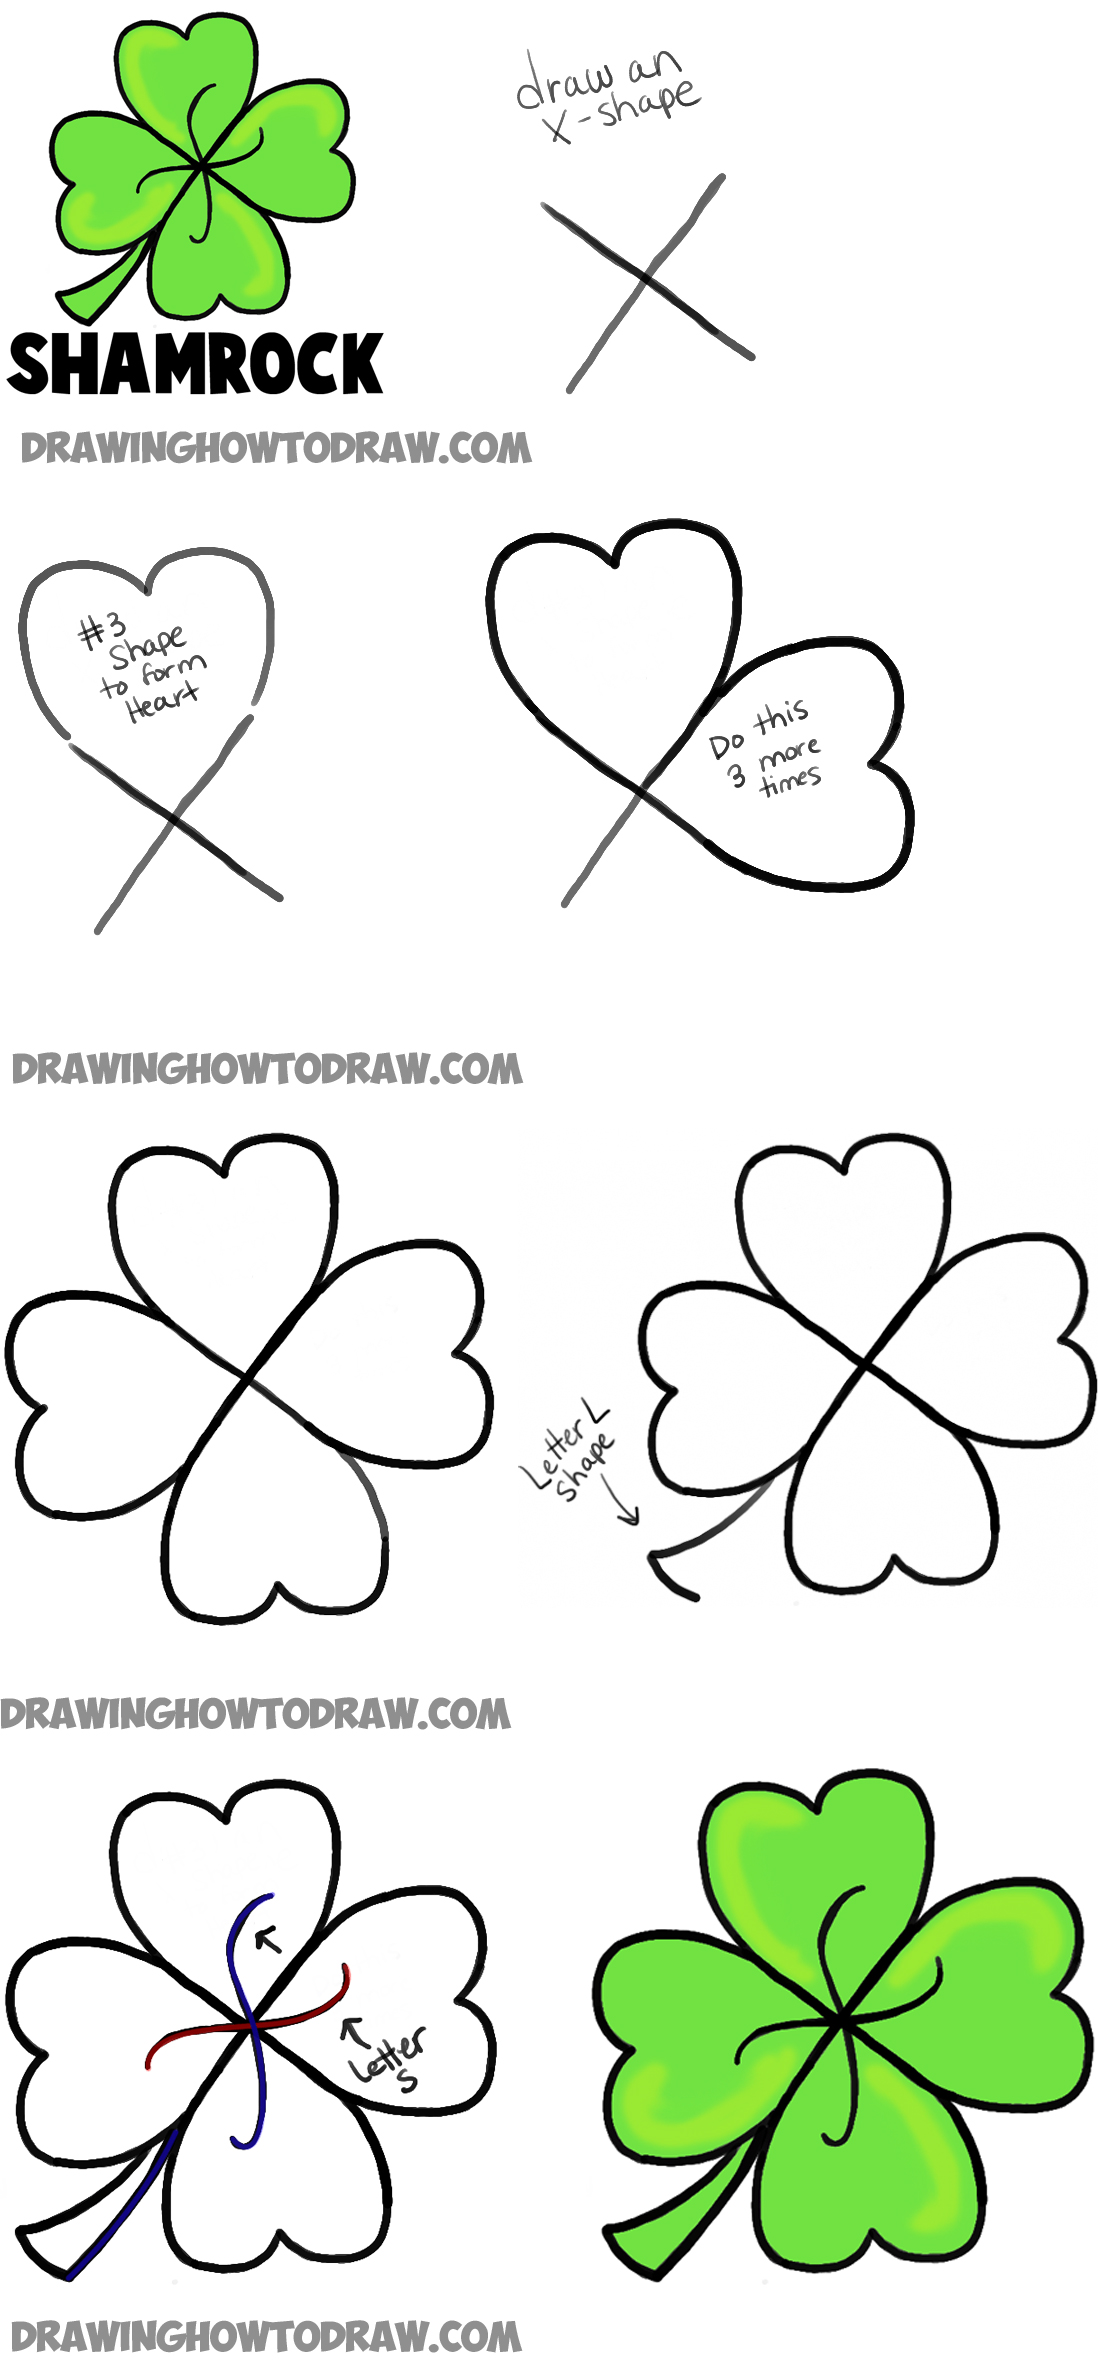
How To Draw Clovers - Add shadows a little for the dark spot. We begin constructing the leaves of your clover drawing. Draw two more heart shapes, one on the left and one on the right of the center leaf. Pay attention to the different sizes and shapes of each part of the four leaf clover. So, first draw the first clover petal. Notice how they taper on the end and have a slight curve. Now make the same “˜3′ shape on the bottom of the x to form another heart. Create the four clover leaves. We don’t create the basic shapes or layouts first, but draw the individual parts of the clover. This is an easy tutorial that anyone can follow.
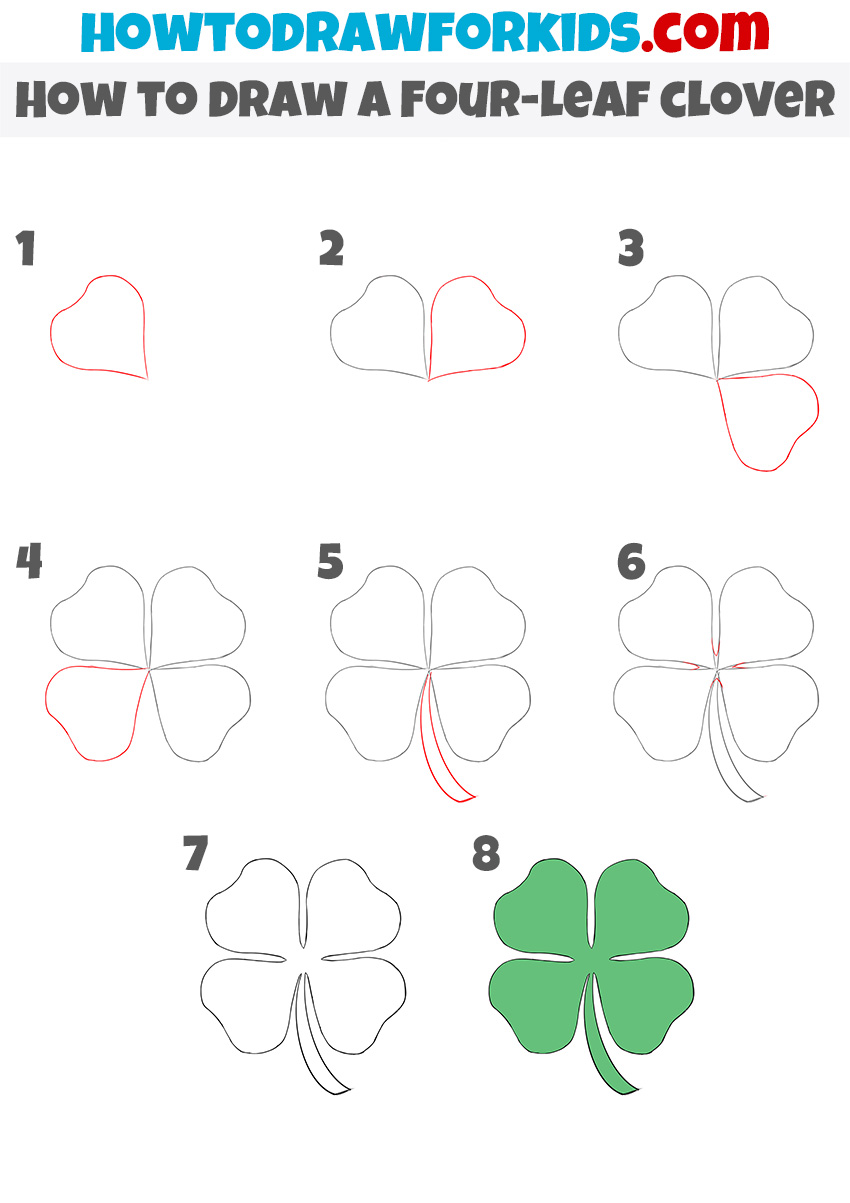
Then, draw a heart shape at the tip of your stem to form the first leaf. ④draw the pattern of the leaf. Start by drawing a straight vertical line in the center of your paper. Begin by drawing a heart. Web black marker (optional) how to draw a four leaf clover printable pdf (see bottom of lesson) in this step by step lesson, we are going to learn how to draw a four leaf clover with your drawing materials. So, first draw the first clover petal. Ready to take your drawing to the next level!? Each heart’s point meets in the middle. Using a sharp pencil, draw a clear x shape on a piece of paper or canvas. How to draw a four leaf cloversubscribe:
Draw a small heart shape that tilts slightly to the left. Now you’ll sketch in center vein marks on each petal starting from the center. In this video, we will show you how to. Patrick's day crafts and diy projects! This is an easy tutorial that anyone can follow. Add yellow where the light hits, blue where the light reflects. Make sure it is long enough to accommodate the entire clover shape. Using a sharp pencil, draw a clear x shape on a piece of paper or canvas. Pay attention to the different sizes and shapes of each part of the four leaf clover. Each leaf is shaped like a heart, so we are going to draw four of these, with the points meeting at the center.

How to Draw a Four Leaf Clover YouTube
We begin constructing the leaves of your clover drawing. Make sure it is long enough to accommodate the entire clover shape. Create the four clover leaves. Start by drawing a straight vertical line in the center of your paper. Let’s draw one of the leaves.

How to Draw a Clover 11 Steps (with Pictures) wikiHow
How to draw a clover. Remember to have fun and be creative! Draw two more heart shapes, one on the left and one on the right of the center leaf. This how to draw a four leaf clover lesson is especially for young artists. Web black marker (optional) how to draw a four leaf clover printable pdf (see bottom of.

How to Draw a Four Leaf Clover A Fun Shamrock Drawing Tutorial
So, first draw the first clover petal. To draw a clover quickly and easily, sketch a long, curved arc for the stem. Start by drawing a straight vertical line in the center of your paper. Now you’ll sketch in center vein marks on each petal starting from the center. Begin by drawing a heart.

How to Draw a Four Leaf Clover (Step by Step Pictures)
Draw two more heart shapes, one on the left and one on the right of the center leaf. Draw a small heart shape that tilts slightly to the left. Add shadows a little for the dark spot. Next draw in the other 3 leaflet shapes, joining the points in the middle. In this video, we will show you how to.
How to Draw a Four Leaf Clover or Shamrocks for Saint Patricks Day
Draw this cute clover by following this. 122 views 1 year ago. This line will serve as the stem of the clover. Welcome to moshley drawing channel. After they complete their clover cutout, let your young artists finish their drawing any way they want.

How to draw a clover easy step by step instruction for kids
Draw a small heart shape that tilts slightly to the left. Begin by drawing a heart. Patrick's day crafts and diy projects! Four leaf clover drawing video. 27k views 7 years ago.
How to Draw a Four Leaf Clover YouTube
Add shadows a little for the dark spot. Using straight lines, intersecting at the straight angle, show the clove leaf veins growth direction. So, first draw the first clover petal. ④draw the pattern of the leaf. Draw two more heart shapes, one on the left and one on the right of the center leaf.
How to Draw a FourLeaf Clover Easy Drawing Tutorial For Kids
It's a great way to turn a heart shape tiny flower into a shamrock drawing. 439 views 2 years ago #drawingforkids #lucky #fourleafclover. Add shadows a little for the dark spot. ④draw the pattern of the leaf. How to draw a clover.

How to Draw a Four Leaf Clover HelloArtsy
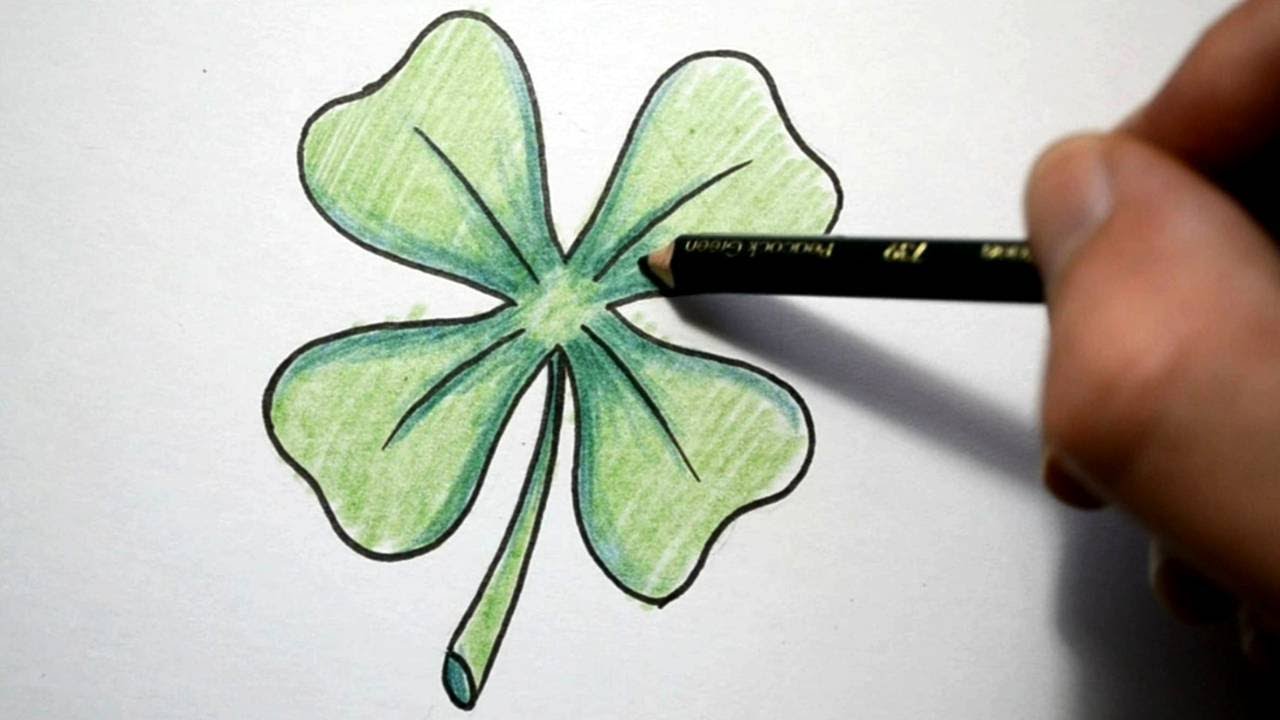
Web you could use a digital drawing tablet, or you could use coloring pens or pencils. Add yellow where the light hits, blue where the light reflects. 27k views 7 years ago. How to draw a clover. Create the four clover leaves.

How to Draw a FourLeaf Clover Easy Drawing Tutorial For Kids
Ready to take your drawing to the next level!? Each heart’s point meets in the middle. 27k views 7 years ago. This line will serve as the stem of the clover. Four leaf clover drawing video.
Draw A Small Heart Shape That Tilts Slightly To The Left.
This how to draw a four leaf clover lesson is especially for young artists. Obviously, as the name suggests, there are four. Remember to have fun and be creative! This is your first cloverleaf.
Subscribe For Regular Drawing And Art Lessons:
Adjust the whole image to look lively, then the painting is completed. Using straight lines, intersecting at the straight angle, show the clove leaf veins growth direction. Notice how they taper on the end and have a slight curve. This line will serve as the stem of the clover.
Now You’ll Sketch In Center Vein Marks On Each Petal Starting From The Center.
To draw a clover quickly and easily, sketch a long, curved arc for the stem. Create the four clover leaves. Draw a circle that will serve as your clover base and draw a line to show the direction of the stalk. Next draw in the other 3 leaflet shapes, joining the points in the middle.
Do You Believe In Luck?
Now draw the same heart on the remaining sides. Welcome to moshley drawing channel. Begin by drawing a heart. We used green and blue construction paper, a black marker, oil pastels, scissors, and glue.