How To Draw Ears Step By Step
How To Draw Ears Step By Step - The left side of the curve should curl slightly into the center of the ear. Doms ( zoom ultimate dark ) pencil كيفية رسم الأذن مع خطوات للمبتدئين#pencildrawing #. Don’t connect this line completely to the left edge because we want to leave some. Our how to draw book is here! Then, you will learn to apply tones and finally, you will work on adding some shades that will make the painting seem more realistic. Web draw in the details of the rim of the ear, notice how in the example we can see that on the left side the line curves in towards the middle. The bottom of the ear tends to align with the base of the nose. The further you go into. At the top of the shape create another line in a shape like one side of a heart. Once we have an ear sketch done with a pencil we can now begin to shade with a pen.
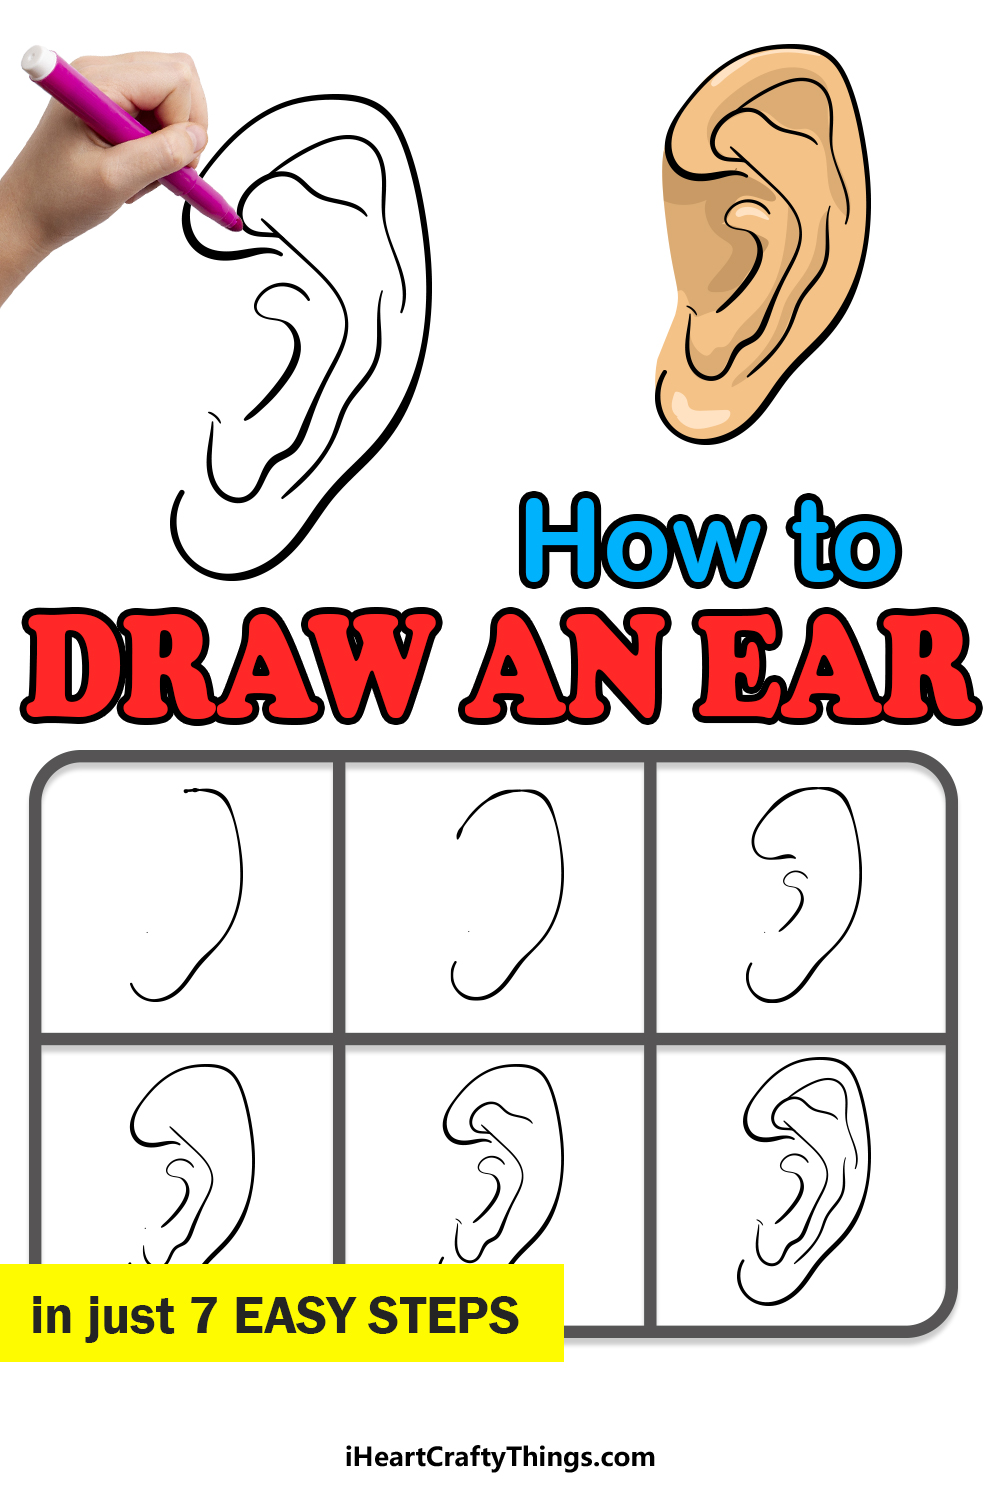
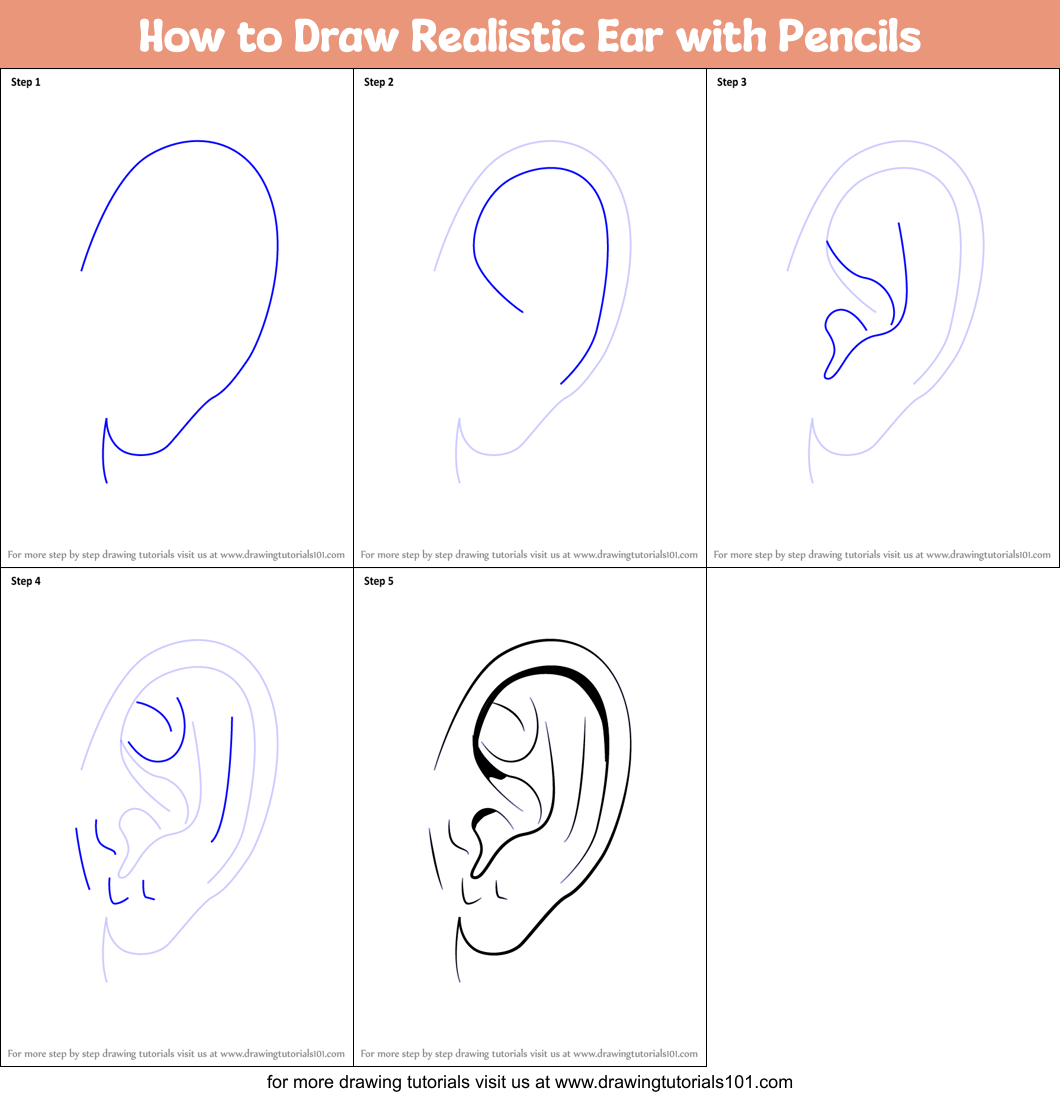
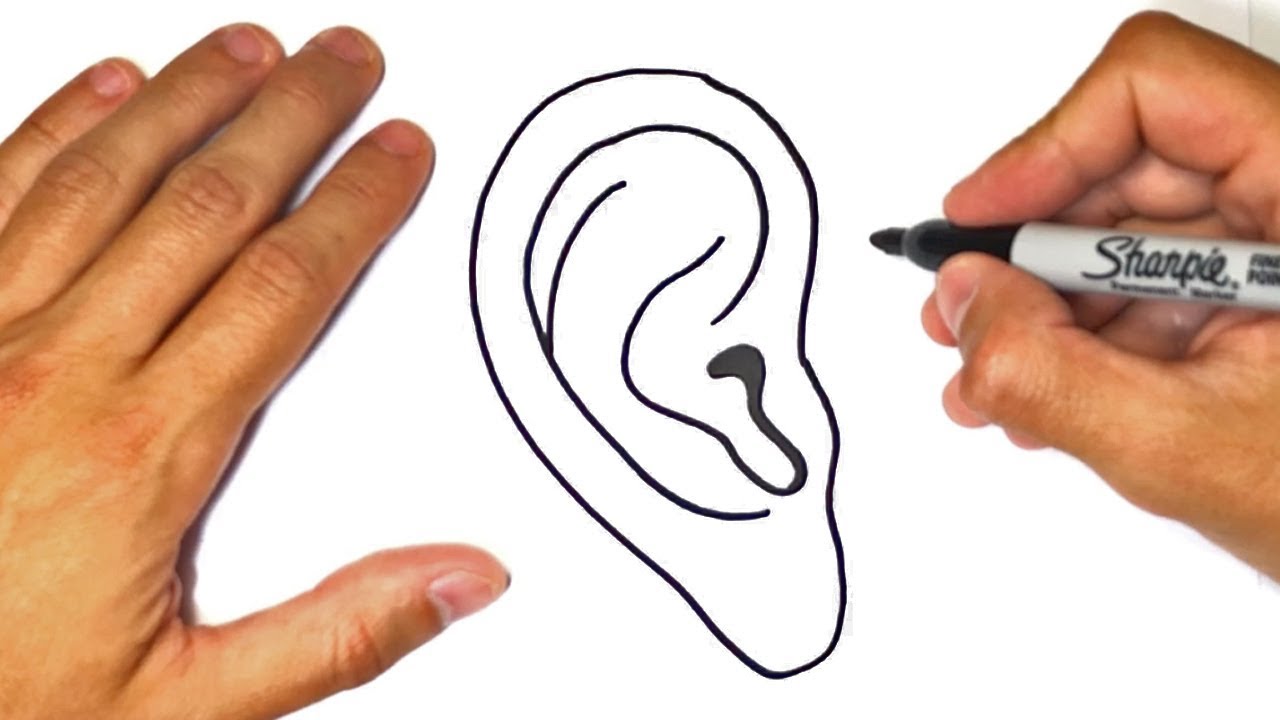
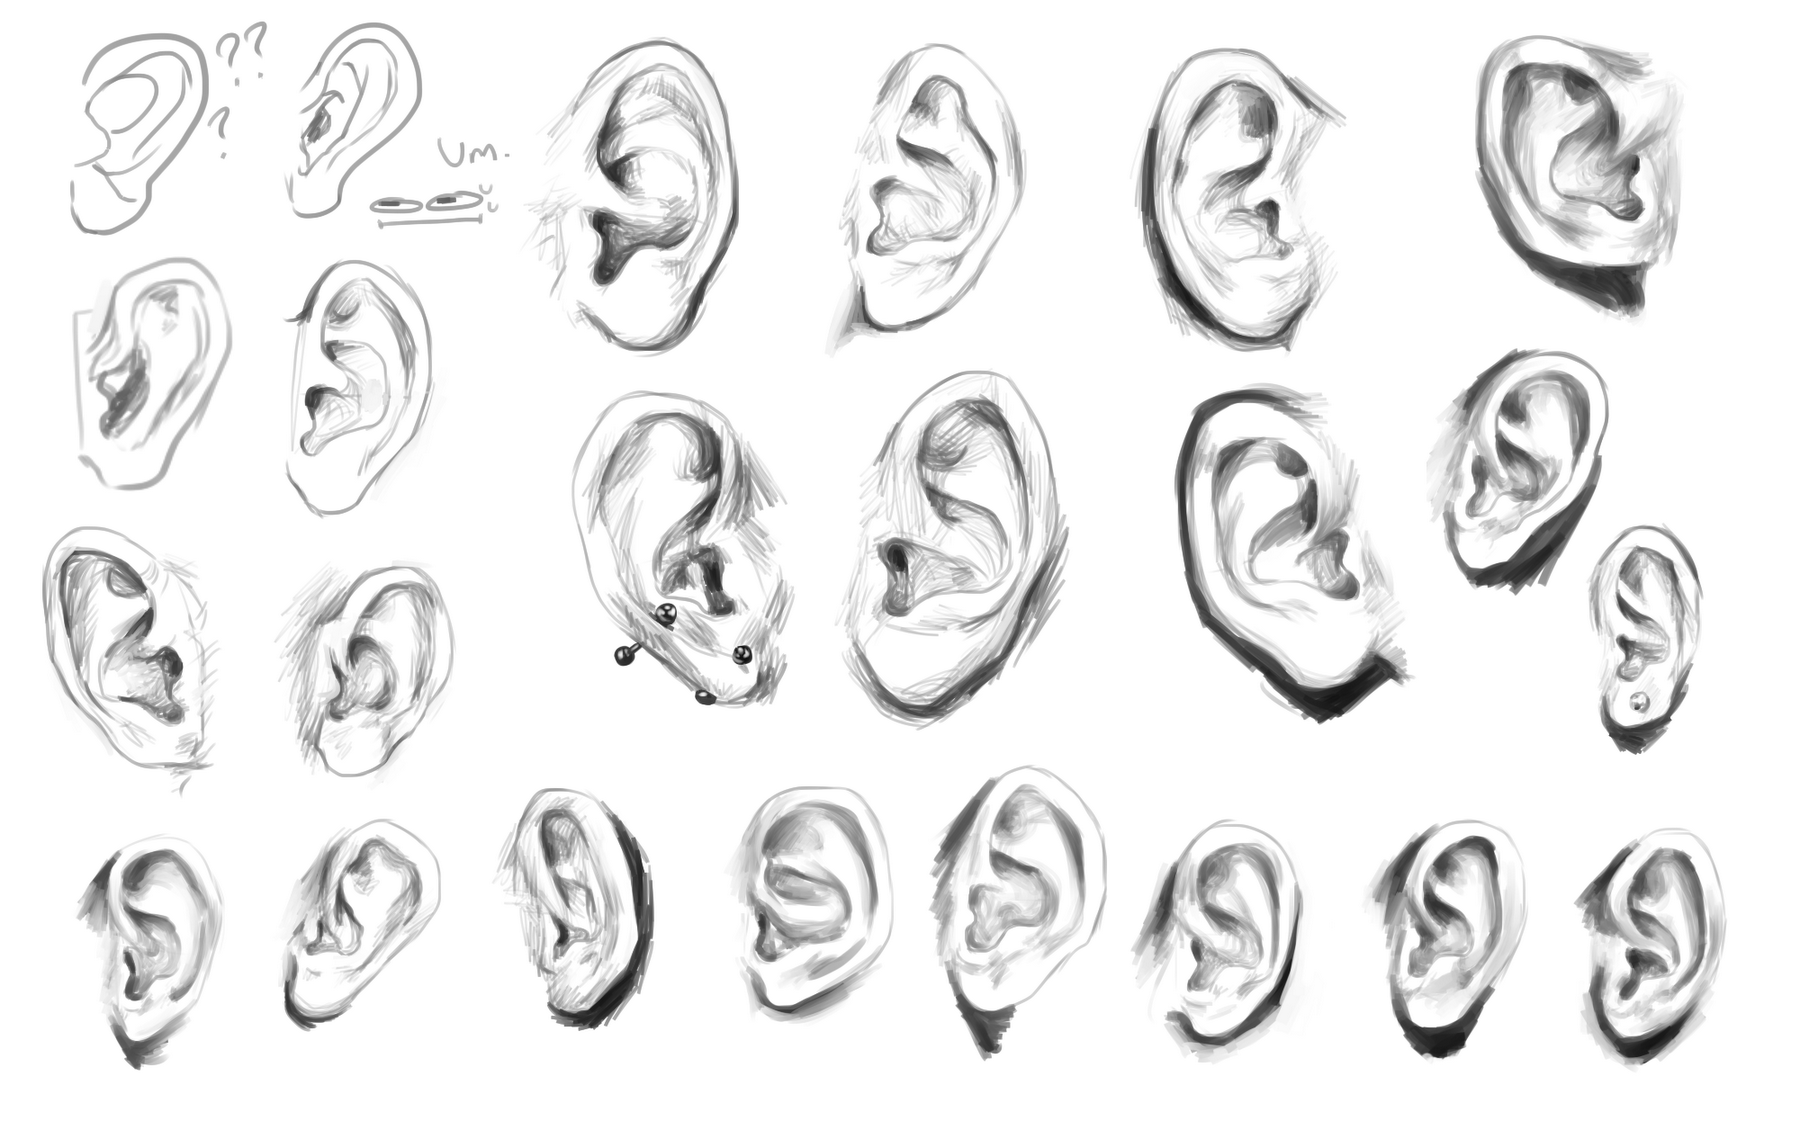
By now, your ear drawing should be looking satisfactory and you should be ready to begin adding some pen to define your ear sketch. Web learn a simple way to draw ears in this drawing for beginners. Draw a curving line from the bottom right of the previous line, down towards the bottom left. As i begin to sketch out the ear i like to begin with the helix. (step 7) fix up the lines so that they are a bit curvier. The reference image will give you a great idea of the length this should be. (step 9) add some of the darker shadows. Detailing the inside of the ear drawing. Draw the smaller oval for the lobe. When it comes to breaking down the surface anatomy of the ear, the helix is a great place to start because it allows you to define the overall contour of the ear before sketching in the remaining shapes to detail it out.
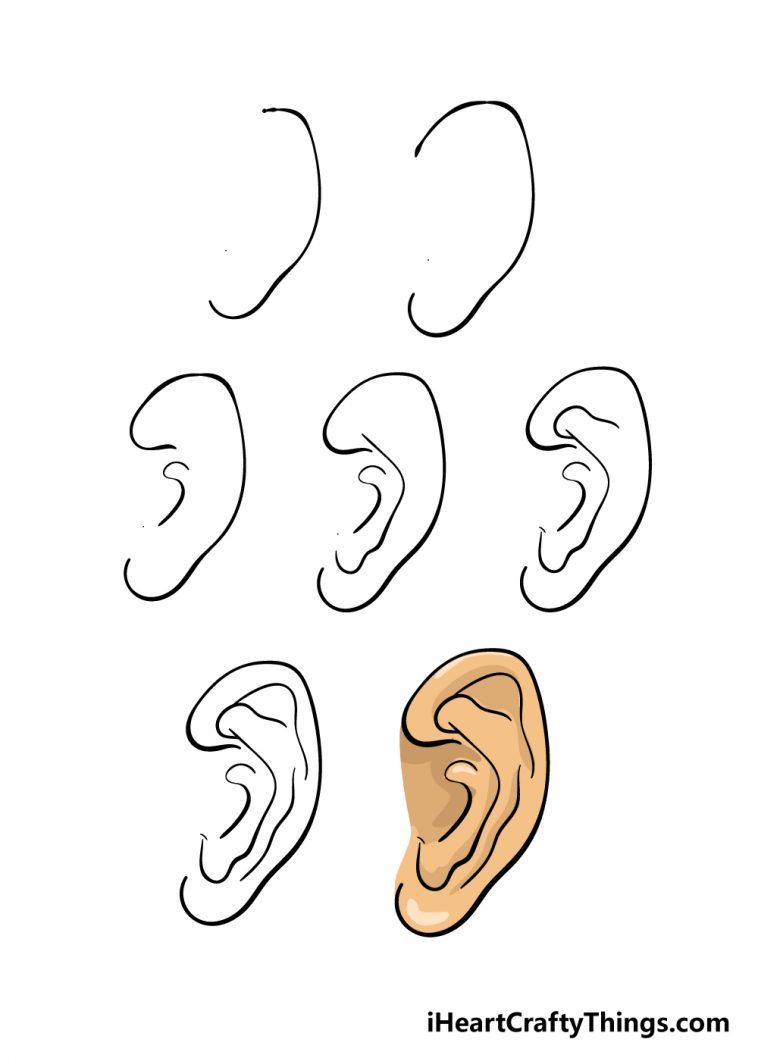
Start your ear drawing with a curve. The first curve should line the middle to top part of the ear. Now that you have the outer edge of your ear drawing, you can extend it a bit more in this next step. With a variety of animals, magical creatures, vehicles, foods, plants and more your kids will never get. Web how to draw flower step by step. As we refer to our source image we can see that the shadows have various tonal values. Remember to leave a small amount of room around the edge. Draw an angled line in the top right corner, the hole of the ear will be on the left side so this is the outer edge of the ear. Add the hole of the ear using two curved lines that meet at a point. How to draw an ear:

How to Draw Ears Step by Step YouTube Portraiture drawing
Sketch two circles, a large one and a small one. To create the helix, the raised outer rim of the ear, follow the outline you just created by drawing a smaller curve that fits inside this outer line. Remember to leave a small amount of room around the edge. Firstly, you will learn to draw basic shapes and lines that.

How to Draw an Ear Really Easy Drawing Tutorial
(1) learning the anatomical features involved and (2) observing and learning the shapes by drawing. Web image by guy wolek. Add the hole of the ear using two curved lines that meet at a point. How to draw an ear: You know what an ear looks like in the front, and what it looks like on the side.

How to Draw Ears 6 Steps (with Pictures) wikiHow
Web learn how to draw realistic ears for beginners with this easy to follow step by step drawing tutorial. The left side of the curve should curl slightly into the center of the ear. Once we have an ear sketch done with a pencil we can now begin to shade with a pen. By now, your ear drawing should be.
Ear Drawing How To Draw An Ear Step By Step
Add the hole of the ear using two curved lines that meet at a point. Web the texas lottery offers multiple draw games for those aiming to win big. For others you’ll want to extend the line almost to the lobe. Draw 2 curves to indicate the main folds within the ear. Add the curve of the helix.
How to Draw Realistic Ear with Pencils (Ears) Step by Step
We're going to start with a shape reminiscent of a sweet potato. To create the helix, the raised outer rim of the ear, follow the outline you just created by drawing a smaller curve that fits inside this outer line. By now, your ear drawing should be looking satisfactory and you should be ready to begin adding some pen to.
How to draw an Ear Step by Step Ear Drawing Lesson
The bottom of the ear tends to align with the base of the nose. How to draw an ear: Add the hole of the ear using two curved lines that meet at a point. By now, your ear drawing should be looking satisfactory and you should be ready to begin adding some pen to define your ear sketch. Web how.
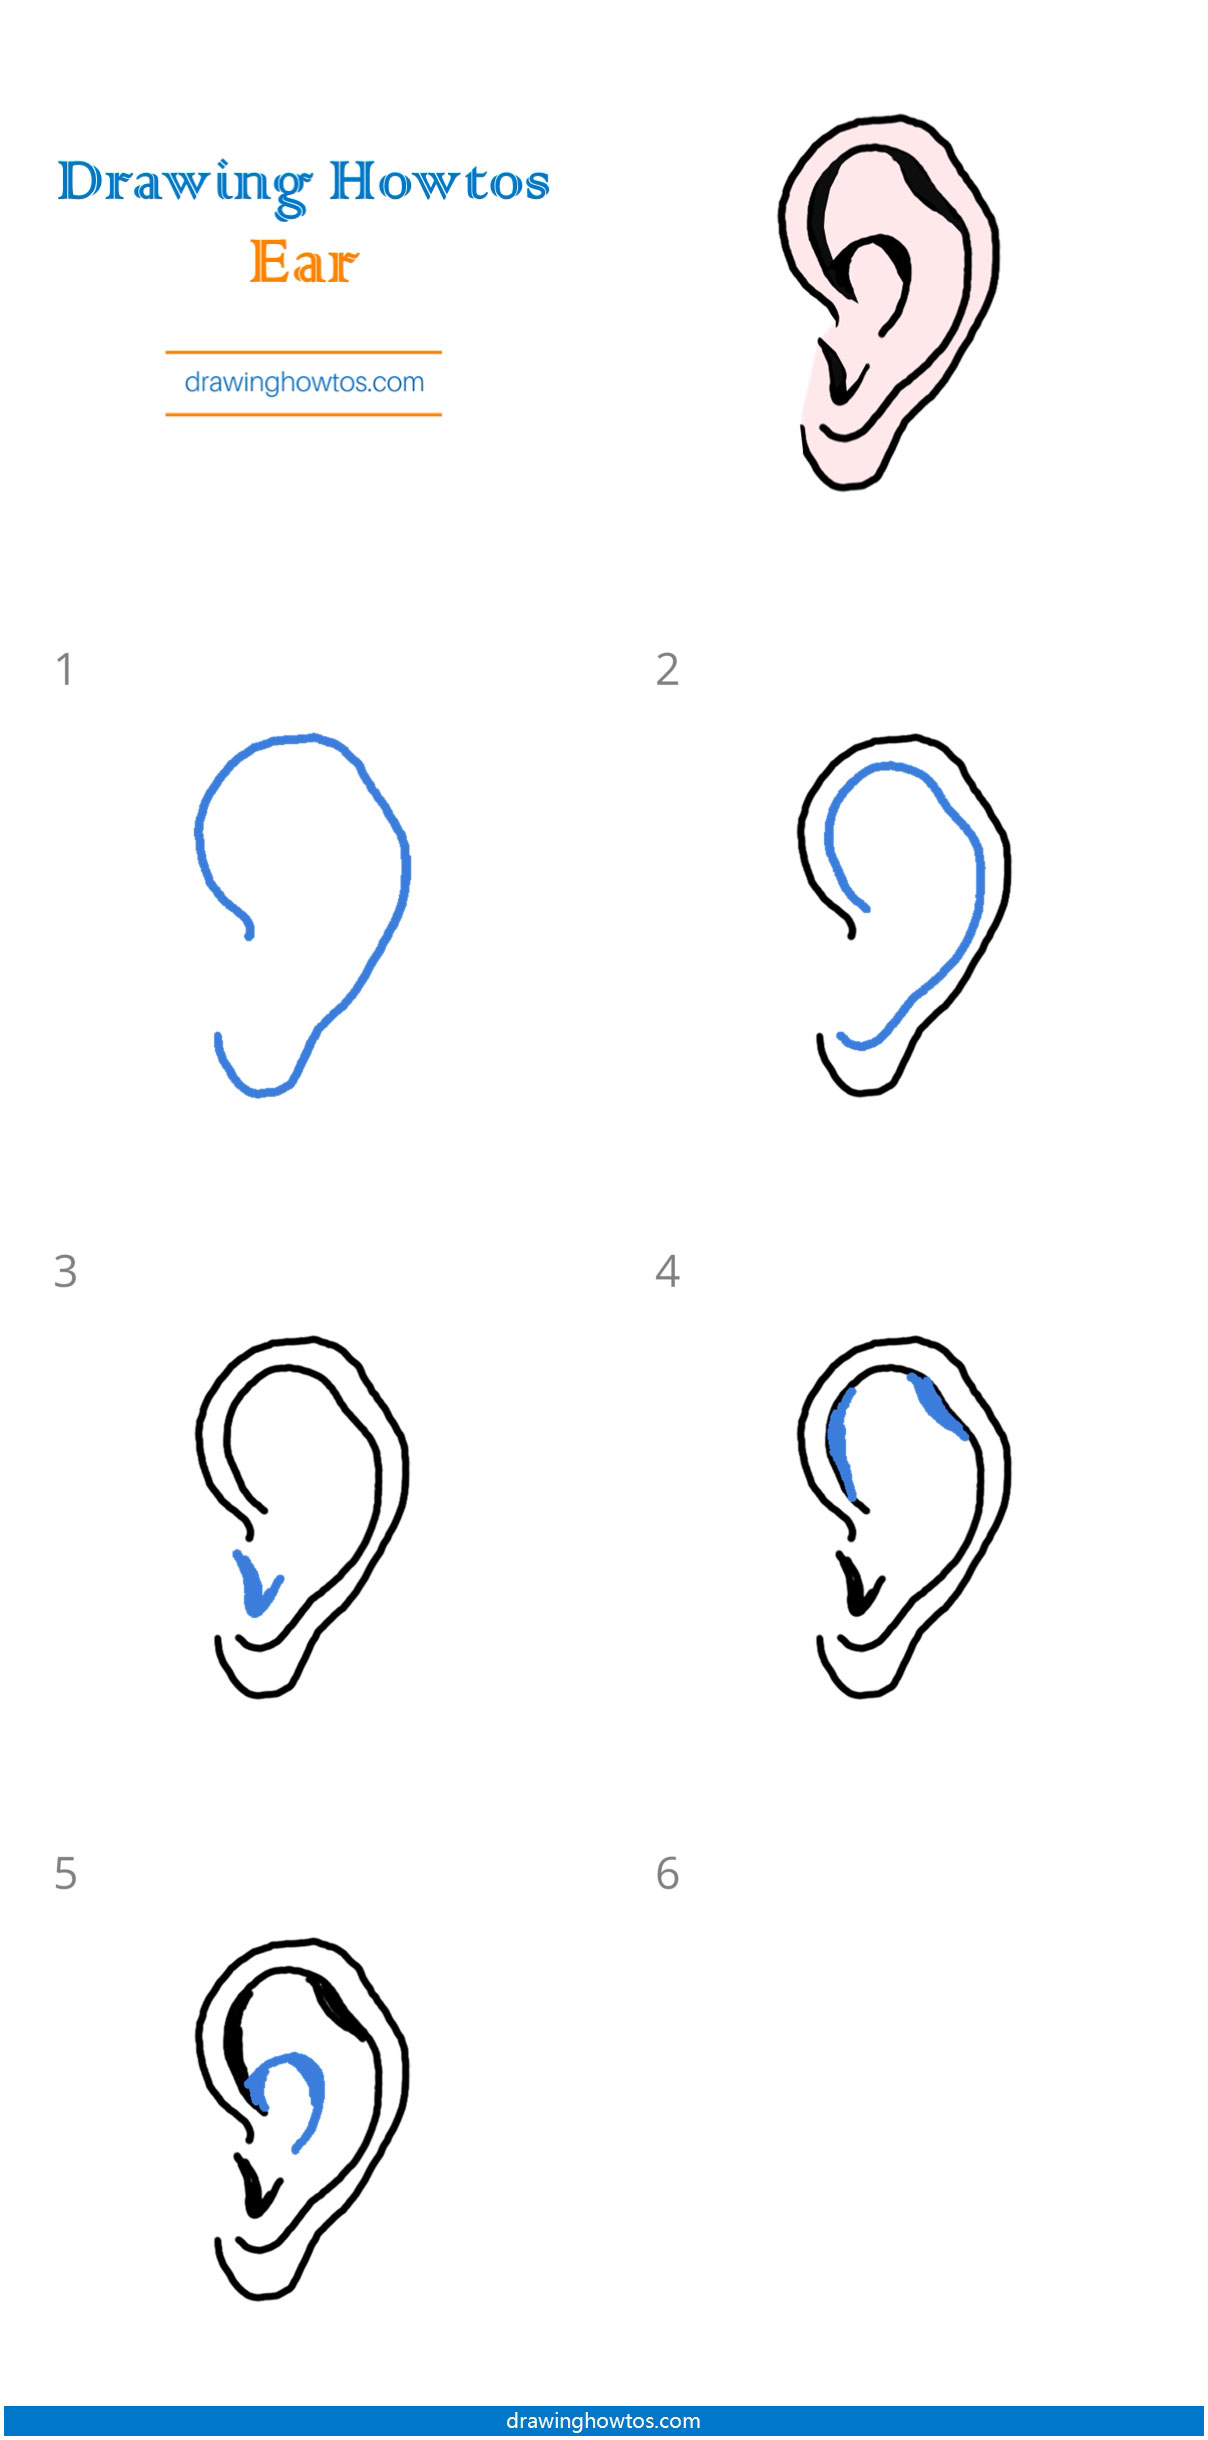
How to Draw an Ear Step by Step Easy Drawing Guides Drawing Howtos
Detailing the inside of the ear drawing. The goal is to get the general flow of it’s shape as well as the major proportions such as the height and width. Draw an angled line in the top right corner, the hole of the ear will be on the left side so this is the outer edge of the ear. For.
How to draw an ear from the front and from the side
When it comes to breaking down the surface anatomy of the ear, the helix is a great place to start because it allows you to define the overall contour of the ear before sketching in the remaining shapes to detail it out. Web draw in the details of the rim of the ear, notice how in the example we can.

How to Draw the Ear from the Front Step by Step Tutorial for Beginners
The bottom of the ear tends to align with the base of the nose. To create the helix, the raised outer rim of the ear, follow the outline you just created by drawing a smaller curve that fits inside this outer line. Start the ear drawing by making a simple construction line sketch that will basically outline the ear. At.
Ear Drawing How To Draw An Ear Step By Step
Draw a curving line from the bottom right of the previous line, down towards the bottom left. Our printable drawing guide (optional) pencil or black marker; Sketch the head to have a base for the ear. Using a pen to add shading to your human ear drawing. Place the large circle above the small one as shown, leaving some space.
Web Image By Guy Wolek.
Then, you will learn to apply tones and finally, you will work on adding some shades that will make the painting seem more realistic. Wider at the top and thinner at the bottom with no sharp edges. Our printable drawing guide (optional) pencil or black marker; For some, the helix stops about halfway down the ear;
Web The Texas Lottery Offers Multiple Draw Games For Those Aiming To Win Big.
All you need to do for this step is extend the lined so that they curve more inward to the inner ear. Detailing the inside of the ear drawing. Begin drawing the details of the ear. Sketch the head to have a base for the ear.
Web Learn A Simple Way To Draw Ears In This Drawing For Beginners.
Web learn how to draw realistic ears for beginners with this easy to follow step by step drawing tutorial. Add the curve of the helix. Start the ear drawing by making a simple construction line sketch that will basically outline the ear. (step 7) fix up the lines so that they are a bit curvier.
The Further You Go Into.
The reference image will give you a great idea of the length this should be. Using a pen to add shading to your human ear drawing. Once we have an ear sketch done with a pencil we can now begin to shade with a pen. By now, your ear drawing should be looking satisfactory and you should be ready to begin adding some pen to define your ear sketch.