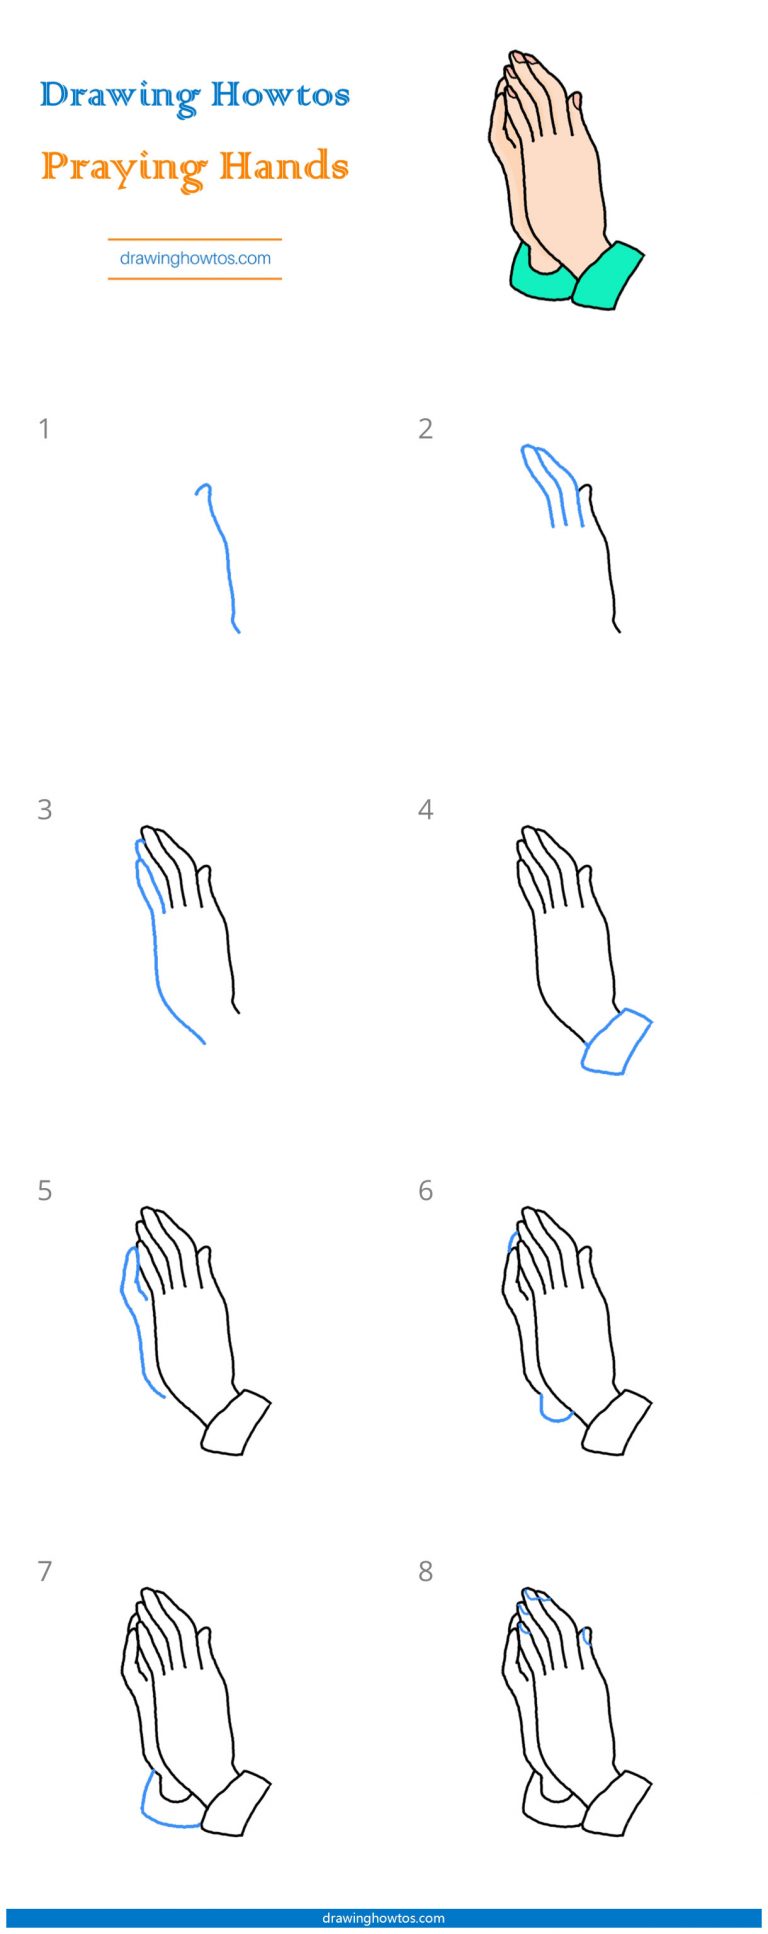
How To Draw Hands Praying Step By Step
How To Draw Hands Praying Step By Step - First, you can learn about the hand by drawing the skeletal structure or a simple open hand. Follow our step by step tutorial and be. This will start at the bottom of the wrist, will curve up a bit and then loop over to form the tip of the thumb. Draw the cuff of the left wrist. For a hand holding an object, consider the item's shape and size, and adjust the fingers and thumb accordingly to show a realistic grip. Just follow my lead, and observe these steps carefully. Color the drawing, and you are done. Step 13 add the shading to the palm and wrist of the left hand. Web about press copyright contact us creators advertise developers terms privacy policy & safety how youtube works test new features nfl sunday ticket press copyright. From a reference photo, sketch the basic shapes and lines of the hand.
Click here to save to pinterest! Make sure the lines are evenly spaced apart and that the thumbs are touching. Add some depth by running a few lines on the hands. Web draw the thumb either resting against the side of the palm or slightly extended outward. These lines will represent the fingers. Sketch the main shapes and lines of the hand first, using a hands reference photo. Draw the cuff of the right wrist. Begin by drawing two small circles for the palms of the hands. Here's a step by step guide on how to draw praying hands. Don’t worry about the lines being perfect at this stage—the goal is to lay the foundations of your hand drawing.
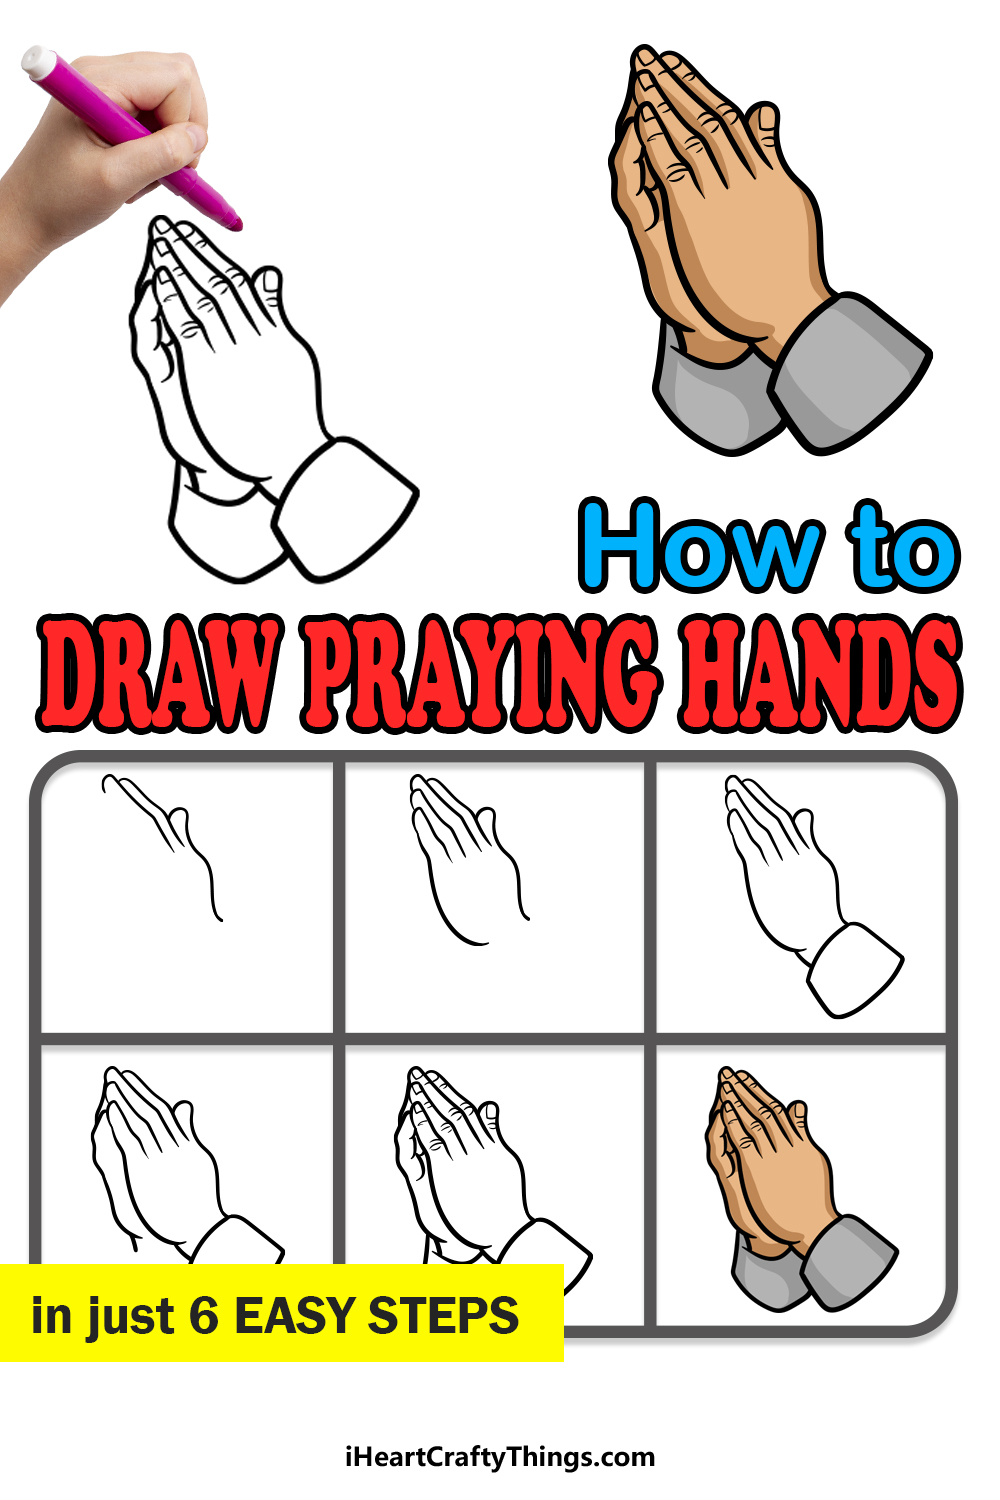
Web follow along with 6 simple steps to learn how to draw your own praying hands. Add the double shape for the thumbs. Draw the cuff of the right wrist. Together, these shapes resemble a christmas tree. Drawing praying hands can be a meaningful and meditative experience. Indicate another fingertip by drawing a short, curved line between the pinkie and ring fingers. Web i will help you out with the process. Web thanks for watching our channel. Shade the middle of the right hand. Web about press copyright contact us creators advertise developers terms privacy policy & safety how youtube works test new features nfl sunday ticket press copyright.
How to Draw Praying Hands Step by Step Easy Drawing Guides Drawing
Add details and shading to enhance the sense of depth and realism in your drawing. Here's a step by step guide on how to draw praying hands. Replenish the lines of the fingers and wrists of the right hand. Web thanks for visiting our drawing tutorial in 5 minutes. Color the drawing, and you are done.
Praying Hands Drawing How To Draw Praying Hands Step By Step
Web i will help you out with the process. Draw the nails on the fingers of the left hand. Web thanks for watching, like, comment, share, and subscribe!how to draw praying hands step by step#prayinghands #praying #hand Sketch the basic shapes and lines of the hand. Add the double shape for the thumbs.
Praying Hands Drawing Tutorial at Explore
Drawing praying hands can be a meaningful and meditative experience. Web in this video, i will be showing you a step by step process of how to draw hands using basic shapes and easy to understand guidelines. Another free people for beginners step by step drawing video tutorial. For a hand holding an object, consider the item's shape and size,.

How to draw PRAYING HANDS step by step YouTube
First, you can learn about the hand by drawing the skeletal structure or a simple open hand. These lines will represent the fingers. Web thanks for watching, like, comment, share, and subscribe!how to draw praying hands step by step#prayinghands #praying #hand This will start at the bottom of the wrist, will curve up a bit and then loop over to.

How to Draw Praying Hands HelloArtsy
Next, draw four lines coming out from the circles. Add details and shading to enhance the sense of depth and realism in your drawing. The finished artwork will be shaded with color resulting in a drawing you can be proud of! Color the drawing, and you are done. Click through to visit the complete tutorial and access the printable and.

How to Draw Praying Hands Really Easy Drawing Tutorial
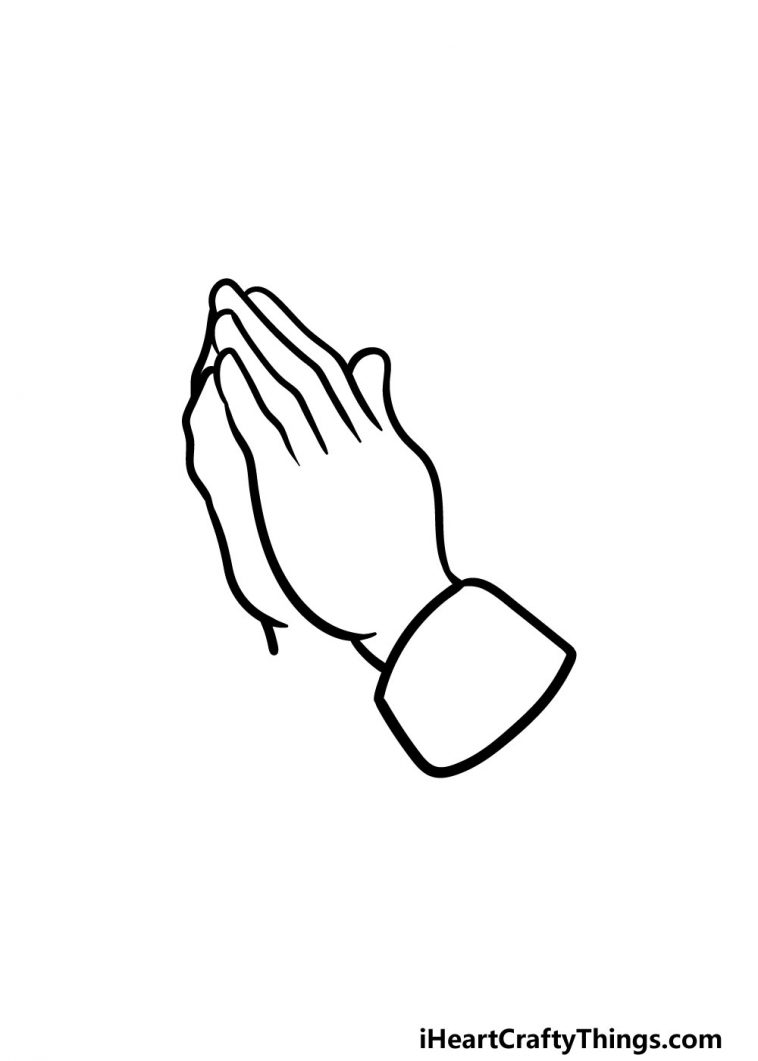
Sketch the second hand behind the first. Begin by extending a long, curved line from the wrist to the tip of the pinkie finger. Web thanks for watching our channel. Shade the middle of the right hand. This project will take 6 steps to complete as we continue to draw each area moving closer to the finished drawing.
Praying Hands Drawing How To Draw Praying Hands Step By Step
Together, these shapes resemble a christmas tree. Draw the nails on the fingers of the left hand. Click through to visit the complete tutorial and access the printable and downloadable pdf for how to draw praying hands. Begin by extending a long, curved line from the wrist to the tip of the pinkie finger. Begin by drawing two small circles.

How to Draw Praying Hands in a Few Easy Steps Drawing Tutorial for
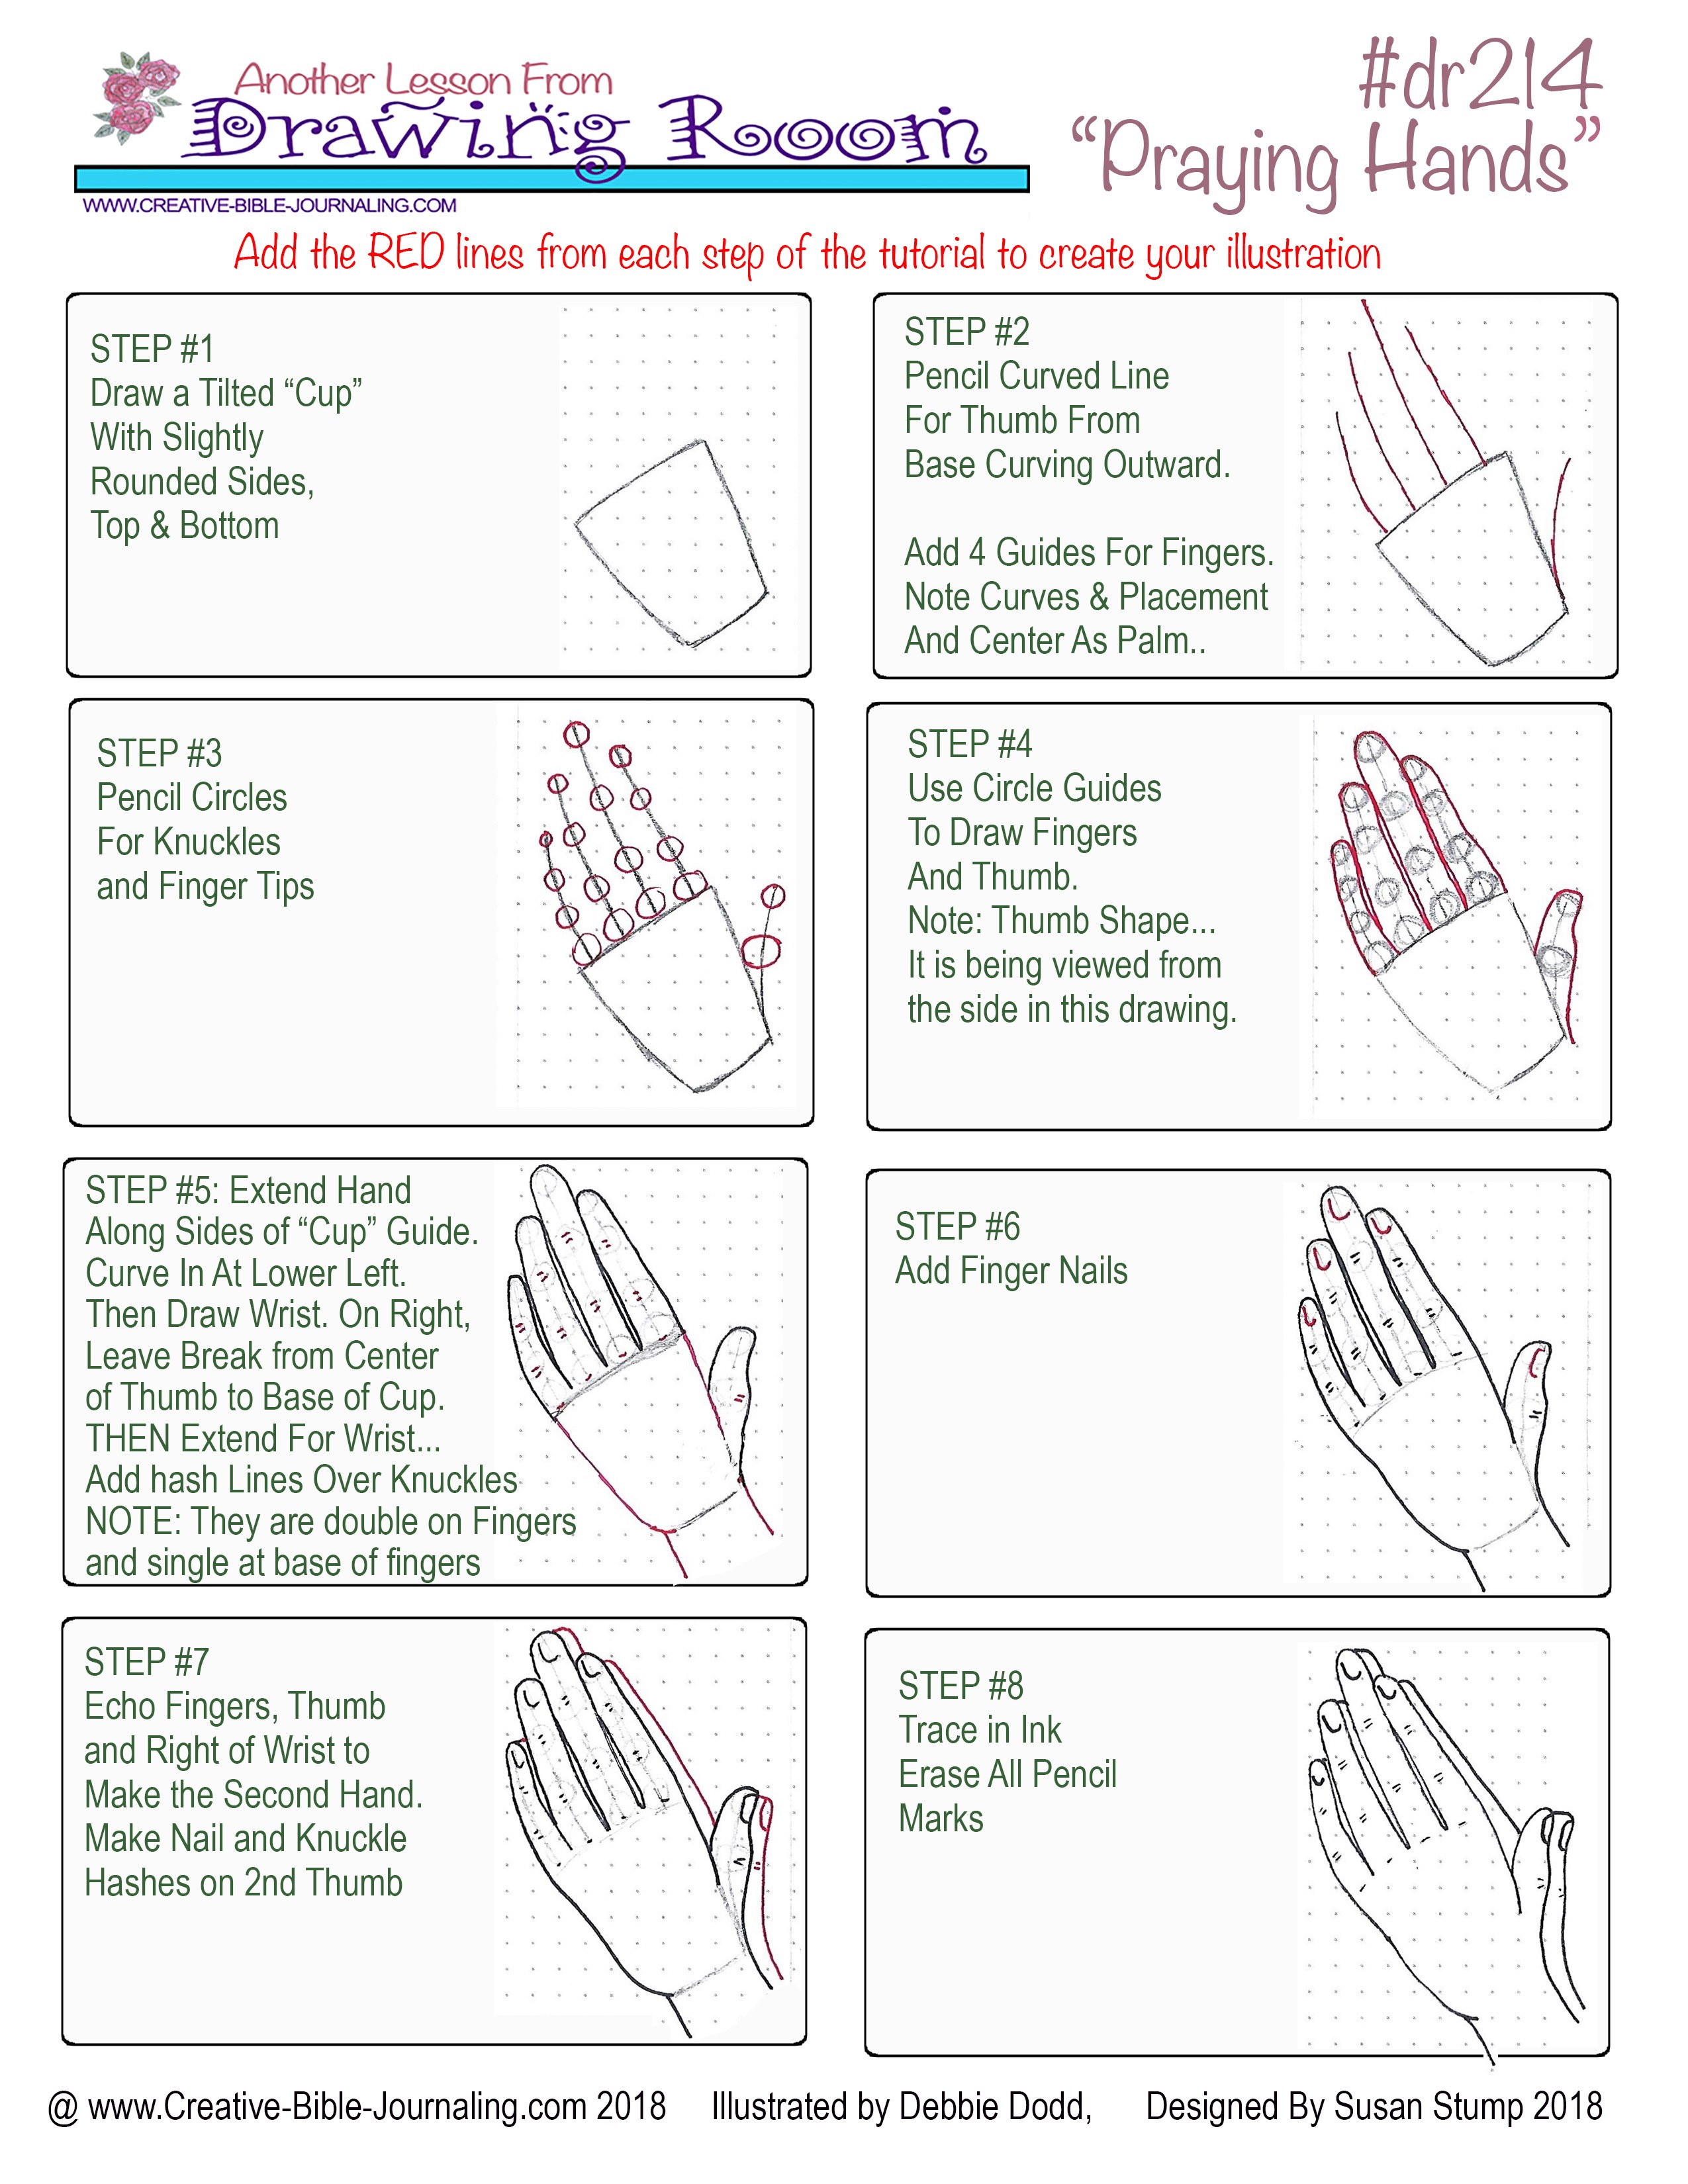
Shade lightly between the fingers. For this first step, we will be using some mostly pretty curved lines. Begin by drawing two small circles for the palms of the hands. Web draw the ring and little fingers of the left hand. Add the fingernails and the oval shapes at mid finger.
Praying Hands Drawing How To Draw Praying Hands Step By Step
Just follow my lead, and observe these steps carefully. Draw the nails on the fingers of the left hand. For this first step, we will be using some mostly pretty curved lines. Follow our step by step tutorial and be. The right hand is overlapped by the left hand.

How to draw Praying Hands step by step YouTube
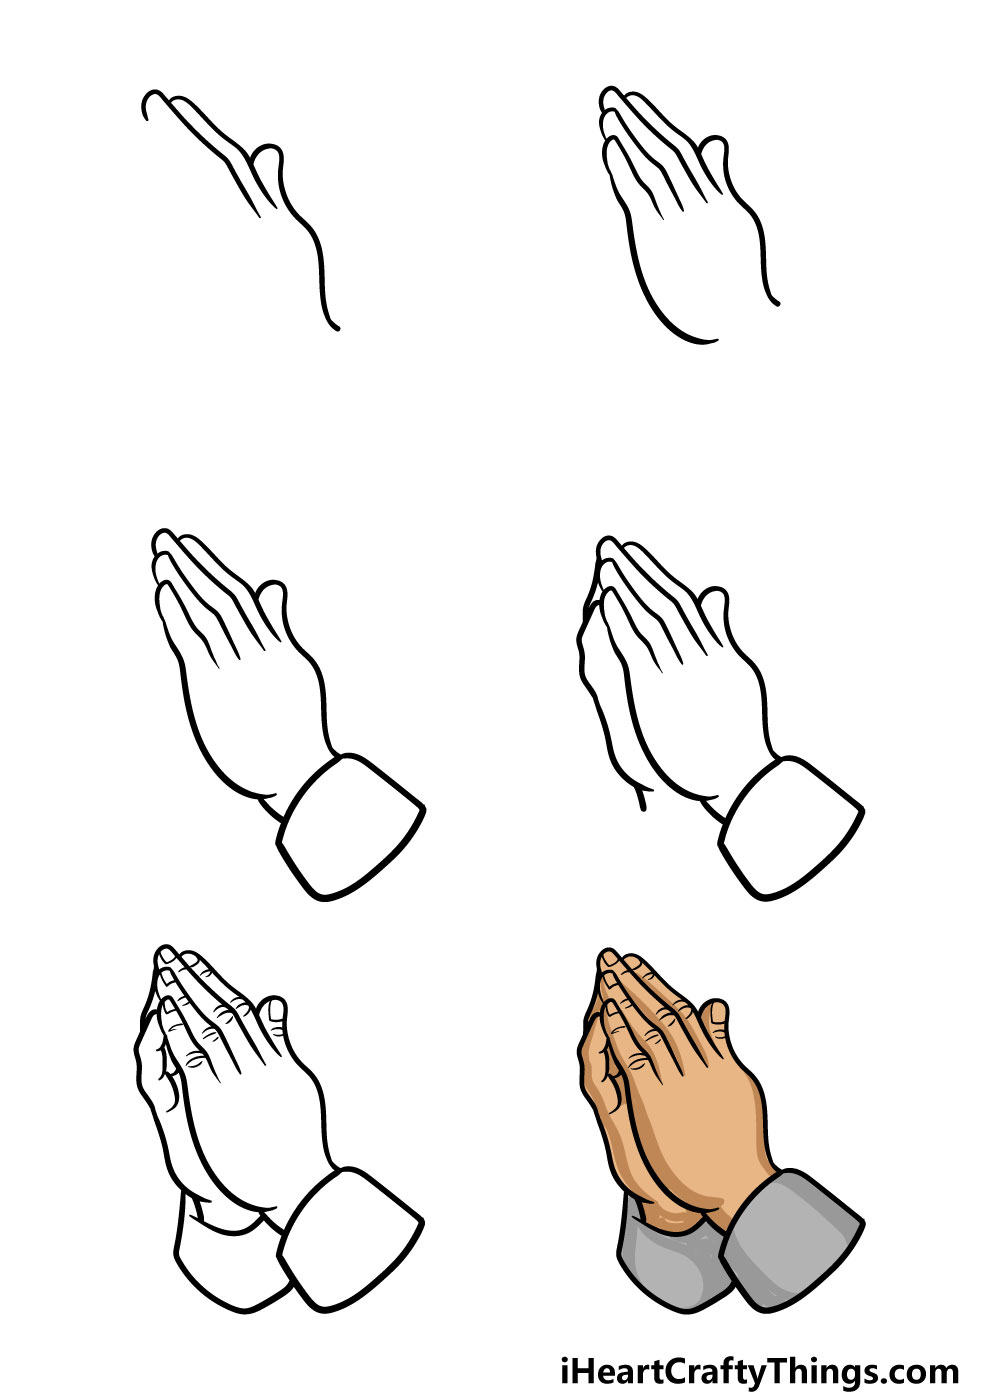
Another free people for beginners step by step drawing video tutorial. Follow our step by step tutorial and be. Sketch the basic shapes and lines of the hand. Draw the cuff of the right wrist. Web by the end of this lesson we will complete a drawing of praying hands by drawing one section at a time.
Shade Lightly Between The Fingers.
This project will take 6 steps to complete as we continue to draw each area moving closer to the finished drawing. Just follow my lead, and observe these steps carefully. Begin by extending a long, curved line from the wrist to the tip of the pinkie finger. How to draw praying hands for kids step by stepplease subscribe our channel to get newest and latest drawing tutorial.thank.
Add The Shading To The Top Of The Left Hand.
The finished artwork will be shaded with color resulting in a drawing you can be proud of! Drawing praying hands can be a meaningful and meditative experience. Notice that the oval shapes are not parallel with each other. Web draw the ring and little fingers of the left hand.
Color The Drawing, And You Are Done.
Follow our step by step tutorial and be. Together, these shapes resemble a christmas tree. Web draw the thumb either resting against the side of the palm or slightly extended outward. Web about press copyright contact us creators advertise developers terms privacy policy & safety how youtube works test new features nfl sunday ticket press copyright.
The Right Hand Is Overlapped By The Left Hand.
Indicate another fingertip by drawing a short, curved line between the pinkie and ring fingers. For this first step, we will be using some mostly pretty curved lines. Don’t worry about the lines being perfect at this stage—the goal is to lay the foundations of your hand drawing. Make sure the lines are evenly spaced apart and that the thumbs are touching.