How To Replace Kitchen Drawer Slides
How To Replace Kitchen Drawer Slides - Steps to upgrade existing drawer slides: Web measure and cut a piece of lumber to fit the width of the drawer. This will create a new sliding surface for the drawer to glide on. Web mount the slider. That’s how i figured out the length on the drawer slides. Web drawer slide installation in 11 steps. Web i usually install a minimum of 3 screws into each component of the slide, with one being at the front, one being around the middle and one at the back of the slide component. Make sure to have a screwdriver on hand for this step. Ensure that the slider fits right along the cabinet drawer’s bottom side. Web 5) install new glides.
Our drawers measured 23″ deep so i subtracted 1/2″ and rounded to 22″. Use the screw gun to connect the ½ inches sliders. Mark placement with a pencil. Measure existing drawer depth and space on each side of the drawer. Extend the slide out and screw into place in the box. If your wood drawer is getting stuck in certain areas you can also wax those places. Ensure all the glides are aligned adequately before installation. Thanks for watching!here is the link for the drawer slides: Plan ahead and order rear mount brackets for face frame cabinets. Then, you will be all done.
Plan 30 minutes a drawer, and relax when it takes you 5 with practice. If you have flooring that's more than 1/4 in. You need to attach one side of the slide inside t. Set your drawer slide on top of the strip, lined up with the front edge. When installing, work on one drawer at a time. The two pieces slide into each other and interlock, allowing the drawer to slide back and forth. Measure existing drawer depth and space on each side of the drawer. Insert the drawer slides into the metal brackets. Web in your kitchen, there's a space between the bottom drawer and the floor. Next, pull the drawer out of its track and set it aside.

How To Install Kitchen Drawer Slides Our Home from Scratch
This will create a new sliding surface for the drawer to glide on. Make sure to have a screwdriver on hand for this step. When installing, work on one drawer at a time. Web mount the slider. Screw the slides into place on the drawer.

How to replace drawer slides YouTube Kitchen drawers
Pull the drawer carefully out as far as it will go. Web choose a slide equal to or less than the length of it. Set your drawer slide on top of the strip, lined up with the front edge. The two pieces slide into each other and interlock, allowing the drawer to slide back and forth. Insert the drawer slides.
How to install soft close drawer slides YouTube
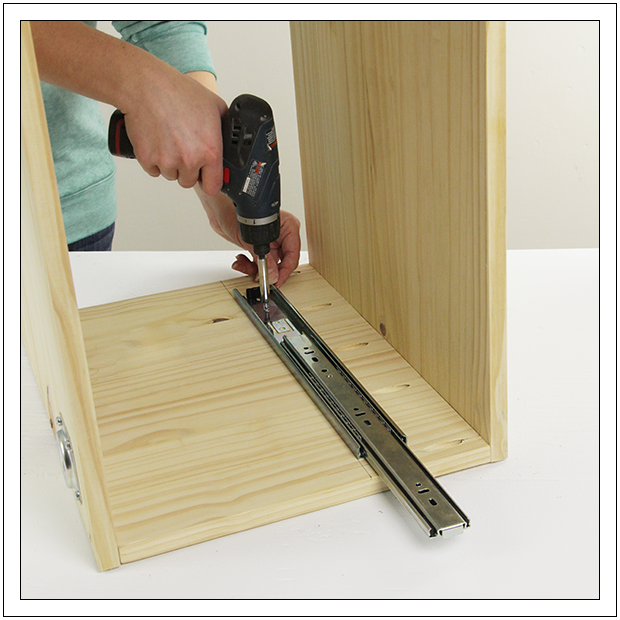
Attach the drawer slide on to the cabinet’s interior with the screws included. Web measure and cut a piece of lumber to fit the width of the drawer. Web remove the drawer and the existing drawer slides, if applicable, from the interior of the cabinet. Our drawers measured 23″ deep so i subtracted 1/2″ and rounded to 22″. Place a.
How to Install Drawer Slides ‹ Build Basic
The first step is to layer the glides out over the drawer box and also in. Thanks for watching!here is the link for the drawer slides: Web in any case, the replacement procedure is basically the same. Ensure that the slider fits right along the cabinet drawer’s bottom side. Position the new glide flush with the bottom of the drawer,.

How to Install Drawer Slides 11 Diy slides, Installing drawer slides
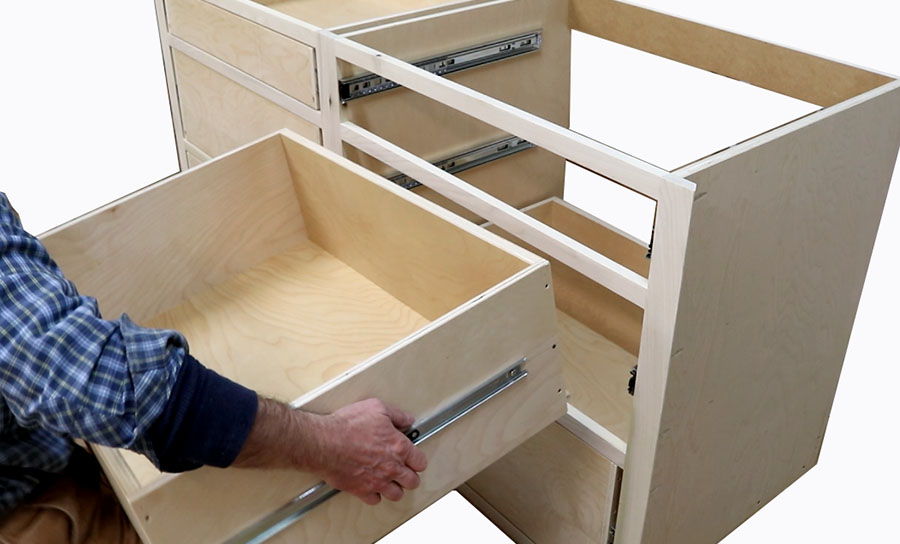
Screw the glide into place, predrilling holes if desired. The big advantage of these slides is that they extend fully, giving you complete access to everything in the drawer. Extend the slide out and screw into place in the box. The two pieces slide into each other and interlock, allowing the drawer to slide back and forth. Web drawer slide.
Build Kitchen & Install Drawer Slides Free Design Plans
Plan 30 minutes a drawer, and relax when it takes you 5 with practice. Web drawer slide installation in 11 steps. Measure the length and width of the drawer. Otherwise, measure the drawer so you can purchase. Ensure that the slider fits right along the cabinet drawer’s bottom side.

How To Install Kitchen Drawer Slides Our Home from Scratch
Then, you will be all done. Screw the glide into place, predrilling holes if desired. Attach the drawer slide on to the cabinet’s interior with the screws included. This will create a new sliding surface for the drawer to glide on. Web pull the drawer out until it stops.

💎 How to Install 3 Types of Drawer Slides in [Step by Step
Position the new glide flush with the bottom of the drawer, confirming that the small extending part of the glide is at the front of the drawer. Next, pull the drawer out of its track and set it aside. If you have flooring that's more than 1/4 in. Web in this video you can see how easy is to replace/upgrade.

Drawer slide install YouTube
Thanks for watching!here is the link for the drawer slides: Web in this video you can see how easy is to replace/upgrade drawer slides. Web drawer slide installation in 11 steps. Web screw the slide marked cr to the right side. Web remove the drawer and the existing drawer slides, if applicable, from the interior of the cabinet.

How To Install Drawers Slides Woodbrew Drawer slides
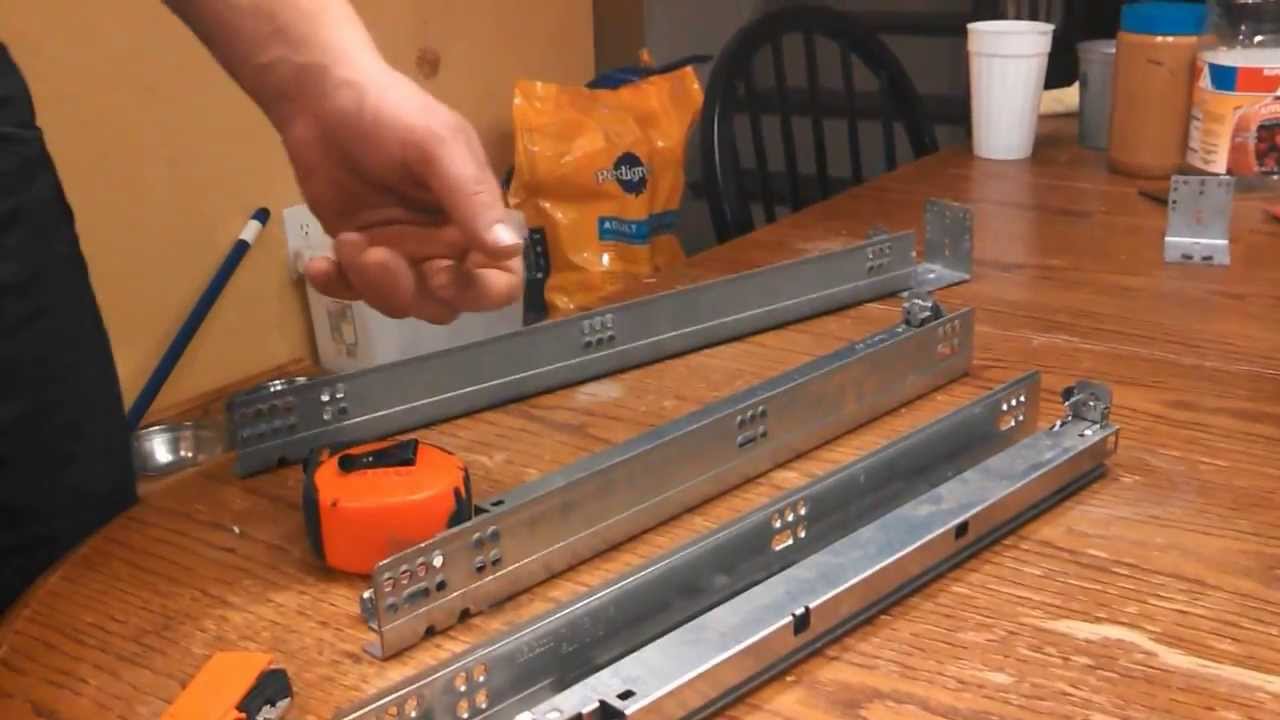
Drawer slides come in two pieces. Measure the length and width of the drawer. Choose a drawer slide that matches the current mount. Insert the drawer slides into the metal brackets. Place the drawer on the countertop above the drawer opening.
You Need To Attach One Side Of The Slide Inside T.
Web measure and cut a piece of lumber to fit the width of the drawer. Remove and replace first, remove the drawer by pulling it out and lifting the glides from the guide tracks. Use a drawer slide jig. Place a strip of 1/4 plywood inside your drawer box against each side.
Take Care That The Wheels Of The Slider Area Are At The Back Of It And That The Front Side Of The Drawer Slider Is Against The Drawer’s Front Side.
Web in this video you can see how easy is to replace/upgrade drawer slides. Measure existing drawer depth and space on each side of the drawer. Plan ahead and order rear mount brackets for face frame cabinets. Web choose a slide equal to or less than the length of it.
Remove Each Of The Glides From The Inside Of The.
The final step is installing the new glides; The slides can be made of wood, metal, plastic, or a combination. Screw the glide into place, predrilling holes if desired. Position the new glide flush with the bottom of the drawer, confirming that the small extending part of the glide is at the front of the drawer.
Not Only Is It A Terrific.
The two pieces slide into each other and interlock, allowing the drawer to slide back and forth. Then, locate the drawer slides on each side of the drawer. Remove the drawer slides from each side of the drawer by unscrewing the mounting screws on each slide. One of the pieces mounts to the drawer, and the other mounts directly to the frame of the furniture.