Ladybird Drawing
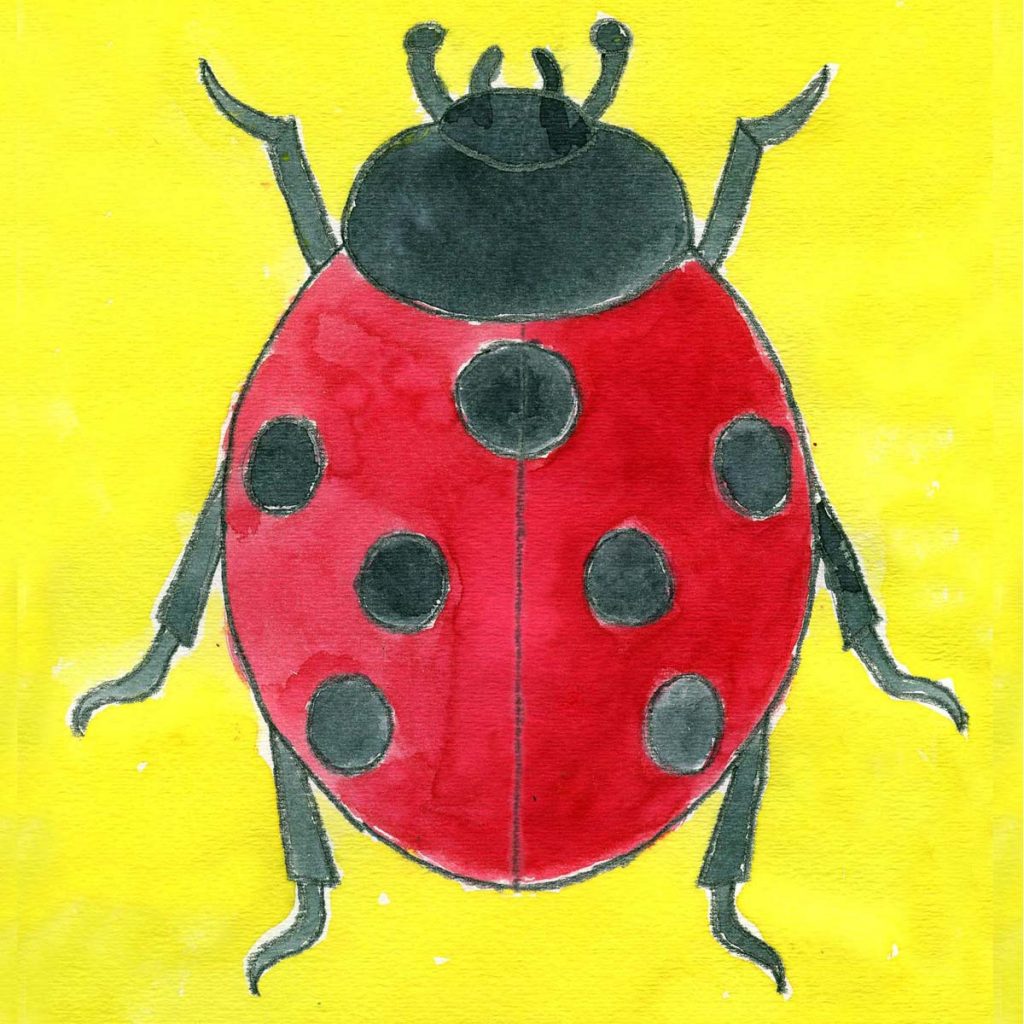
Ladybird Drawing - In order to show the divide of the wings on the ladybug’s back, you can simply draw a line down the middle of the oval body. Add the two front legs bending forward. Web draw a large oval for the body. You can create the eyes with small circles inside the larger eyes. Then draw a semicircle on the left and another on the right for the wings of the ladybug. Add the antennae and front legs. Web in this drawing lesson we’ll show you how to draw a ladybug in 6 easy steps. Draw a curved line on the bottom side of the oval and connect this line with the one you just drew. Then, sketch the front legs at the bottom of the pronotum. Add a small bump for the head.
In order to show the divide of the wings on the ladybug’s back, you can simply draw a line down the middle of the oval body. 1,900+ drawing & coloring pdfs. Now let’s add the rest of the ladybug’s head. Complete your drawing by adding details, such as shading or additional lines, and color your ladybird in red and. We’ll fill in the gap in the next step. We show you all the tips and tricks to achieve amazing results. Set a timer for three or five minutes. Experience the soft, creamy texture of soft pastel art as you bring your creative vision to life on the page. Draw 3 legs on each side. Get some paper and something to sketch with (pencil, pen, marker, etc.) pull up some reference photos of ladybugs.
This will form the cartoon ladybug's head. Shading in the ladybug face with pen. If drawing 7, draw one between both wings, and 3 on each of the wings. 1,900+ drawing & coloring pdfs. Complete your drawing by adding details, such as shading or additional lines, and color your ladybird in red and. Afterward, return your attention to the upper section of the ladybug. This free and easy step by step ladybug drawing lesson progressively builds upon each previous step until you get to the final rendering of the ladybug. Web how to draw a cartoon ladybug! Add the two front legs bending forward. With the already marked “neckline”, the head is a rounded triangle.
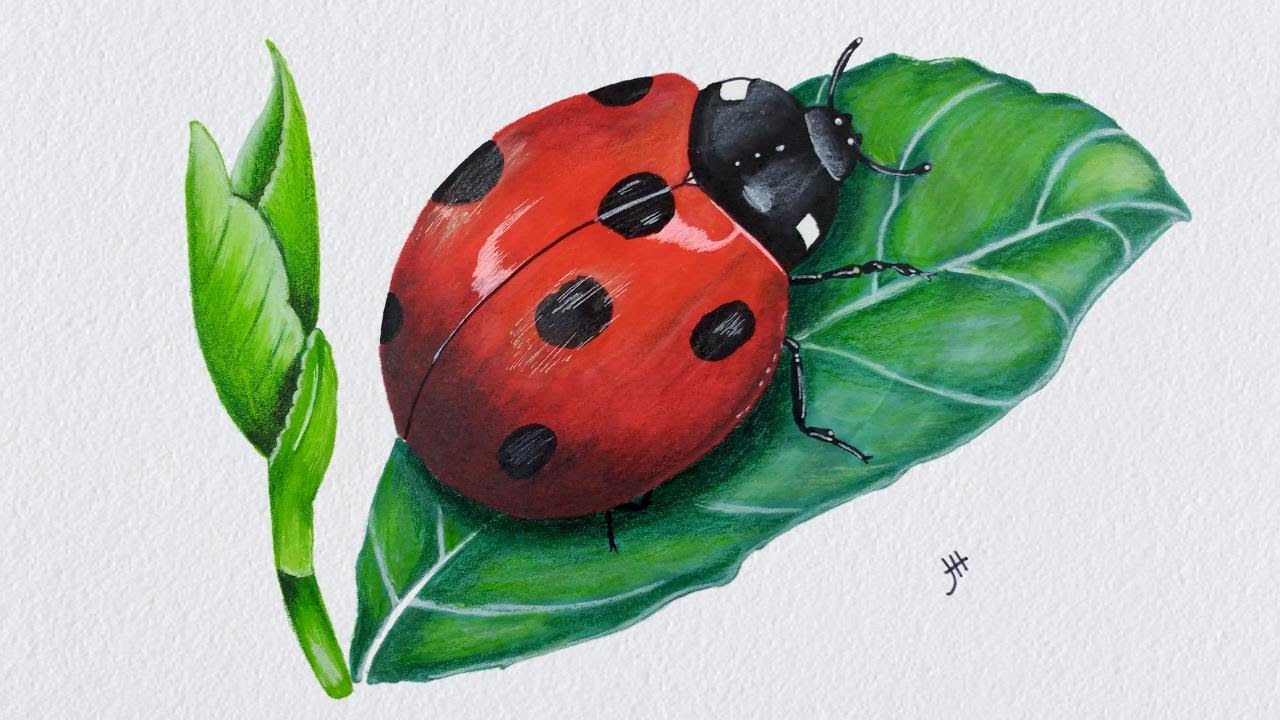
Ladybug Drawing with Alcohol Brush Marker And Color Pencil Realistic
Trace with a marker and color. Afterward, return your attention to the upper section of the ladybug. This part of your ladybug drawing will be very simple! Add six tiny legs extending from the underside of the body. We show you all the tips and tricks to achieve amazing results.

How To Draw a LadyBug StepbyStep
Draw several small, round spots on the ladybird’s wings. Draw a curve that nearly forms a circle a few inches wide, but don’t close it entirely—leave a small gap at the bottom. This part of your ladybug drawing will be very simple! Then draw a semicircle on the left and another on the right for the wings of the ladybug..

Ladybug Drawing Spence Conage
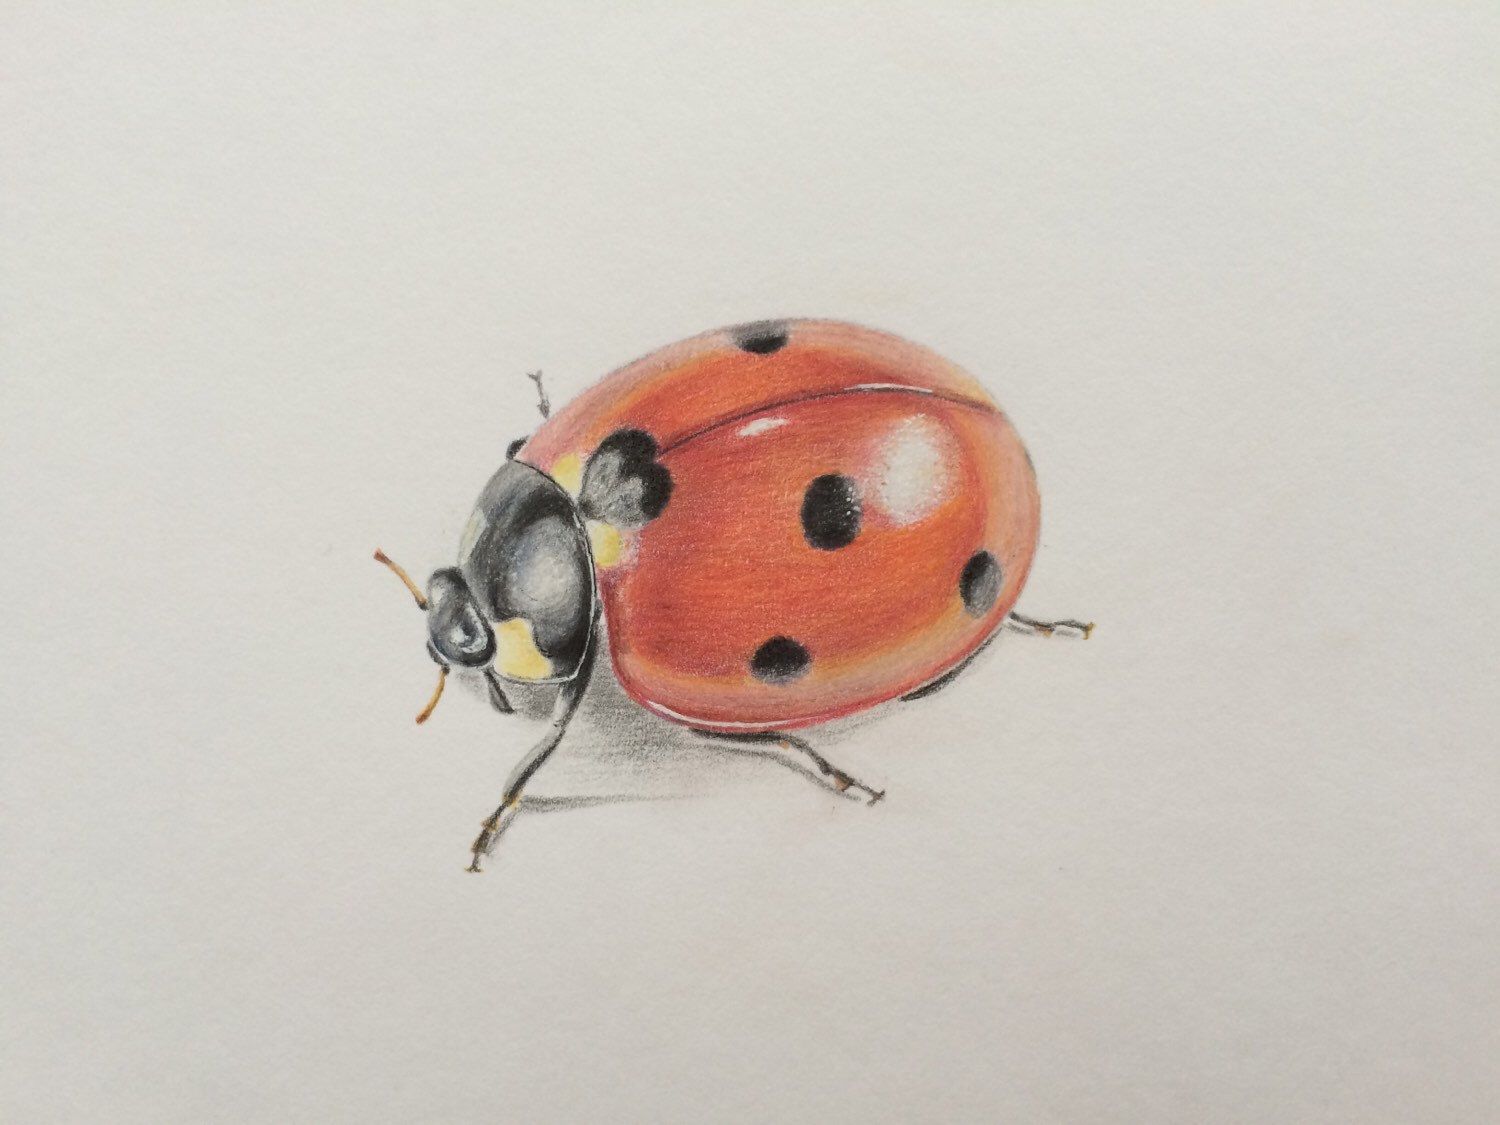
We hope you have fun following along with us. Web how to draw a cartoon ladybug! 1,900+ drawing & coloring pdfs. Web learn how to draw a realistic and colorful ladybug. Add the antennae and front legs.
How to Draw a Ladybug (Step by Step Pictures) Cool2bKids
Draw dots on each wing. Web in this drawing lesson we’ll show you how to draw a ladybug in 6 easy steps. Web draw a large oval for the body. This free and easy step by step ladybug drawing lesson progressively builds upon each previous step until you get to the final rendering of the ladybug. Web bee, worm, snail,.

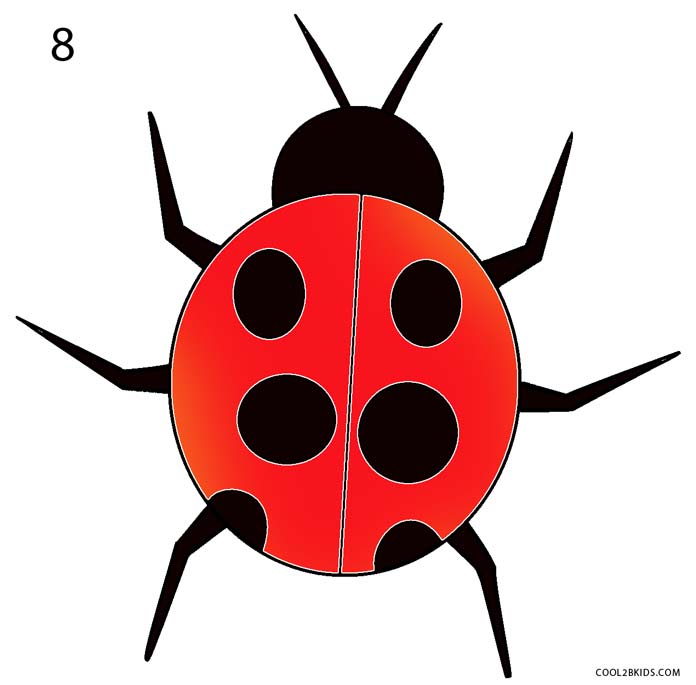
How to Draw a Ladybird 8 Steps (with Pictures) wikiHow
We show you all the tips and tricks to achieve amazing results. Draw a small half circle at one end of the oval. Add the seven spots on the back as shown. Add six tiny legs extending from the underside of the body. Then carve off a small “face” at the tip of the head with another arc.
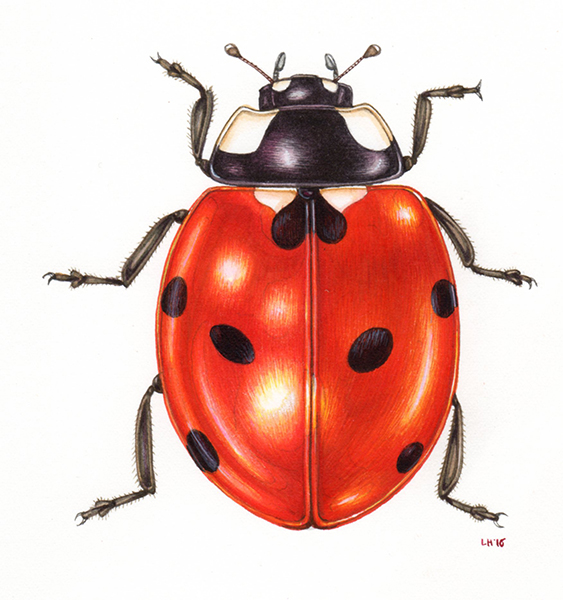
Step by Step Ladybird Watercolour illustration Lizzie Harper
Draw a small half circle at one end of the oval. Draw the two middle legs bending back. Web learn how to draw a realistic and colorful ladybug. With the already marked “neckline”, the head is a rounded triangle. Draw a curve that nearly forms a circle a few inches wide, but don’t close it entirely—leave a small gap at.

How to Draw a Ladybug Really Easy Drawing Tutorial
Of course, she picked how to draw a ladybug! Then, sketch the front legs at the bottom of the pronotum. With the already marked “neckline”, the head is a rounded triangle. Set a timer for three or five minutes. Draw several small, round spots on the ladybird’s wings.
Ladybird Drawing at Explore collection of Ladybird
Shading in the ladybug face with pen. Then quickly sketch out as many ladybug drawings as you can before you run out of time. Draw two lines on top of the head and add a circle at the top of each. We hope you have fun following along with us. Web ladybird drawings with soft pastels.

How To Draw A Ladybug Feketerdo
Draw a small half circle at one end of the oval. Web bee, worm, snail, butterfly, caterpillar, ladybug, praying mantis, dragonfly, cockroach, ant, grasshopper. We’ll fill in the gap in the next step. It was hadley’s turn to pick what bug we were going to draw today. With the already marked “neckline”, the head is a rounded triangle.
Easy How to Draw a Ladybug Tutorial and Ladybug Coloring Page
Trace with a marker and color. Simply draw the red lines in each step and within a few minutes you’ll have yourself a fantastic drawing of a. The last step in drawing a simple ladybug is to add eyes and a small smile. Draw a curved line on the top of the oval using a darker pencil stroke. Let’s start.
Web Ladybird Drawings With Soft Pastels.
Unlock ad free and printable drawing and coloring tutorials. Add six tiny legs extending from the underside of the body. Trace with a marker and color. One of her favorite things to do in the summer is to catch ladybugs and let them crawl all over her hands.
Add A Pair Of Wobbly Antennae And Two Mandibles To The Top Of The Head.
Then, draw a curved line across the body behind the head. Draw the other two sides of the head from the “neckline”, meeting at a point in the middle. This free and easy step by step ladybug drawing lesson progressively builds upon each previous step until you get to the final rendering of the ladybug. We show you all the tips and tricks to achieve amazing results.
Draw A Curved Line On The Top Of The Oval Using A Darker Pencil Stroke.
Set a timer for three or five minutes. Shading in the ladybug face with pen. The mandibles should be significantly thicker and shorter than the antennae. This includes the pronotum and face area of the ladybug.
Then Draw The “M” Letter Shape At.
Add a small bump for the head. You can create the eyes with small circles inside the larger eyes. Then carve off a small “face” at the tip of the head with another arc. 1,900+ drawing & coloring pdfs.