Making Drawer Fronts
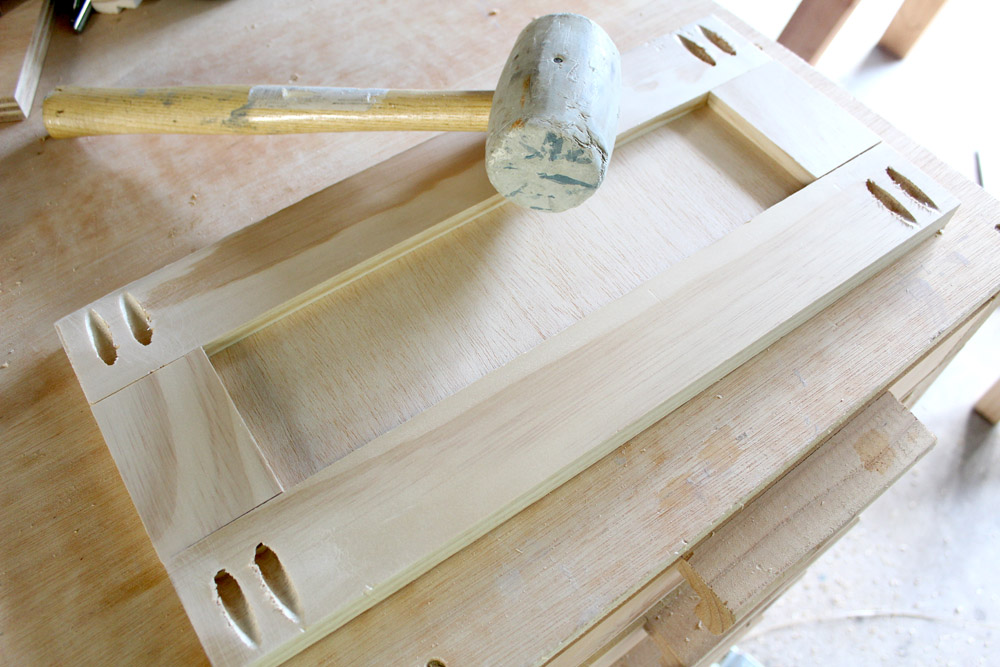
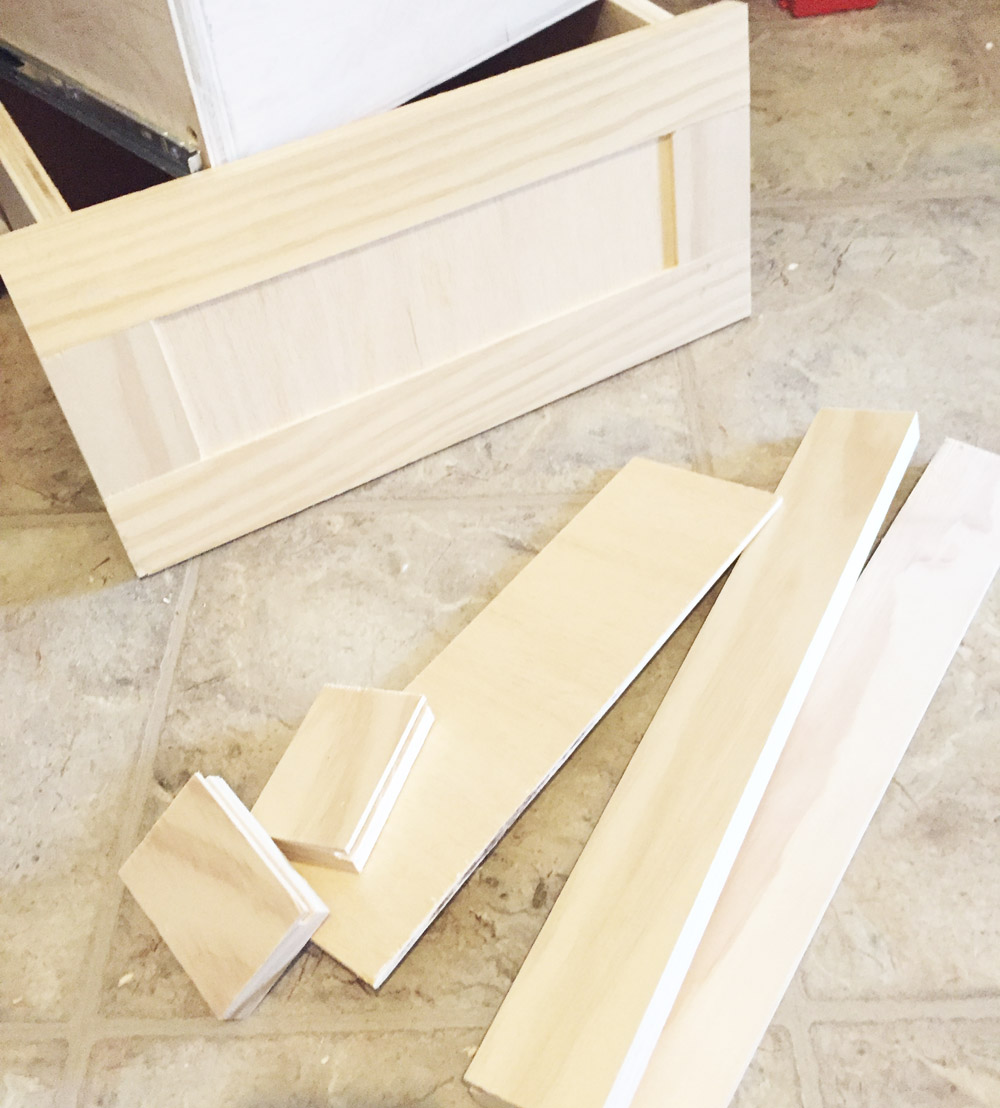
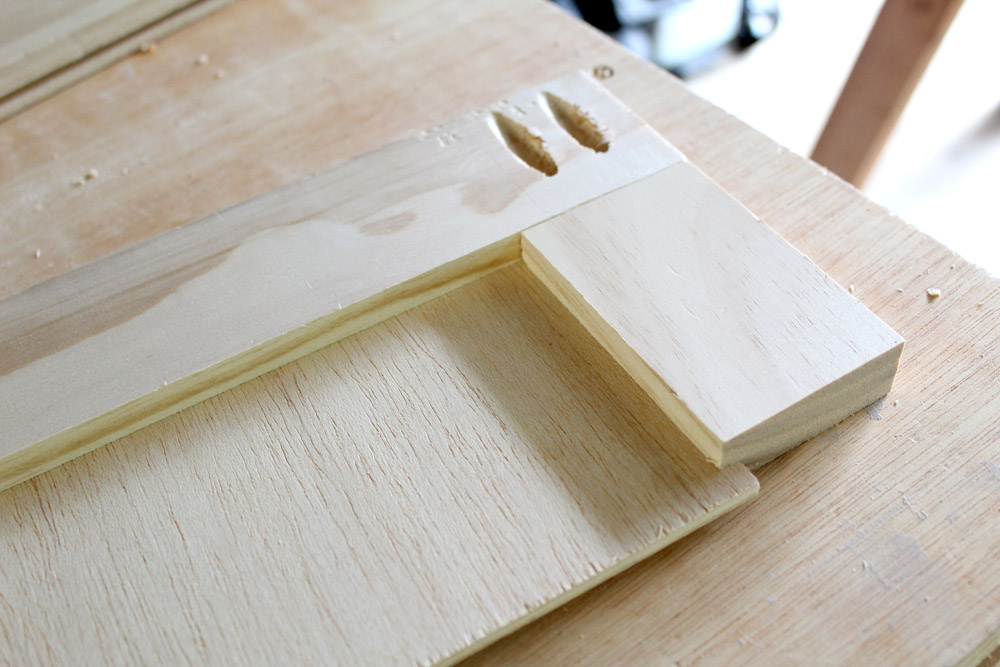
Making Drawer Fronts - This breakout feature comes from wood magazine's weekend with wood 2015 class, featuring. Step 3 to give the drawer front makeover it a finished appearance, use a wood trim around the plywood using a 45 degree cut to cover up the raw edges. 1 5/16″ in from the edge. Face clamp (optional, but helps) 1. Basically, you’re creating a frame to cover the. Adding a routed edge to this easy to make slab overlay drawer front gives it detail and style th. It’s much easier to do this now than it is after the panel is in. Web here's a simple, easy to make drawer front that looks great. Measure the drawer opening carefully to make sure you have the right size. If the grooves are perfectly center in the rails and stiles, you should have a 1/4″ section of wood to each side of the groove.
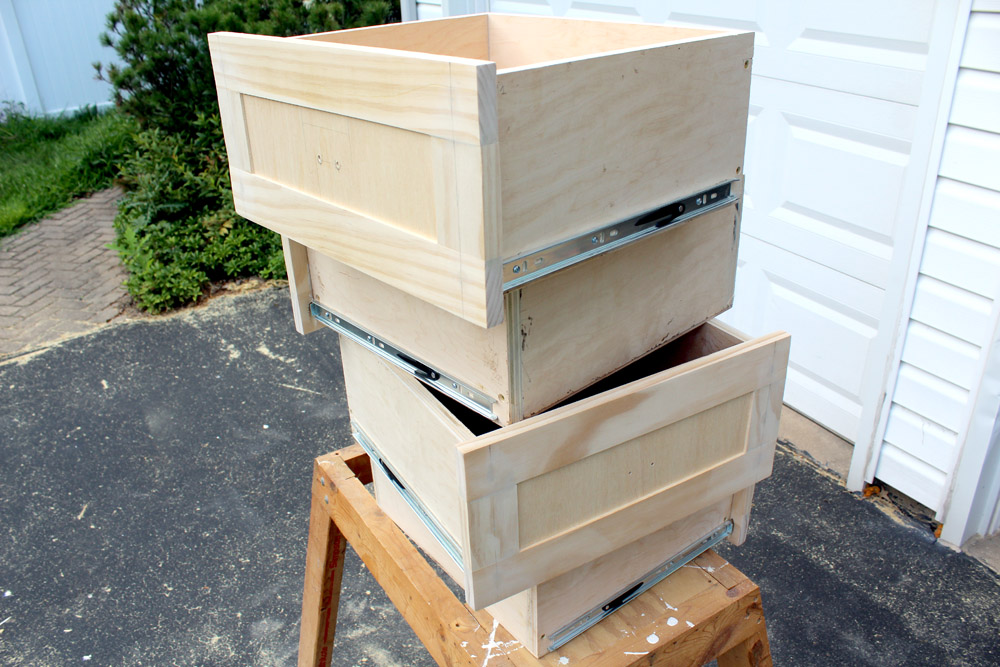
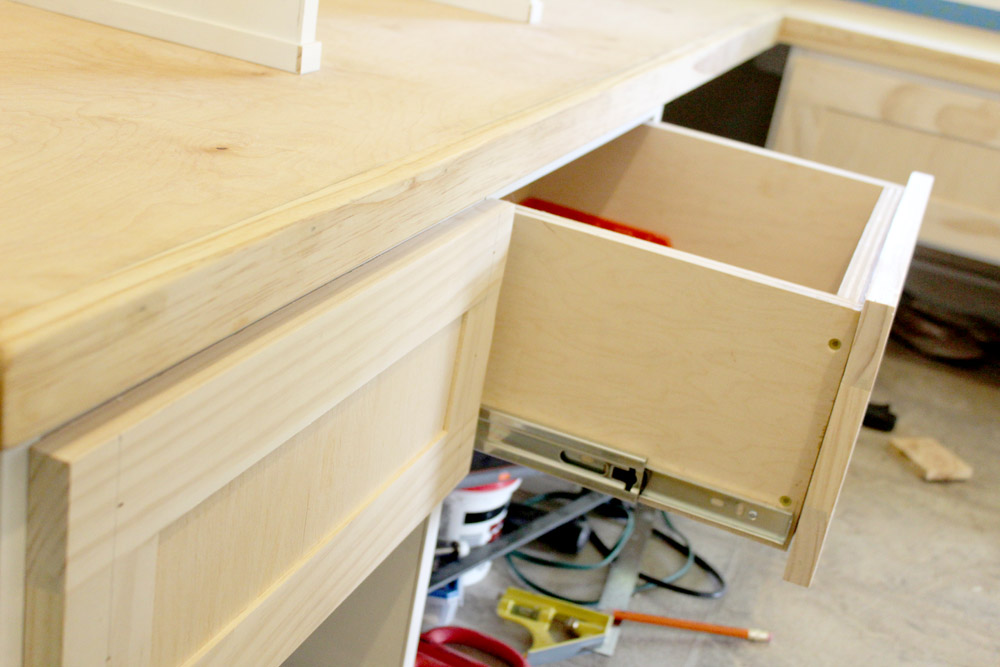
They serve as the face of a drawer, giving it a clean and polished look while also acting as a protective layer for the contents inside. Step 3 to give the drawer front makeover it a finished appearance, use a wood trim around the plywood using a 45 degree cut to cover up the raw edges. The size of the box inside the drawer isn't so important since the main concern is with the opening. Some of our most popular styles include adobe, shaker, and heritage. Plywood is less expensive, won’t cup or warp like lumber might. 1/2″ rabbet on both ends is 1″. No need for fancy clamps or anything like that! Cut the rabbet 1/4″ deep so the back of the plywood lines up flush with the back of the rails and. Now you’re ready to attach the trim to the base. With our 1/8″ gap marked on the center of the drawer dividers we were then able to measure the drawer front width.
Web e veryone loves a good ikea hack.from upgrading drawers, shoe cabinets, tables, mirrors and more, it’s so easy to personalize your favorite ikea pieces to make your home feel more comfortable. I used pine wood because it’s softwood and is easy to sand the edges with 220 grit sandpaper for a finished smooth edge. Web complete this step for each side of each drawer fronts, but make sure to keep the pieces together. But, when i want to make an overlay drawer front, i usually use 1x dimensional. You could use the circular saw for both if that’s all you have but for me this was faster. Web the most reliable way to measure for the rail lengths is to start by laying out the drawer face (or door) sides on the cabinet carcass with a pencil. New placement for the front camera. Use the router and a 1/4″ straight bit to cut a rabbet all the way around your 1/2″ piece of plywood. Web 12″ bar clamp. Olu fashanu should come in right away and secure the offensive line in front of…
How to Make Quick and Easy Shaker Style Drawer Fronts
Step 3 to give the drawer front makeover it a finished appearance, use a wood trim around the plywood using a 45 degree cut to cover up the raw edges. Web the blade intersects the front with an identical angle as the drawer sides. If the grooves are perfectly center in the rails and stiles, you should have a 1/4″.
How to Make Quick and Easy Shaker Style Drawer Fronts
Measure the drawer opening carefully to make sure you have the right size. You could use the circular saw for both if that’s all you have but for me this was faster. It’s much easier to do this now than it is after the panel is in. Web after sanding, wipe everything down well and prime and paint the frames.

Howto Make Custom Drawer Fronts for RATIONELL drawers IKEA Hackers
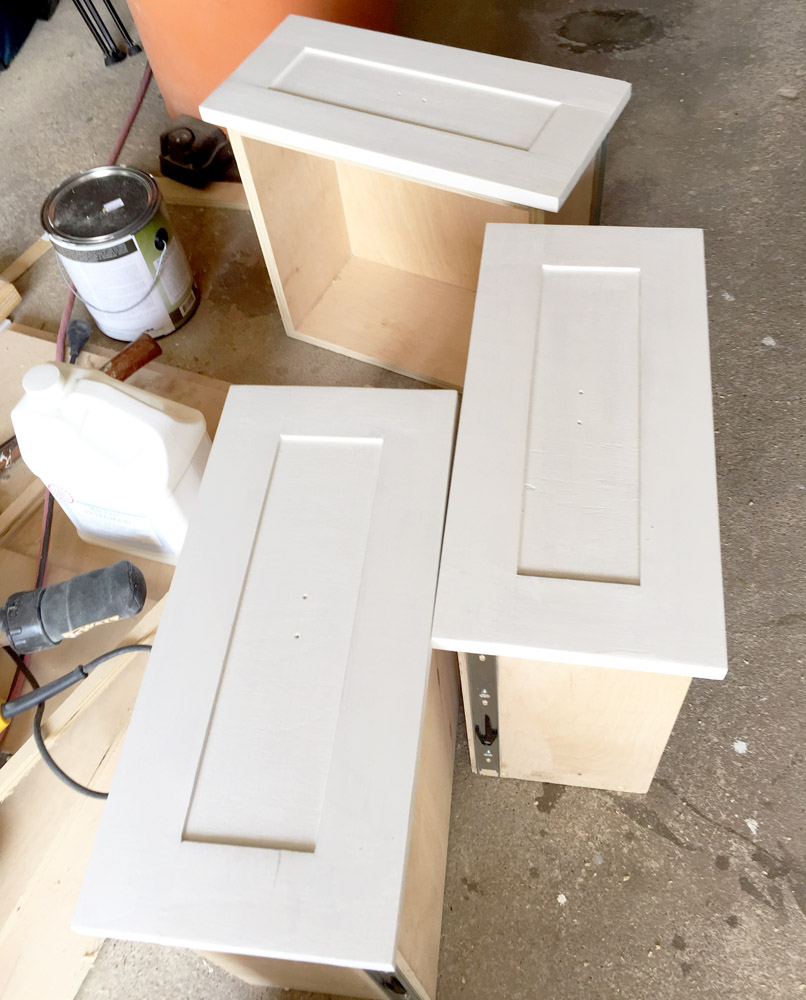
You want your drawer front to be at least a ¼” bigger on each side than the hole or opening that the drawer will go in. Sand your drawer front, making sure to go over the areas where wood filler was applied. If i am making inset drawers, like with this diy console table or this diy kids desk with.
How to Make Quick and Easy Shaker Style Drawer Fronts
It’s much easier to do this now than it is after the panel is in. But, when i want to make an overlay drawer front, i usually use 1x dimensional. The total drawer height minus 4″ is the length to cut the stile. Cut the rabbet 1/4″ deep so the back of the plywood lines up flush with the back.

10InstallingDrawerFronts Addicted 2 DIY
Here's how i transformed our. Then, wipe both the trim piece and the base with a dry cloth. No need for fancy clamps or anything like that! 2 1/2″ wide stock times two is 5″. Web i'm using poplar, since it's affordable, durable and easy to work with.

Custom Door And Drawer Fronts Kitchen door styles
1/2″ rabbet on both ends is 1″. If you have a speed square use it to draw your line, otherwise just make sure your line is 1 5/16″ in from the edge all the way down. The total drawer height minus 4″ is the length to cut the stile. Web if you want to make painting easy, it’s essential to.
How to Make Quick and Easy Shaker Style Drawer Fronts
Web how to diy and build new drawer fronts that attach to your old drawers, giving your kitchen, bathroom or furniture a facelift. Web complete this step for each side of each drawer fronts, but make sure to keep the pieces together. Cut the rabbet 1/4″ deep so the back of the plywood lines up flush with the back of.

How to make quick and easy shaker style drawer fronts Artofit
Web if you want to make painting easy, it’s essential to clean cabinet doors and drawer fronts beforehand. If i am making inset drawers, like with this diy console table or this diy kids desk with drawers, i usually go for plywood with edge banding. Here's how i transformed our. Prime, paint, and add hardware. Web how to diy and.
How to Make Quick and Easy Shaker Style Drawer Fronts
I used pine wood because it’s softwood and is easy to sand the edges with 220 grit sandpaper for a finished smooth edge. With our 1/8″ gap marked on the center of the drawer dividers we were then able to measure the drawer front width. Web i'm using poplar, since it's affordable, durable and easy to work with. New placement.
How to Make Quick and Easy Shaker Style Drawer Fronts
The total drawer height minus 4″ is the length to cut the stile. Web grab your 1/4 scrap, orient it so that the 4″ is the width and the 10″ is the height. Sand your drawer front, making sure to go over the areas where wood filler was applied. With our 1/8″ gap marked on the center of the drawer.
You Could Use The Circular Saw For Both If That’s All You Have But For Me This Was Faster.
This breakout feature comes from wood magazine's weekend with wood 2015 class, featuring john olson. Here's how i transformed our. Some of our most popular styles include adobe, shaker, and heritage. They serve as the face of a drawer, giving it a clean and polished look while also acting as a protective layer for the contents inside.
Web Add Wood Trim.
Basically, you’re creating a frame to cover the. New placement for the front camera. We also have over 64 different styles and 22 different wood types or finishing options. You want your drawer front to be at least a ¼” bigger on each side than the hole or opening that the drawer will go in.
Web How To Diy And Build New Drawer Fronts That Attach To Your Old Drawers, Giving Your Kitchen, Bathroom Or Furniture A Facelift.
Cut the rabbet 1/4″ deep so the back of the plywood lines up flush with the back of the rails and. Sand your drawer front, making sure to go over the areas where wood filler was applied. Step 3 to give the drawer front makeover it a finished appearance, use a wood trim around the plywood using a 45 degree cut to cover up the raw edges. Web building drawer fronts is a crucial step in furniture or cabinet making.
I Used Pine Wood Because It’s Softwood And Is Easy To Sand The Edges With 220 Grit Sandpaper For A Finished Smooth Edge.
2 1/2″ wide stock times two is 5″. Measure between drawers to be sure the. Now that we know the width of the face we need to subtract the stiles. Web in this video (part 3 of 3) i’ll show you how to make and install drawer facesmerchandise & plans: