Pumpkin Stems Drawing
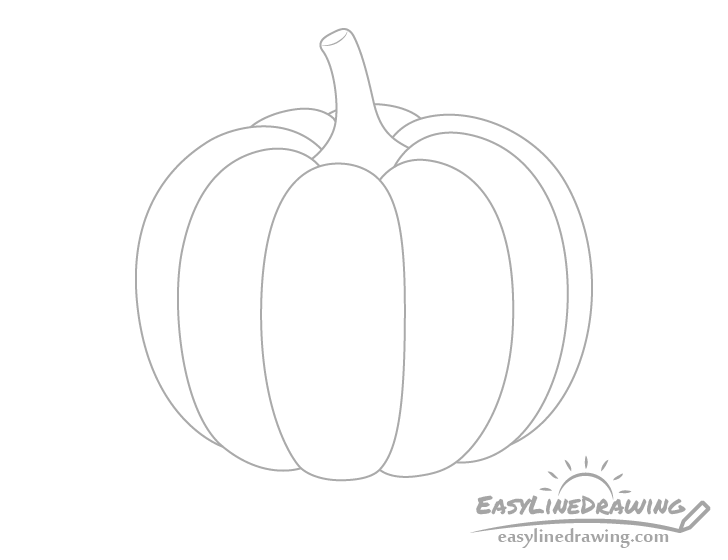
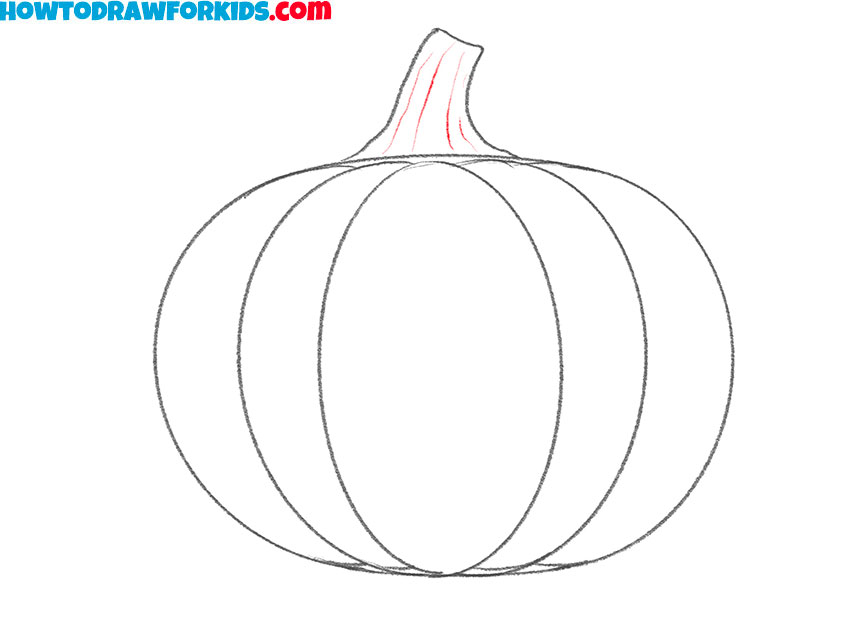
Pumpkin Stems Drawing - To do this, begin by drawing a curved line towards the top of your pumpkin. Now repeat the technique on the right hand side: Draw scary pumpkin faces, like a jack o lantern expression, for a spooky vibe. Start at our “stem base”, only just touch our pumpkin body at the bottom and finish on the previous rib. Draw the stem right over top of the rest of the pumpkin and then erase the lines of the ribs that are now overlapped by it. You’ll be refining the details a little later in the process. Web sketch the stem at the top of the pumpkin, using short, jagged lines to create a rough and gnarled texture. Web divide this line in half, marking the spot for the pumpkin’s stem. Color the mouth and space behind the eyes black to give your pumpkin. Next, begin to draw lines on the stem of the pumpkin.
Next, begin to draw lines on the stem of the pumpkin. Then, draw a matching curved line on the right side of the pumpkin to make it round. Web pumpkin drawing step 1. Start small at the top and make it bigger as you go down. Draw the stem of the pumpkin. Use additional short lines to begin enclosing the ribs visible behind the stem. Use raw umber a132 to represent the shadowed areas on the pumpkin stem and add the shadow created by the pumpkin. You’ll be refining the details a little later in the process. At this stage of your drawing you can make your stem just a rough sketch. There is this little depression at the tip of the stem, so we need to draw some bumpy lines to indicate that.
Web mark off the width and height of the picture. There’s definitely room for extra creativity here. Draw another curved line across it to give the tip of the stem an oval shape. Pumpkin usually tend to be shaped like a sort of sphere with a squashed in top and bottom. Web this gives the pumpkin stem a more natural look. Take notice that the blue outlines are used to indicate the newest components being drawn in each in each of the steps. Again, draw three ribs out to the righ outline of the pumpkin body. Stem forum and cosmic visions student art exhibition. Make a leaf stem by drawing a vertical line at the bottom middle of the leaf. It enhances your ability to observe and recreate natural shapes, making it a valuable skill for artists of any level.
How to Draw a Pumpkin Step by Step EasyLineDrawing
Go over the contour and lines of the pumpkin sections with this color. Draw a curved line on the left side of the pumpkin shape. Draw lines close together that follow the curvature of the stem. Make the it wider towards it’s base and narrower towards the top with a light curve in it’s shape. In this case the pumpkin.

How to Draw a Pumpkin HelloArtsy
Begin by drawing a vertical oval on your page. Add new lines to show the shape of the pumpkin. Stick green pipe cleaners as stems on your drawing. Web draw the pumpkin’s stem. Color your pumpkin with your favorite shade of bright orange.

How to draw a pumpkin Step by step Drawing tutorials
Web mark off the width and height of the picture. Stick green pipe cleaners as stems on your drawing. Then, draw a matching curved line on the right side of the pumpkin to make it round. Start by drawing the overall shape of your pumpkin with a two curved lines. Draw lines close together that follow the curvature of the.

10+ Ideas For Drawing On Pumpkins
The design and proportion of each part will be highlighted in each step of the lesson. Next, refine those lines for depth. The strongest light source is coming from. Web repeat until all the pumpkin sections are blended. Start coloring from the edge of the sketch and fill in.

Hand drawn set sketch pumpkin leaves Royalty Free Vector
Next, draw the pumpkin stem. Web drawing a pumpkin starts with imagining its round, ribbed body and distinct stem. But instead of a full circle, draw a large semicircle for the pumpkin itself. Web in today’s tutorial, we will discover how to draw a pumpkin on paper. Draw the stem of the pumpkin.
How to Draw a Pumpkin Easy Drawing Tutorial For Kids
Draw a sketch of the future leaf nearby, shaped like a rhombus. Web drawing a pumpkin starts with imagining its round, ribbed body and distinct stem. Next, begin to draw lines on the stem of the pumpkin. Go over the contour and lines of the pumpkin sections with this color. Web start with a simple, soft oval.
Pumpkins with stems leaves abstract bark drawing in modern Minimal art
Use a brown pastel to draw a thinner outline around each oval part. Use a curved line to enclose the end of the stem. Make several different shapes of pumpkins and color them in rainbow colors. Leave a little opening at the top for the stem. Gently smudge the brown outlines so they blend with the orange.
Pumpkin Vine Drawing Free download on ClipArtMag
Once you’re done with the stem, you’re ready to draw the leaves. To do this, begin by drawing a curved line towards the top of your pumpkin. Draw lines close together that follow the curvature of the stem. Use raw umber a132 to represent the shadowed areas on the pumpkin stem and add the shadow created by the pumpkin. Web.

EASY How to Draw a Cute Pumpkin Tutorial for Halloween/Fall
The strongest light source is coming from. Start coloring from the edge of the sketch and fill in. Use an hb and 4b pencil to shade the stem. Make several different shapes of pumpkins and color them in rainbow colors. The irregular shape and rugged texture of the stem should reflect the organic nature of real pumpkin stems, infusing your.

how to draw a pumpkin patch Jame Mckenna
Now repeat the technique on the right hand side: Draw another curved line across it to give the tip of the stem an oval shape. Using orange a003, color over the inner areas of the eye, nose and mouth. You are invited to join the event to learn about how we create. You’ll be refining the details a little later.
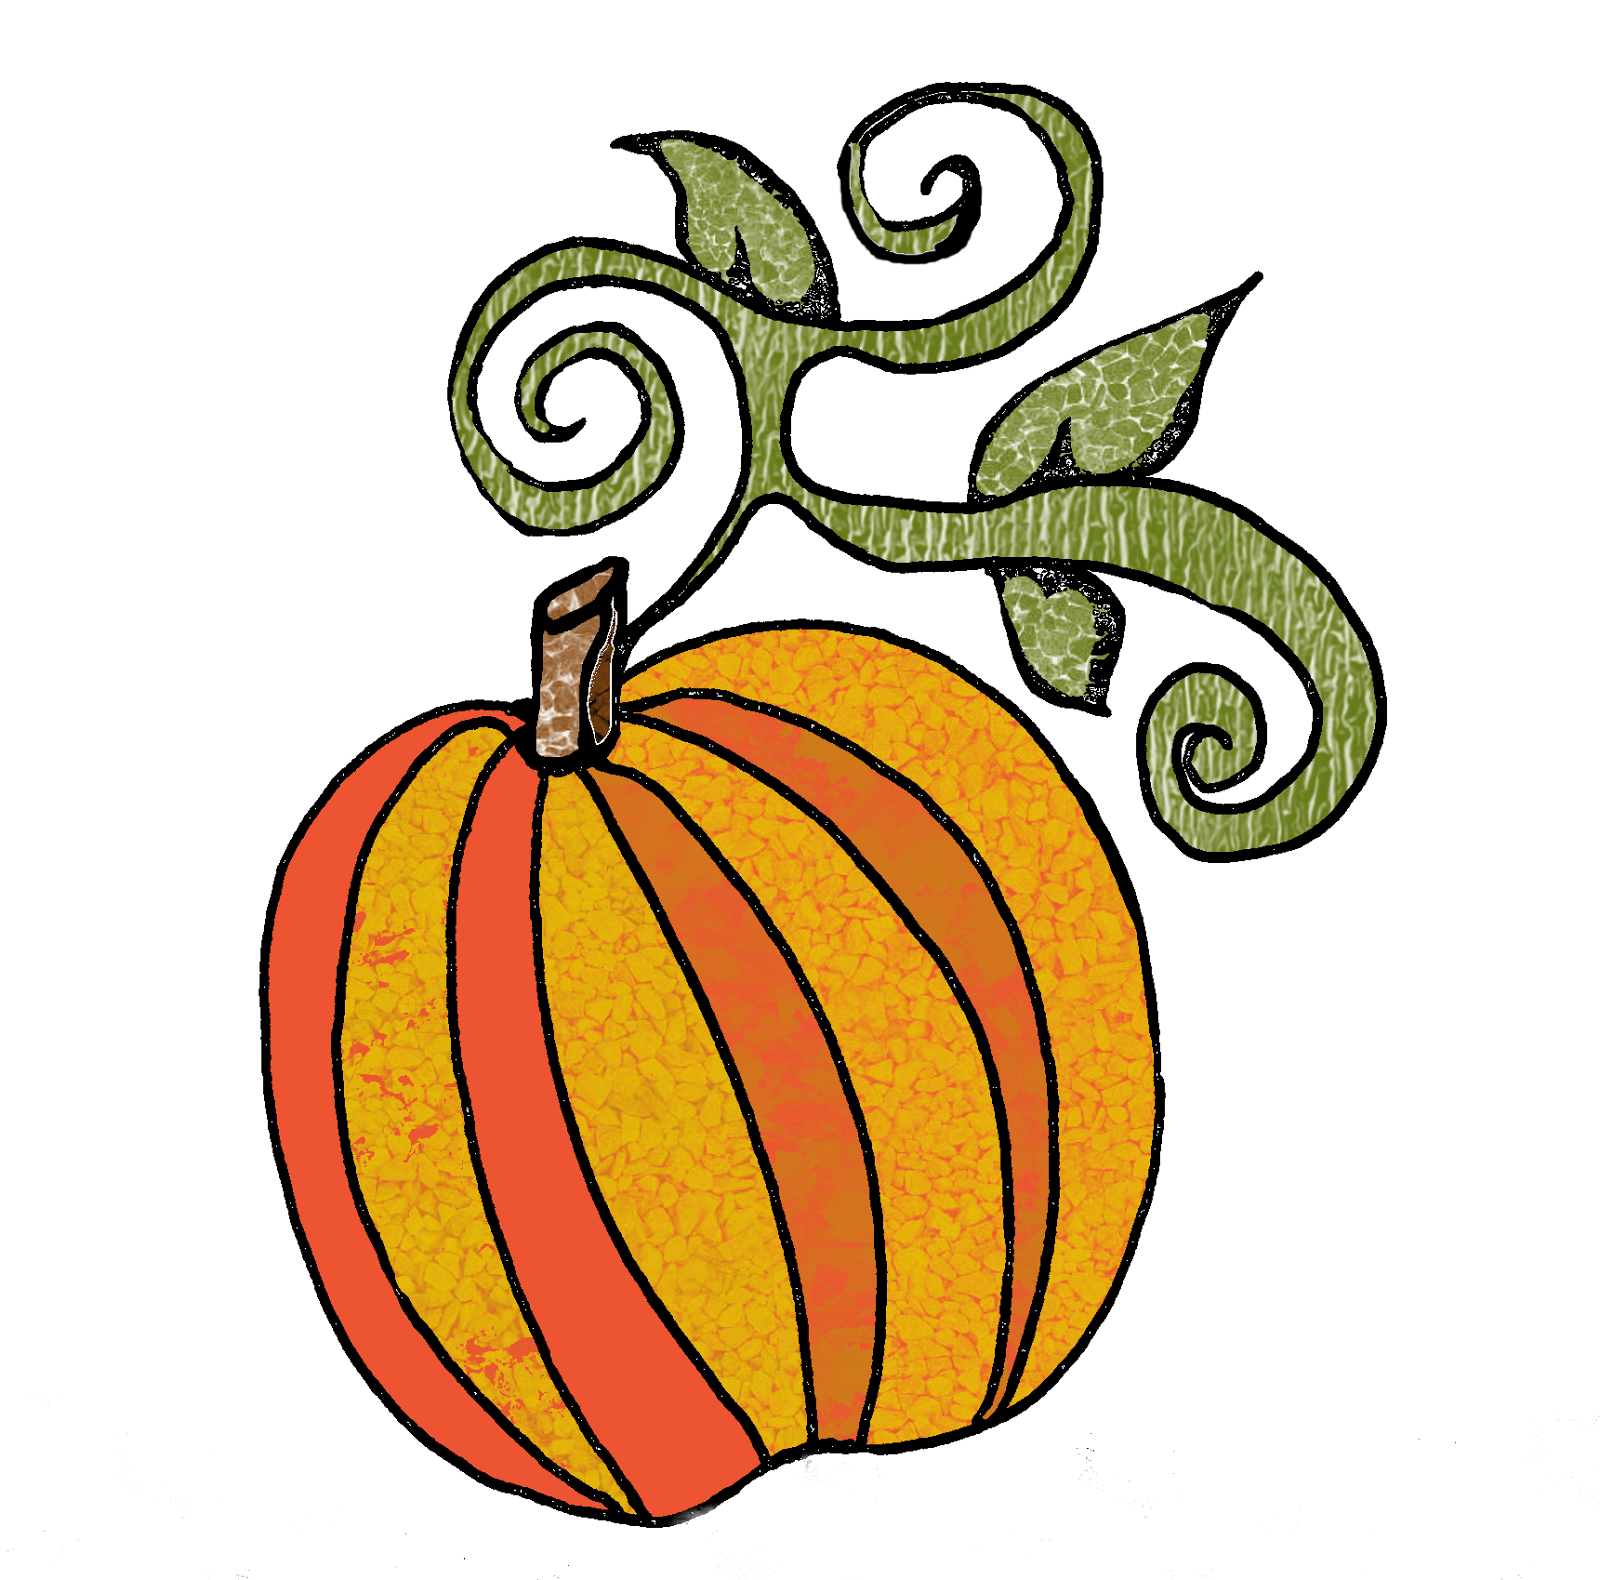
Finally, Add A Stem, Shading For A 3D Effect, And Voilà—You’ve Harvested Art!
The irregular shape and rugged texture of the stem should reflect the organic nature of real pumpkin stems, infusing your drawing with an authentic touch. Web sketch the stem at the top of the pumpkin, using short, jagged lines to create a rough and gnarled texture. Add new lines to show the shape of the pumpkin. Web this gives the pumpkin stem a more natural look.
Bake The Crust Further Until.
Color your pumpkin with your favorite shade of bright orange. Next, begin to draw lines on the stem of the pumpkin. In this case the pumpkin itself and the stem. Begin the pumpkin drawing by first getting it’s major shapes.
And Then Draw Your Stem Coming Out Of That Curved Line.
Now repeat the technique on the right hand side: Web repeat until all the pumpkin sections are blended. Go over the contour and lines of the pumpkin sections with this color. Begin by drawing a vertical oval on your page.
Show, With Light Lines, The Main Proportions Of The Pumpkin, Its Leaf And Its Stem.
There’s definitely room for extra creativity here. Smudge the leaf and stem to smooth out the color. Use a brown pastel to draw a thinner outline around each oval part. Color the mouth and space behind the eyes black to give your pumpkin.