Shadow Drawing
Shadow Drawing - Web two, from this point, we draw a line at the same angle as this angle visible on the top view. Use your eraser to show the light areas. The highlight is the lightest part where the light directly hits the object. Keep the pencil sideways so that the greatest area of the tip will be in contact with the paper. You will learn how to shade the. Enclose a small triangle at the horizon line to indicate the inner sides of the legs. Just pick some angle that would suggest that the shadow is casted to the back, and to the right if the light source is placed to the left. Draw a series of short curved lines below the arm of the shadow on each side. This is to emphasize that the light areas are conforming to the light source or to make it simple, the light is bouncing from the artificial light to the subject that is facing the light source. Web the 3 areas of a form:
The halftones are always going to be lighter than any value on the shadow side and blend. Use your eraser to show the light areas. The left image is underexposed, tones are very dark and resemble one another, details are lost, and the shape flattens. From there, draw straight lines down to the horizon line to outline the legs. Make sure the thickest section of the core shadow is darkest. Use a light blender or paper stump to reduce the appearance of pencil strokes. Draw a series of short curved lines below the arm of the shadow on each side. Enclose a small triangle at the horizon line to indicate the inner sides of the legs. Keep the pencil sideways so that the greatest area of the tip will be in contact with the paper. These are the fists folded against the hips.
Web two, from this point, we draw a line at the same angle as this angle visible on the top view. Web once you’re done visualizing, draw a core shadow. Just pick some angle that would suggest that the shadow is casted to the back, and to the right if the light source is placed to the left. Enclose a small triangle at the horizon line to indicate the inner sides of the legs. Keep the pencil sideways so that the greatest area of the tip will be in contact with the paper. Keep your hand firmly, avoid too much pressure. When you’re first starting you just need to think of the three simple areas of the form: Use a light blender or paper stump to reduce the appearance of pencil strokes. Web the key is to keep the right balance between light and dark tones to detail the image successfully. Web in this easy to follow fully narrated step by step tutorial i will show you guys how i draw shadows and light a full figure.
How to draw shadows of people and objects without errors
Keep your hand firmly, avoid too much pressure. Use your eraser to show the light areas. Three, decide how high the light source is. Web in this easy to follow fully narrated step by step tutorial i will show you guys how i draw shadows and light a full figure. You don't actually need to draw a top view.

Shadow drawing THE EDUCATION HUB
Use your eraser to show the light areas. You don't actually need to draw a top view. Don’t rush and start light. Use a light blender or paper stump to reduce the appearance of pencil strokes. From there, draw straight lines down to the horizon line to outline the legs.
Shadow Arts Drawing silhouette style Artwork Arimac Medium
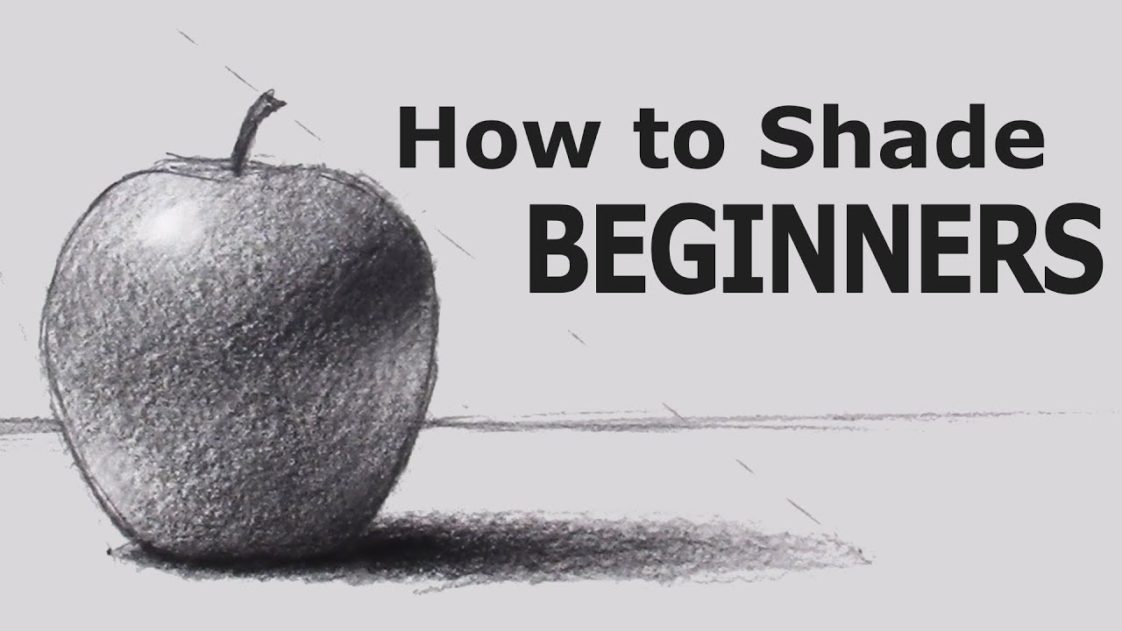
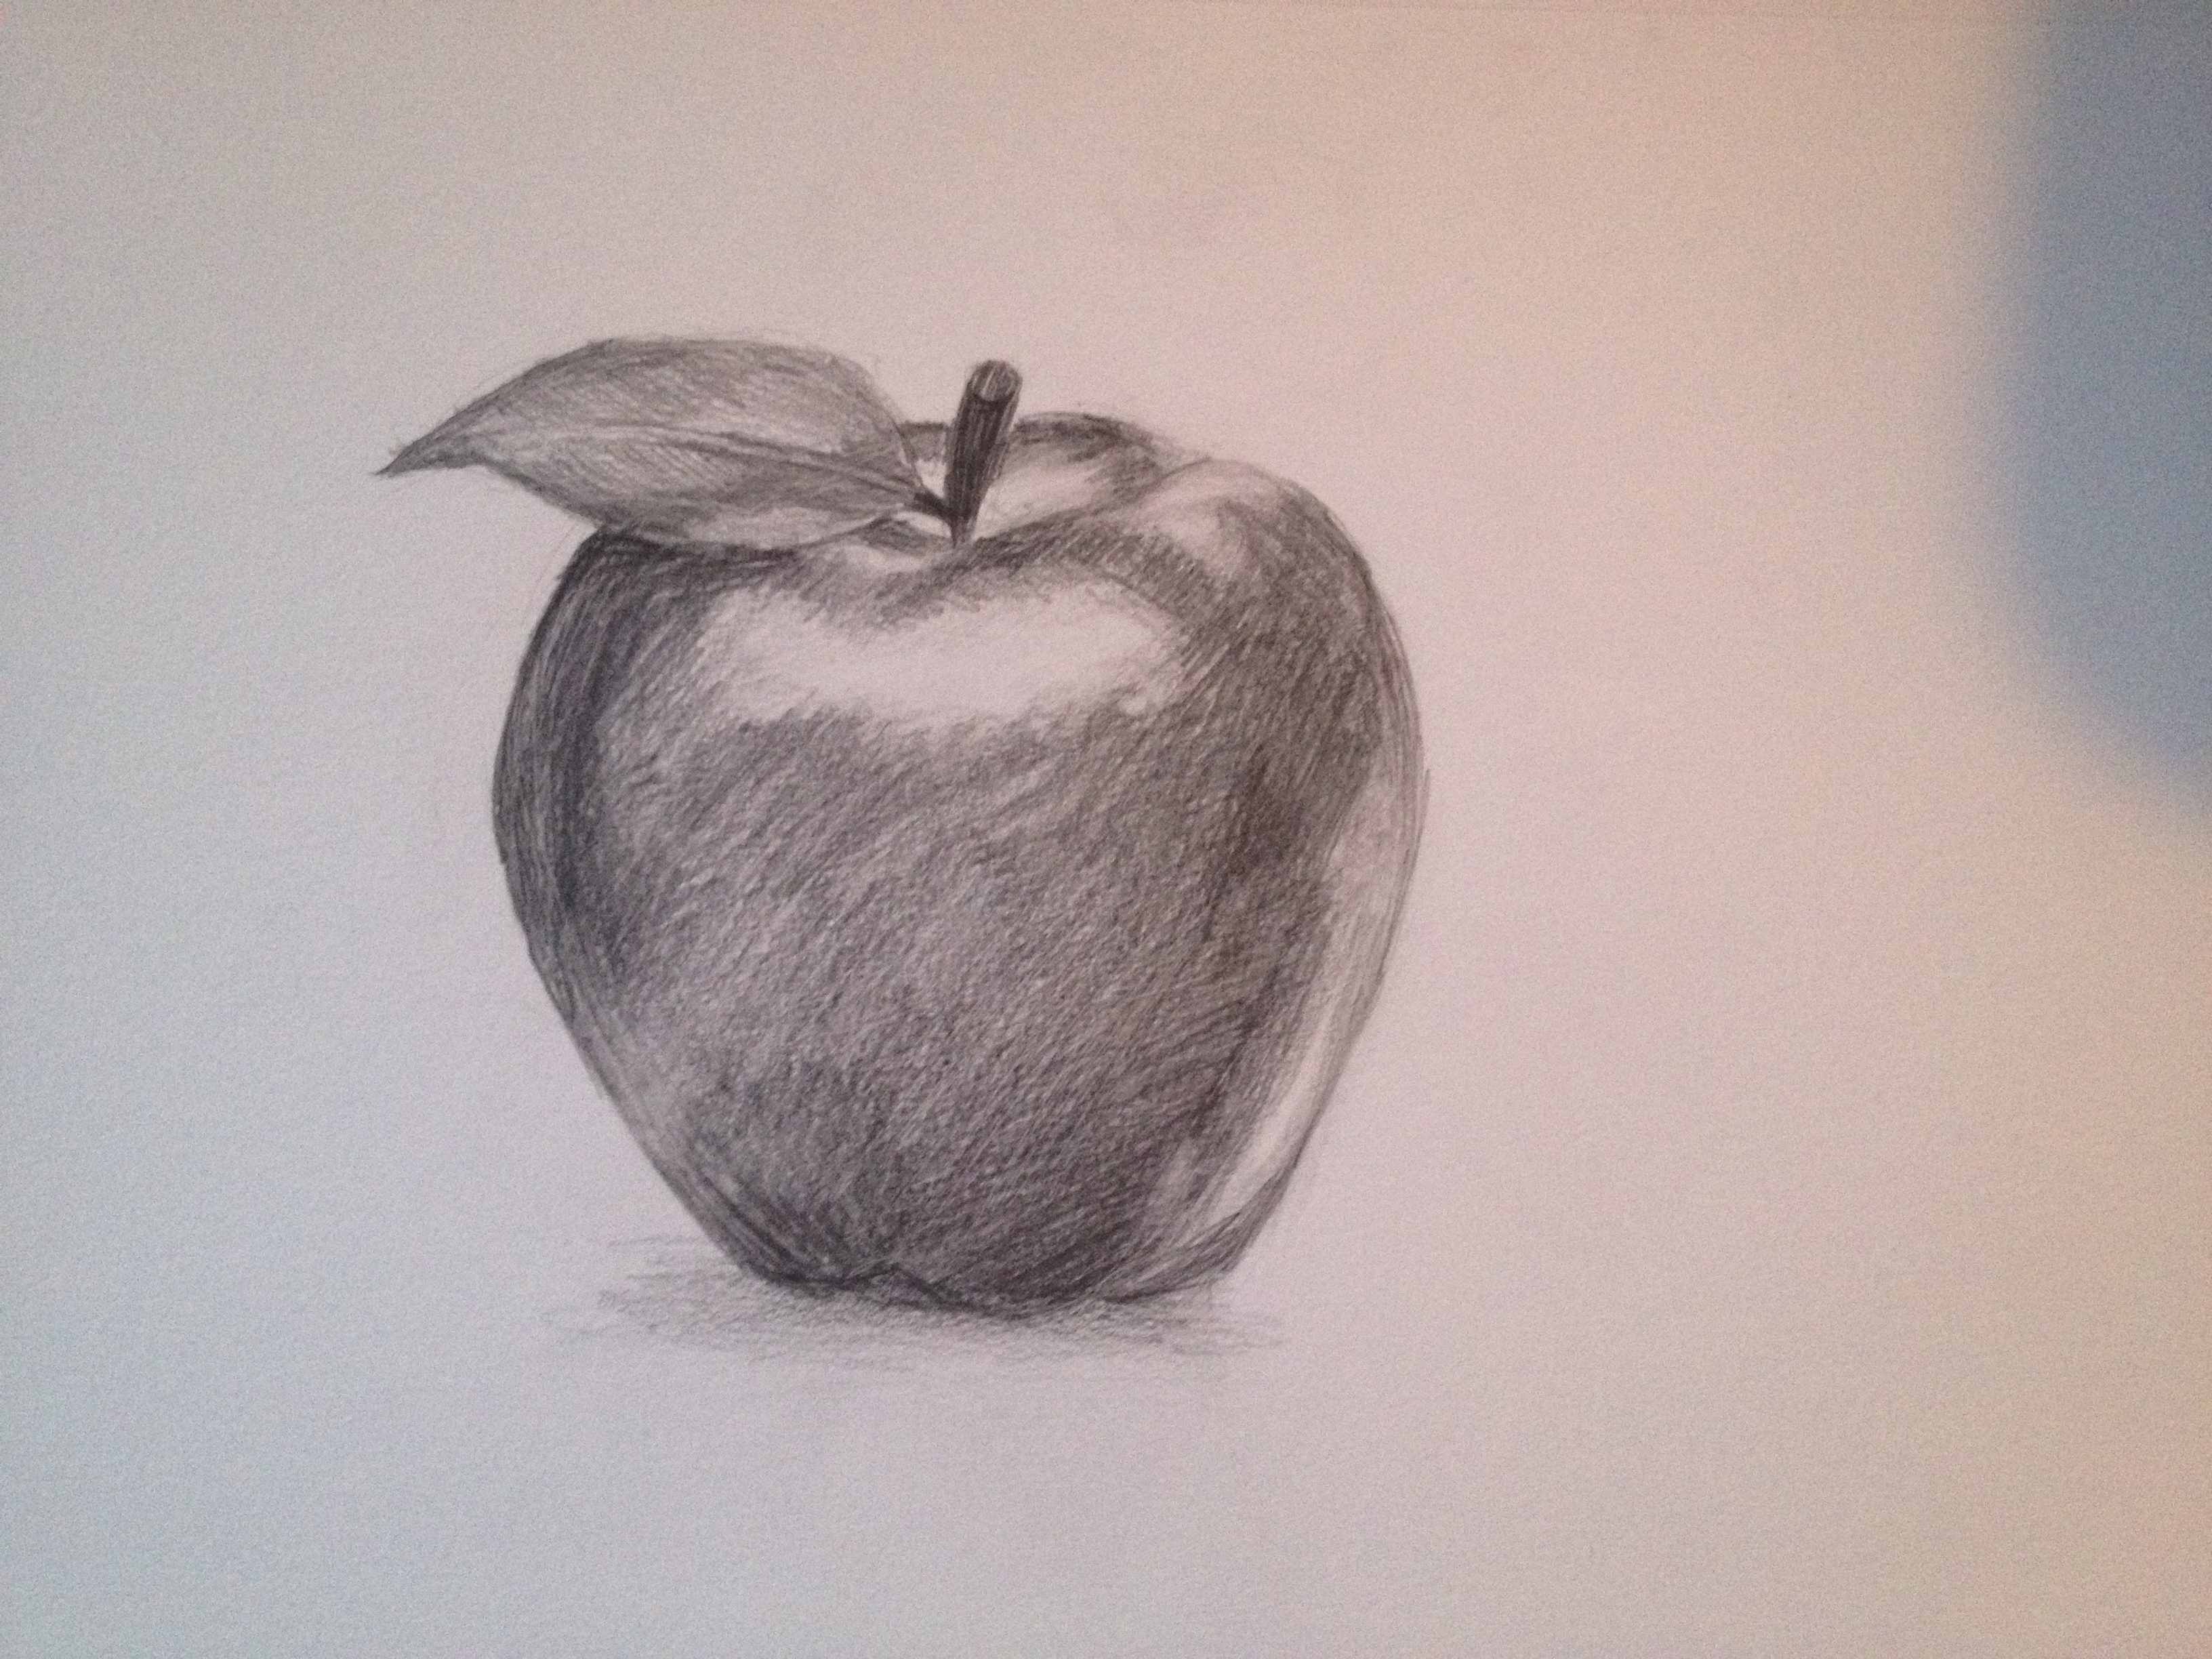
From there, draw straight lines down to the horizon line to outline the legs. Web two, from this point, we draw a line at the same angle as this angle visible on the top view. My core shadow is thinner on the left side because there are more reflections on that side (yours might look different depending on the apple’s.

Guide to Drawing Shadows Art Rocket
Use a light blender or paper stump to reduce the appearance of pencil strokes. Web in this easy to follow fully narrated step by step tutorial i will show you guys how i draw shadows and light a full figure. Where the apple touches the table, there is less light. Don’t rush and start light. The highlight is the lightest.

How to draw shadow in perspective. With these basica you can figure out
Three, decide how high the light source is. You don't actually need to draw a top view. Keep your hand firmly, avoid too much pressure. This is to emphasize that the light areas are conforming to the light source or to make it simple, the light is bouncing from the artificial light to the subject that is facing the light.

How to Draw a Shadow Really Easy Drawing Tutorial
From there, draw straight lines down to the horizon line to outline the legs. You will learn how to shade the. Web in this easy to follow fully narrated step by step tutorial i will show you guys how i draw shadows and light a full figure. Use your eraser to show the light areas. Web two, from this point,.
Shadowy Charcoal Portraits by Dylan Andrews a drawing series in
From there, draw straight lines down to the horizon line to outline the legs. Enclose a small triangle at the horizon line to indicate the inner sides of the legs. Keep the pencil sideways so that the greatest area of the tip will be in contact with the paper. Web two, from this point, we draw a line at the.
Pencil Shadow Drawing at GetDrawings Free download
The left image is underexposed, tones are very dark and resemble one another, details are lost, and the shape flattens. My core shadow is thinner on the left side because there are more reflections on that side (yours might look different depending on the apple’s surroundings). The highlight is the lightest part where the light directly hits the object. Don’t.

Китти Прайд on Instagram “art drawing face shadow dark waves
Just pick some angle that would suggest that the shadow is casted to the back, and to the right if the light source is placed to the left. Web once you’re done visualizing, draw a core shadow. Draw an outline first to get the shape of your image. Make sure the thickest section of the core shadow is darkest. My.

Perspective Shadow Perspective Drawing Joshua Nava Arts
Make sure the thickest section of the core shadow is darkest. Enclose a small triangle at the horizon line to indicate the inner sides of the legs. This is to emphasize that the light areas are conforming to the light source or to make it simple, the light is bouncing from the artificial light to the subject that is facing.
Use Your Eraser To Show The Light Areas.
Just pick some angle that would suggest that the shadow is casted to the back, and to the right if the light source is placed to the left. You don't actually need to draw a top view. Enclose a small triangle at the horizon line to indicate the inner sides of the legs. Web the 3 areas of a form:
Three, Decide How High The Light Source Is.
Keep the pencil sideways so that the greatest area of the tip will be in contact with the paper. Web tips for drawing shadows: You will learn how to shade the. Web two, from this point, we draw a line at the same angle as this angle visible on the top view.
The Highlight Is The Lightest Part Where The Light Directly Hits The Object.
Don’t rush and start light. Make sure the thickest section of the core shadow is darkest. Use a light blender or paper stump to reduce the appearance of pencil strokes. My core shadow is thinner on the left side because there are more reflections on that side (yours might look different depending on the apple’s surroundings).
When You’re First Starting You Just Need To Think Of The Three Simple Areas Of The Form:
From there, draw straight lines down to the horizon line to outline the legs. Keep your hand firmly, avoid too much pressure. Where the apple touches the table, there is less light. Start showing the cast shadow.