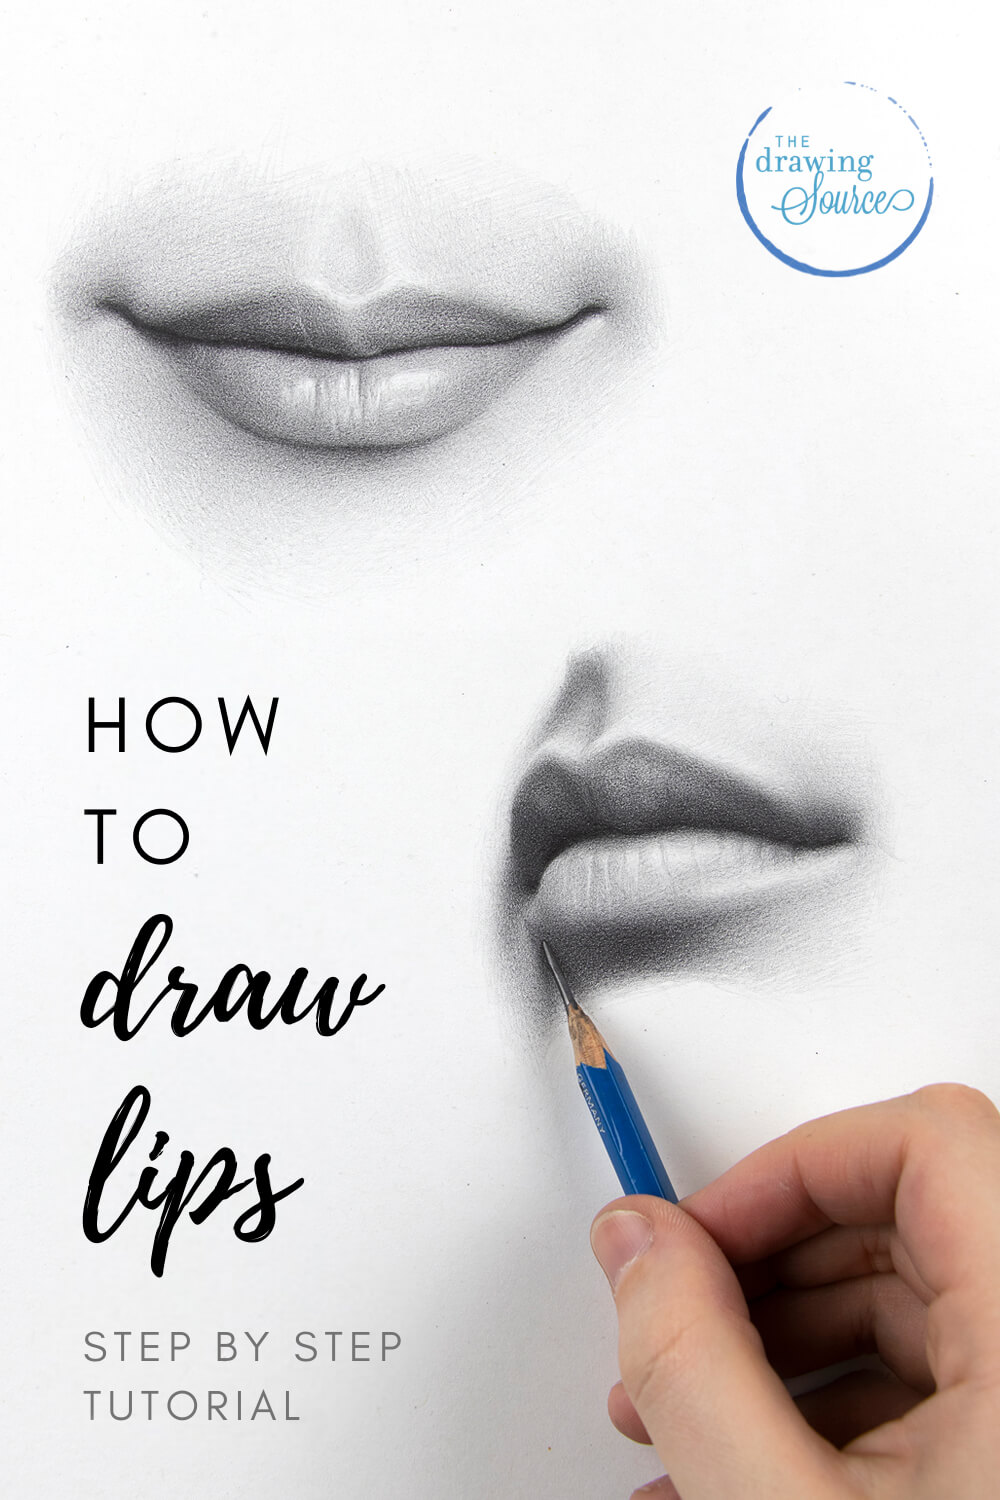
Step By Step Drawing Lips
Step By Step Drawing Lips - With a variety of animals, magical creatures, vehicles, foods, plants and more your kids will never get bored. Draw a horizontal line lightly with your pencil. Partway down draw a curve (similar to a “u” shape). The first step of any drawing is to start with the most basic shapes—regardless of the point of view that you're trying to capture. See how to draw a realistic face: Next, begin to shade the darkest areas of the lips: Bear in mind that the two lines we drew previously and the one we drew in this step should be connected, forming the upper lip. These shapes show the underlying form of the lips. Outline a smaller shape inside the lip. The shorter the line, the more plump they will be.
The longer you draw the horizontal line, the wider the lips will be. Web learn how to draw and shade realistic lips, step by step with pencil. Web this will be the center of our lips. The shorter the line, the more plump they will be. Web so i searched inside my realistic portrait drawing course and put together this sample lesson for you. Now draw the center line for. Web the upper lips can be divided into three masses and the lower lips into two masses. Draw this line lightly because we’re going to erase it later. Outline a smaller shape inside the lip. The longer you draw the horizontal line, the wider the lips will be.
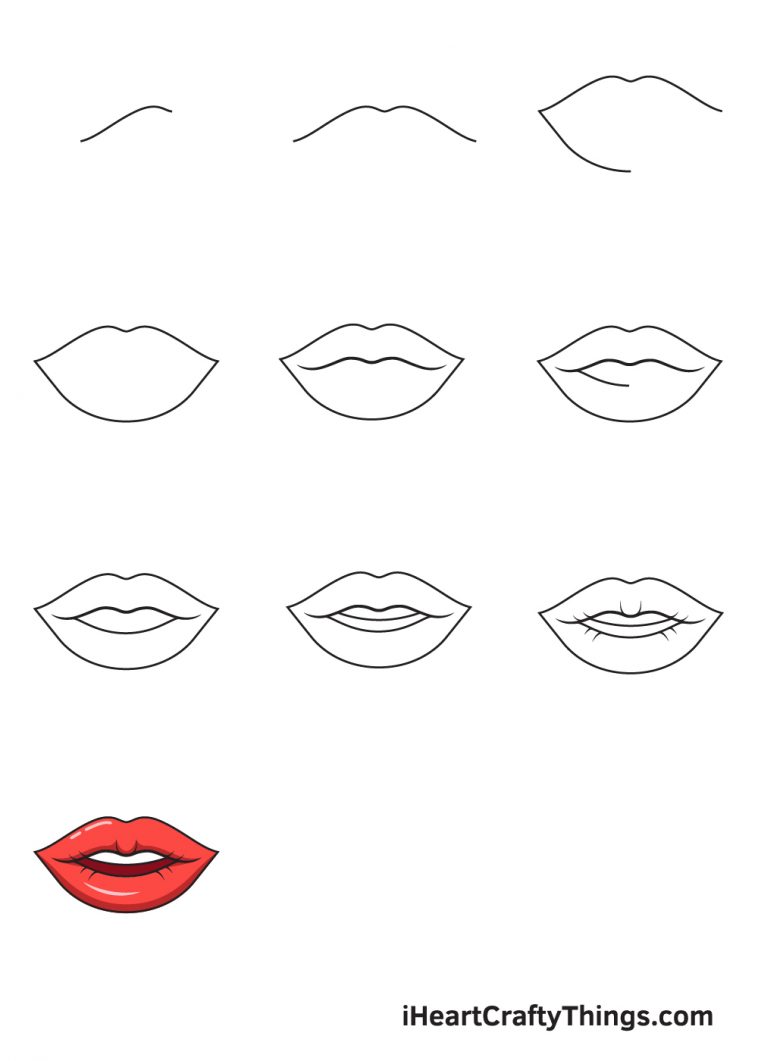
They should start at the center point of your triangle and extend past the edges of the triangle. Partway down draw a curve (similar to a “u” shape). Lightly draw the philtrum (the crease between the upper lips and nose) and outline the cast shadow. Draw a horizontal line lightly with your pencil. These shapes show the underlying form of the lips. At this stage, it’s more important to make a lot of light marks and to get things. The longer you draw the horizontal line, the wider the lips will be. These circles will be used to round out the lines for the lips. Add two long lines to that v, make them flat and longer than the v lines, then add another two lines for the corners of the mouth. This will be the top of the lip, or what they call the cupid’s bow.

How To Draw A Lips Step By Step Easy at Drawing Tutorials
Web the texas lottery offers multiple draw games for those aiming to win big. These shapes show the underlying form of the lips. Draw mouths and lips in different styles. Web how to draw flower step by step. I did a few versions to show different ways to do it, so i really hope it helped!:) lmk what other.
How to Draw Lips Step by Step
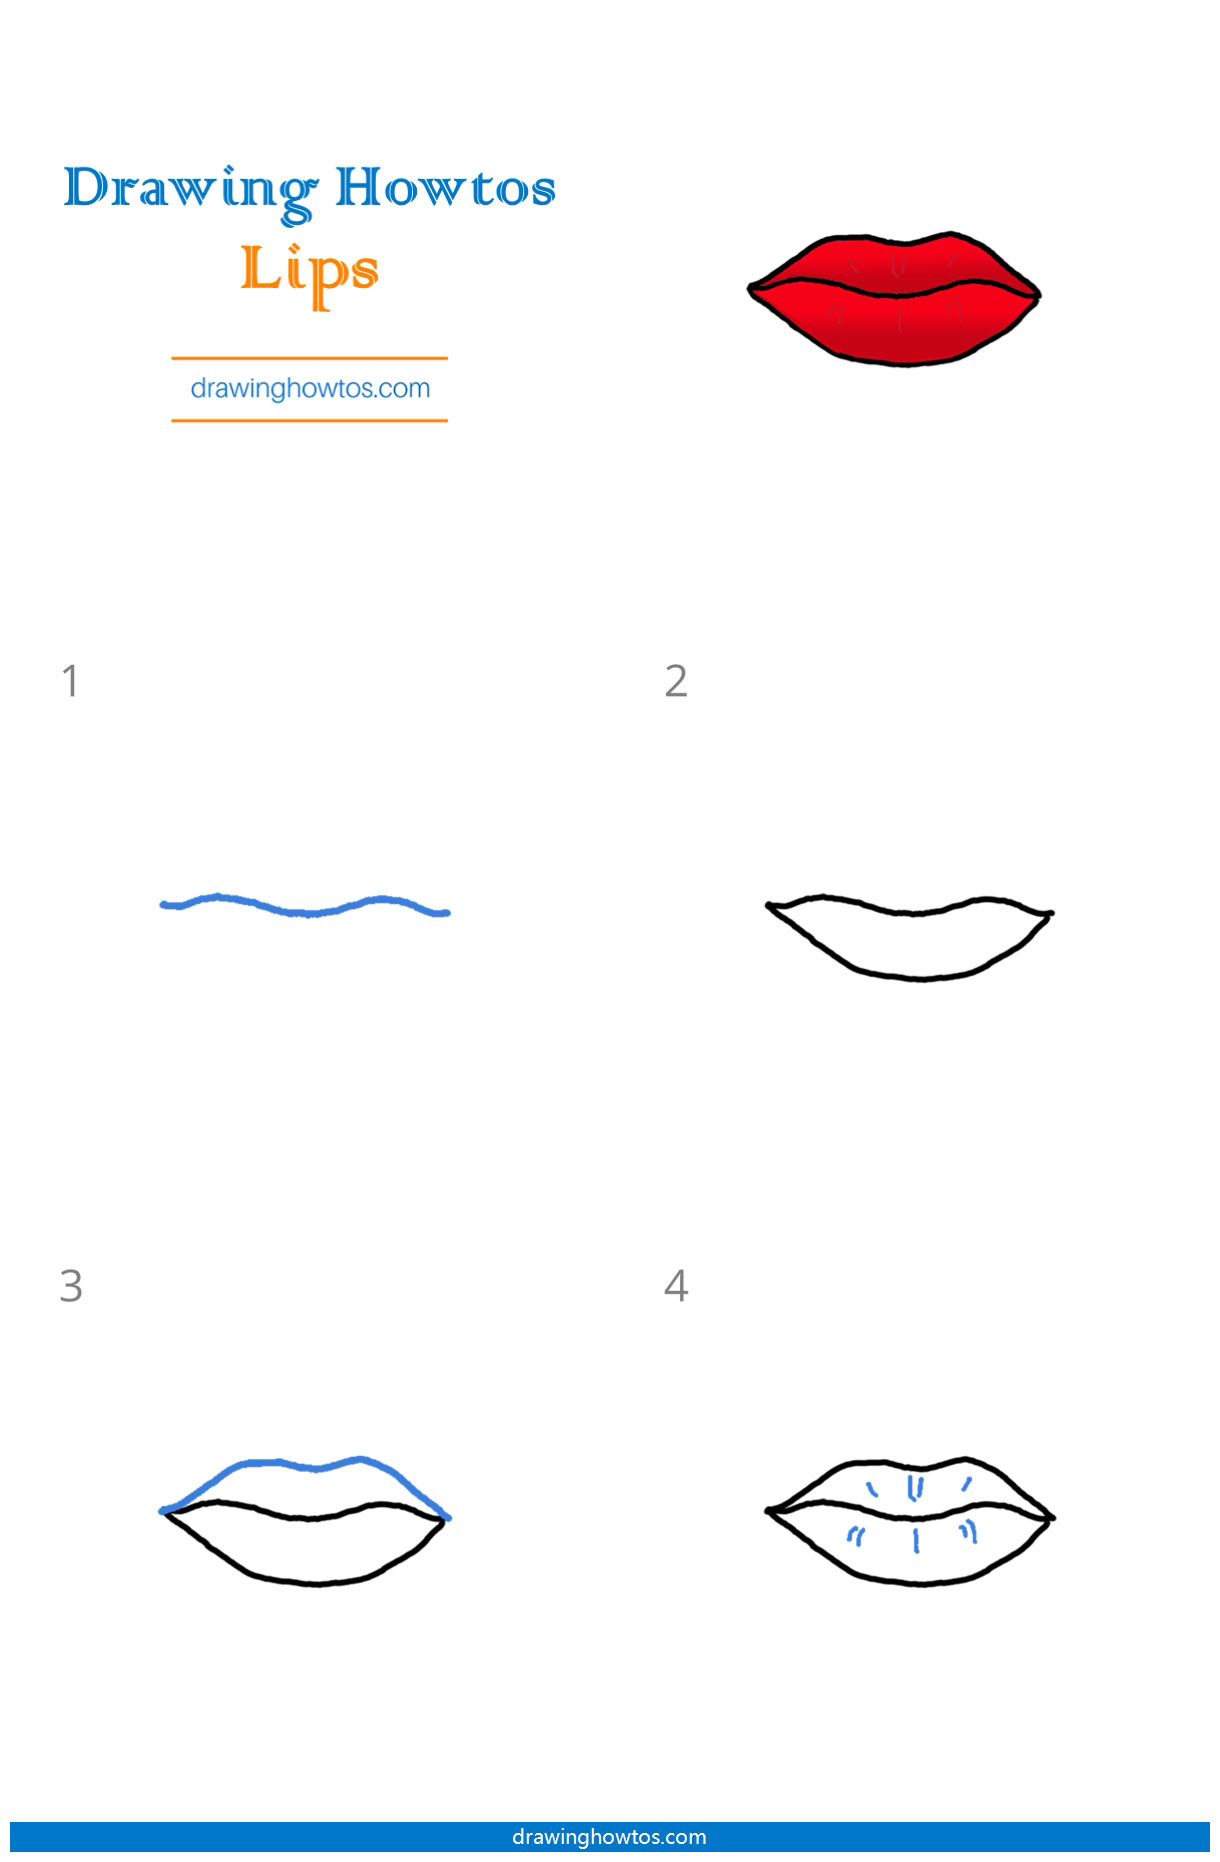
There are many ways you can customize your drawing to make it extra unique, which i'll. Web this will be the center of our lips. Web how to draw lips step 1: Partway down draw a curve (similar to a “u” shape). Lightly draw the philtrum (the crease between the upper lips and nose) and outline the cast shadow.
30+ How to Draw Lips for Beginners Step By Step HARUNMUDAK
The shorter the line, the more plump they will be. Web the lips can help transmit different expressions and emotions: Use a soft eraser or a kneaded eraser to add highlights on the lips. Web so i searched inside my realistic portrait drawing course and put together this sample lesson for you. In this video, i'll explain the whole process,.
Lips Drawing How To Draw Lips Step By Step
Outline a smaller shape inside the lip. Feather out the ends of the bottom line so. Draw a straight horizontal line between the “u” shape and the base of the triangle. The shorter the line, the more plump they will be. Web how to draw lips step by step step 3:
How To Draw Lips Easy Step By Step
Draw the first half of the hexagon form in the top lip, do your best to make it symmetrical. They should start at the center point of your triangle and extend past the edges of the triangle. It does not represent tiktok’s views or advice. The longer you draw the horizontal line, the wider the lips will be. It will.

lips drawing step by step for beginners Valentine Hidalgo
Then, add two small marks or shading to the corners of the lips to signify the nodes. “i map that part out as guidelines in order to preserve the white space i need for highlights,” explains bevis. The longer you draw the horizontal line, the wider the lips will be. These circles will be used to round out the lines.

Pin on pinterest love boards
Web how to draw lips step by step step 3: Design and draw a character. Draw a straight horizontal line between the “u” shape and the base of the triangle. There are many ways you can customize your drawing to make it extra unique, which i'll. Learn a simple method for developing an original character, from mind map to finished.
30+ How to Draw Lips for Beginners Step By Step HARUNMUDAK
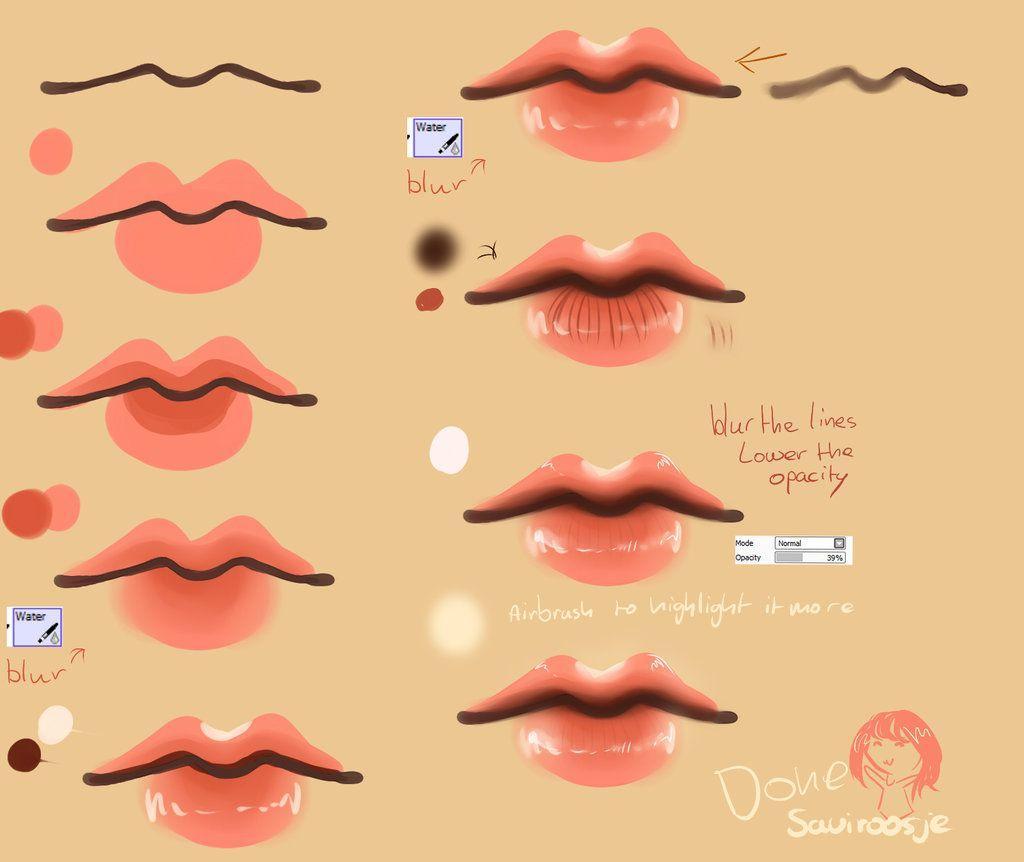
Once we know the basics, it is time to draw them in different styles to see which one we feel the most comfortable with. Here’s a look at may 13, 2024 results for each game: Our how to draw book is here! Next, begin to shade the darkest areas of the lips: Add two long lines to that v, make.

How To Draw A Lips Step By Step Easy at Drawing Tutorials
At this stage, it’s more important to make a lot of light marks and to get things. These circles will be used to round out the lines for the lips. “i map that part out as guidelines in order to preserve the white space i need for highlights,” explains bevis. Draw the bottom line of the upper lip as before,.

How to Draw Lips Really Easy Drawing Tutorial
Feather out the ends of the bottom line so. The longer you draw the horizontal line, the wider the lips will be. Web this will be the center of our lips. Here’s a look at may 13, 2024 results for each game: Draw mouths and lips in different styles.
These Shapes Show The Underlying Form Of The Lips.
Partway down draw a curve (similar to a “u” shape). Add two long lines to that v, make them flat and longer than the v lines, then add another two lines for the corners of the mouth. Draw a straight horizontal line between the “u” shape and the base of the triangle. Use a soft hb pencil to add texture to the lips.
Once We Know The Basics, It Is Time To Draw Them In Different Styles To See Which One We Feel The Most Comfortable With.
This information is ai generated and may return results that are not relevant. With your pencil, draw a curved line with center of the line touching the bottom edge of the lower circles. Partway down draw a curve (similar to a “u” shape). We’ll start out with the outline of the lip already drawn and this video will just go over how to shade and add in the all details.
Sara Barnes / My Modern Met.
Use a soft eraser or a kneaded eraser to add highlights on the lips. Draw the first half of the hexagon form in the top lip, do your best to make it symmetrical. Draw the heart shape in the middle of the top lip. Web this will be the center of our lips.
These Circles Will Be Used To Round Out The Lines For The Lips.
The shorter the line, the more plump they will be. Draw a curved line below the bottom two circles to create the bottom lip. The longer you draw the horizontal line, the wider the lips will be. See how to draw a realistic face: