Step By Step How To Draw Naruto
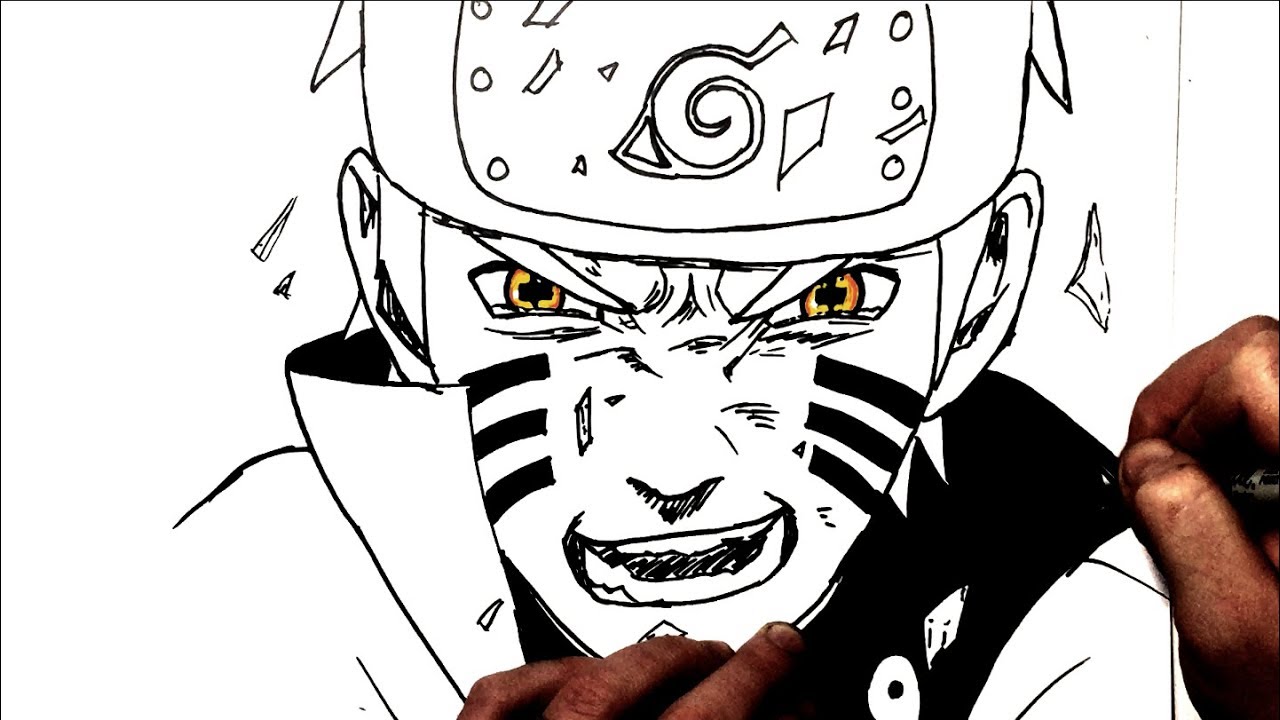
Step By Step How To Draw Naruto - With a variety of animals, magical creatures, vehicles, foods, plants and more your kids will never get. Next, draw the front of the hair by drawing a line that curves down from the forehead. These will be the basic shapes for naruto's head and neck. See picture 6 to draw his eyes over the two parallel lines marking the area for the eyes. Draw a circle beneath this, with two smaller circles within. The first three steps involve establishing a basic sketch to capture the overall proportions and pose. There is a lot to add in this step, so this is one where you should definitely pay close attention to the reference image. Complete naruto headband and front hair spikes. Begin with naruto uzumaki’s face—those distinctive whisker marks, round eyes, and spiky hair. Our printable drawing guide (optional) pencil or black marker;
Draw two horizontal lines within the middle third of the oval to indicate the eye level. Displays the basic proportions sketch to guide your. When drawing the lines, bend them so they follow the contour of the. Draw a circle within each eye. Create naruto nose and mouth. The step you should currently be focusing on. Place this shape in the center of the piece of paper. On the other, connect them with a short, straight line. Web creating the basic sketch. In this art drawing tutorial i will show you how to draw naruto uzumaki || how to draw anime step by step || naruto drawing tutorial.
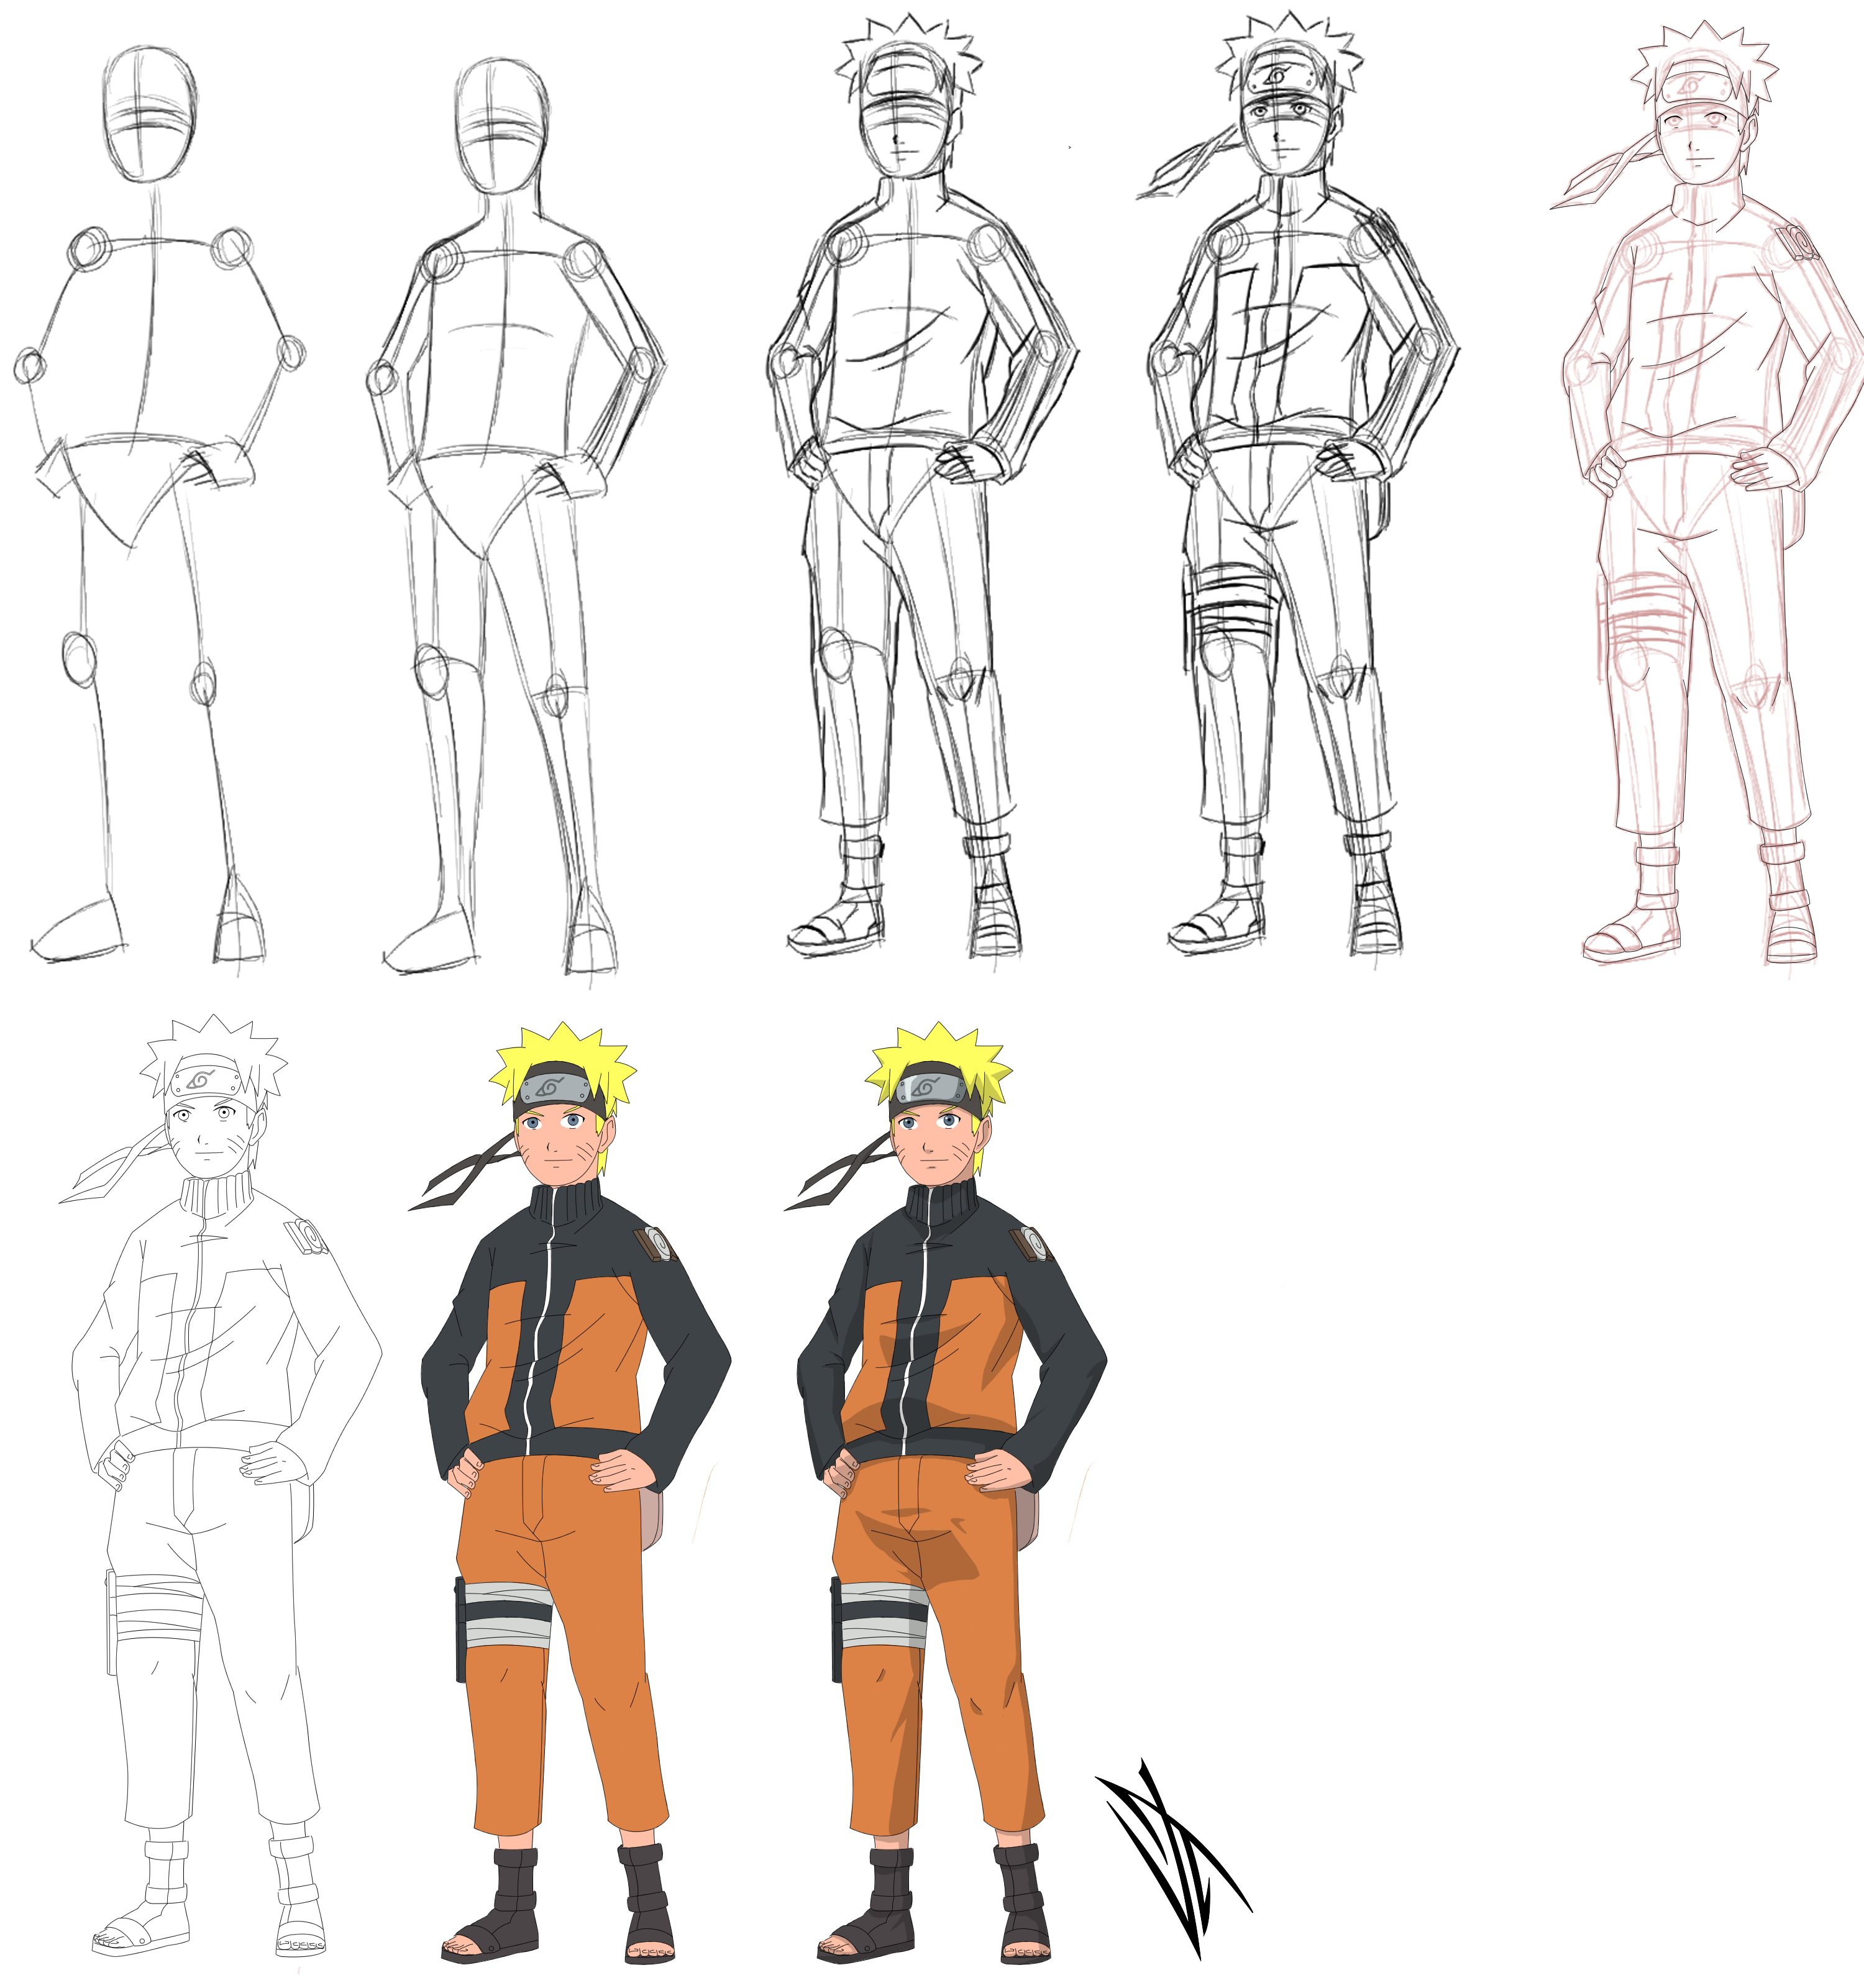
Erase the parallel lines once the eyes are done. Draw a backwards letter ‘j’ in the left ear and a letter ‘j’ within the right ear. Fill color in the naruto uzumaki drawing. Next, work on the outlined headband to make it look more like the one worn by naruto (picture 6). There is a lot to add in this step, so this is one where you should definitely pay close attention to the reference image. To draw naruto, start with an oval near the bottom half of the page. Draw the bottom of naruto’s head. Now we’re ready to add the final details to your naruto drawing. Draw his headband as well. Start with a stick figure and gradually build up the shapes and forms of naruto’s body in kurama mode.

How To Draw Naruto Uzumaki Easy Step By Step Tutorial YouTube
To draw naruto, start with an oval near the bottom half of the page. In this art drawing tutorial i will show you how to draw naruto uzumaki || how to draw anime step by step || naruto drawing tutorial. Finally, draw a curved line beneath. Start with a stick figure and gradually build up the shapes and forms of.
How to Draw Naruto Step By Step YouTube
On the other, connect them with a short, straight line. On one side, allow the lines to meet in a point; Finally, draw a curved line beneath. Ears, bottom hair, and eyebrows. The first three steps involve establishing a basic sketch to capture the overall proportions and pose.

How to draw NARUTO for beginners step by step YouTube
Now we’re ready to add the final details to your naruto drawing. Begin by drawing two curved lines beneath the eyebrow. Next, draw the front of the hair by drawing a line that curves down from the forehead. Place the eyes along these lines, with the space between them roughly equal to the width of one eye. Place this shape.
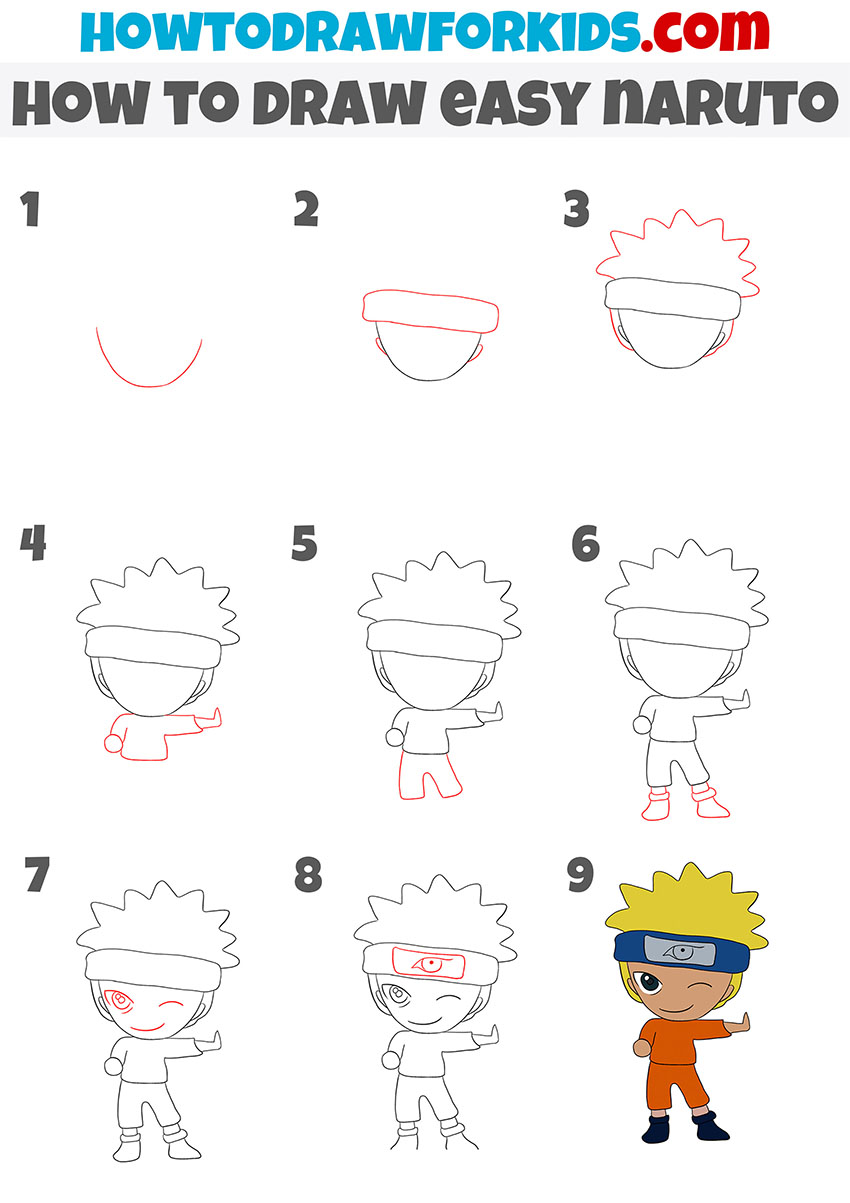
How to Draw Easy Naruto Easy Drawing Tutorial For Kids
Web creating the basic sketch. Draw his headband as well. In this art drawing tutorial i will show you how to draw naruto uzumaki || how to draw anime step by step || naruto drawing tutorial. Start with a stick figure and gradually build up the shapes and forms of naruto’s body in kurama mode. Erase the parallel lines once.
How to Draw Naruto Easy Drawing Tutorial For Kids
Draw a circle within each eye. Start with a stick figure and gradually build up the shapes and forms of naruto’s body in kurama mode. Begin with naruto uzumaki’s face—those distinctive whisker marks, round eyes, and spiky hair. Draw two horizontal lines within the middle third of the oval to indicate the eye level. To draw naruto, start with an.

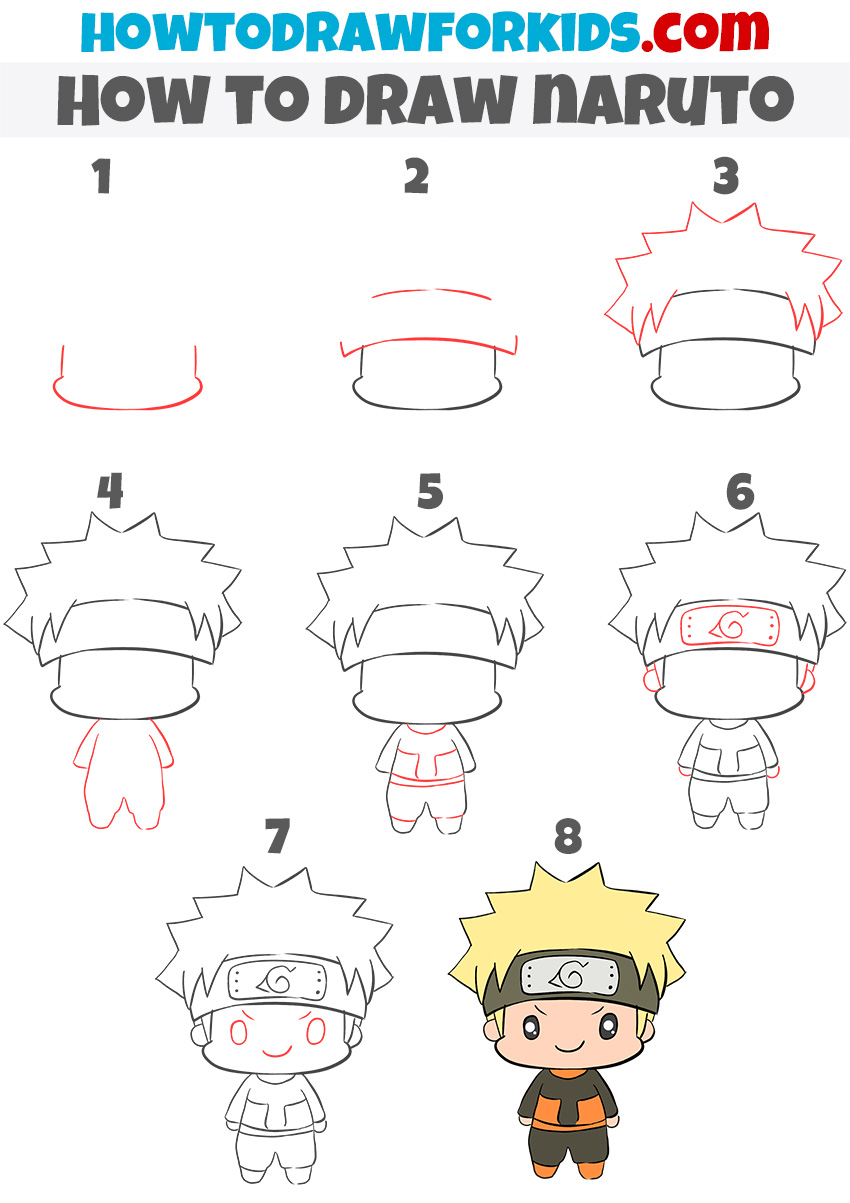
How to Draw Naruto How to Draw Easy
Next, draw two intersecting lines across the circle, one vertical line and one horizontal line. Draw two horizontal lines within the middle third of the oval to indicate the eye level. Place this shape in the center of the piece of paper. Represents the lines you’ve already drawn. Web hello everyone, i'm bito!

How to draw NARUTO step by step, EASY YouTube
There is a lot to add in this step, so this is one where you should definitely pay close attention to the reference image. Place the eyes along these lines, with the space between them roughly equal to the width of one eye. Web how to draw flower step by step. Represents the lines you’ve already drawn. Web use light,.
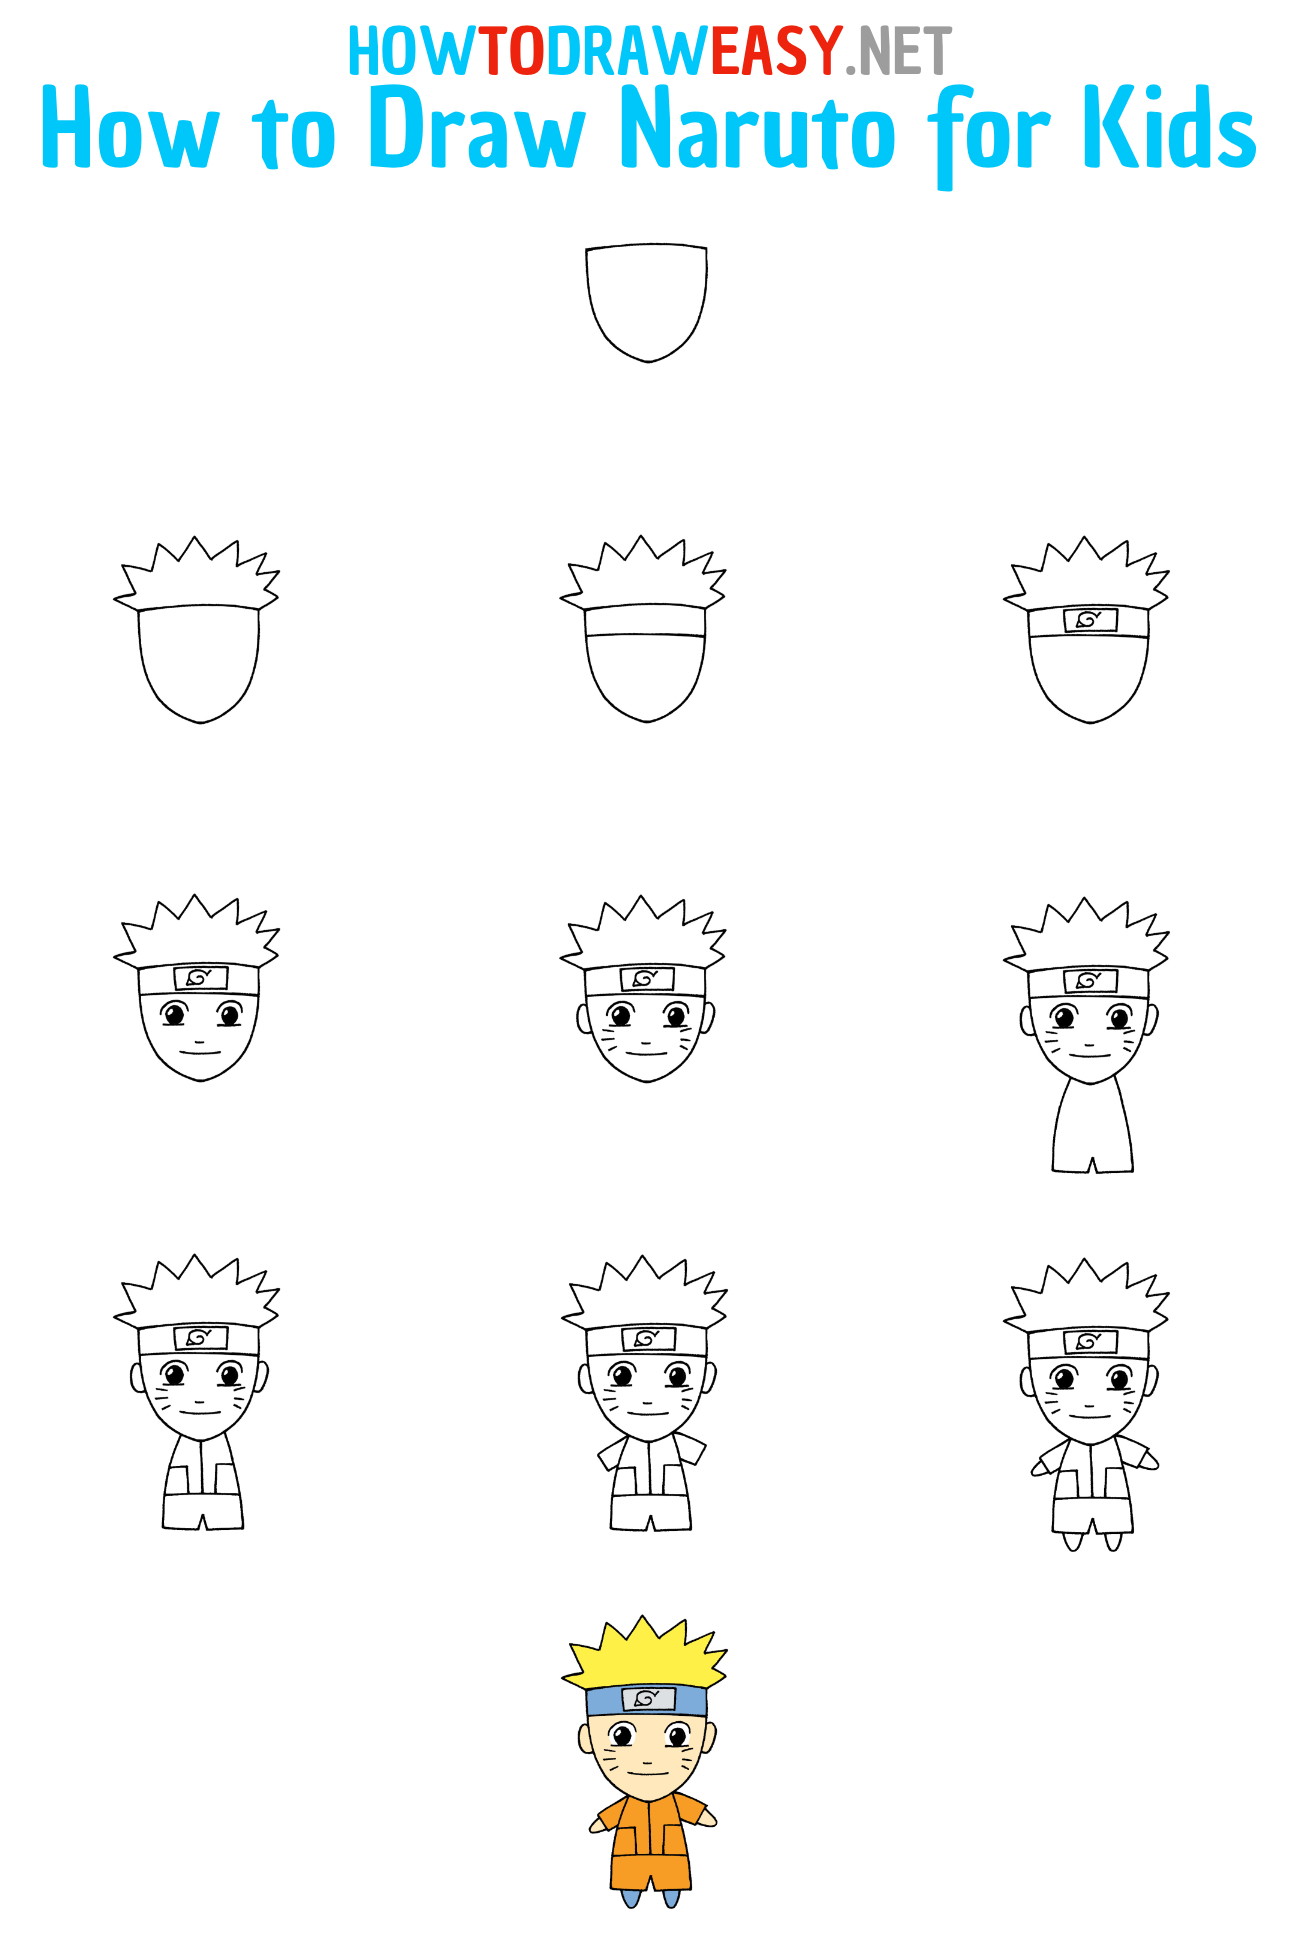
How to Draw Naruto for Kids How to Draw Easy
Web draw naruto's eye. Web creating the basic sketch. Start with a stick figure and gradually build up the shapes and forms of naruto’s body in kurama mode. Next, draw the front of the hair by drawing a line that curves down from the forehead. Draw two horizontal lines within the middle third of the oval to indicate the eye.
How to Draw Naruto in a Few Easy Steps Easy Drawing Guides
Web draw naruto's eye. To draw naruto, start with an oval near the bottom half of the page. Displays the basic proportions sketch to guide your. Next, draw two intersecting lines across the circle, one vertical line and one horizontal line. Finally, add the back of the hair by drawing a line that curves up from the neck.
Step by step Uzumaki Naruto by JohnnyWolf on DeviantArt
Represents the lines you’ve already drawn. Sketch in the basic shapes and features of the character, such as the head, torso, and limbs. Refine the details and add shading and. Web draw naruto’s top teeth. Web hello everyone, i'm bito!
With A Variety Of Animals, Magical Creatures, Vehicles, Foods, Plants And More Your Kids Will Never Get.
Draw two small lines under the oval. Draw the bottom of naruto’s head. Create naruto nose and mouth. Draw his legs and some final details.
Web Hello Everyone, I'm Bito!
Next, draw the front of the hair by drawing a line that curves down from the forehead. Web naruto characters often have large, expressive eyes. These will be the basic shapes for naruto's head and neck. Begin with naruto uzumaki’s face—those distinctive whisker marks, round eyes, and spiky hair.
Draw Both Ears As Letter ‘C’ Shapes.
Draw a dot for the pupil and a circle for the highlight, on the bottom left of the eye. Draw a circle beneath this, with two smaller circles within. Web this guide comprises 42 steps, with the initial three dedicated to sketching out the foundational structure. Finally, draw a curved line beneath.
Begin By Drawing Two Curved Lines Beneath The Eyebrow.
Now we’re ready to add the final details to your naruto drawing. To draw naruto, start with an oval near the bottom half of the page. On the other, connect them with a short, straight line. Finally, add the back of the hair by drawing a line that curves up from the neck.