Teeth Draw
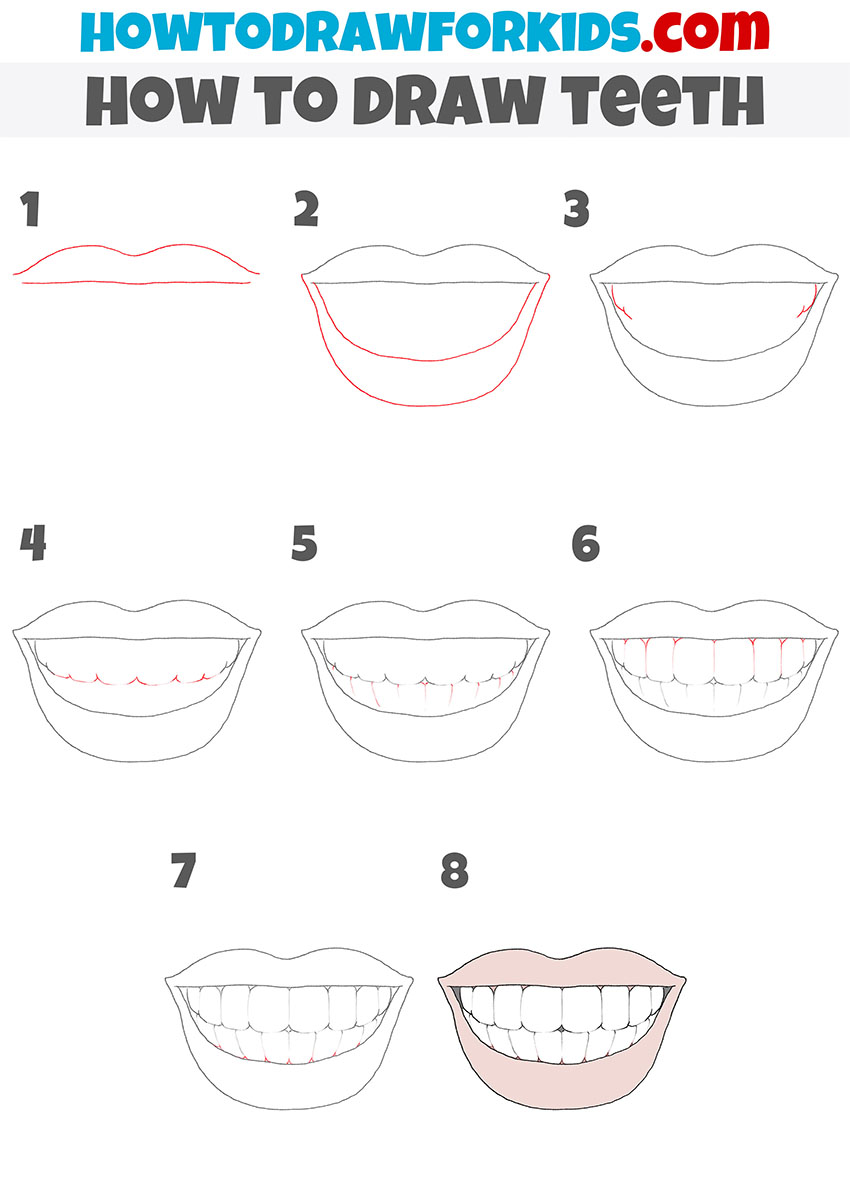
Teeth Draw - Draw a “u” shaped line at the top of the mouth to form the uvula, a fleshy extension at the back of the throat. (step 7) lightly draw guidelines for the teeth. It all starts with a simple shape. This leaves up to eight. Keep in mind that the teeth in the back will be partially hidden behind other teeth and will appear narrower. For the first step of this guide on how to draw a tooth, we will be starting with the top of the tooth. Do the same for the bottom. Add details such as the lines on the bottom lip that indicate where the skin puckers, and lightly (with a hard pencil, 3h or greater) add a few lines that show division between the teeth. Consider shadows within the mouth. Draw the upper and lower lips using the lines you just drew as a guide.
(step 7) lightly draw guidelines for the teeth. You want the lines to be subtle or it will be hard to erase later. Add details such as the lines on the bottom lip that indicate where the skin puckers, and lightly (with a hard pencil, 3h or greater) add a few lines that show division between the teeth. Web (step 6) draw lines to connect everything together. Start with a curved line for each lip and then fill it in. Tutorial on how to draw mouth and lips is here: Draw the bottom teeth lightly as they appear in your reference photo. The grouping of the mouth, teeth, and jaw can be referred to as the oral cavity. It all starts with a simple shape. When you draw lines between each tooth, it looks like gaps between them.
Web the stepwise drawing is helpful (drawing of the crown and then root using boxes of graph paper) especially useful for learners with different levels of drawing skills. Restoration is the final season of the longest running web series by the team at roosterteeth.com. Web (step 6) draw lines to connect everything together. Instead, slightly indicate each tooth at the gum line and with a slight. Follow my step by step drawing tutorial and make your own tooth drawing easy!👇 su. You want the lines to be subtle or it will be hard to erase later. Draw a “u” shaped line at the top of the mouth to form the uvula, a fleshy extension at the back of the throat. Draw the tooth’s open mouth. Draw the upper and lower lips. Draw oversized teeth (without disturbing the proportions of the tooth).
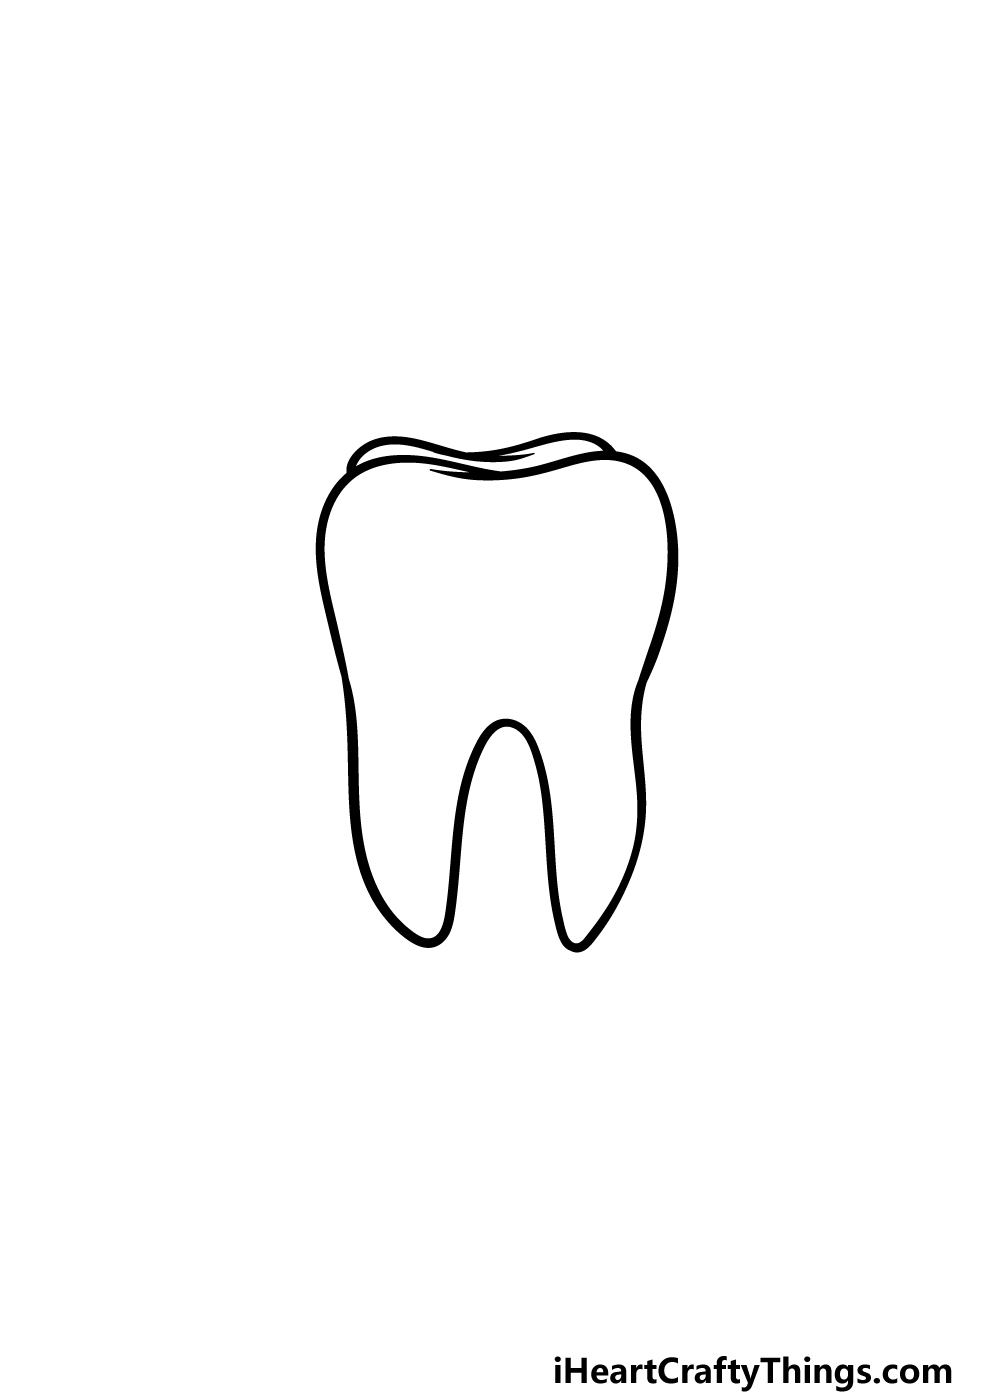
Tooth Drawing How To Draw A Tooth Step By Step
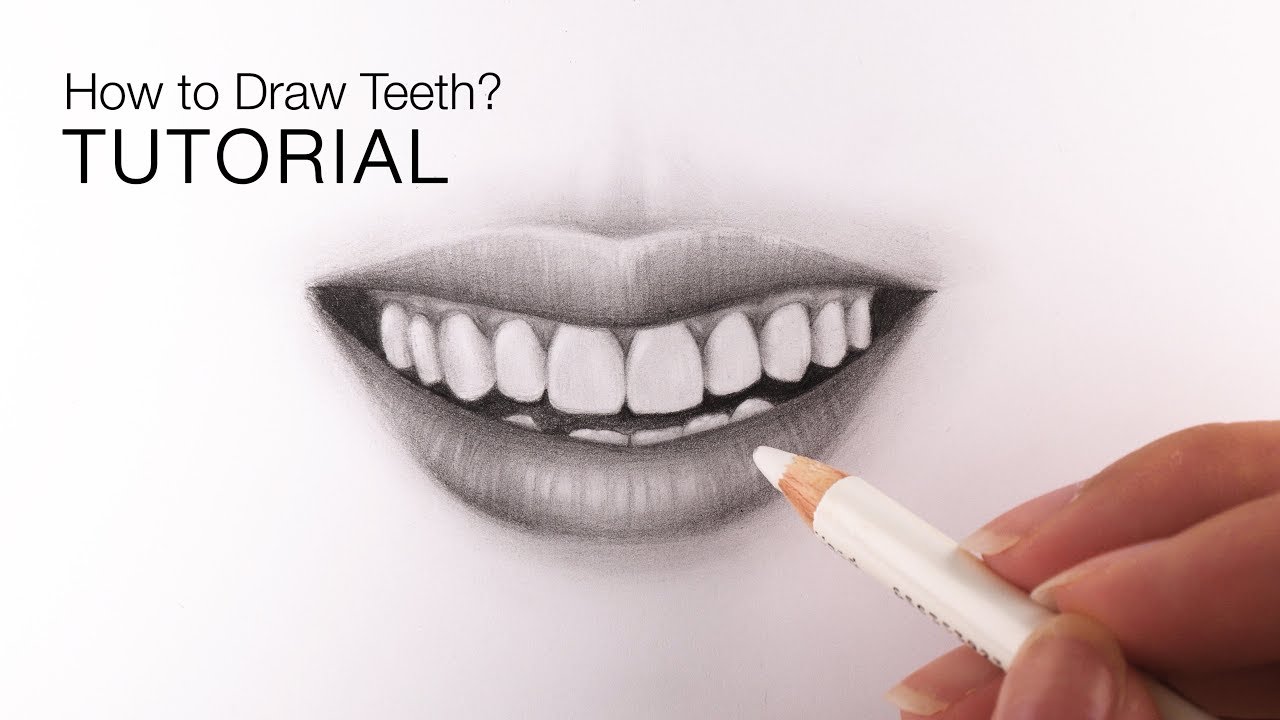
Consider shadows within the mouth. Web how to draw teeth. If you still want to show the teeth individually, it helps to draw the spaces as finely as possible. Web hi everyone, in this video i show you how to draw a tooth step by step 🦷. Once you have established the base layer of colors, you can then work.

How to Draw Teeth 11 Steps (with Pictures) wikiHow
This leaves up to eight. I put together 20 easy tooth drawing ideas that will help you get started. (step 9) use the guidelines to help you start drawing the. Using hb lead, draw the 2 front teeth and work your way out, alternating from one side to the other in order to keep track of the sizing for each.
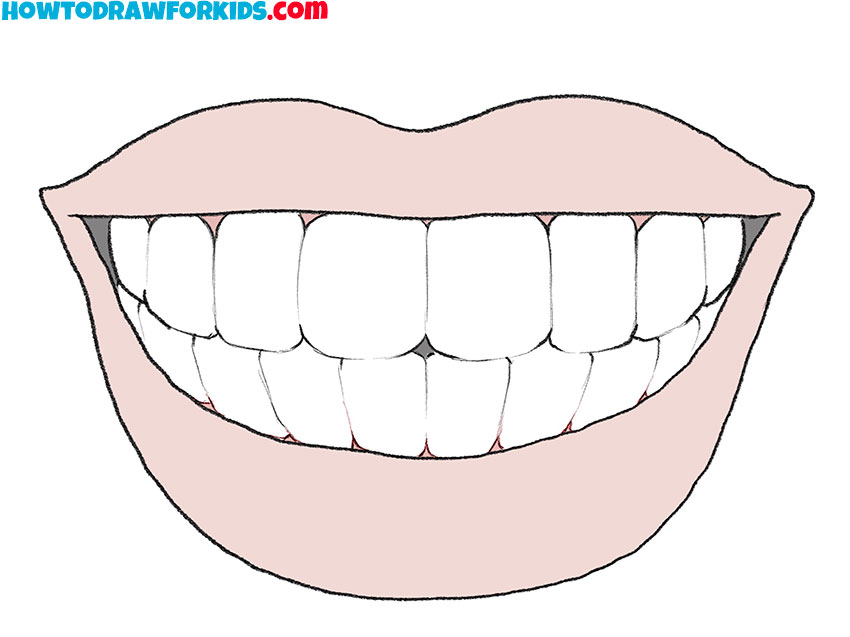
How to Draw Teeth Easy Drawing Tutorial For Kids
(step 7) lightly draw guidelines for the teeth. Draw the bottom row of teeth. Web the teeth are easiest to show if you ignore the spaces between them. For the first step of this guide on how to draw a tooth, we will be starting with the top of the tooth. Follow my step by step drawing tutorial and make.

How to Draw Teeth Step by Step YouTube
Web hi everyone, in this video i show you how to draw a tooth step by step 🦷. Web how to draw teeth. Web when teeth are visible, never draw each individual tooth using lines. Do the same for the bottom. Blend the darks to soften the lips, and add back in more darks if needed.
How to Draw Teeth for BEGINNERS EASY Tutorial YouTube
Web the teeth are easiest to show if you ignore the spaces between them. Web line and color quick start guide: Keep in mind that the teeth in the back will be partially hidden behind other teeth and will appear narrower. The front teeth are also generally larger then the sets of teeth close to them. Remember not to draw.

How to Draw Teeth 11 Steps (with Pictures) wikiHow
Web how to draw teeth | teeth drawing cartoon (step by step guides) | easy drawing with pen.learn how to draw teeth in this really easy drawing tutorial. Restoration is the final season of the longest running web series by the team at roosterteeth.com. Web types of teeth. Draw the tooth’s open mouth. The shadows will always be darkest inside.
How to Draw Teeth Easy Drawing Tutorial For Kids
The grouping of the mouth, teeth, and jaw can be referred to as the oral cavity. Web hi everyone, in this video i show you how to draw a tooth step by step 🦷. This tutorial will show you that although drawing teeth may seem like a daunting task at first, it is really quite easy with the right instructions..

How to DRAW a TOOTH Easy Step by Step YouTube
Follow my step by step drawing tutorial and make your own tooth drawing easy!👇 su. This leaves up to eight. Below the previously drawn elements, add thin curved lines. (step 9) use the guidelines to help you start drawing the. Remember not to draw the outlines too dark.
Tooth Drawing How To Draw A Tooth Step By Step
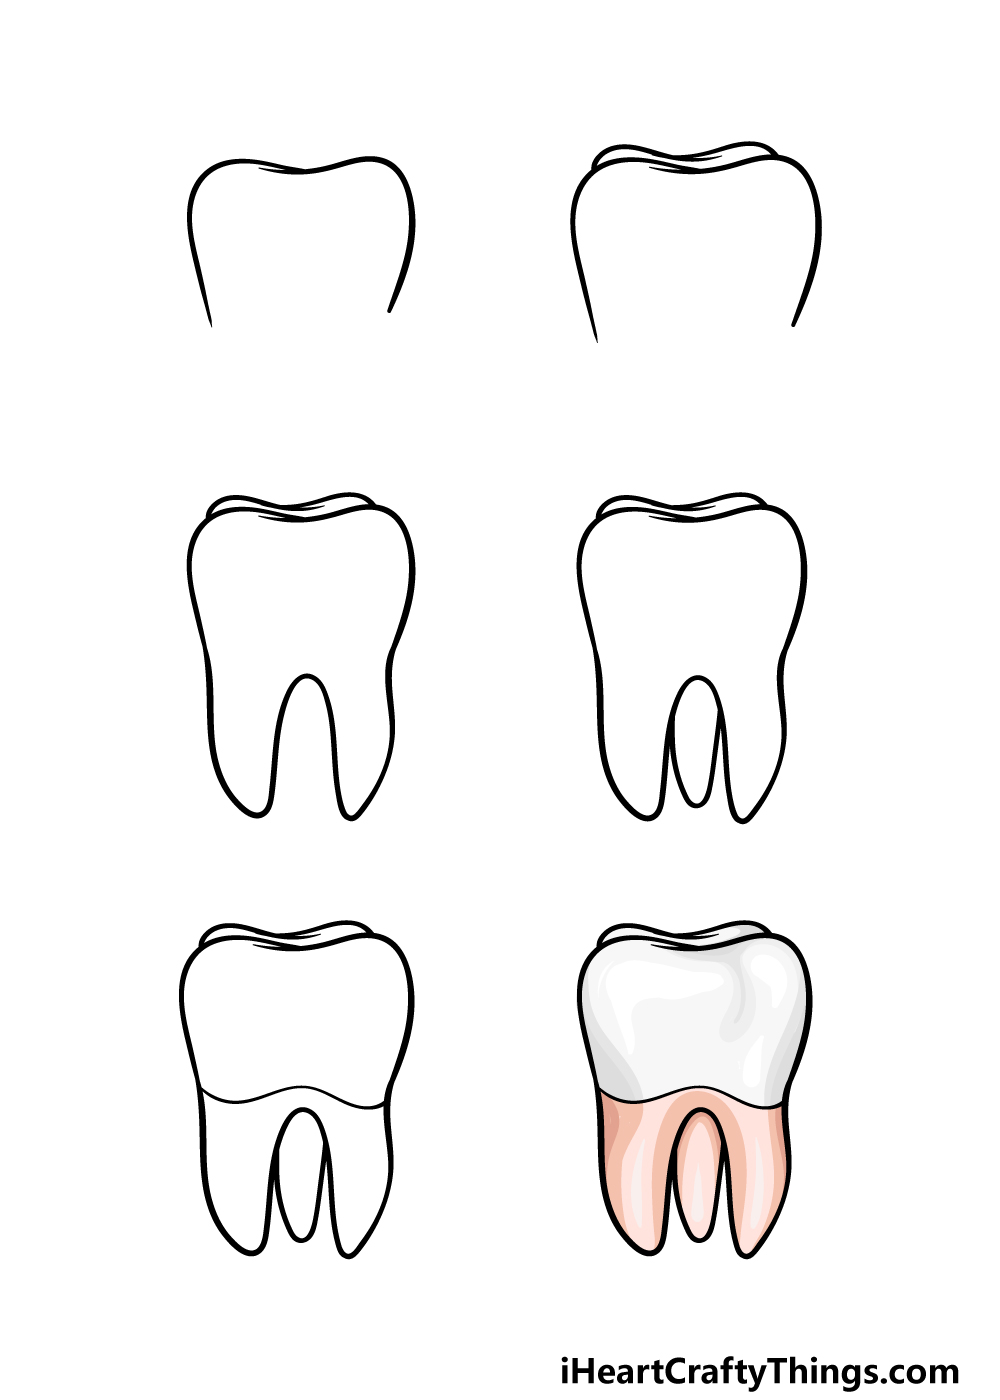
(step 8) lightly draw lines for the teeth…teeth appear smaller as you go further back into the mouth…this is a matter of perspective as things look smaller as they get farther away. Follow my step by step drawing tutorial and make your own tooth drawing easy!👇 su. You can draw this part of the tooth by using some curved lines.

Step by step tutorial tooth drawing cute Perfect for beginners
Add details such as the lines on the bottom lip that indicate where the skin puckers, and lightly (with a hard pencil, 3h or greater) add a few lines that show division between the teeth. If you still want to show the teeth individually, it helps to draw the spaces as finely as possible. (step 8) lightly draw lines for.
When You Draw Lines Between Each Tooth, It Looks Like Gaps Between Them.
Draw the upper teeth by starting with two small rectangles. Once you have established the base layer of colors, you can then work over those layers with line work for more shape and form. It all starts with a simple shape. You can draw this part of the tooth by using some curved lines that connect at the top of the tooth.
Draw The Upper And Lower Lips Using The Lines You Just Drew As A Guide.
This leaves up to eight. Before drawing out each individual tooth draw some vertical divider lines to estimate their size. Add the outline of the top row of teeth. Being able to draw realistic teeth is a game changer when it comes to your creatures.
Blend The Darks To Soften The Lips, And Add Back In More Darks If Needed.
Web when teeth are visible, never draw each individual tooth using lines. Start with a curved line for each lip and then fill it in. Web how to draw teeth | teeth drawing cartoon (step by step guides) | easy drawing with pen.learn how to draw teeth in this really easy drawing tutorial. For the first step of this guide on how to draw a tooth, we will be starting with the top of the tooth.
Draw The Upper And Lower Lips.
Draw the tooth’s open mouth. Rvb, red vs blue, rooster teeth, rt. Depict lines between the top teeth. This will form the surface of the tooth, and then we can move on to the next section in part 2 of this guide!